Photoshop Screen Blending Mode: A Complete Guide
Let's take a moment to remember: the Screen blending mode is usually described as a way to remove black areas from an image, letting you knock out a black background.
That explanation isn't wrong, but it can confuse many beginners in Photoshop or other digital art apps. So now, let's use the simplest, most detailed approach to explain everything about "Screen."

In this article, you will learn:
- What Is Screen Blending Mode?
- The Relationship Between Screen and Multiply Blending Modes
- How to Use the Screen?
- Conclusion
What Is Screen Blending Mode?
Let's first look at the Cambridge Dictionary definition of "screen": a flat surface in a cinema, on a television, or as part of a computer, on which pictures or words are shown.
So why is this blending mode called "Screen"?
Because this blending mode works like a display screen. On TVs and phones, screen colors come from three primary lights: red, green, and blue.
These red, green, and blue pixels are actually color filters. They don't make light by themselves. They need a backlight to shine through and show color on the screen.
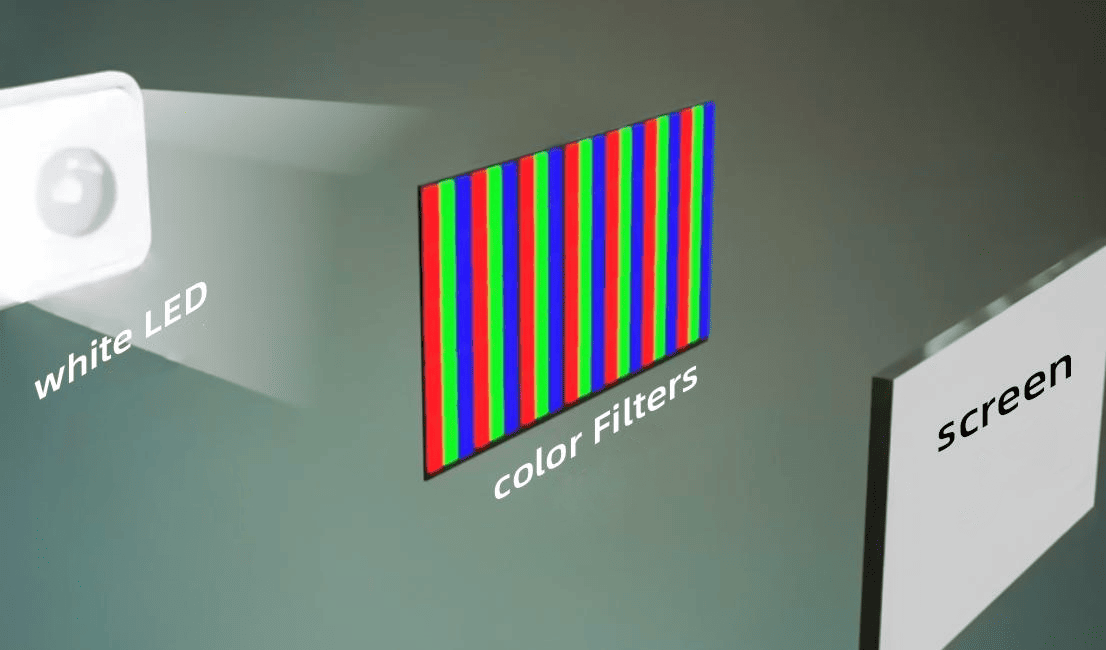
Of course, the full technology is complex. Here, we're just talking about layer blending modes, not how screens are built. A simple idea is enough.
All the colors on a screen come from mixing the three light primaries. If you mix them fully, you get six basic colors. That clearly isn't enough for every image. So, screens change each light's brightness to create many more colors.
For example, in the picture below, we lower the blue light's brightness:
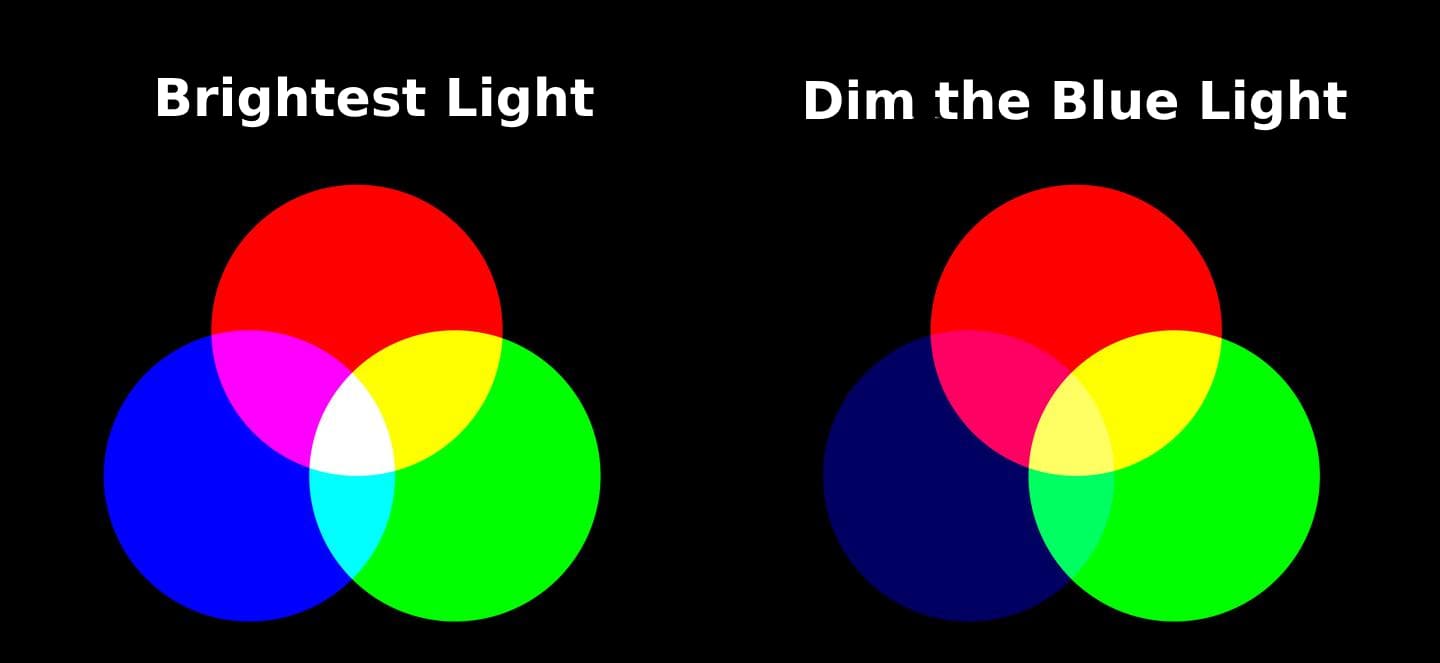
See, when we dim the light, it's like adding black to it, right?
You can think of the dimmed blue as "dark blue light." It's not technically correct, but it helps you picture it.
In other words: 50% black light + 50% blue light = 100% dark blue light.
But wait, black light? Where does that come from? There's no black light in nature. On a screen, this "dark blue light" happens because the Screen blending mode removes all the black. That leaves 50% blue, which shows as dark blue.
That 50% blue light is much weaker. When you mix it with other colors, the weak light makes the result look different from a full-strength mix. That's how you get all the different colors on screen.
So we can conclude that screen colors come from mixing red, green, and blue at different brightness levels. The Screen blending mode works by filtering out black. Since its logic matches how a display works, it's called "Screen."
The Relationship Between Screen and Multiply Blending Modes
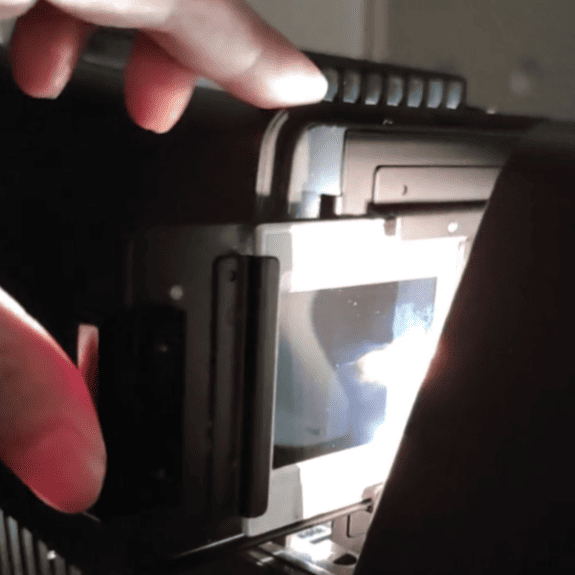
Let's look at Adobe's explanation of Screen: The effect is similar to projecting multiple photographic slides on top of each other.
Adobe means turning the top image into a photo slide and shining it onto the image below.
What's a photographic slide? It's exactly that piece of film you see in the photo below. Isn't that the "positive" that Multiply uses? Yep — that's slide film.

So, Screen and Multiply are linked. Simply put, Multiply removes white areas, while Screen removes black areas.
Further Reading:
Mastering Multiply Layer: A Guide to Blending Modes in Digital Art
You can think of them as opposites: once you get one, you get the other.
Now, back to Adobe's line: projecting multiple photographic slides on top of each other. Projection needs light! You have to put the slide in a projector and shine it.
Does that remind you of the display screen idea? A backlight shines through colored filters to make the image, exactly the same principle.
Here's the takeaway:
- If you stack slide film over an image with no light, it's the Multiply.
- If you light the slide and project it onto the image below, it's the Screen.
How to Use the Screen?
If the explanation above still seems confusing, here's the clearest way to think about Screen:
After you remove the black parts from the top layer, the white parts shine through semi‑transparently onto the layer below.
Let's look at another example. Imagine 100 ml of gray liquid made by mixing 50 ml of white and 50 ml of black. If you filter out the black, just like Screen does, you're left with only the 50 ml of white.
If you pour out the black liquid and want to get back 100 ml total, you'd add water to the white until it reaches 100 ml. That dilution makes the white turn transparent.
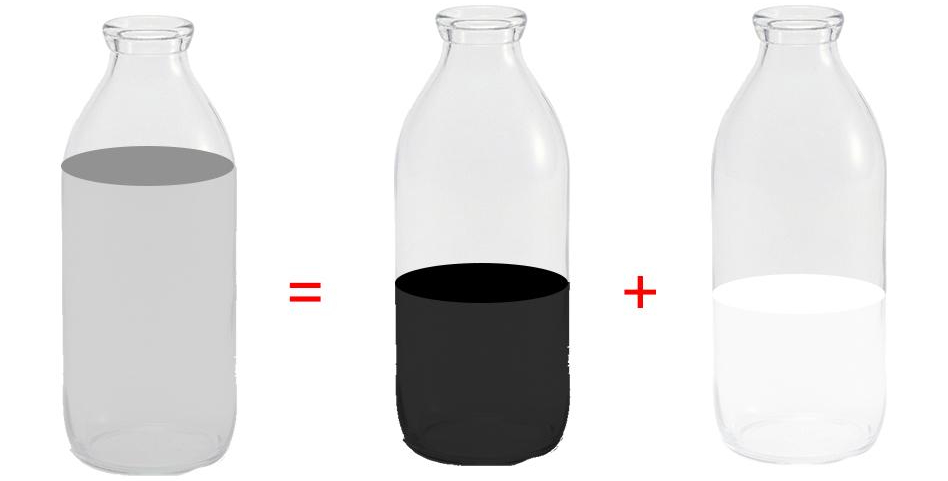
So, Screen doesn't just remove black; it also makes whatever was white semi‑transparent.
By now, you've got the full picture of what Screen does. The theory is done — let's see how to use it in practice.
In the example below, we want to place a white dove against a sky background.
If you set the dove layer to Screen blending mode, the black background disappears, but the dove itself looks a bit see‑through.
That's because Screen also filtered out any black pixels inside the dove. Exactly as we said: it pulls out all the black from the top layer, then leaves the bright parts to show through transparently.
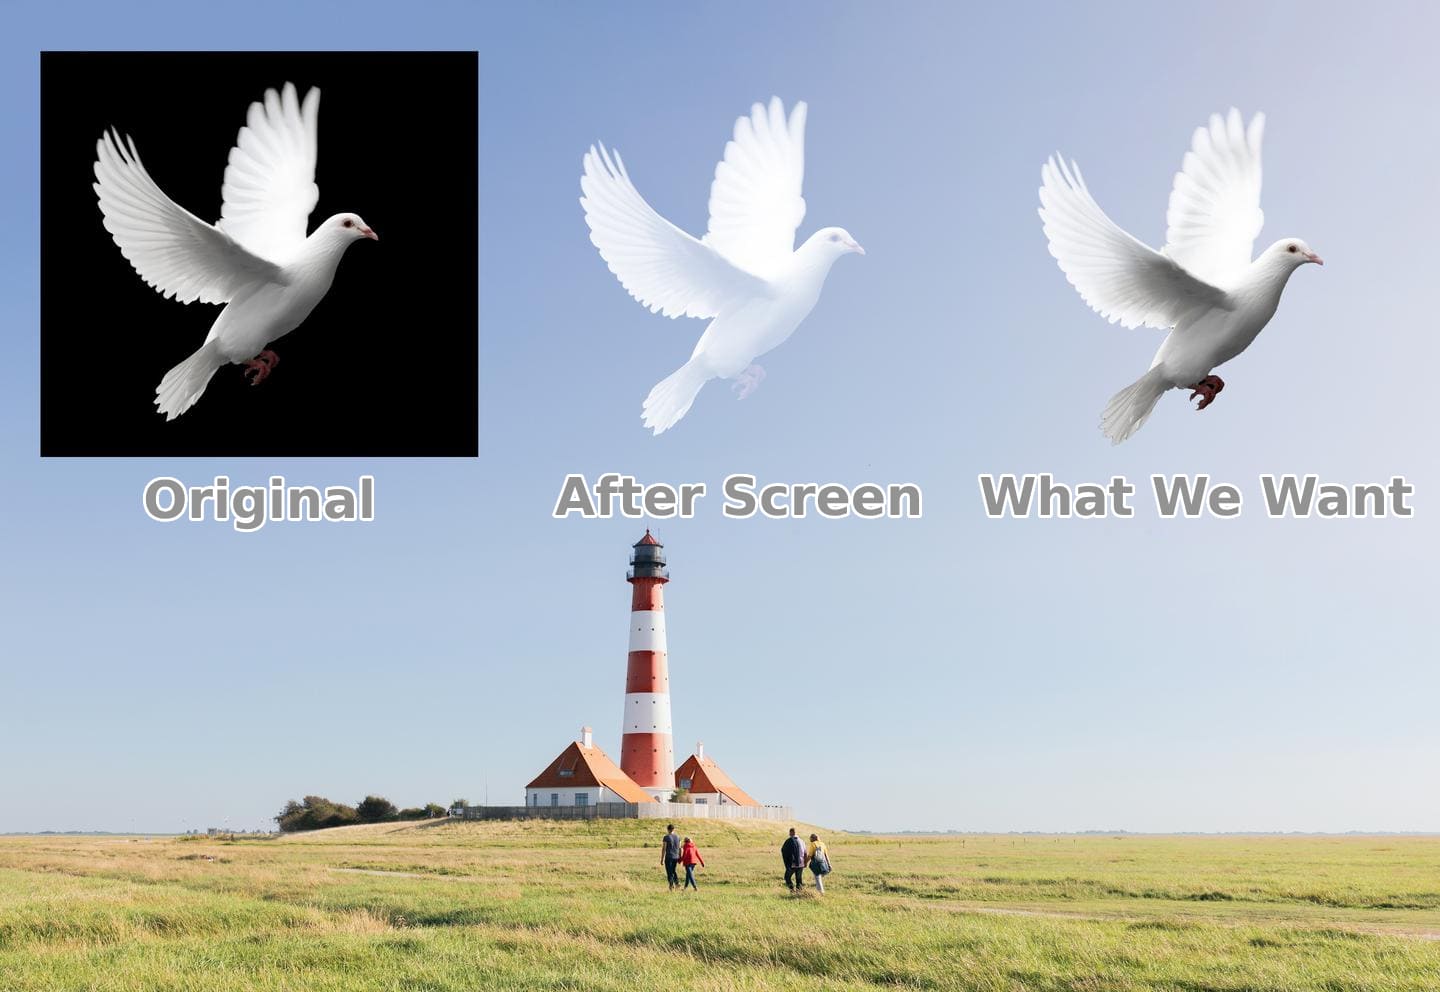
So in real projects, if you're aiming for a more artistic effect, feel free to use any blending mode (including Screen). But if you just want to use Screen to cut out a black‑background image, it's not the best choice.
Further Reading:
Mastering Photoshop Blending Modes: How to Blend in Photoshop?
Conclusion
Now you've grasped the basic principles and tricks of the Screen blending mode. It's not just a simple tool for removing black backgrounds. It's a blending mode full of creative possibilities.
If you find yourself constantly fiddling with layers, switching between them, or tweaking blending effects in your work and creative projects, a powerful controller can make your life a lot easier.
Let us introduce TourBox — a creative console loved by photographers, digital artists, and content creators. Its knobs and buttons let you quickly switch layers, adjust opacity, and assign custom shortcuts for your favorite blending modes.

If you use blending modes often, you can even group your go-to modes into a single TourMenu. It works like a quick-access menu so you can launch exactly what you need in an instant.

If you're after a more efficient, fluid creative workflow, give it a try!