How to Use Select and Mask in Photoshop?
Local editing is at the heart of photo post-processing. The trick is making precise selections so you can tweak each part individually.
In this tutorial, we'll show you the easiest and most useful way to build those selections — the Select and Mask tool. Ready? Let's jump in!

In this article, you will learn:
Common Ways to Create Selections in Photoshop
Photographers usually use three methods to make precise selections in Photoshop.
About 80% of the time, especially when edges are clear, you can rely on the Quick Selection tool. Paired with Select and Mask, it even handles tricky fades like flames or clouds and detailed edges like hair or leaves with ease.
For roughly 19% of cases, you need to work by brightness. If you only want the light or dark areas of an object, use a luminosity mask or work with channels.
The last 1% covers tough scenarios where edges barely stand out, like a dark silhouette against a night sky. In those cases, you have to go old-school with the Pen or Lasso tools, tracing the shape by hand.
In this article, we'll focus on the Quick Selection plus Select and Mask workflow that solves about 80% of your selection needs.
How to Use Select and Mask in Photoshop?
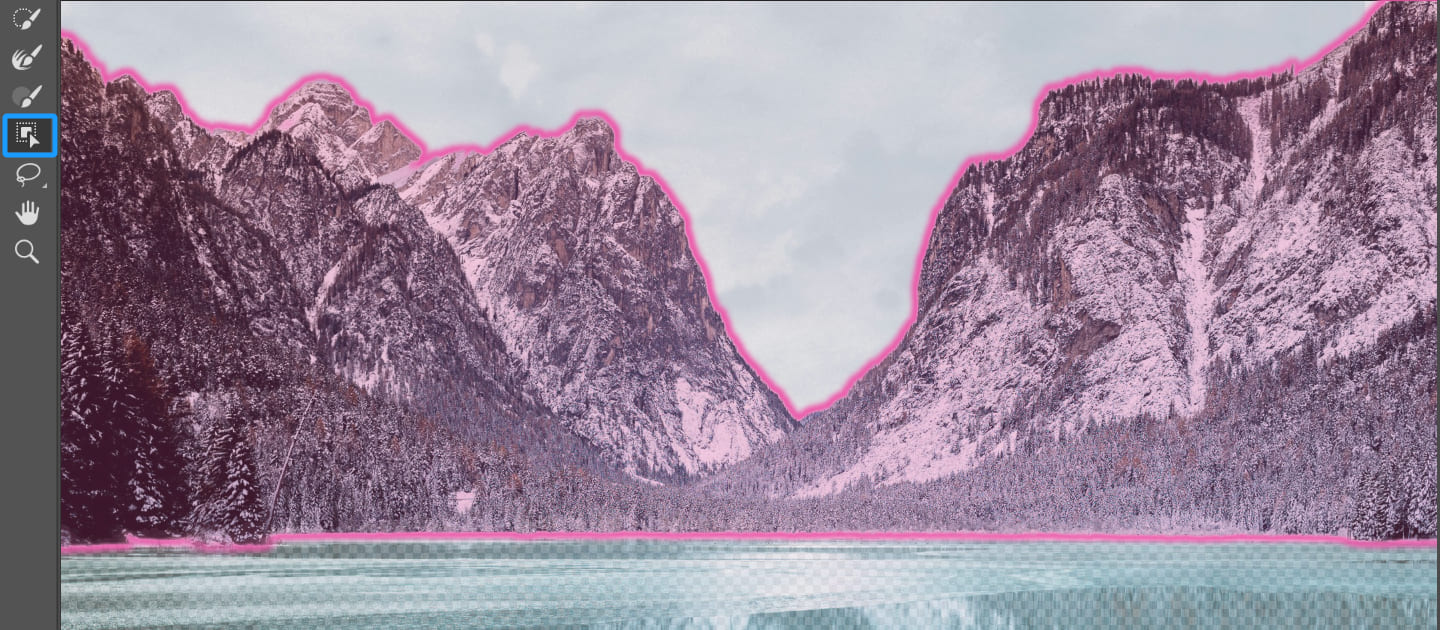
The Quick Selection tool is the fourth icon down in the left-hand toolbar.
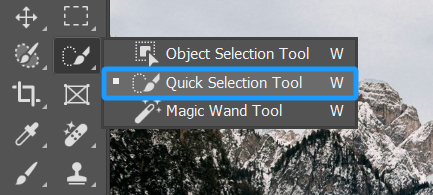
After you pick it, check "Sample colors from composite image" and "Automatically Enhance Edge."

Next, click on the areas you want to select — in our example, points 1, 2, and 3 in the sky. You'll see the tool automatically detects the edge between the sky and the mountains, though a few spots might still be rough.

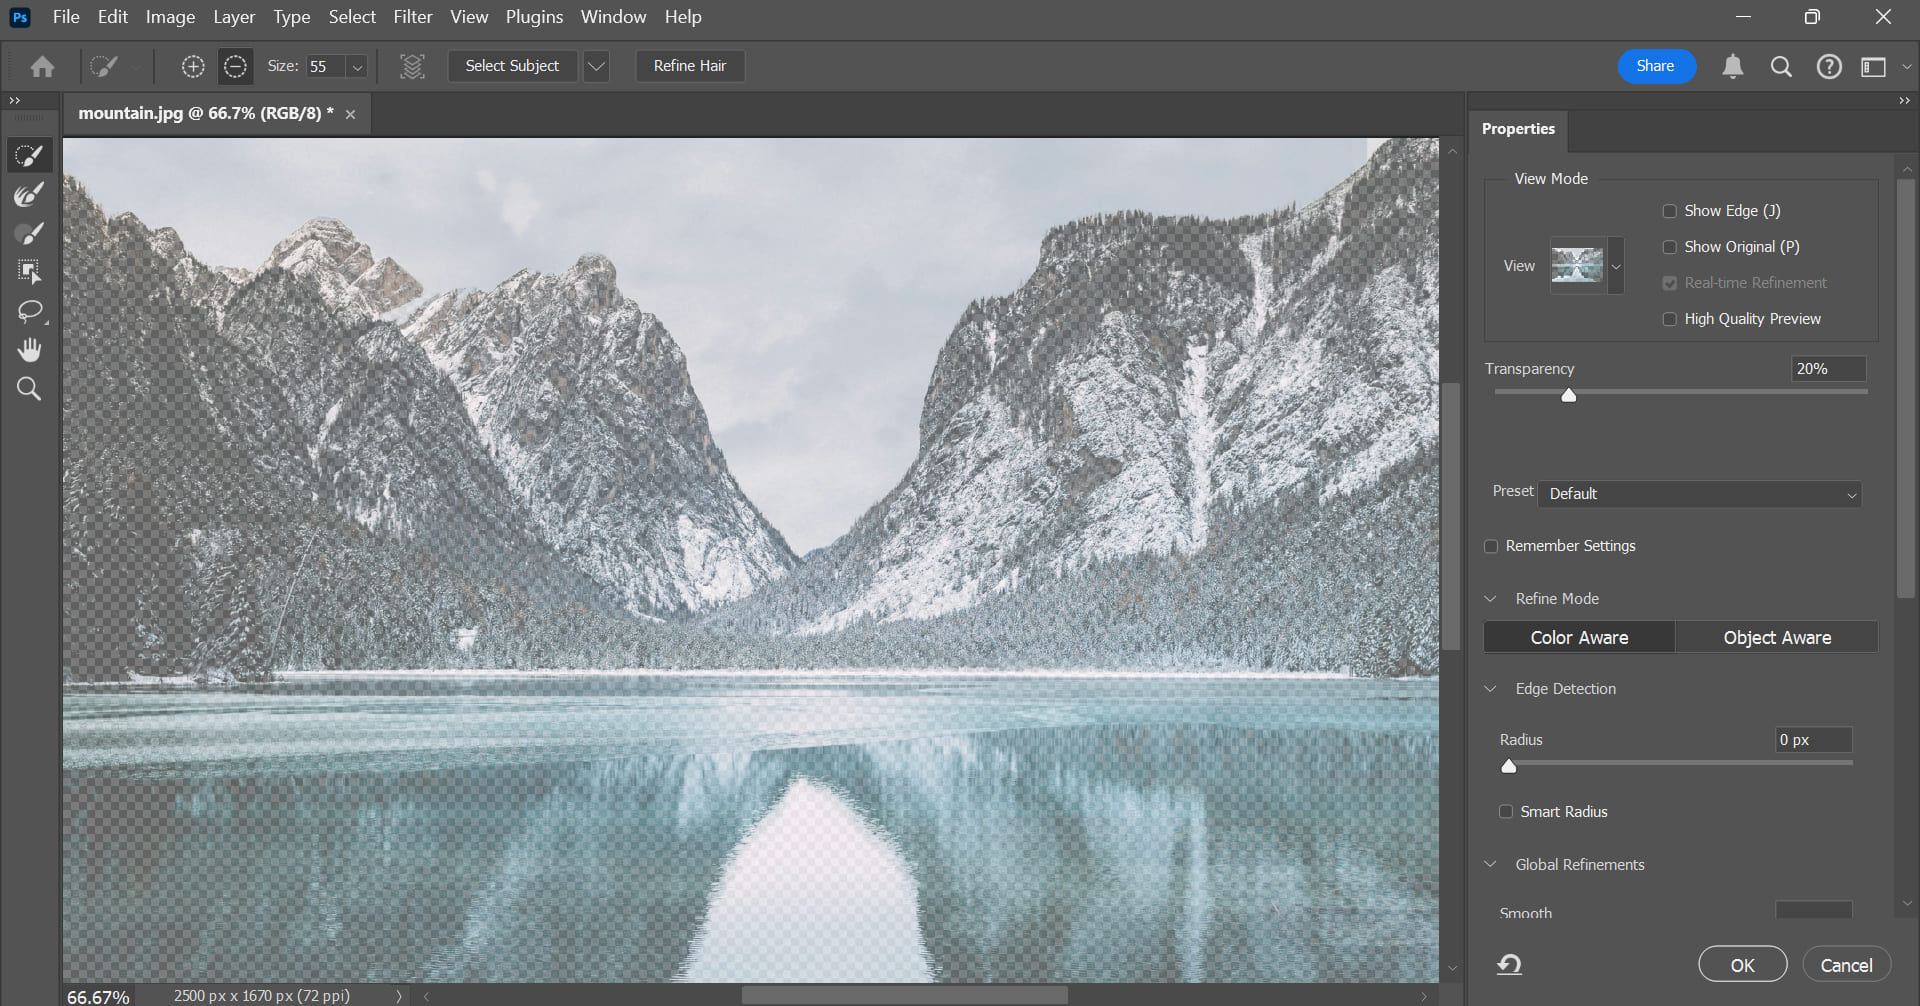
To tidy up those edges, click "Select and Mask" in the options bar at the top.

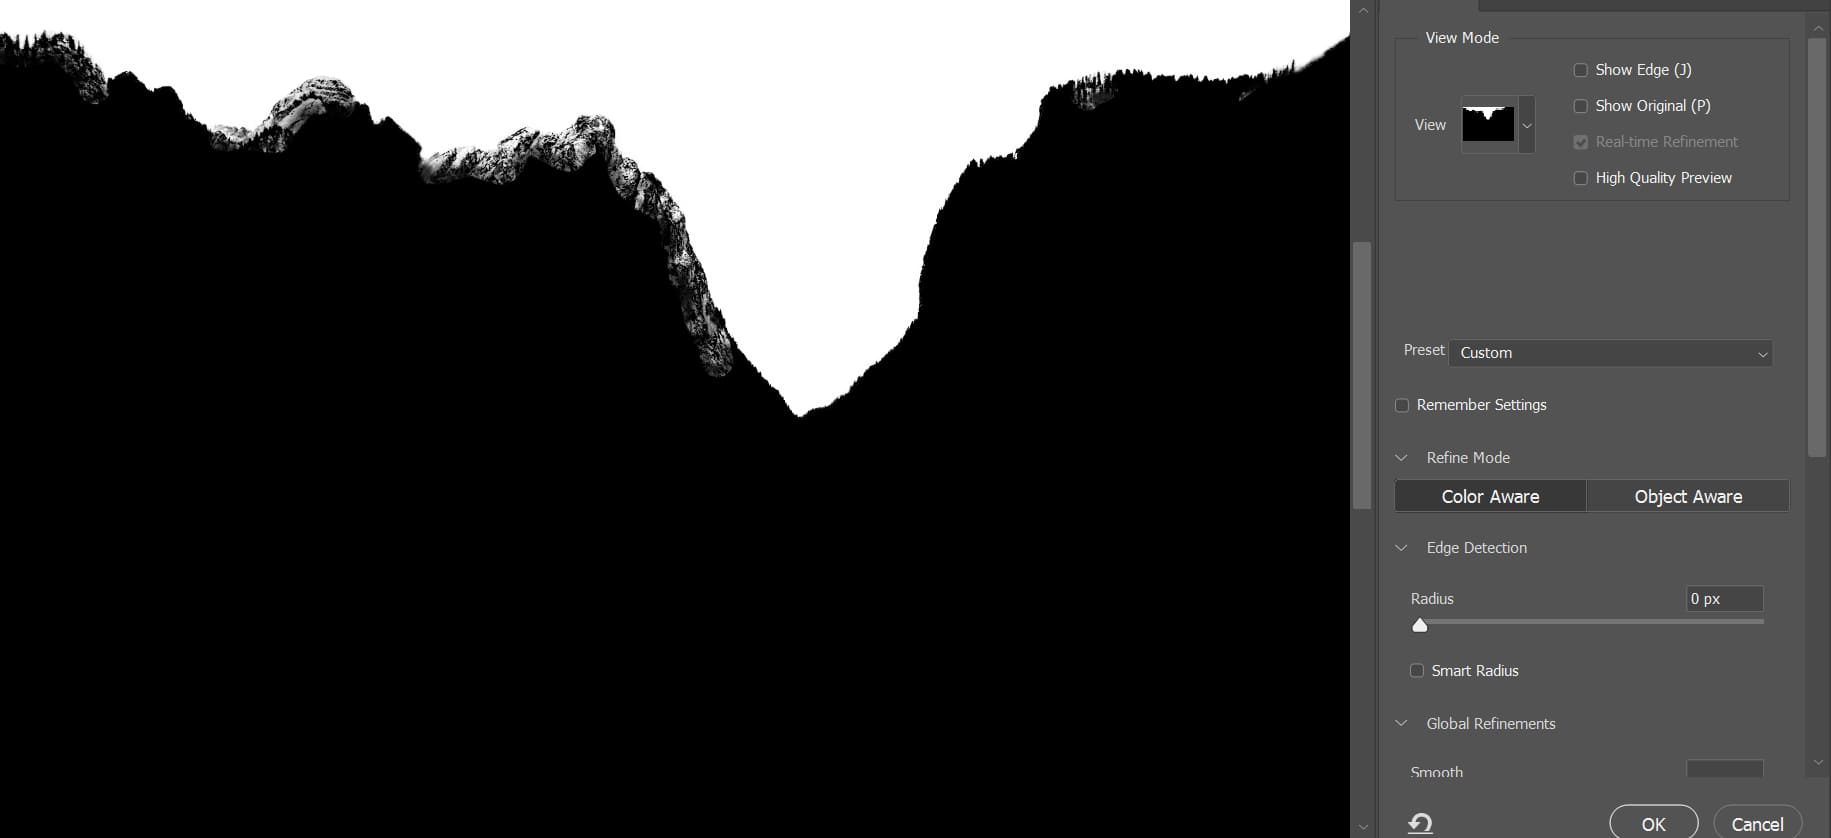
When you open the Select and Mask panel, you'll see three sections: on the left are the tools, in the middle is your image with the selection preview, and on the right are the sliders for different settings.
The first icon on the left is the Quick Selection Brush — it works just like the regular Quick Selection tool. Click the + icon to add to your selection with the brush.
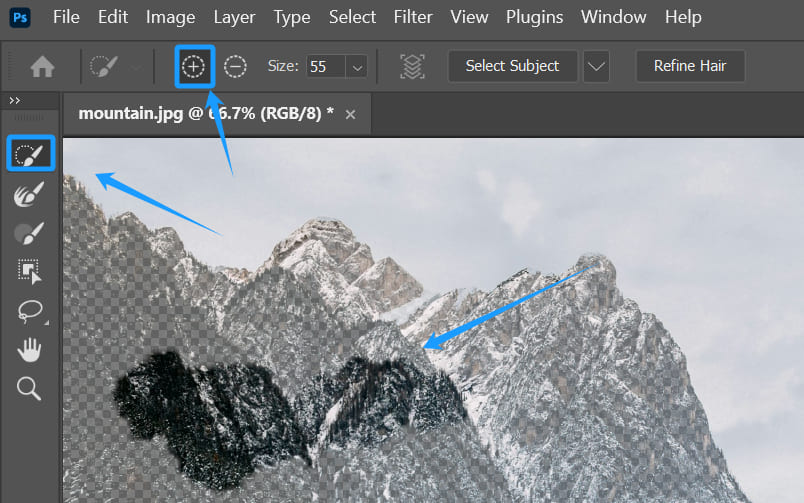
You can also click the – icon to subtract from your selection. In our example, the top of the mountain got picked up as part of the sky. Switch to the – option and paint along the mountain edge. That removes the mountain from the sky selection.
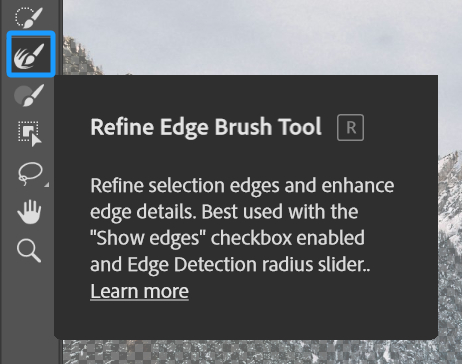
The second icon on the left is the Refine Edge Brush Tool, which is perfect for handling semi-transparent and super detailed edges. For example, if you've got trees against the sky, the Quick Selection tool can't cleanly separate all those branches.
With the Refine Edge Brush, you just paint over those tricky areas, like the branches, and Photoshop magically separates them from the sky.
The third icon is the regular Brush Tool, which works like painting on a mask. If you use the + brush, you add to the selection; if you switch to the – brush, you subtract from it.
Finally, the fourth icon is the Object Selection Tool. As the name suggests, it picks out whole objects. In our example, if you drag around part of the mountain, the Object Selection Tool adds the entire mountain section to your selection.
Once you've roughly outlined your selection, it's time to fine-tune it using the sliders on the right side of the Select and Mask panel.
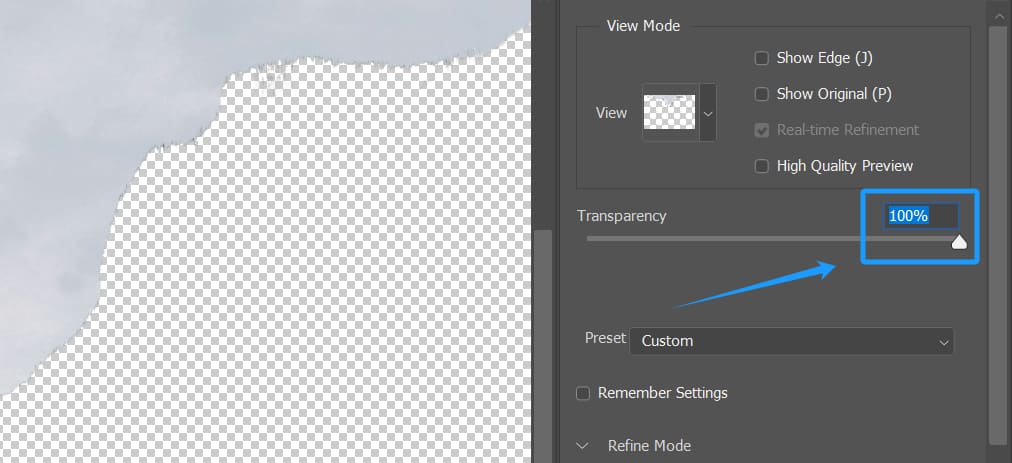
At the top is a dropdown where you pick your preview mode — how you see the selected versus unselected areas. By default, you get "Onion Skin."
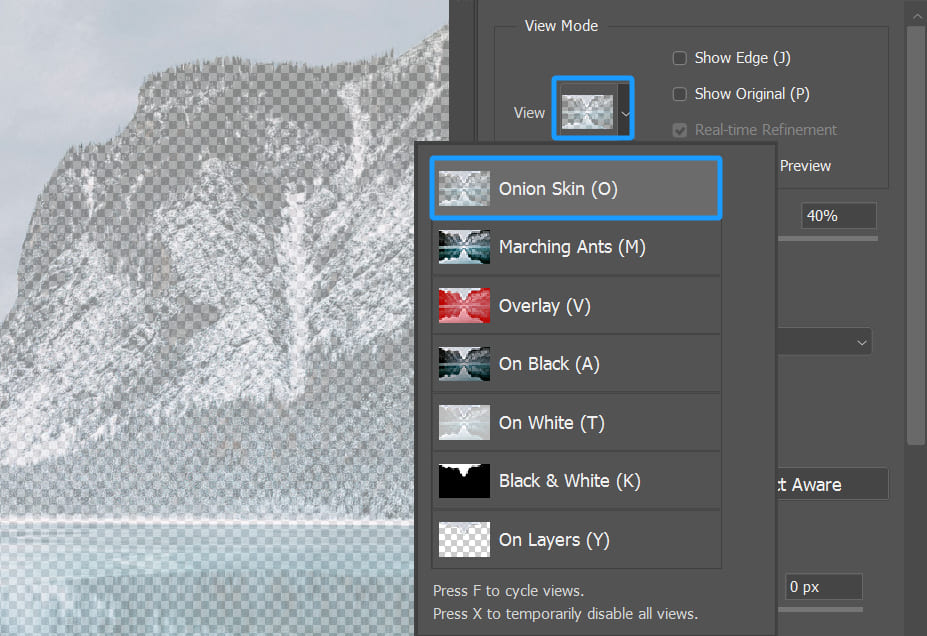
Your selection shows the normal image, and everything else is covered with a semi-transparent checker pattern. You can boost that overlay to 100% opacity so the background looks like solid black-and-white blocks, or drop it to 50% so you can still glimpse the original image underneath.
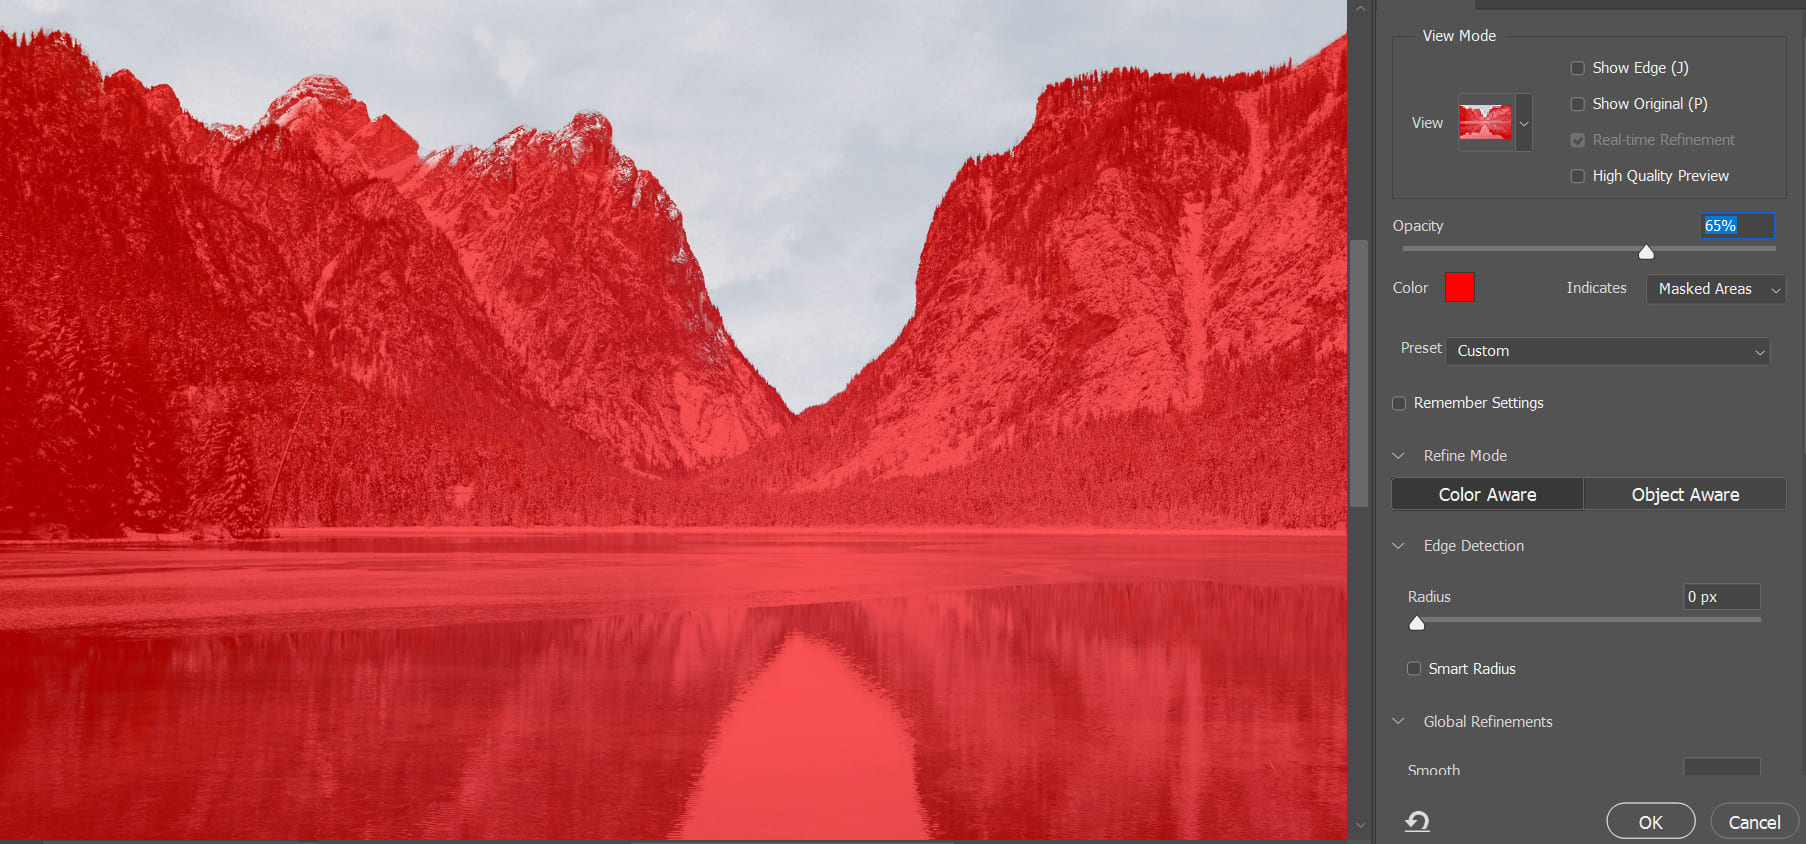
Another handy preview is "Overlay," which tints the unselected parts with a color — say, red at 65% opacity — so you can spot missed spots easily.
The most direct view is "Black & White," which shows your mask exactly: white is fully selected, black is unselected, and gray is partially selected.
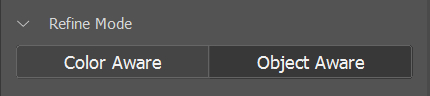
After picking your preview view, you can choose a Refine Mode: Color Aware or Object Aware. Color Aware focuses on color differences, while Object Aware tries to detect whole objects. Pick the one that best matches how your subject stands out.
If your edges are still rough but have clear contrast, try "Edge Detection." Just set a radius (for example, 3 pixels), and Photoshop will scan that area around your selection, find the strongest contrast line, and snap your edge to it automatically.

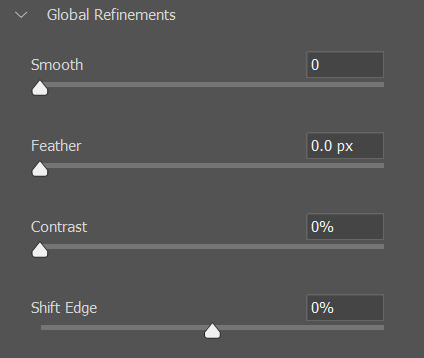
Below that, you'll find several sliders:
- Smooth: Reduces jagged edges, making the selection outline look rounder.
- Feather: Controls how soft or hard the edge is. Higher values give you a gradual, blurry transition.
- Contrast: Sharpens the edge by tightening the transition, so higher values make the selection outline crisper.
- Shift Edge: Expands or contracts your selection, which is great for fine-tuning the border.
When you're happy with your adjustments, click OK to apply your final selection.
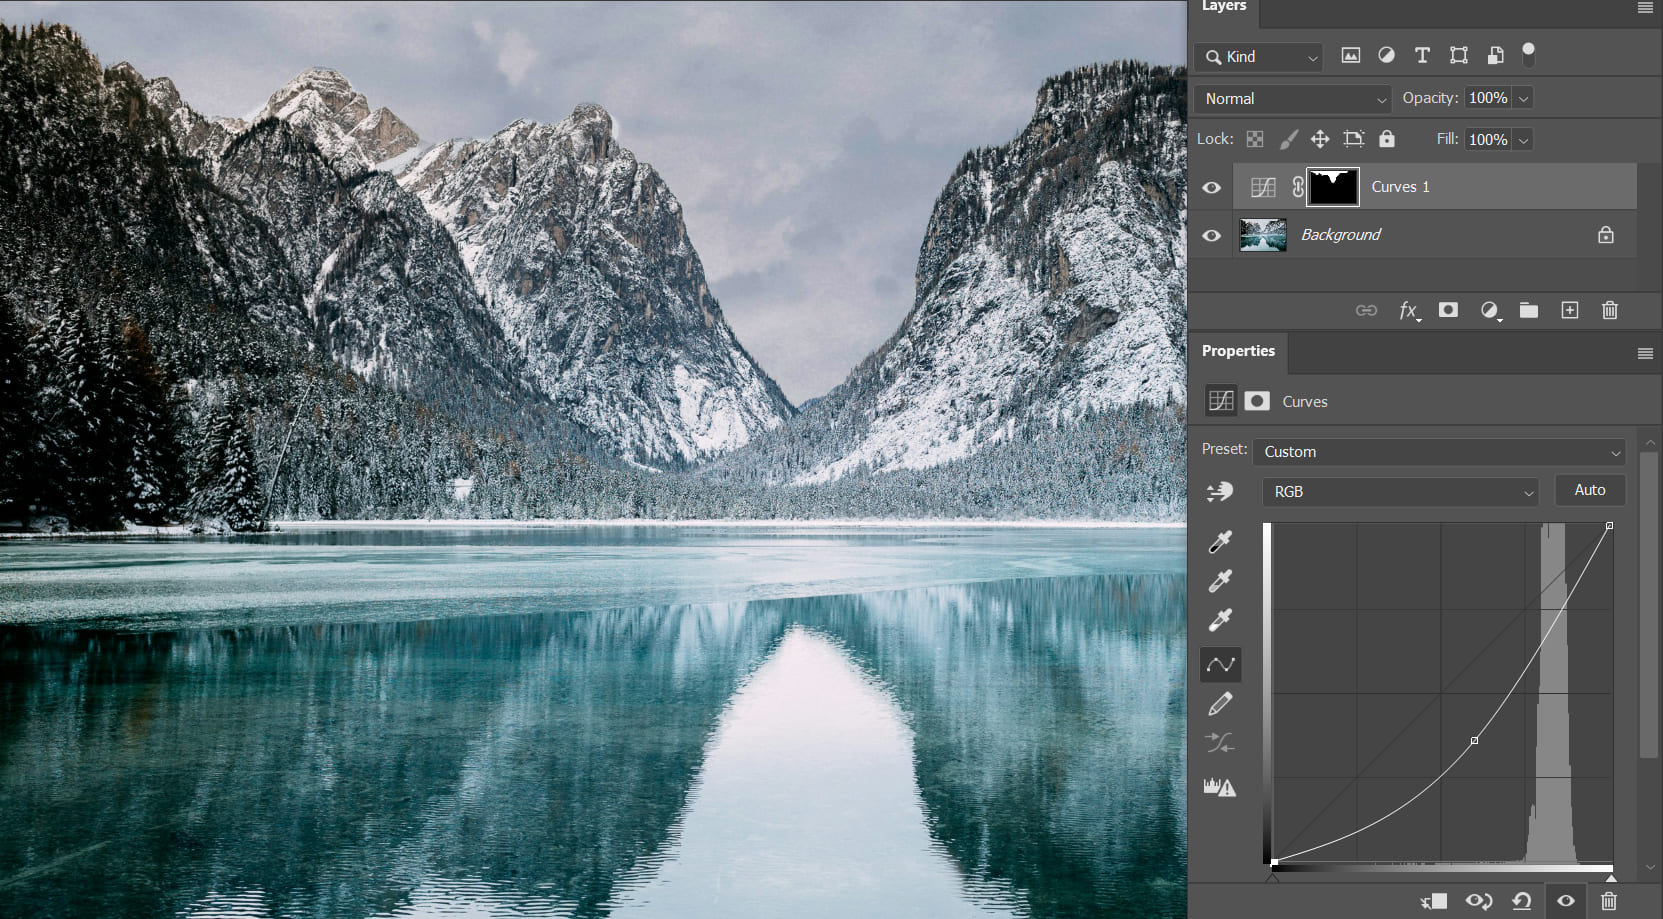
With an active selection, just add a new adjustment layer and Photoshop turns the selection into that layer's mask.
Then you can do local edits — like in our example, we added a Curves layer, used a darkening curve, and only the sky got darker while everything else stayed the same.
Conclusion
In this article, we showed how to use Photoshop's Select and Mask feature to refine your selections and then do local edits with adjustment layers.
Local editing is a key post-processing skill. The secret is to combine Select and Mask for a clean mask, then tweak just that area with an adjustment layer. We hope you find this helpful.
Product Recommendation:
Editing hundreds of photos after a shoot can be exhausting. Sorting, retouching, and color grading each image are tedious steps, but with a TourBox, you can streamline your workflow.

Think of TourBox like a game controller for photo editing and color grading. It makes the process feel as fun and intuitive as playing a video game. And if you shoot video, it can speed up every step of your video editing, too.

For any creative, TourBox can boost your workflow. If you're curious, check it out!