Mastering Sky Replacement in Photoshop: Step-by-Step Guide
In the powerful toolkit of Adobe Photoshop, one feature that undoubtedly stands out is the Sky Replacement tool.
This feature allows you to completely replace the sky in your photos with a different style in a matter of seconds, greatly enhancing the visual impact of your images.
In this article, we will delve into the usage methods and some practical tips of this feature, enabling you to make the most of Photoshop's Sky Replacement tool and create stunning works of art. So, let's get started!

In this article, you will learn:
- What Is Photoshop Sky Replacement?
- How to Replace Sky in Photoshop?
- Frequently Asked Questions About Photoshop Sky Replacement?
What Is Photoshop Sky Replacement?
The Photoshop Sky Replacement feature is a super cool tool that uses Adobe Sensei technology to automatically analyze the foreground and sky in your photos.
It takes away the hassle of creating complex masks and makes sky replacement easy, smart, and lightning fast.
One of the best things about Photoshop Sky Replacement is how smart it is at recognizing the sky areas. Even in tricky situations, like when you have buildings with holes in them, Photoshop Sky Replacement can still figure out what part belongs to the sky.
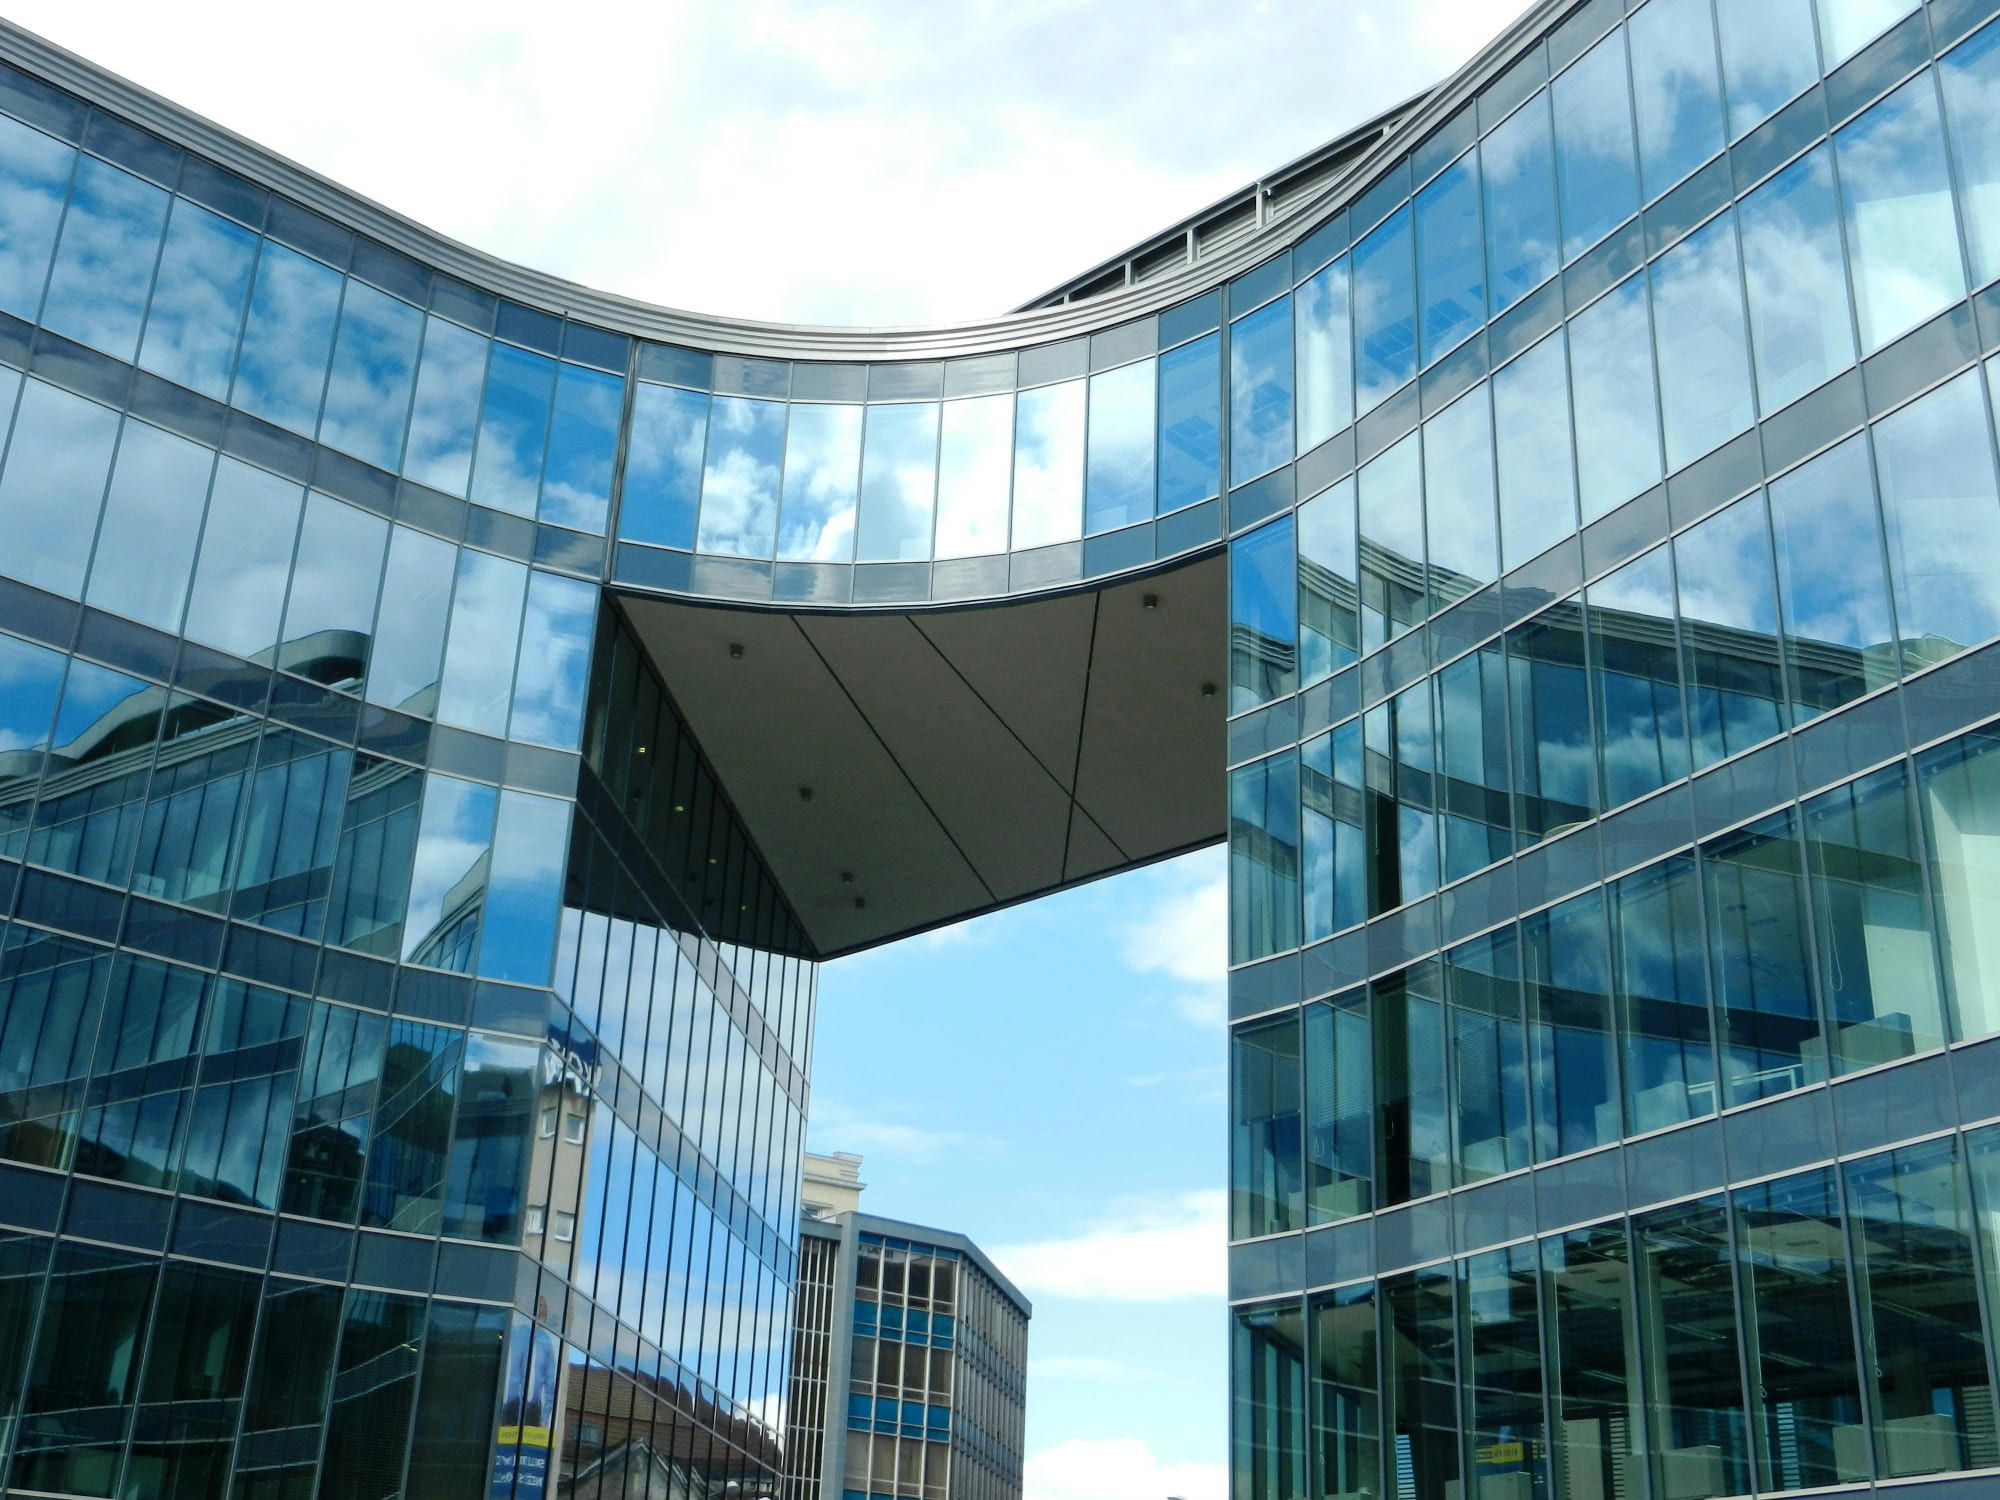
Let's use the photo above as a demonstration of the Photoshop Sky Replacement feature. You can see that even the empty space between the buildings has been accurately identified.

But here's the real magic: Once it identifies the sky, it creates separate layers and masks that you can fine-tune and tweak to perfection.
This means you have complete control over how your replaced sky looks in your photo. It's like having a digital wand to create stunning skies with ease.
If you want to improve your experience with Photoshop, you might want to check out TourBox, a creative tool. You can visit our dedicated page to see how TourBox enhances efficiency in photo editing and digital painting.

With TourBox, you can set up shortcuts and actions for many commonly used operations. This means you no longer have to memorize any software shortcuts and can completely eliminate the need for cumbersome keyboard and mouse operations. You can operate TourBox with just one hand to execute various commands.
The best part is that TourBox seamlessly interacts with multiple creative software. Whether you're using Photoshop for retouching workflows or Lightroom for photo management and color grading, TourBox can enhance your experience and efficiency in both.
In the next section, we will walk you through each parameter of the Photoshop Sky Replacement panel, so you can quickly learn how to replace the sky in Photoshop.
How to Replace Sky in Photoshop?
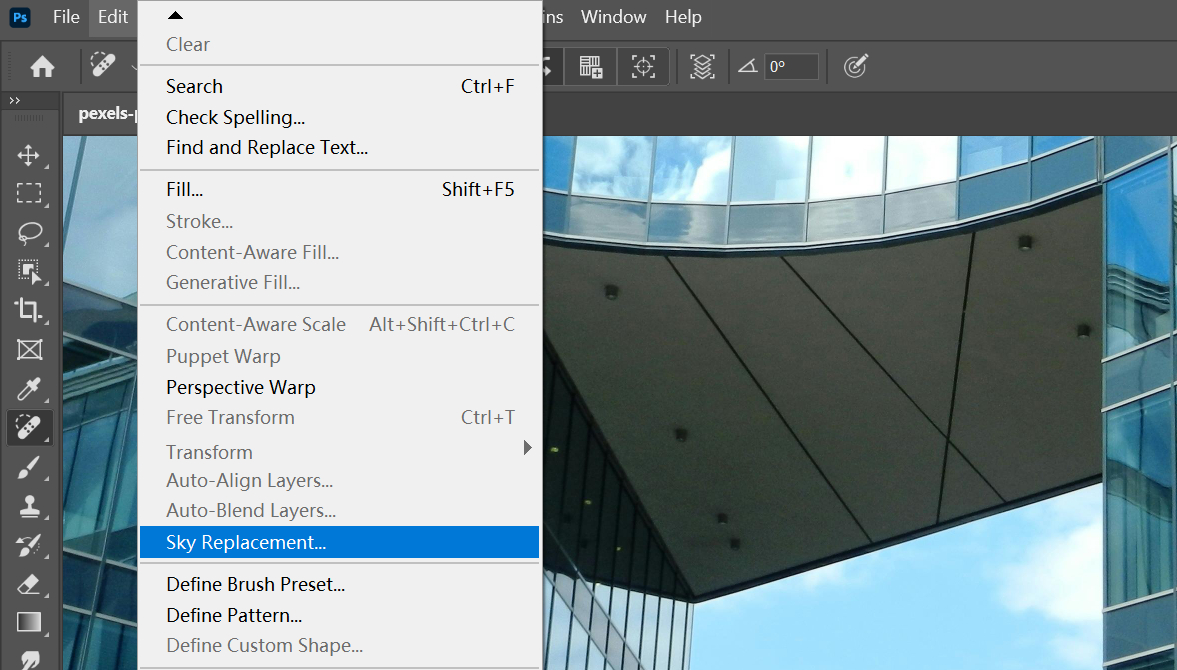
You can find "Sky Replacement" under the Edit dropdown menu in Photoshop.
In the Sky Replacement panel, you'll see four small tools on the left side:
- Sky Move Tool (V): As the name suggests, this tool allows you to adjust the position of the sky.
- Sky Brush (B): Use this tool to expand or shrink the sky area. You can press the Alt/Opt key to toggle between modes.
- Hand Tool (H): Use this tool to drag the photo for better viewing.
- Zoom Tool (Z): Use this tool to zoom in or out on the photo.
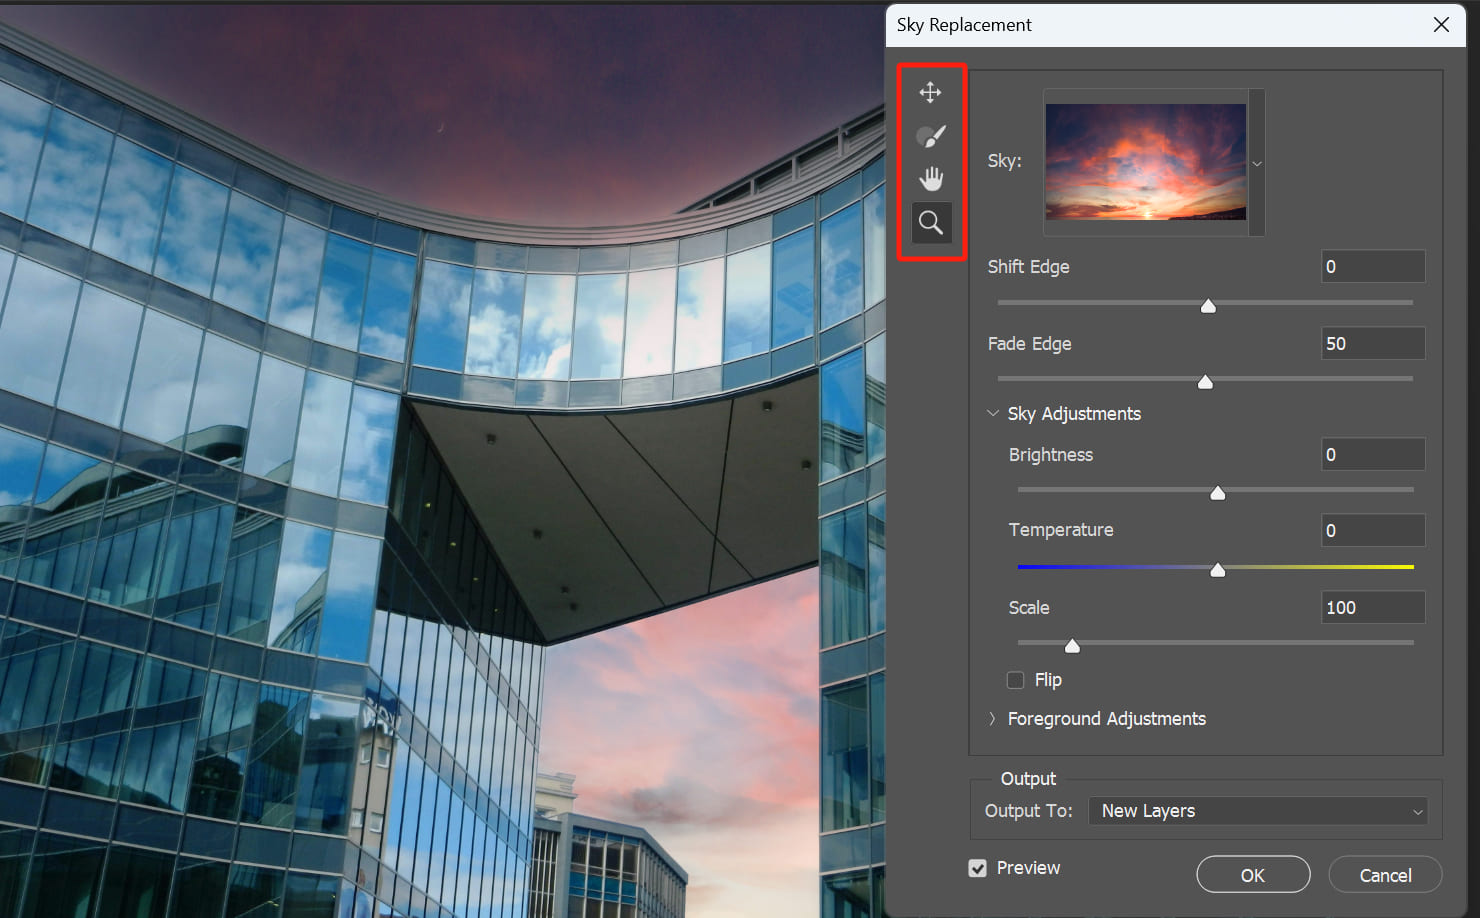
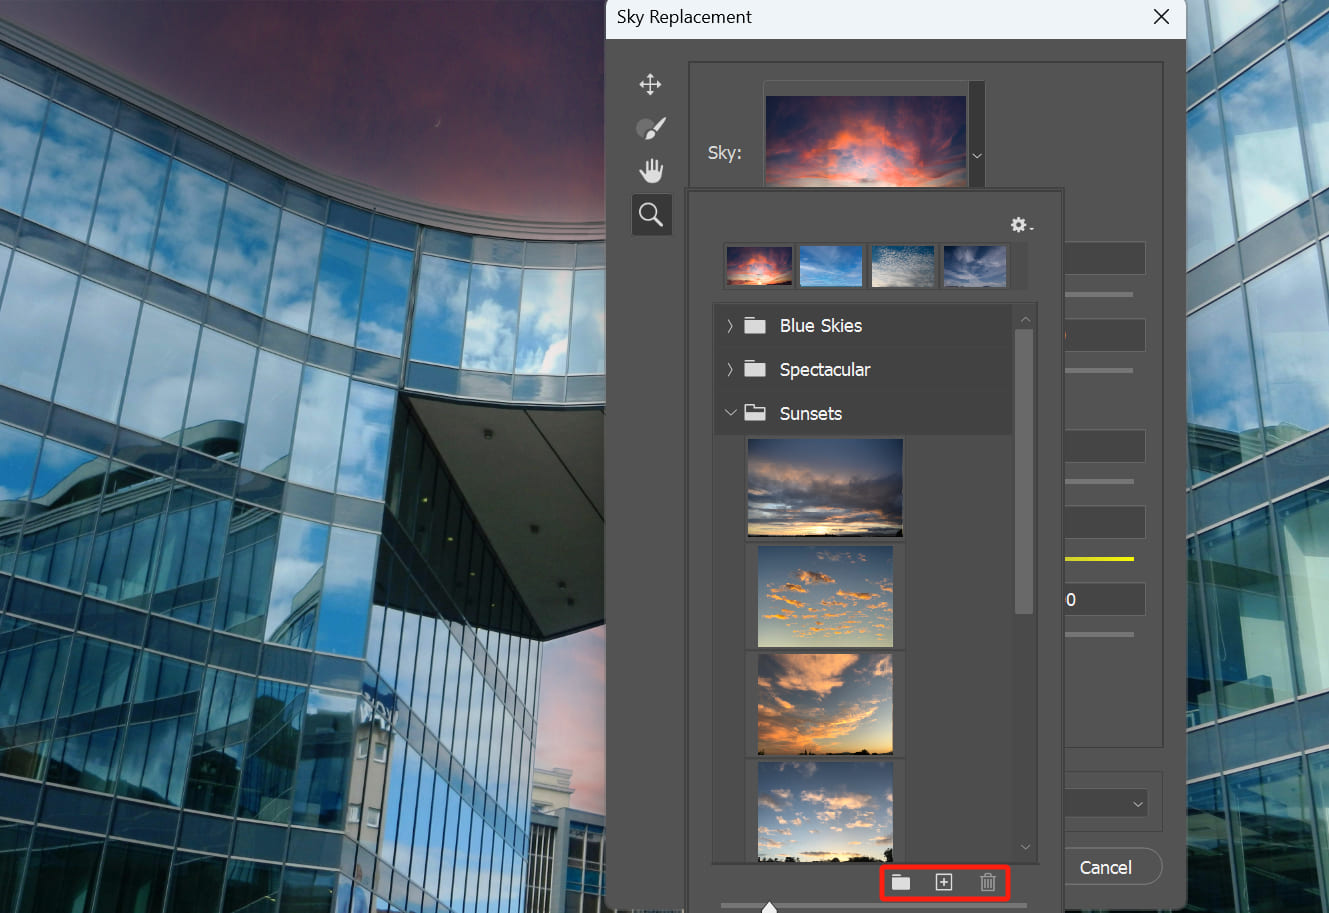
The most important part of the Sky Replacement panel is the central SKY option. Clicking on the SKY option box will open a menu with default sky images provided by Photoshop.
You can add and organize your own sky images in the sky options box. At the bottom of the panel, you have buttons to create a sky group, add sky images, and delete sky images. There's a lot of flexibility here.
Once you select a sky image, you'll see the real-time changes happening to your photo (make sure the Preview option is selected). You can see how well the new sky fits with your image, and sometimes, you may not even need to adjust any other parameters—just hit OK and you're done!
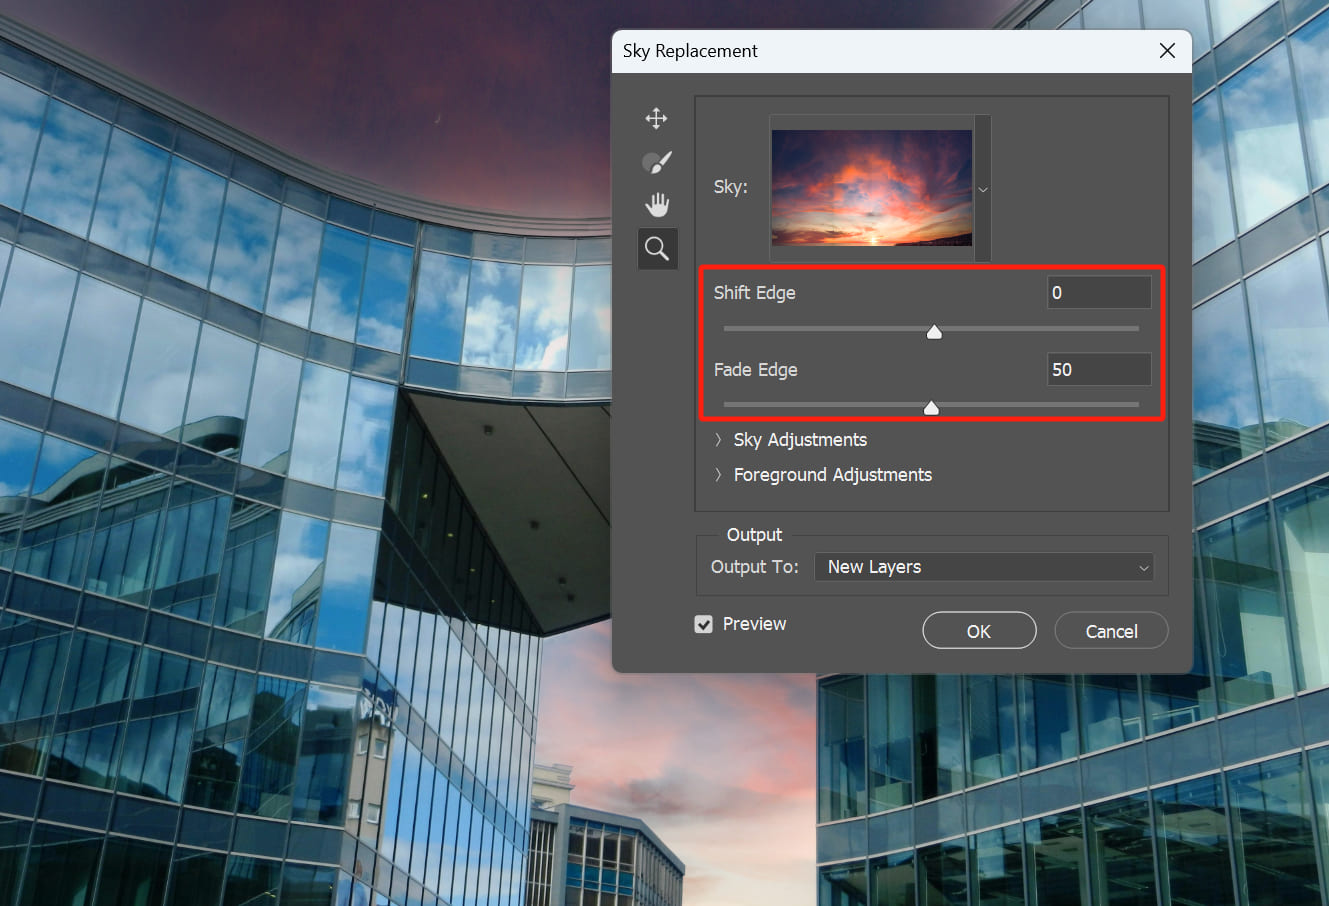
After selecting the sky image you want to replace, you can make adjustments to the edges. There are two options below the Sky option box that allow you to customize the sky edges:
- Shift Edge: Expand or shrink the boundary between the sky and the foreground.
- Fade Edge: Soften the transition between the sky and the foreground.
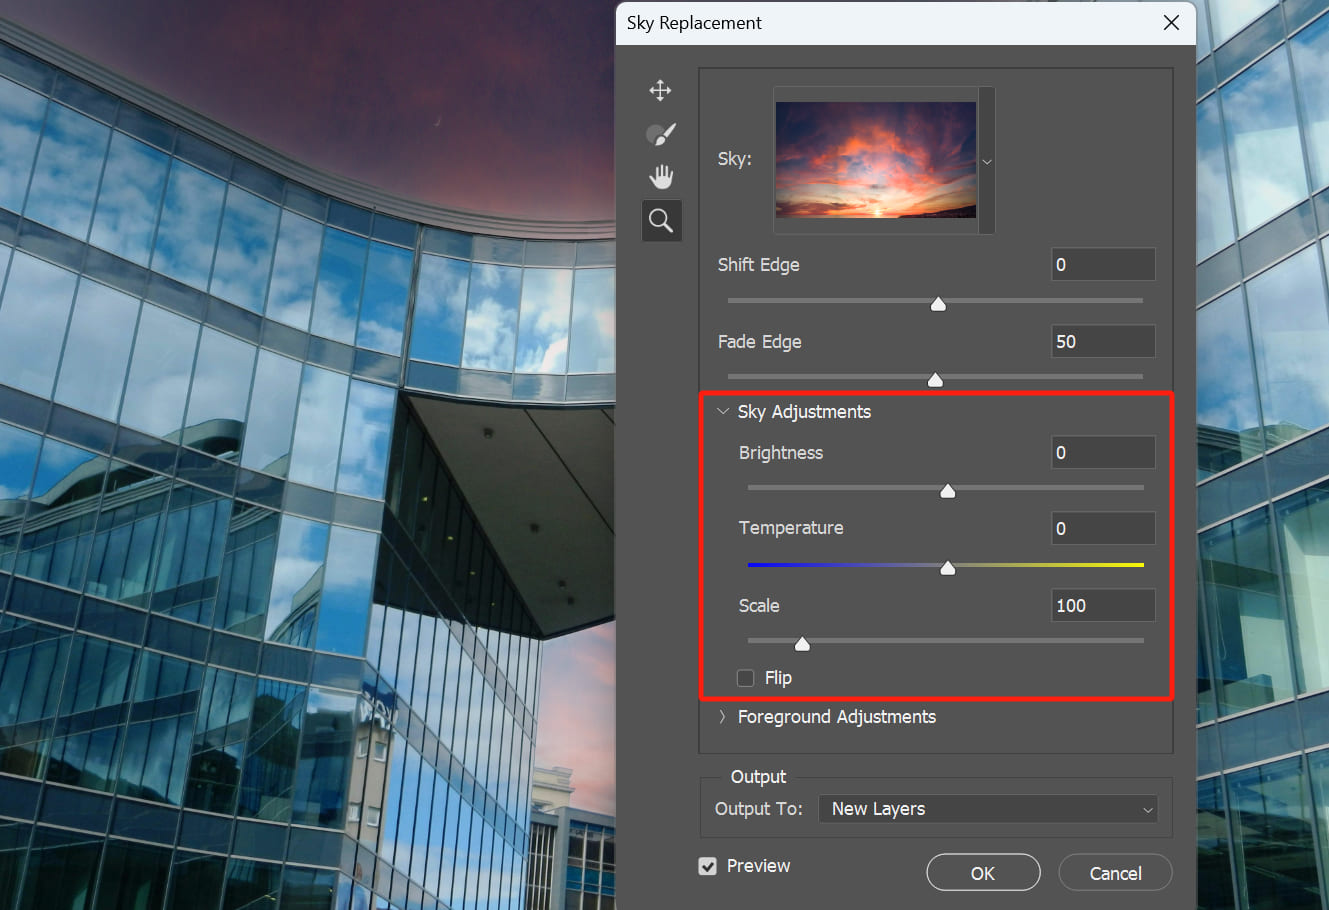
Once you fine-tune the sky edges, you can make adjustments to the sky in the "Sky Adjustments" area, which includes the following options:
- Brightness: Drag the slider to adjust the brightness of the sky material.
- Temperature: Drag the slider to adjust the color temperature of the sky material, achieving a cooler or warmer tone.
- Scale: Resize the sky material.
- Flip: Flip the sky material horizontally.
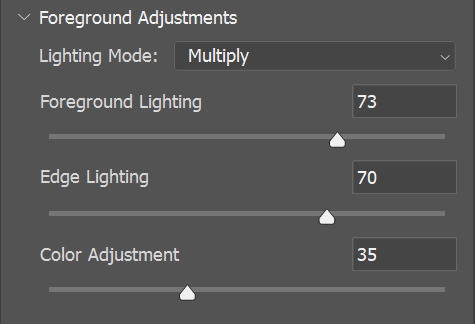
In addition to adjusting the sky, you can also make adjustments to the sky area in the foreground of your photo using the Photoshop Sky Replacement panel.
You can adjust the lighting and color of the foreground sky area to better blend it with the sky material:
- Lighting Mode: You can choose between Multiply to darken the sky area or Screen to brighten it. If you are familiar with Photoshop's layer blending modes, this should be easy to understand.
- Foreground Lighting: This allows you to control the brightness of the sky area in the original image.
- Edge Lighting: Use this to control the brightness of the sky edges in the original image, preserving edge details and reducing halos.
- Color Adjustment: This allows you to control the blending of colors between the original image and the sky material.
Bonus Tip:
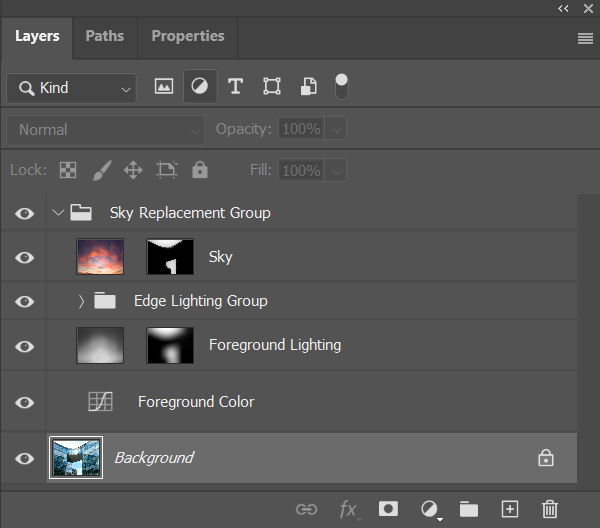
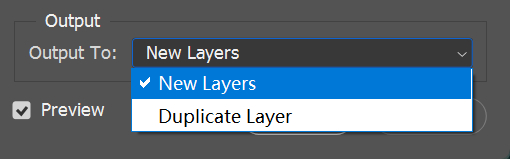
After completing the Photoshop Sky Replacement, you can see how Photoshop replaced the sky in your photo in the Layers panel. (Make sure the output is set to "New Layers")
The so-called "Foreground Lighting" is essentially a black-and-white layer generated based on the lighting distribution of the sky material. You can control its impact on the sky area of the original image by adjusting the layer blending mode and opacity.
Lastly, there's the Output setting:
- If you choose "New Layers," it will create all the relevant layers and masks.
- If you choose "Duplicate Layer," it will directly generate a final effect layer.
Frequently Asked Questions About Photoshop Sky Replacement?
Question: Can I Use Any Photo for Sky Replacement?
Yes, you can use any photo. However, the best results are achieved with photos that have a clear and expansive sky. If there is no sky area or if the sky area is not prominent in the photo, you won't be able to use this feature.
Question: Do I Need a Special Version of Photoshop for Sky Replacement?
No, you don't. While some versions of Photoshop may include more advanced sky replacement tools, the basic sky replacement technique can be accomplished in most versions of Photoshop.
Question: Will Replacing the Sky Affect Other Parts of My Photo?
If done correctly, replacing the sky should not affect other parts of the photo.
The great thing about the Photoshop sky replacement feature is that if you set the output to "New Layers," Photoshop will generate the corresponding sky replacement layers and masks, allowing you to further refine the result.
Product Recommendation:
If you're interested in how TourBox can improve your work efficiency and enhance your workflow, you might want to check out the latest product, TourBox Lite. TourBox Lite offers great value for money, especially for first-time users of TourBox.

That concludes our tutorial on how to replace the sky in Photoshop. We hope this has been helpful to you. Lastly, why not give TourBox a try and see how it can bring a significant change to your creative journey.