Candy Colors | How to Achieve the Dreamy Tones Dominating Instagram?
Did you ever realize that candy colors always make your mouth water? But who would have thought that candy colors could also be used in photo editing?
Creative photographers, with their minds wide open, intentionally bring the colors of their photos closer to candy colors during post-processing. This has led to the popular trend of candy-colored photos on platforms like Instagram and other social media.
So, what's the secret behind these candy colors? How can you use Lightroom to achieve this unique look for your photos? Without further ado, let's get started.

In this article, you will learn:
- What Are the Candy Colors?
- Capturing Candy-Colored Photos: How to Do It?
- Post-Processing Adjustments: How to Use Lightroom to Achieve Candy Colors?
- Frequently Asked Questions About Candy Colors
What Are the Candy Colors?
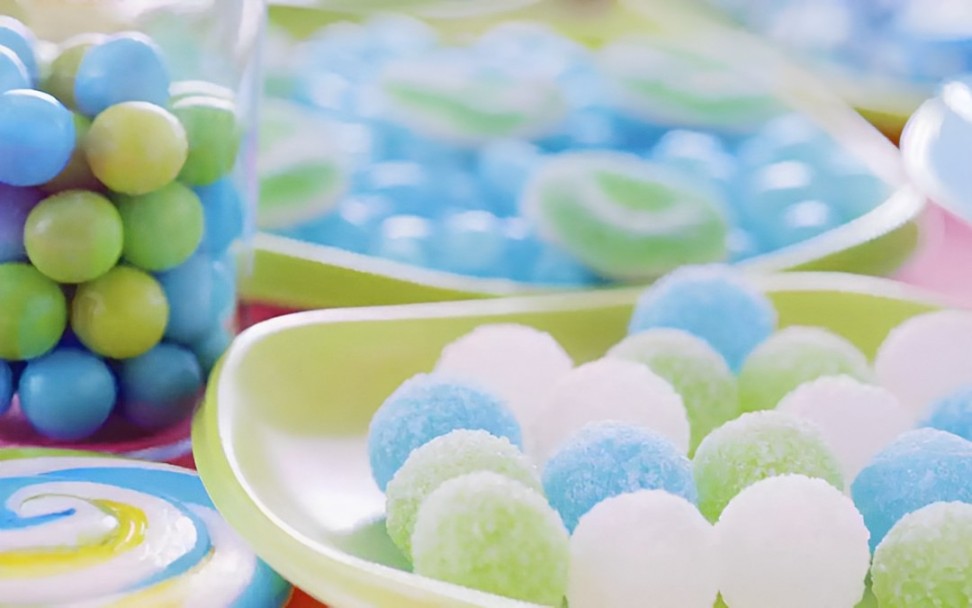
You might be curious about what candy colors are. Well, let's take a look at the candy photo below and feel the sensations it brings.
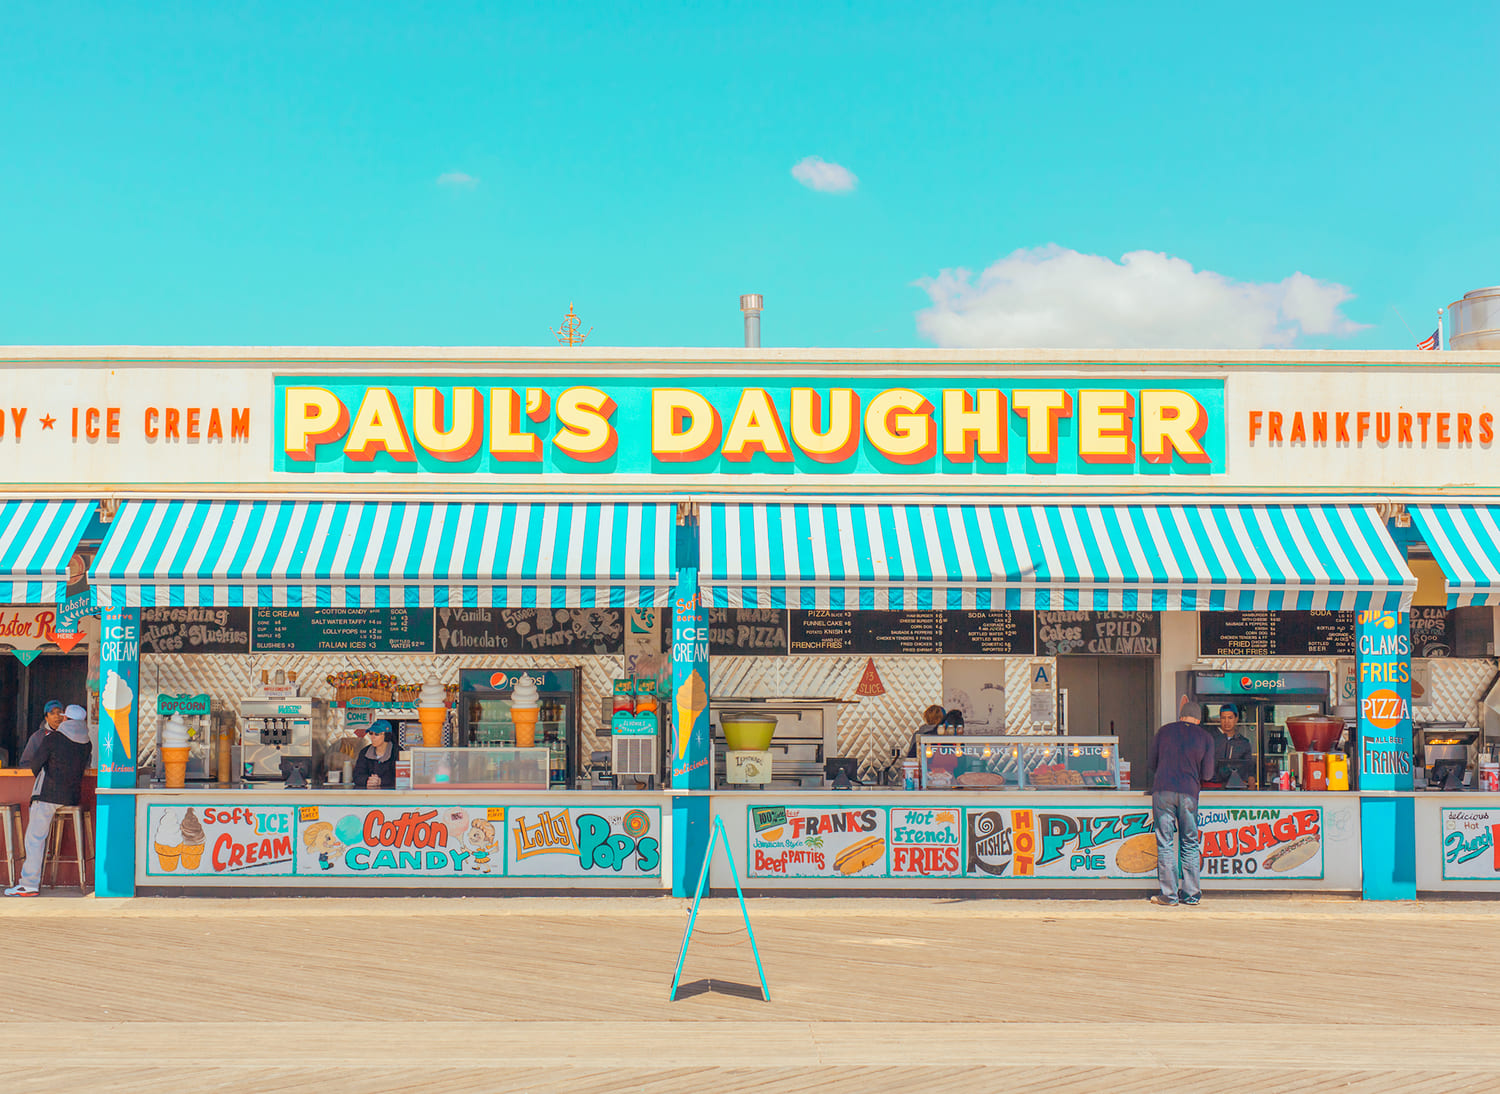
Next, let's examine the candy-colored photo below. Does it give you a dreamy feeling, just like how candy makes you feel?
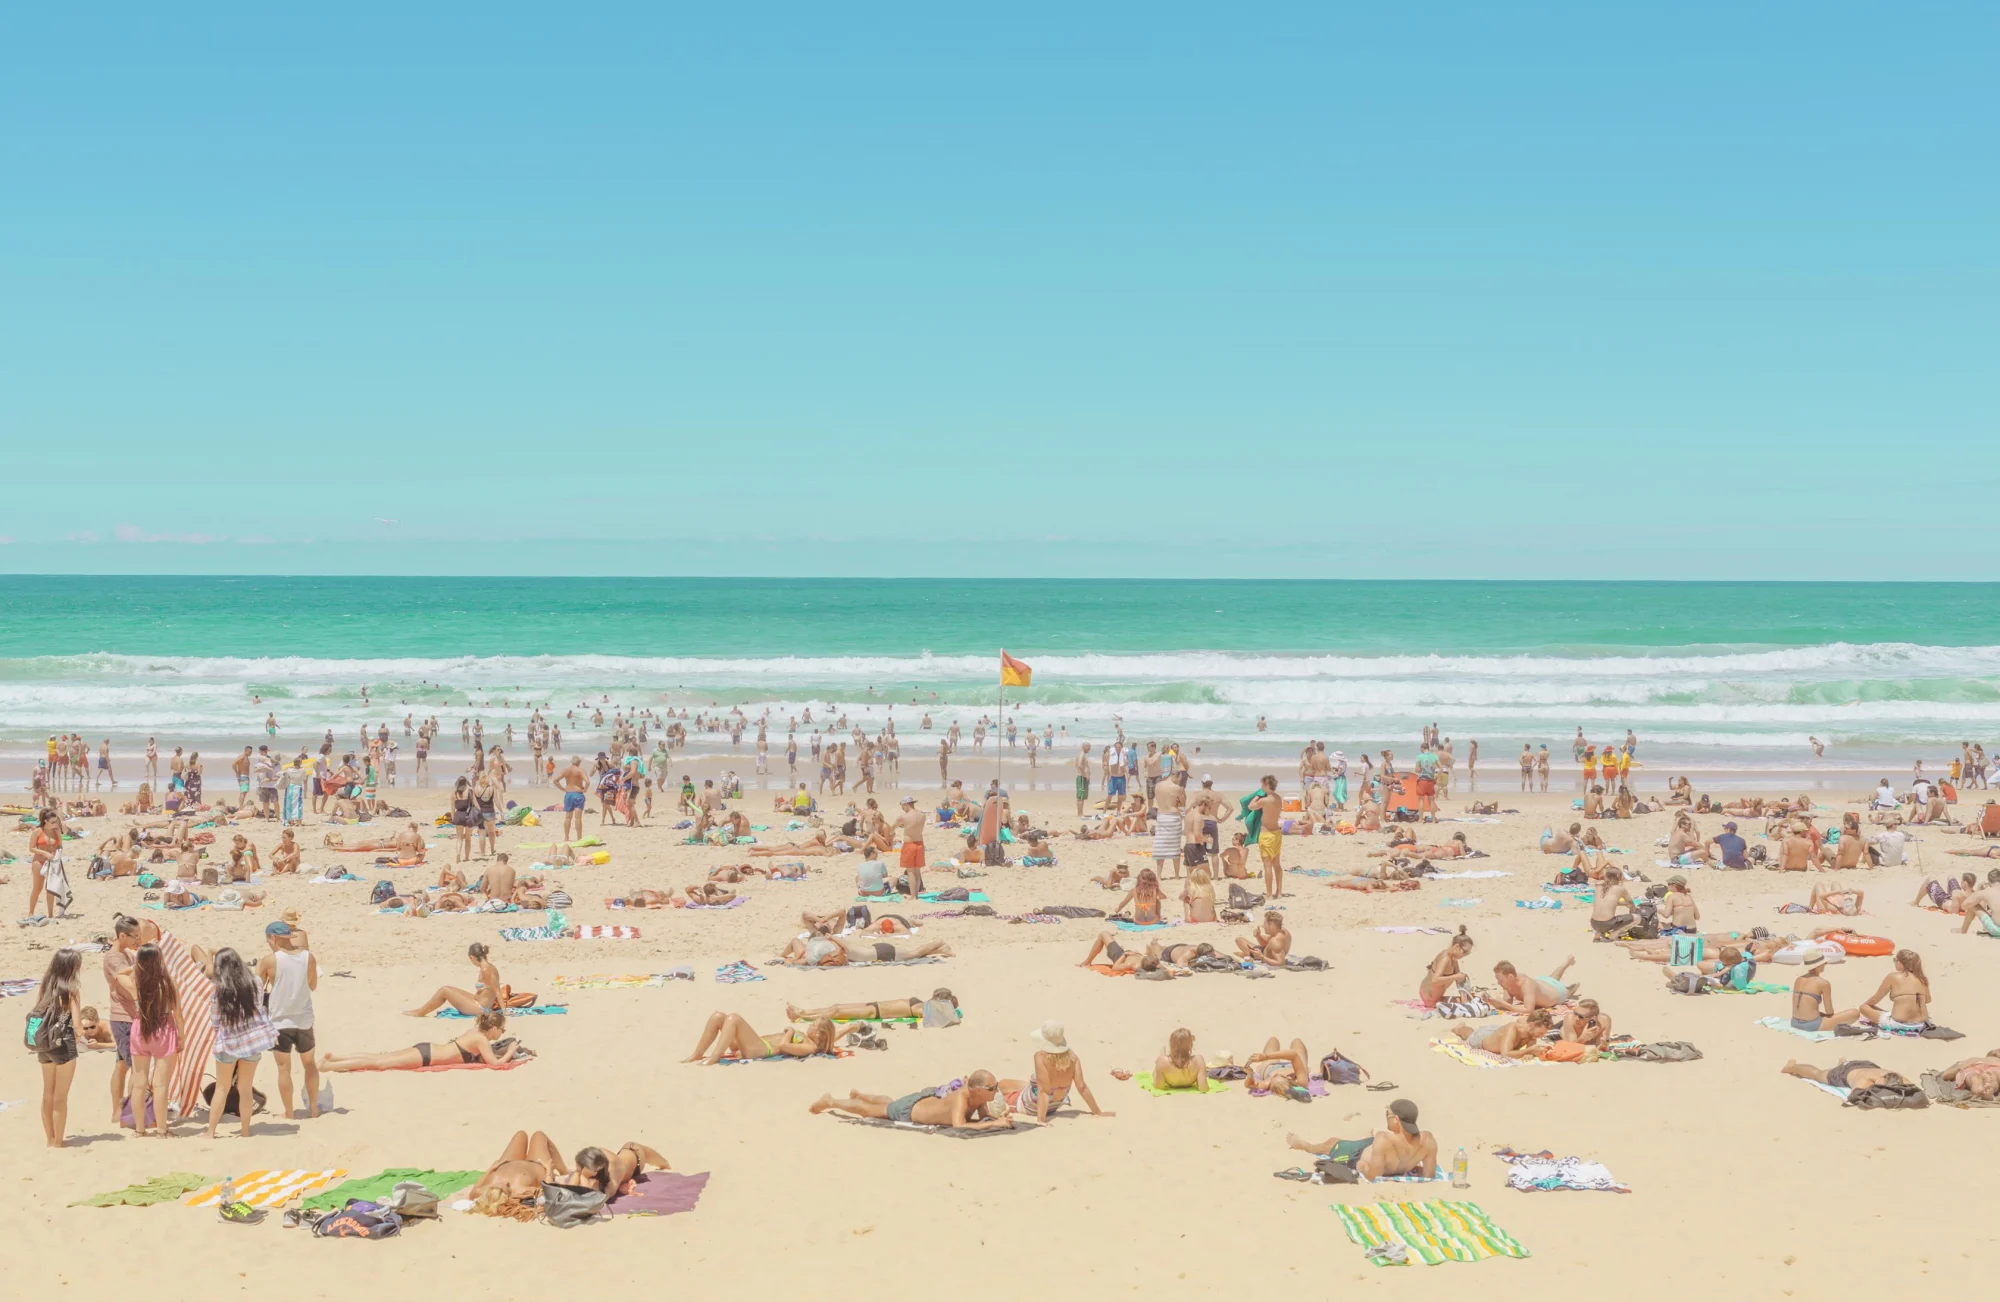
This type of color scheme, characterized by extremely soft and gentle hues, evokes a fairy-tale-like, dreamy atmosphere. That's what we refer to as candy colors.
The candy-colored style photos we're sharing here are captured by Ben Thomas, a renowned Australian photographer and the winner of the 2018 Hasselblad Masters.
These candy-colored photos belong to his series called "Chroma" (meaning "color" in Greek), which he started in 2015. It's his unique photography style.
Although the "Chroma" series photos may look dreamy, they are actually real landscapes from around the world. These photos are typically taken on bright, sunny days and undergo post-processing adjustments using software to create a distinctive aesthetic appeal.
You might be eager to give it a try! In the following sections, we will guide you through the process of capturing your photos and making adjustments using post-processing software to achieve that candy-colored look.
Capturing Candy-Colored Photos: How to Do It?
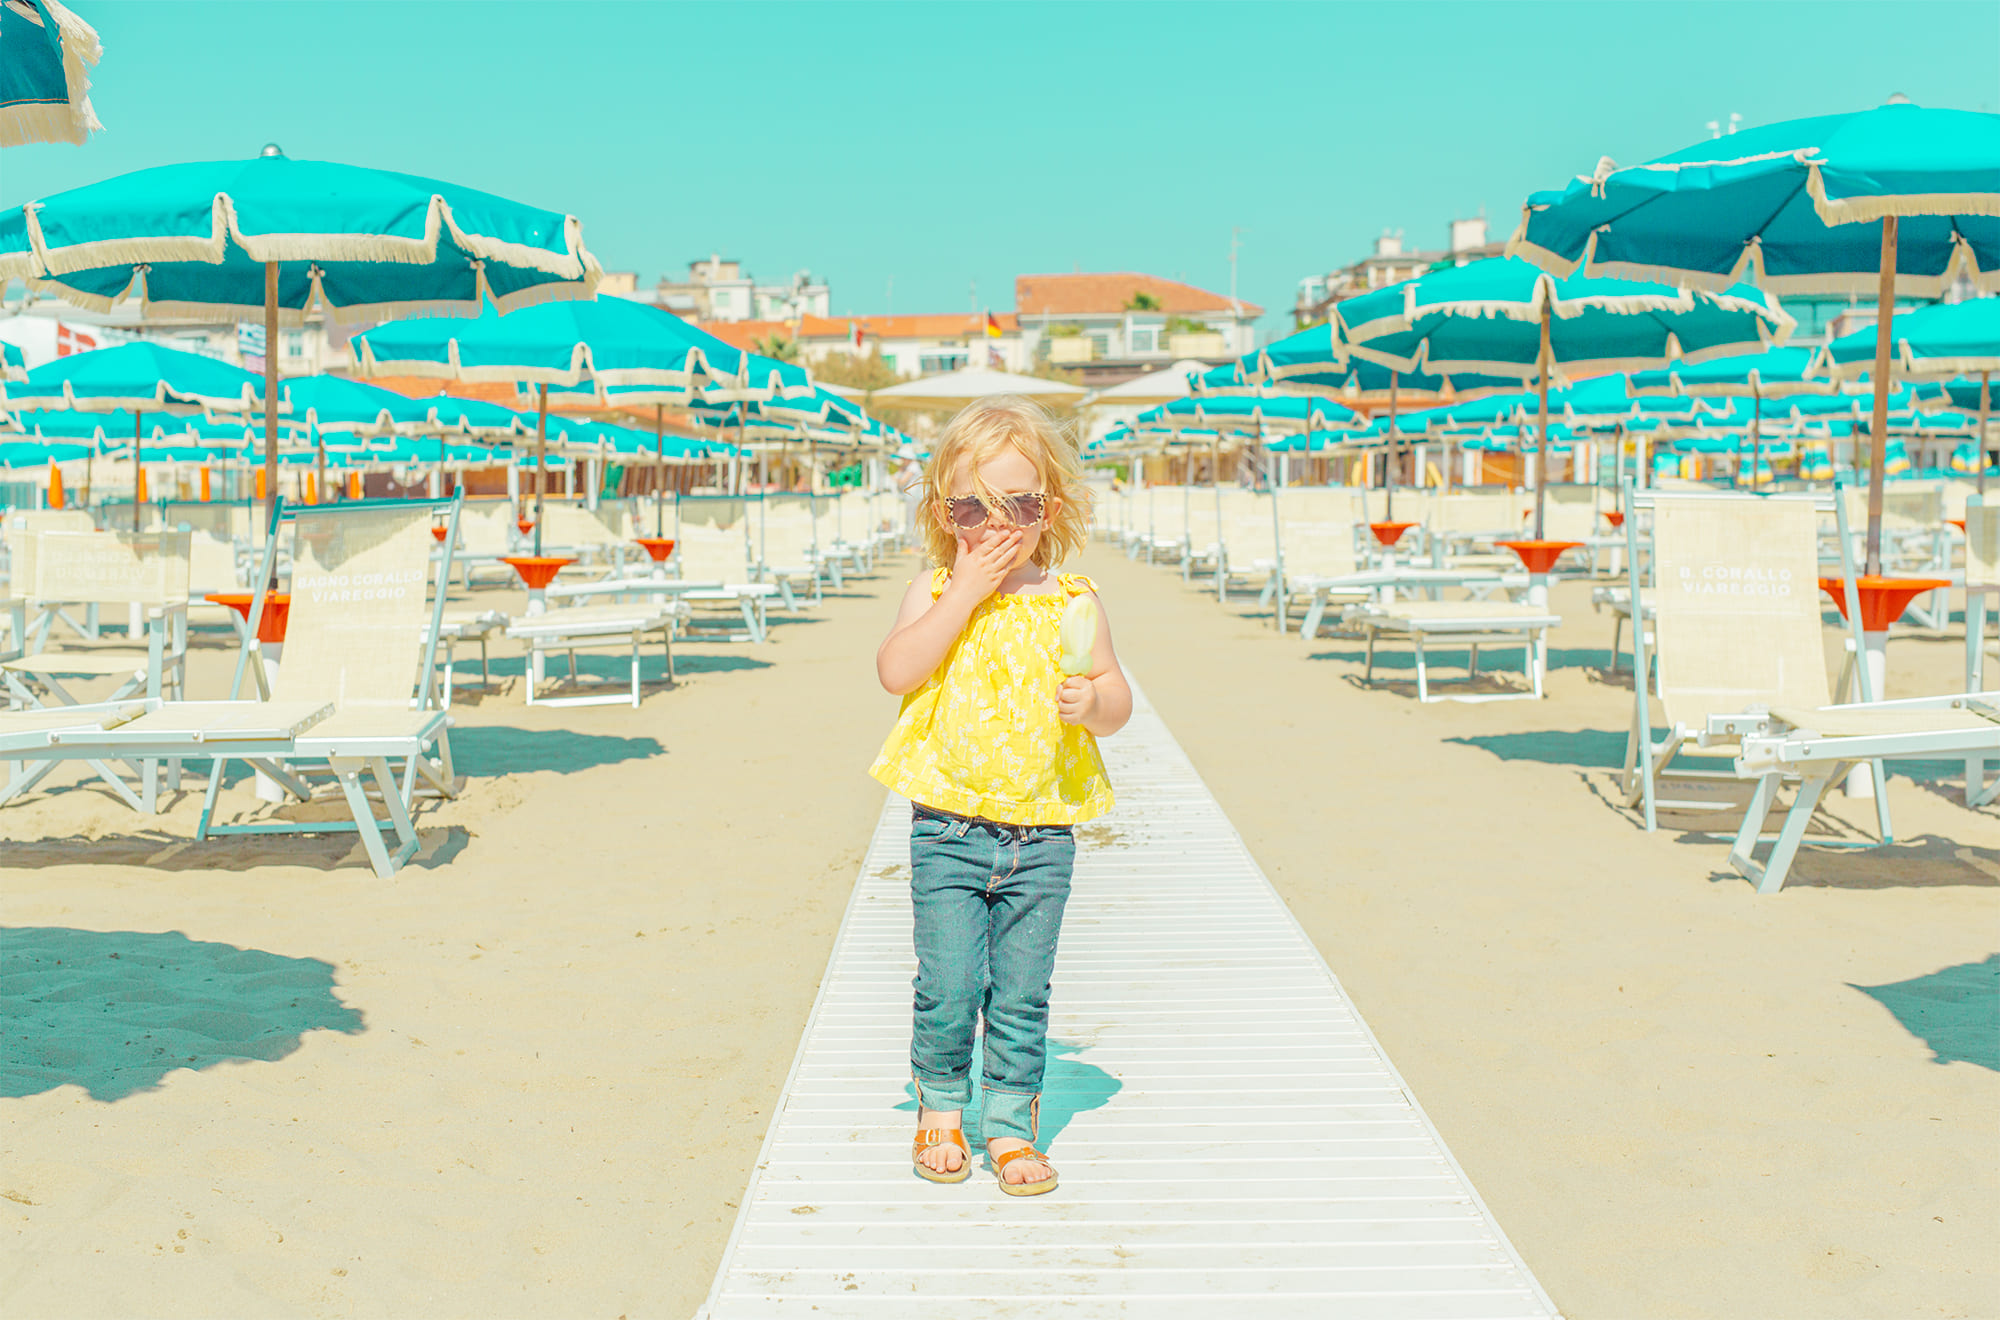
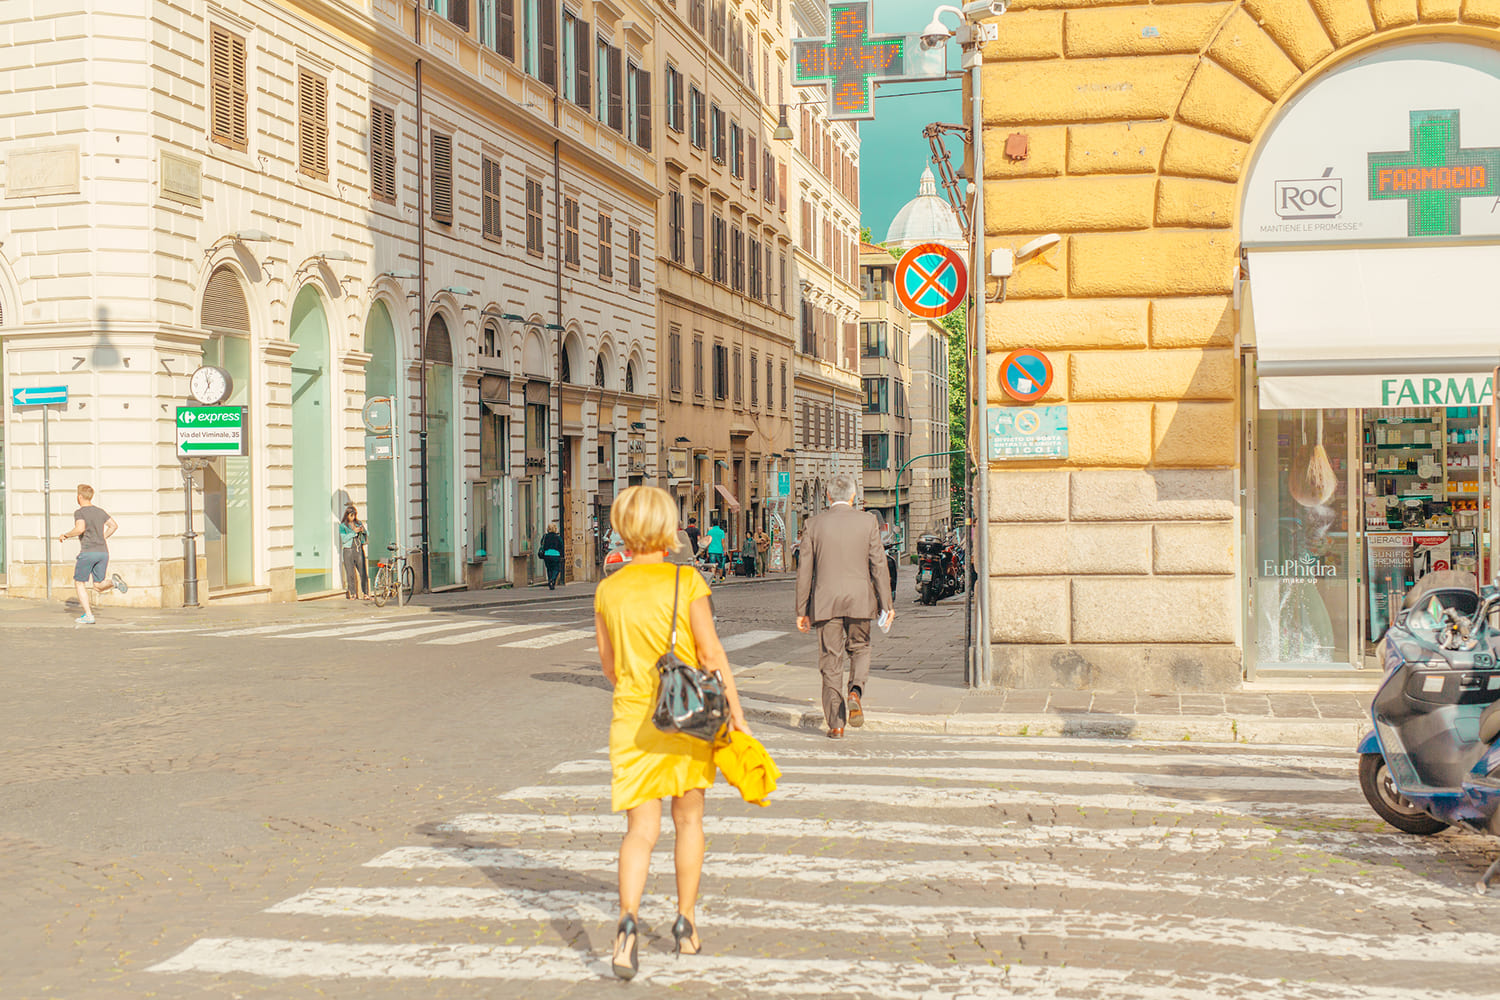
In Ben Thomas' "Chroma" series of candy-colored photos, the color palette primarily consists of blues, reds, oranges, and other vibrant hues. The key is to avoid monotony and incorporate multiple colors into the composition.
If you want to recreate this style, it's crucial to consider the colors in your chosen scene during the initial stages of shooting.
Our recommendation is to include a blue sky in the background. Additionally, pay attention to the colors of the surrounding elements or buildings. Opt for bright and highly saturated colors like red, orange, and yellow. The colors should be vibrant and eye-catching.
Post-Processing Adjustments: How to Use Lightroom to Achieve Candy Colors?
During the shooting phase, choose suitable locations and ensure proper exposure in your photos. The rest of the magic happens during post-processing.
Before diving into the editing process, let's analyze how to adjust the photo to achieve candy colors.
Color Adjustment Approach:
- The overall photo should be bright with clear details.
- Warm tones should be unified into shades of orange, with high brightness.
- Neutral green tones should be adjusted to warmer hues and increased brightness.
- Cool blue tones should be adjusted to cyan-blue shades with increased brightness.
- The overall colors should be vibrant and highly saturated.
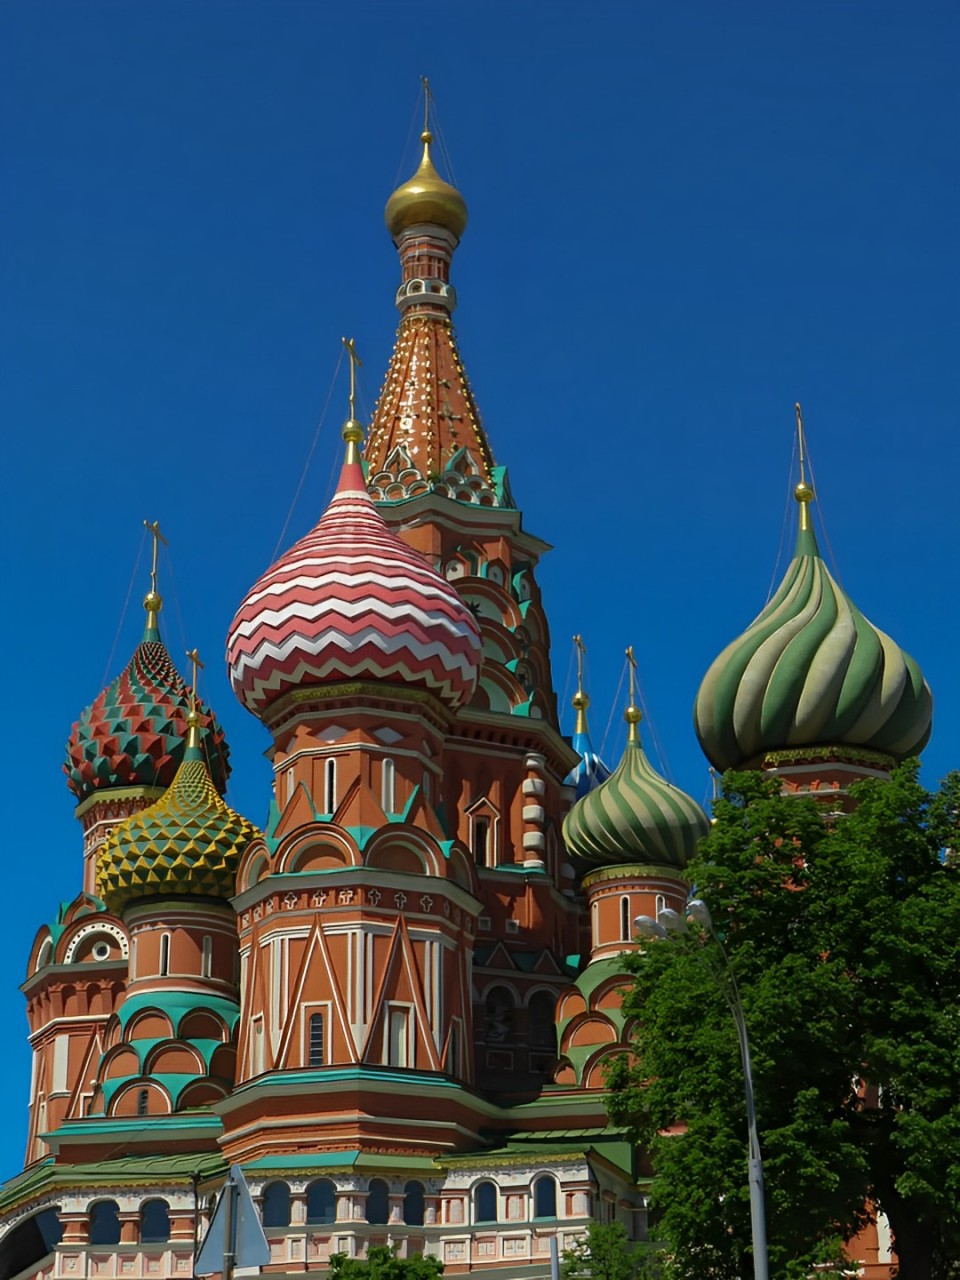
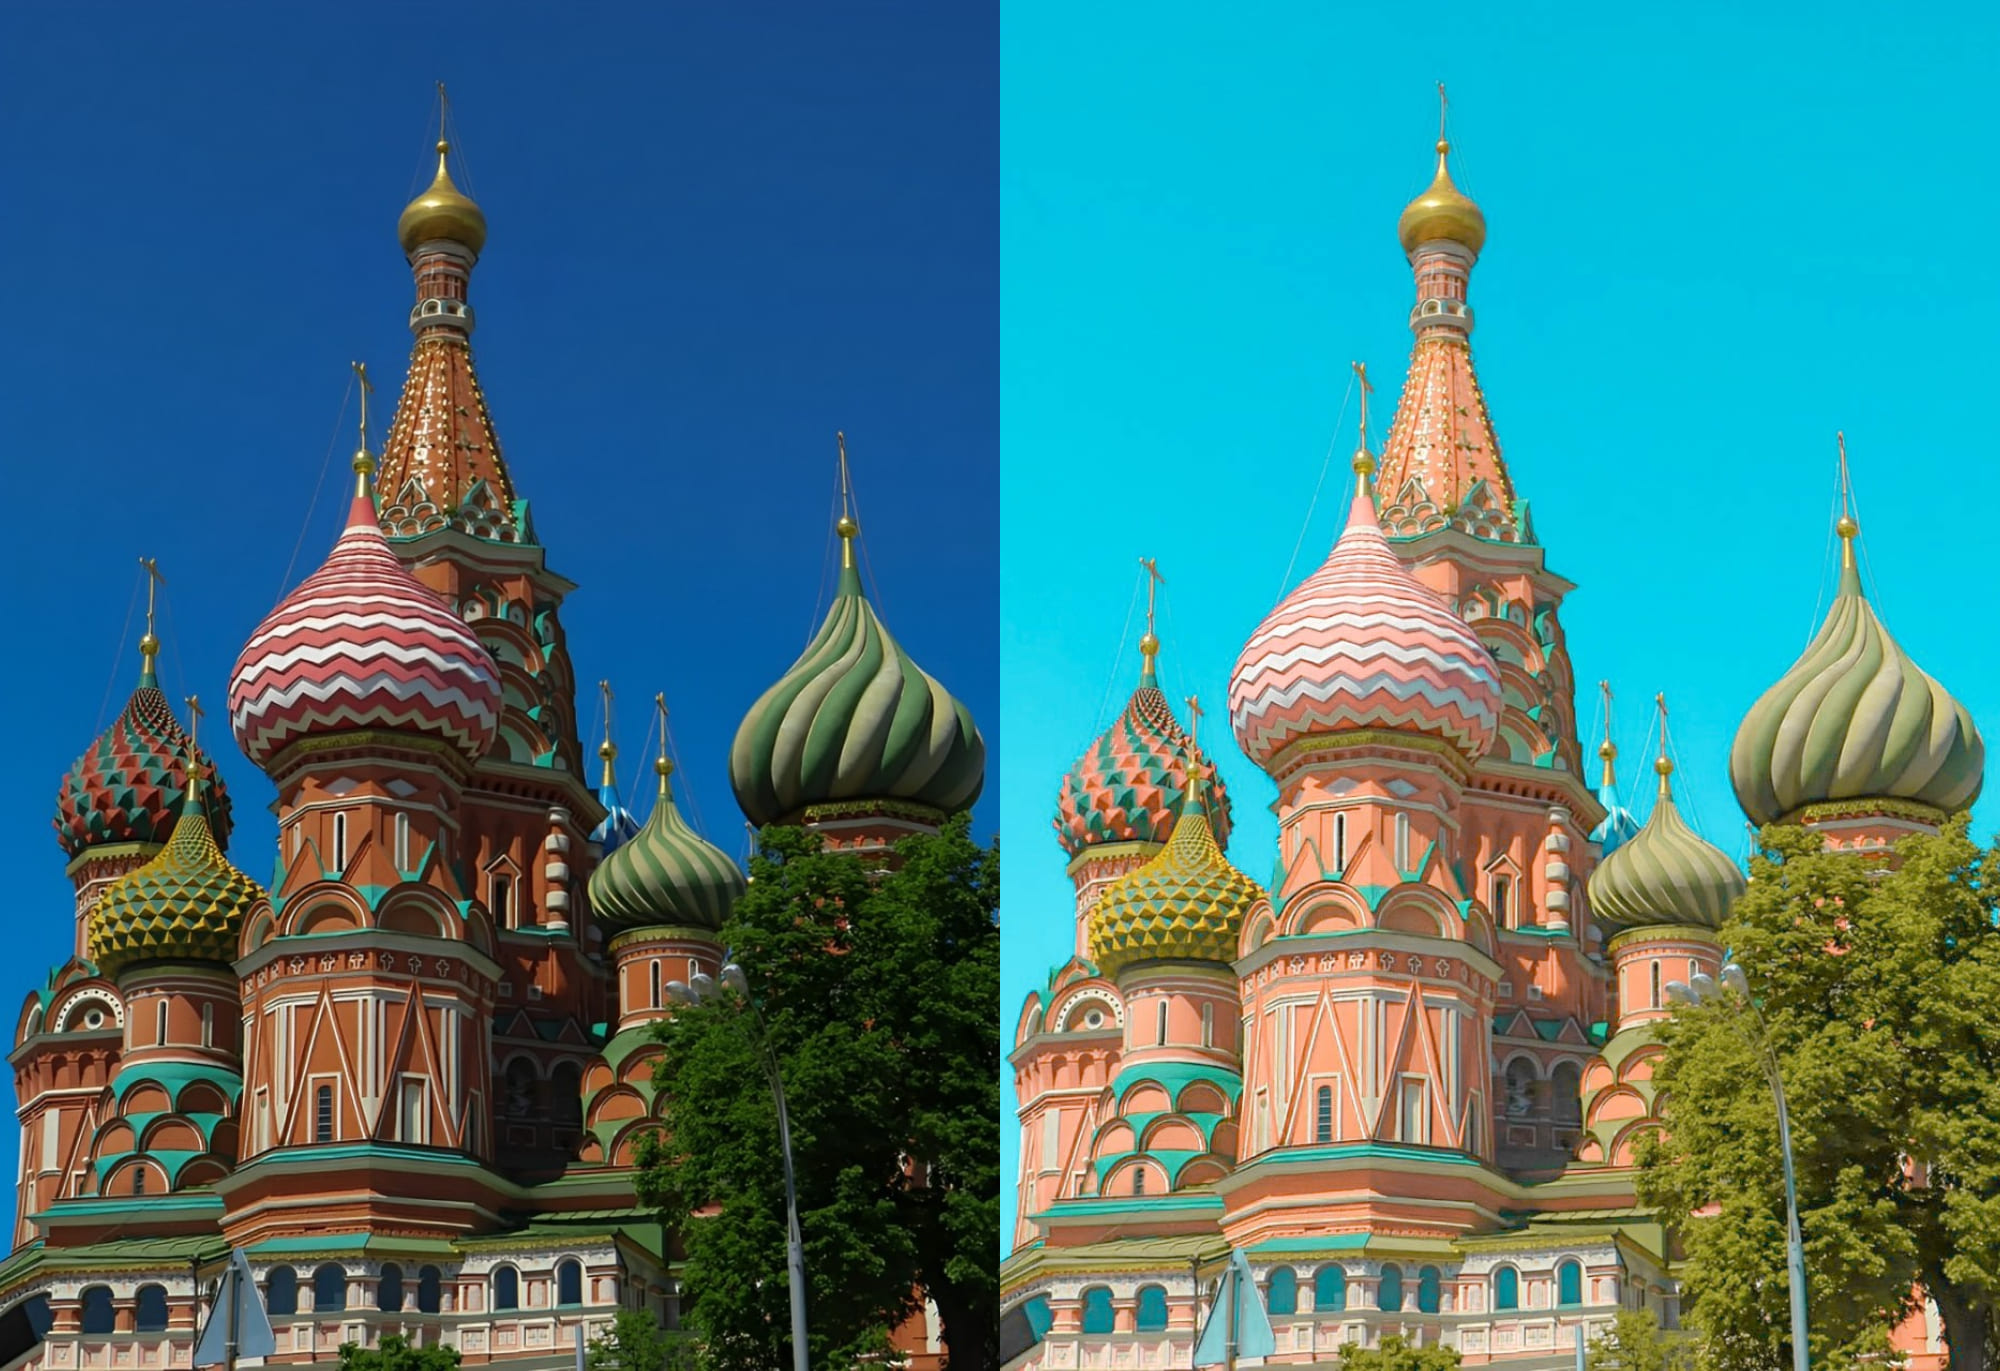
After analyzing the approach, let's take the following image as an example and make adjustments based on our analysis. We will use Lightroom Classic for color grading. Of course, you can also use other photo editing software like the Camera Raw filter in Photoshop, as the principles of color adjustment are similar.
First, you need to adjust the brightness of the photo, especially the details in the shadows. The goal is to ensure that the photo has clear details while appearing overall brighter. To do this, increase the values of exposure, shadows, and blacks.
Next, you can slightly decrease the contrast. Avoid having too strong a contrast in the image and aim for a softer look.
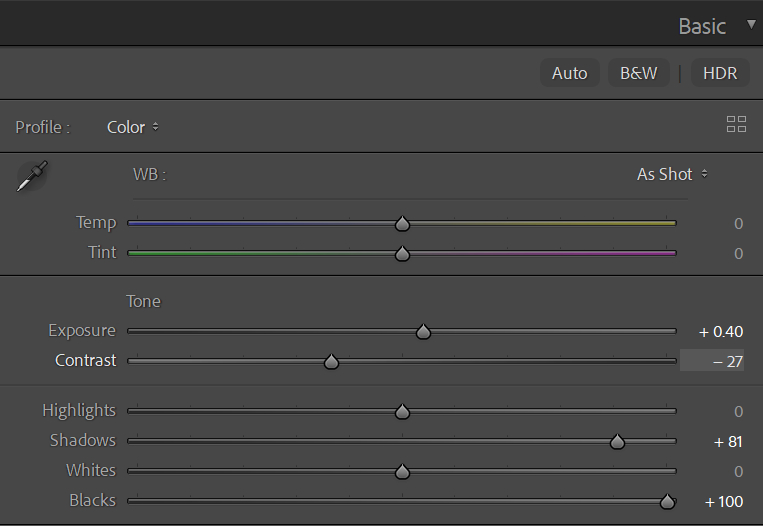
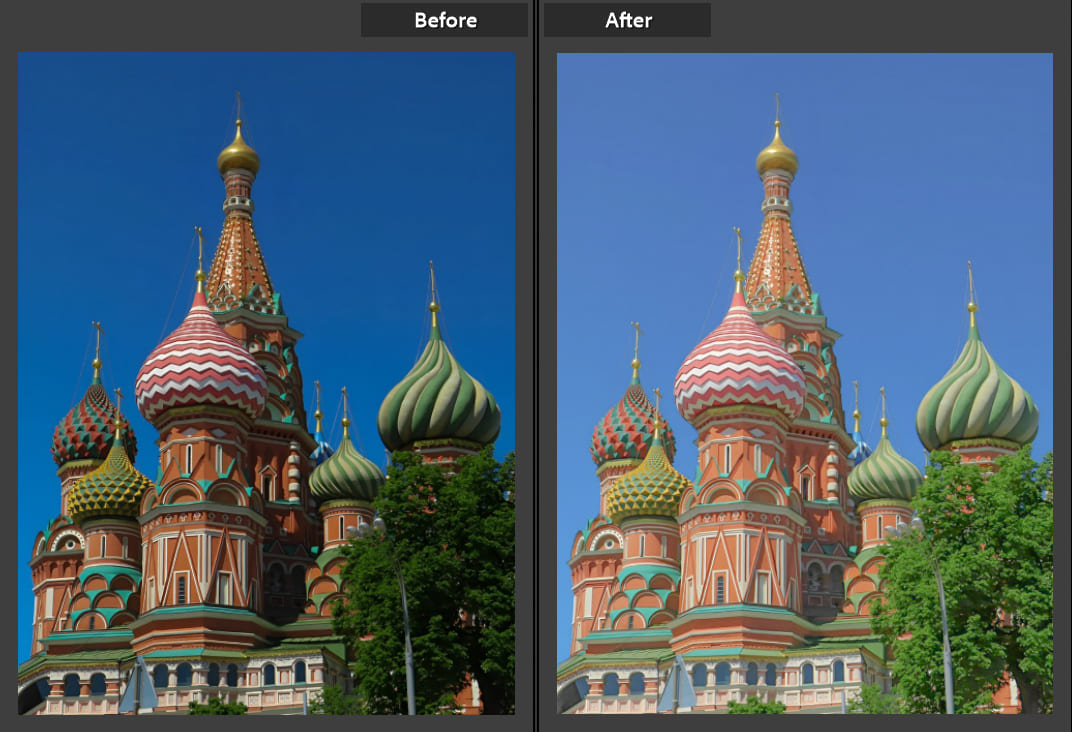
You can find all these parameters in the Basic panel in Lightroom Classic. Let's see the before and after results of these adjustments.
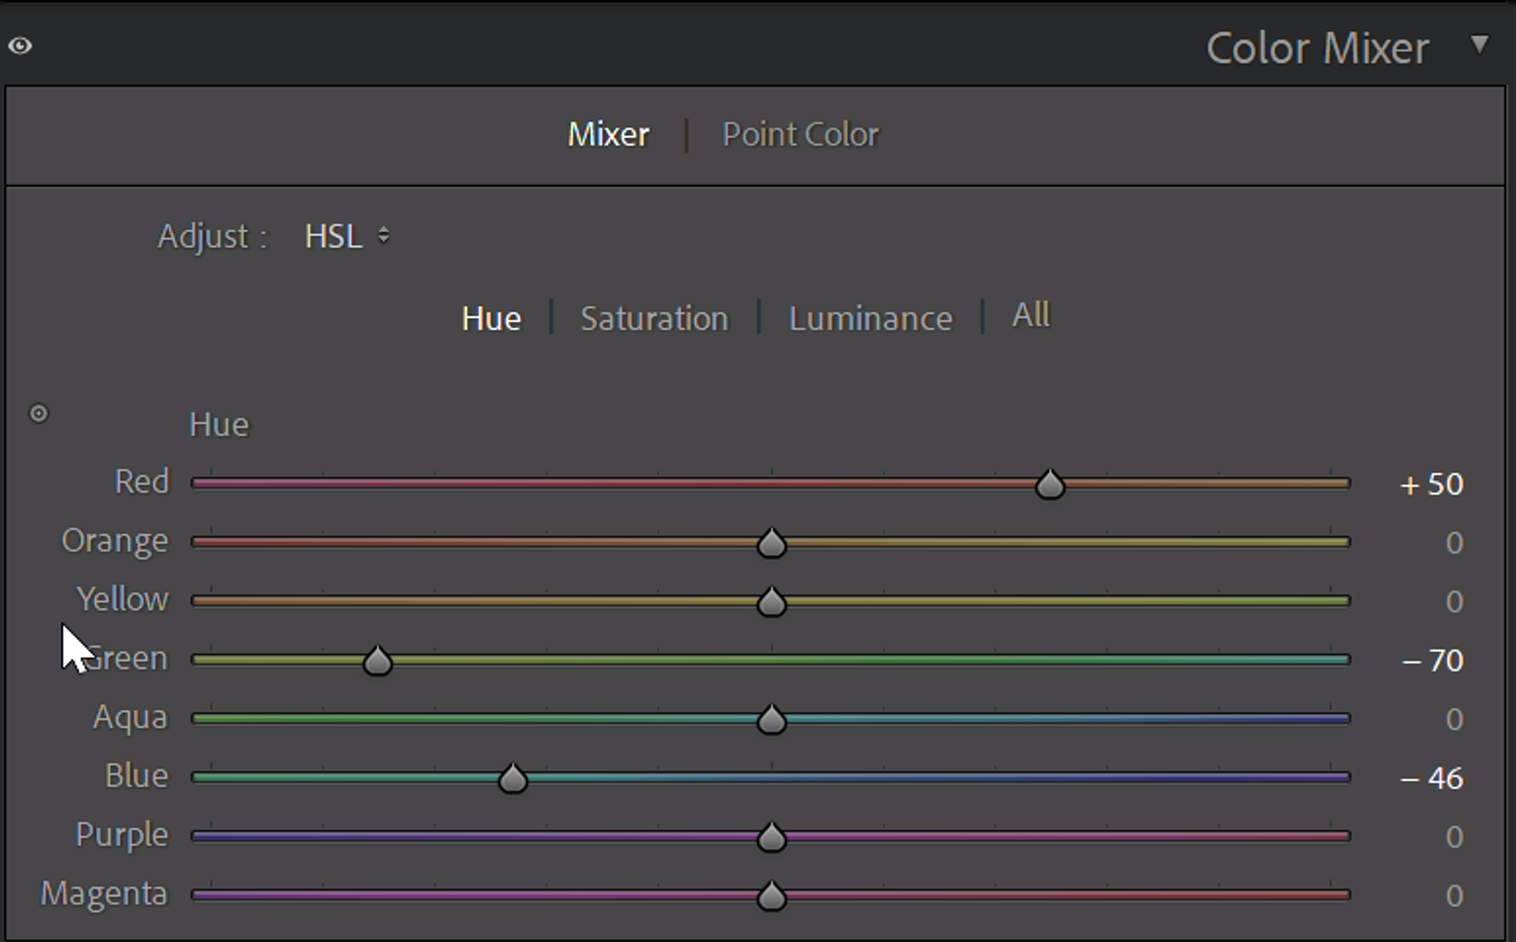
Now, it's time for the most important step: color grading. Use the HSL adjustments in the Color Mixer panel to individually adjust the colors in the photo.
Based on our analysis, you need to make the following Hue adjustments:
- Shift warm-colored buildings from red to orange.
- Shift neutral-colored vegetation from green to warm orange.
- Shift the blue sky towards a cyan-blue shade.
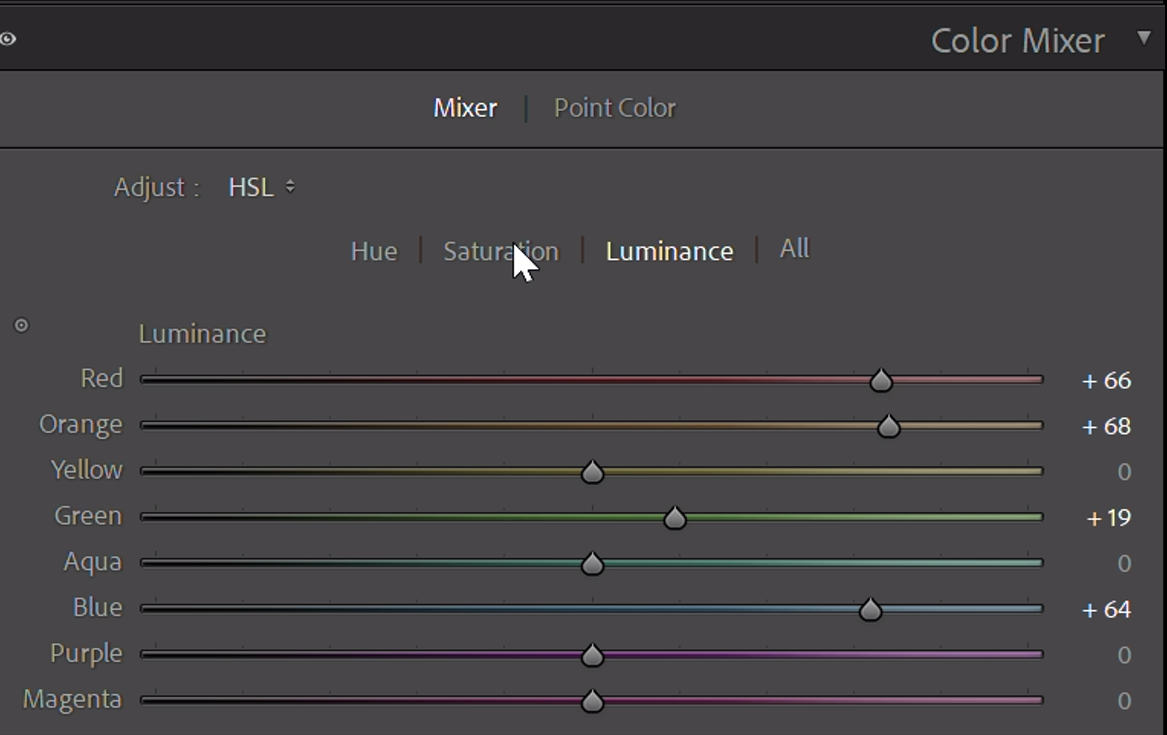
Also, consider increasing the Luminance of the main colors in the image.
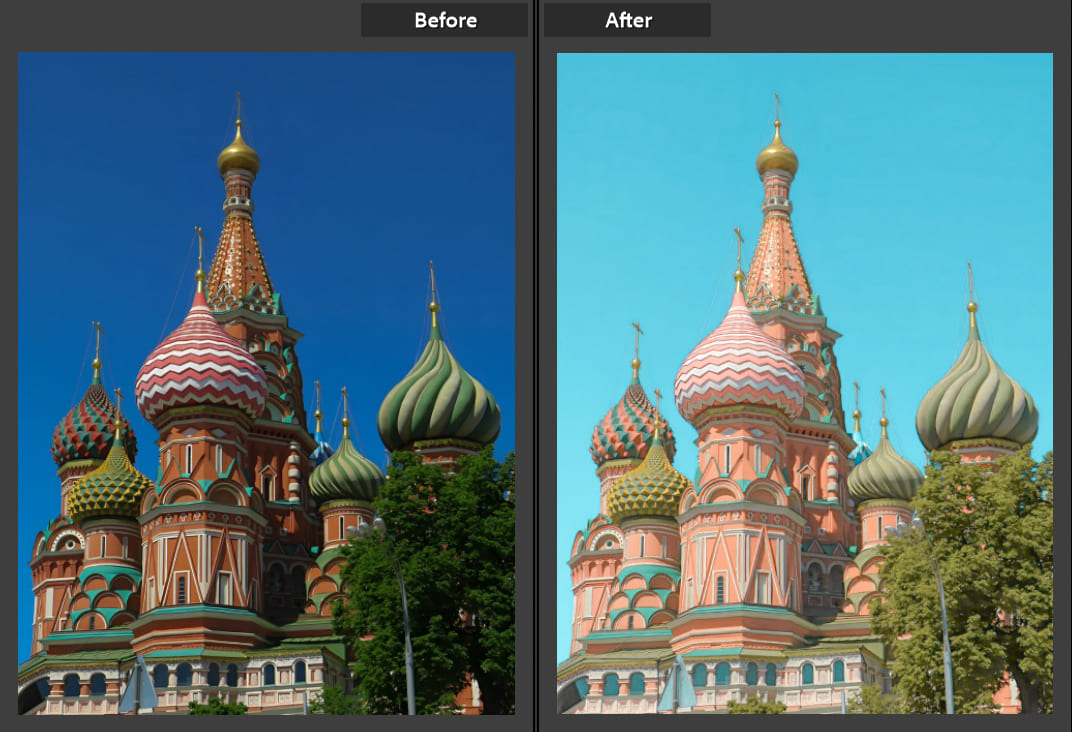
Let's take a look at the before and after results of these adjustments.
The HSL tool is a commonly used feature in Lightroom Classic that photographers often use to change colors in specific areas of a photo. The built-in HSL plugin panel in TourBox makes color grading for your photos more intuitive and efficient.
TourBox is a creative tool designed for photographers, digital artists, and content creators. With simple settings or using the presets we provide, you can easily control TourBox with one hand and make all the parameter adjustments in Lightroom Classic.
In addition, TourBox seamlessly interacts with various image editing, video editing, digital painting, and office software. With TourBox's customizable settings, you can perform any operation and make your digital software usage easier and more efficient than ever before.

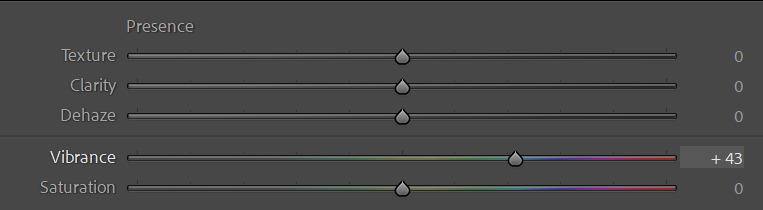
Lastly, if you feel that the image has too much gray and lacks vibrant colors, you can take one final step: increasing the overall color saturation.
To do this, use the Vibrance slider in the Basic panel and slightly increase the value of Vibrance.
Congratulations! Now you can use this color grading approach we've shared to transform your photos into dreamy candy-colored ones. Share them on social media and enjoy the results!
Frequently Asked Questions About Candy Colors
Question: Can Candy Colors Be Applied to All Photos?
Candy colors are vibrant and suitable for photos that require a lively and bright visual effect. However, whether they are suitable for all photos depends on the content of the photo and your design needs.
Question: Do You Need Special Cameras Or Lenses to Capture Photos Suitable for Candy Colors?
No, you don't. While certain types of cameras and lenses may make it easier to capture photos that are suitable for candy colors, you can still take great photos with any camera by mastering some photography techniques.
Question: Do You Need Specific Weather Conditions to Capture Photos Suitable for Candy Colors?
Weather conditions do play a role. Shooting in bright, intense sunlight would be better.
Question: Can You Achieve Candy Colors in Other Image Editing Software?
Yes, definitely! Although this tutorial primarily focuses on color grading in Lightroom Classic, you can use similar methods in software like Photoshop, GIMP, and others to achieve candy colors.
Product Recommendation:
If you're interested in how TourBox can enhance your workflow efficiency, consider our latest product, TourBox Lite. It comes at a lower price and is perfect for first-time TourBox users.

That concludes our tutorial on how to achieve candy colors in Lightroom Classic. We hope it has been helpful to you.