How to Use HSL in Lightroom Classic: A Guide to Color Adjustment
When editing photos in Lightroom Classic, experienced photographers often start by making basic adjustments to exposure, including white balance and exposure value. After that, they may add some color to the photo, especially when it appears dull.
However, you may find that simply adjusting the Vibrance and Saturation of the photo through the Basic panel affects the overall color effect, which is not the desired result.
So, what if you only want to change the color of specific areas? Today, we'll share how to use the HSL panel in Adobe Lightroom Classic to control individual colors in photos and create unique and personalized color tones.
These HSL adjustment tips also apply to Lightroom, Capture One, Camera Raw, and other photo-editing software. Let's get started.

In this article, you will learn:
- How to Use HSL in Lightroom Classic?
- How to Adjust Hue in Lightroom Classic?
- How to Adjust Saturation in Lightroom Classic?
- How to Adjust Luminance in Lightroom Classic?
- How to Select Colors for Precise Adjustments?
- Frequently Asked Questions About HSL in Lightroom Classic?
How to Use HSL in Lightroom Classic?
To effectively manage individual colors in your photos, it's important to understand and remember three key terms that impact and control colors:
- Hue: This adjusts the color itself in the photo.
- Saturation: This increases or decreases the intensity of colors. Photos often appear more vibrant than the actual scenery because the colors in the photo are more saturated.
- Luminance: This adjusts the brightness of the colors.
In Lightroom Classic version 13.0, the HSL panel has been renamed to Color Mixer, and you can find it in the Develop module. (In versions before Lightroom Classic 13.0, you can use the HSL tool in the "HSL/Color" panel.)

Additional Tip:
Simply click on the adjustment mode menu in the header of the "Mixer" panel to switch between HSL and Color display modes.
The logic behind both modes is the same, but the HSL panel provides options to adjust hue, saturation, and luminance, while the Color panel allows you to make adjustments based on different colors.
When editing each photo in Lightroom Classic, you can utilize different combinations of these three functions to control what stands out or what you want to tone down in your photos.
There isn't a fixed formula for these settings, as they produce different effects depending on the photo. It takes trial and error with different parameters to achieve the desired outcome.
For color grading experiments, we recommend using TourBox, a creative tool that allows you to control complex operations in creative and office software with just one hand, eliminating the need for a keyboard and mouse.

TourBox has a built-in Dynamic Panel feature that simplifies each step of using HSL color grading in Lightroom Classic. You can adjust all the parameters using the Scroll and Knob on TourBox.
Additionally, TourBox offers TourMenu and macro functions that provide more possibilities for your editing workflow.

In the following sections, we will analyze each function of HSL in Lightroom Classic in detail.
How to Adjust Hue in Lightroom Classic?
When you want to change a specific color in a photo, such as turning green into blue or red into yellow, you will use the Hue adjustment interface.
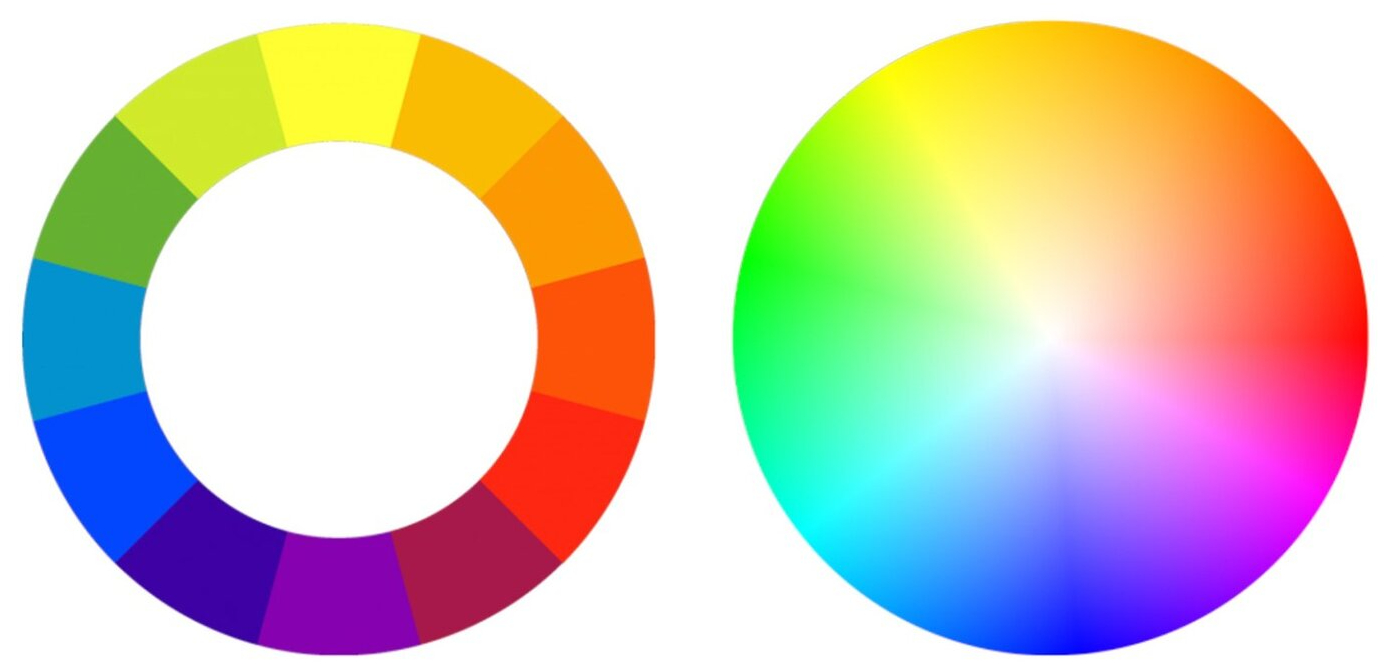
It's important to note that the color change in Lightroom Classic is not as extensive as in Photoshop, where you can easily replace one color with any other color. In Lightroom Classic, you can only replace it with the closest neighboring color on the color wheel.
The color wheel, also known as the color palette, is a spectrum-like wheel that you can find in any color grading software, be it Photoshop or video editing software. All color adjustments in digital editing are based on the principles of this color wheel.
Within the HSL module, there are eight colors: red, orange, yellow, green, cyan, blue, purple, and magenta. Each color has its own slider. When adjusting the hue, the color will shift clockwise or counterclockwise on the color wheel, altering its hue.
When making adjustments in the HSL module, it only affects the selected color and its surrounding colors, while other colors remain unchanged or have minimal changes. This allows for precise control over a specific color in the image, achieving the desired effect.
For example, if you want to make the blue in the image more purplish, you can increase the hue of the blue color while leaving other colors unaffected.
The Hue function is an important tool for achieving specific color tones, and many of the color presets you see are created using the Hue tool.
How to Adjust Saturation in Lightroom Classic?
Saturation adjustment is one of the most commonly used functions among the three in the HSL panel. While you may also use the Vibrance and Saturation sliders in the Basic panel, it's important not to overuse them as they can affect the overall color of the entire photo.
Excessive saturation can make the photo look extremely unnatural, so the best practice is to enhance the saturation of specific colors in the photo.
For example, let's take a look at the photo below. In this street scene of New York, the orange brick buildings lack color and appear dull.
In this case, you can use the Saturation adjustment for the colors specifically in the buildings. You can increase the saturation of red, orange, and yellow to make the image more vibrant.
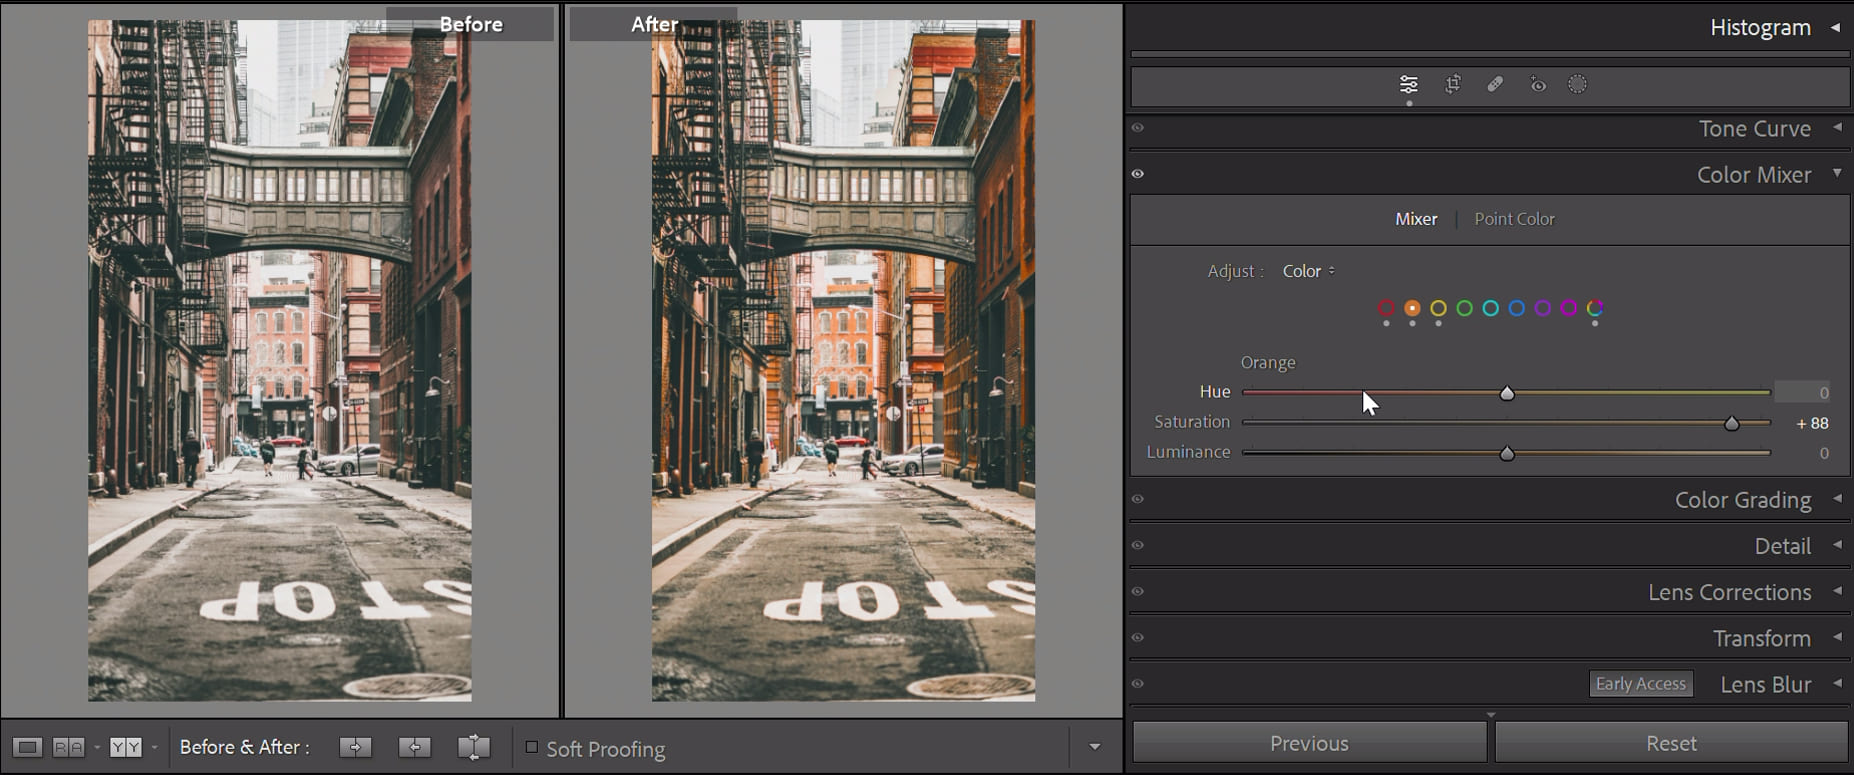
Similarly, you can also use this function to decrease the saturation of a particular area. When the overall saturation is too high, it can make the colors feel overpowering and the image may appear heavy and unnatural.
In such cases, you can reduce the saturation to tone down the intensity of the colors, making your photo look more natural.
How to Adjust Luminance in Lightroom Classic?
Luminance is a less commonly used function in photo editing, as its main purpose is to highlight the subject of the photo.
For example, if you want to make a person stand out from the background, you can choose to increase or decrease the brightness of the background color. This function can be very useful in portrait or subject-focused photos.
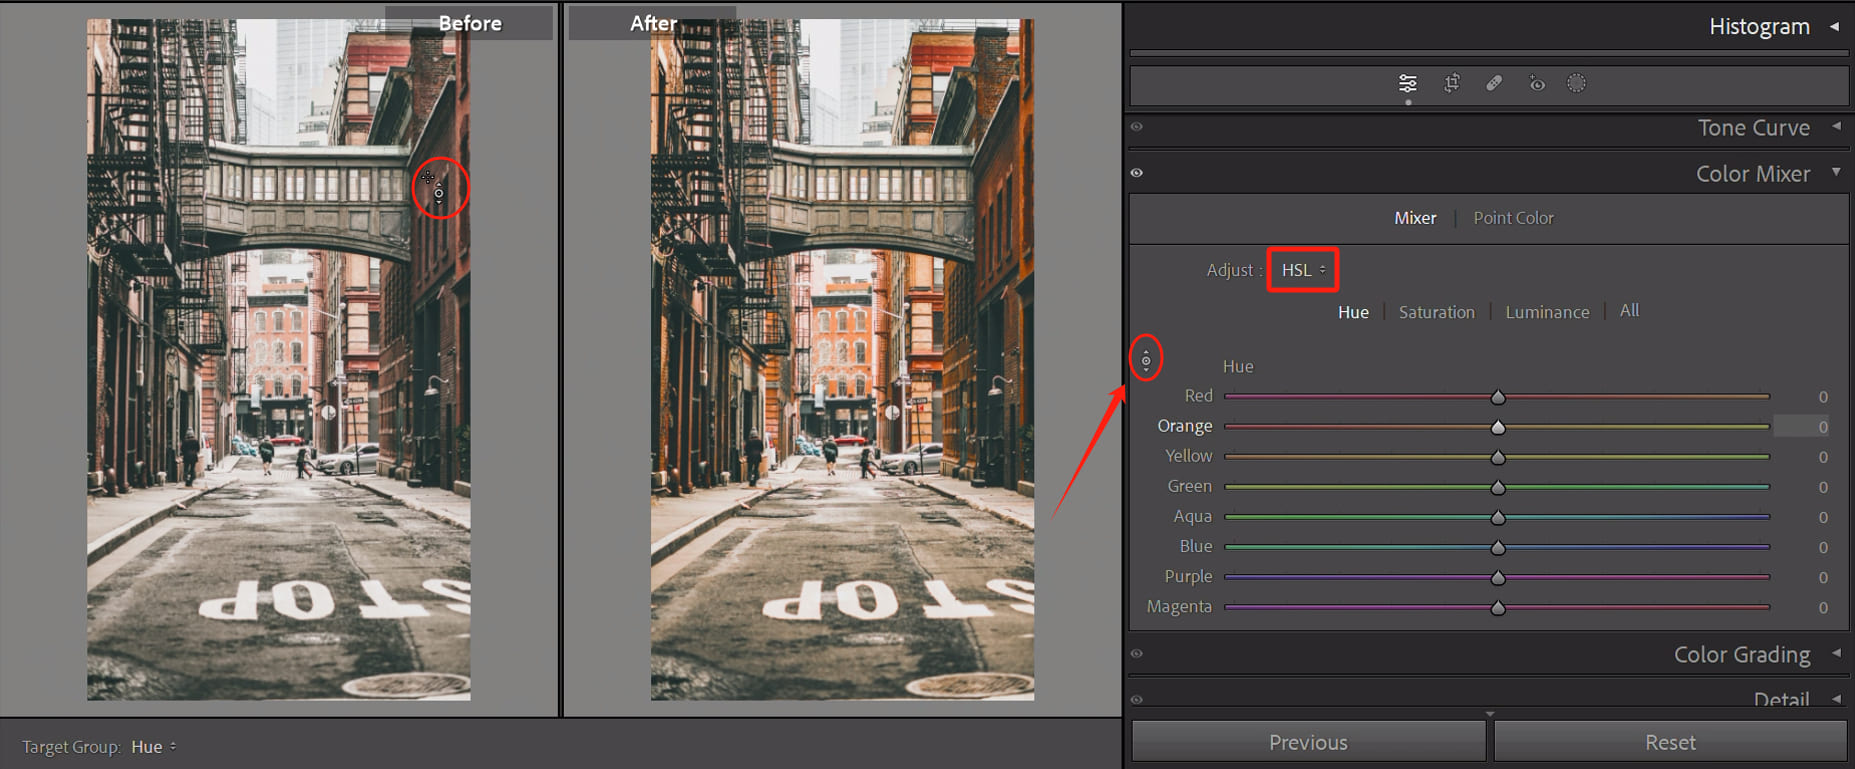
How to Select Colors for Precise Adjustments?
When adjusting HSL values in Lightroom Classic, you need to select the corresponding color name. But what if you're not sure which color to choose or what a particular color is called?
There's a handy tool that can help you with this. Switch to the HSL panel, and in the top left corner of each option panel, you'll see a small circle. Clicking on it will change your cursor to a double-ended arrow.
Move your cursor to the color you want to adjust in the image, and then drag it up or down using your mouse or the up/down arrow keys on your keyboard.
This will allow you to make adjustments to that color. Some colors may affect the values of two or three colors, which is the power of this little tool.
Frequently Asked Questions About HSL in Lightroom Classic?
Question: What Is the Difference Between HSL and Color?
HSL and Color are different display modes of the same panel. They have the same functionality but a different way of presenting the options. You can choose to use either mode based on your preference.
Question: Does HSL Adjustment Affect the Entire Image?
No, HSL adjustments only affect specific colors in the image, not the entire image.
Question: How to Create Black and White Photos Using the HSL?
You can use the HSL panel to create black-and-white photos by reducing the saturation of all colors to the minimum and removing all colors from the image.
Then, you can use the luminance to adjust the brightness and contrast in the image, giving the black-and-white photo more depth and detail.
Question: How to Find the HSL in Lightroom Classic?
In Lightroom Classic version 13.0, the HSL panel has been renamed as the Color Mixer, and you can find it in the Develop module. If you are using a previous version, you can use the HSL tool in the "HSL/Color" panel.