[TourBox Tips] 3 Methods for Color Grading in Premiere Pro
Regarding color grading in Premiere Pro, TourBox can be your reliable assistant. It not only enhances efficiency but also makes your creative process more enjoyable.
So, how can you set up TourBox to make your color grading in Premiere Pro a breeze?
In this tutorial, we'll walk you through 3 different setup methods for TourBox, making it a breeze to get started with color grading in Premiere Pro. Are you ready? Let's dive in and get started!
Method 1: Use Knob and its Combination Shortcuts
You can easily perform color grading in Premiere Pro using TourBox's Knob and its combination shortcuts.
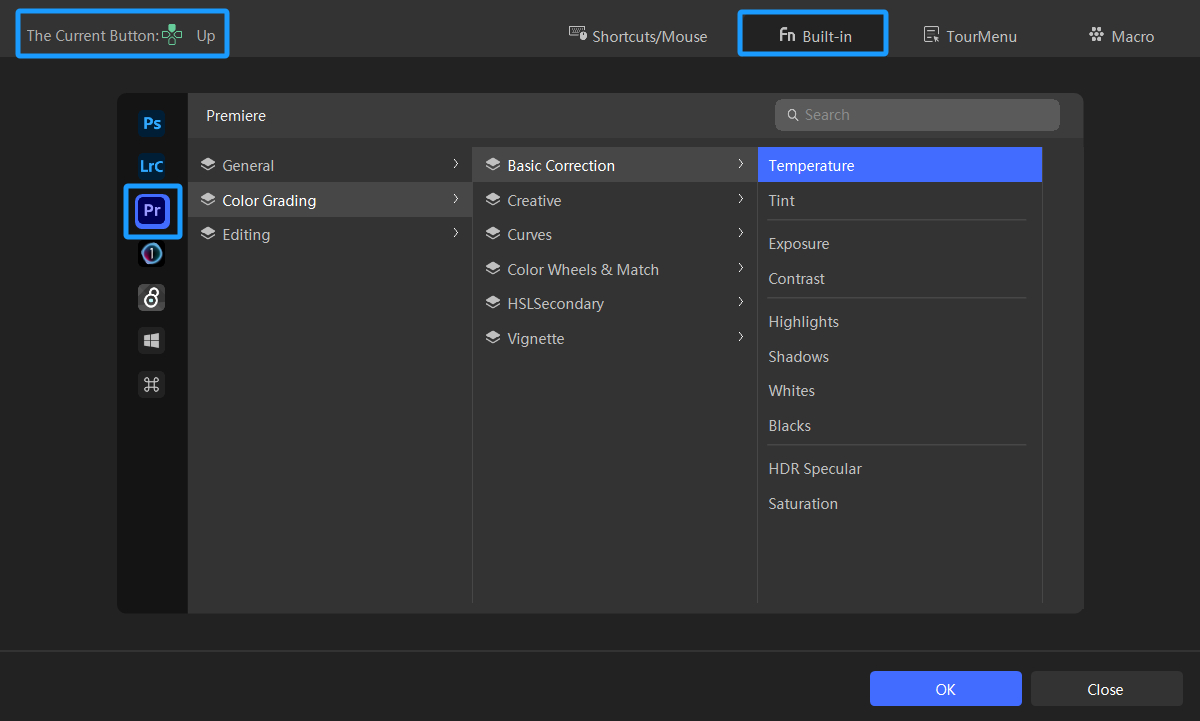
In the TourBox Console, select the Knob from the Rotation Section to access the settings panel. Switch to the "Built-in" tab.
Navigate to the Premiere option in the left application bar to configure the corresponding functions from the Premiere Pro list.
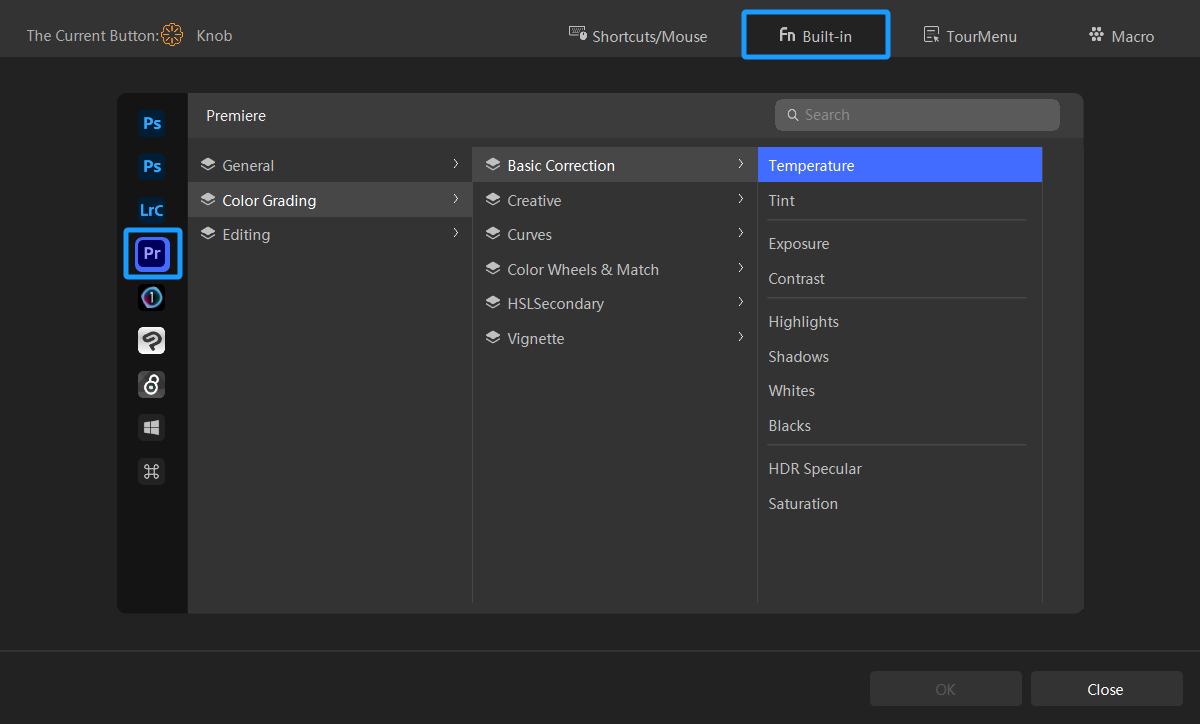
For example, you can assign the Knob to adjust the Temperature in the Basic panel and assign other frequently used adjustment parameters to the combination shortcuts of the Knob.

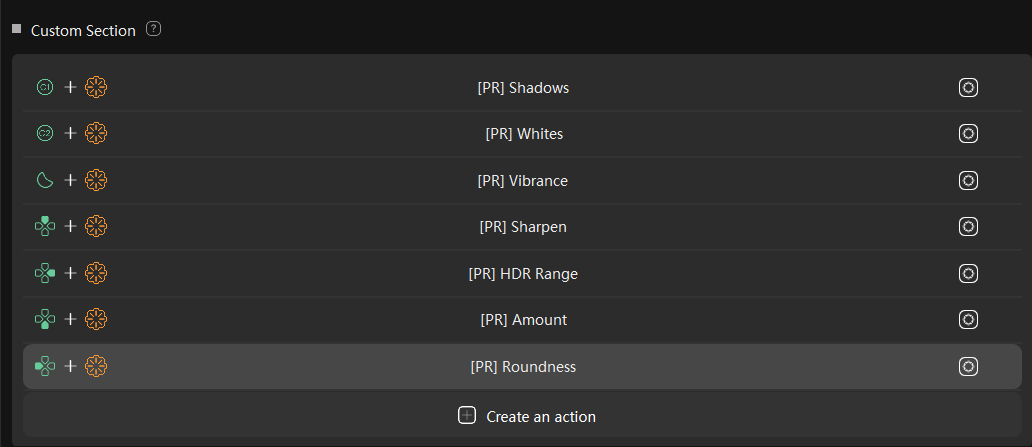
You can also add more custom actions in the Custom section to enhance your workflow.
When using combination commands, you may encounter some key conflicts. For instance, when you press the first button, the command assigned to the first button is triggered.
This happens because TourBox's buttons are set to trigger upon pressing. You need to set them to "UP" mode so that you can hold down the button without triggering any command. This allows you to proceed with the actions of the second button or the Knob.
Further Reading:
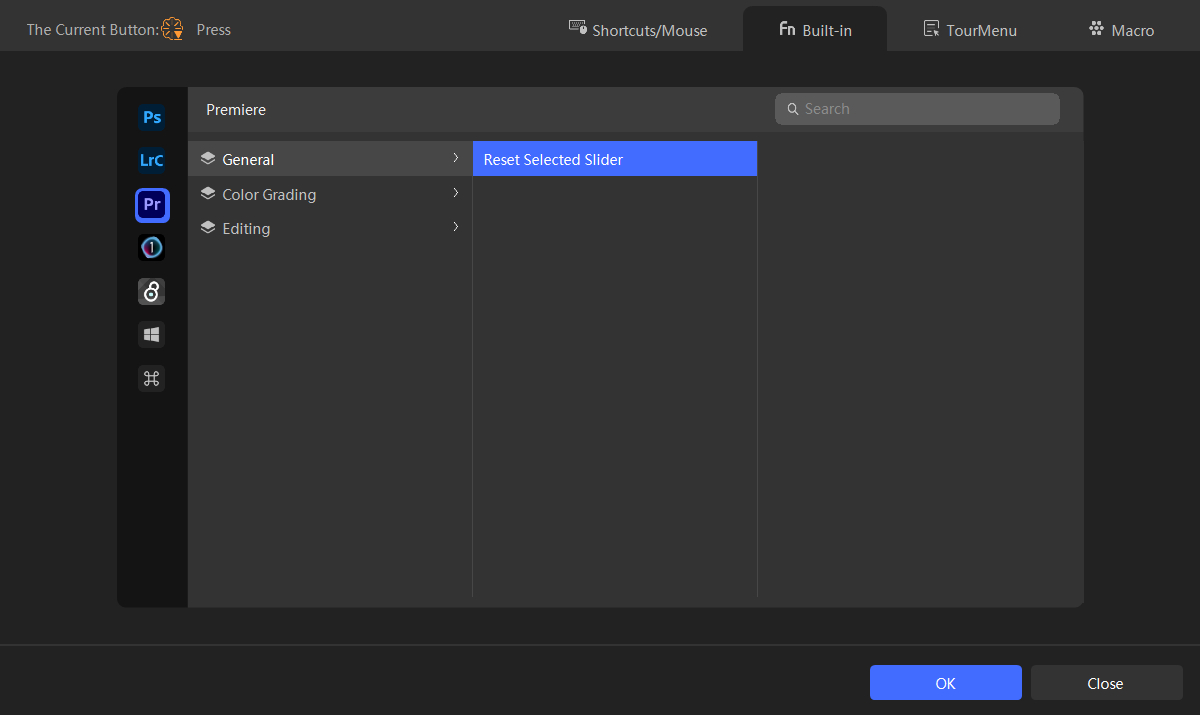
To facilitate parameter reset, you can assign the "Reset Selected Slider" command to the press action of the Knob. This way, you can quickly reset parameter adjustments with just a press of the Knob, making it very convenient.
Method 2: Assign Built-in Functions to TourBox Buttons
You can directly configure common color grading tools in Premiere Pro to TourBox buttons, such as the Up, Down, Left, and Right buttons.
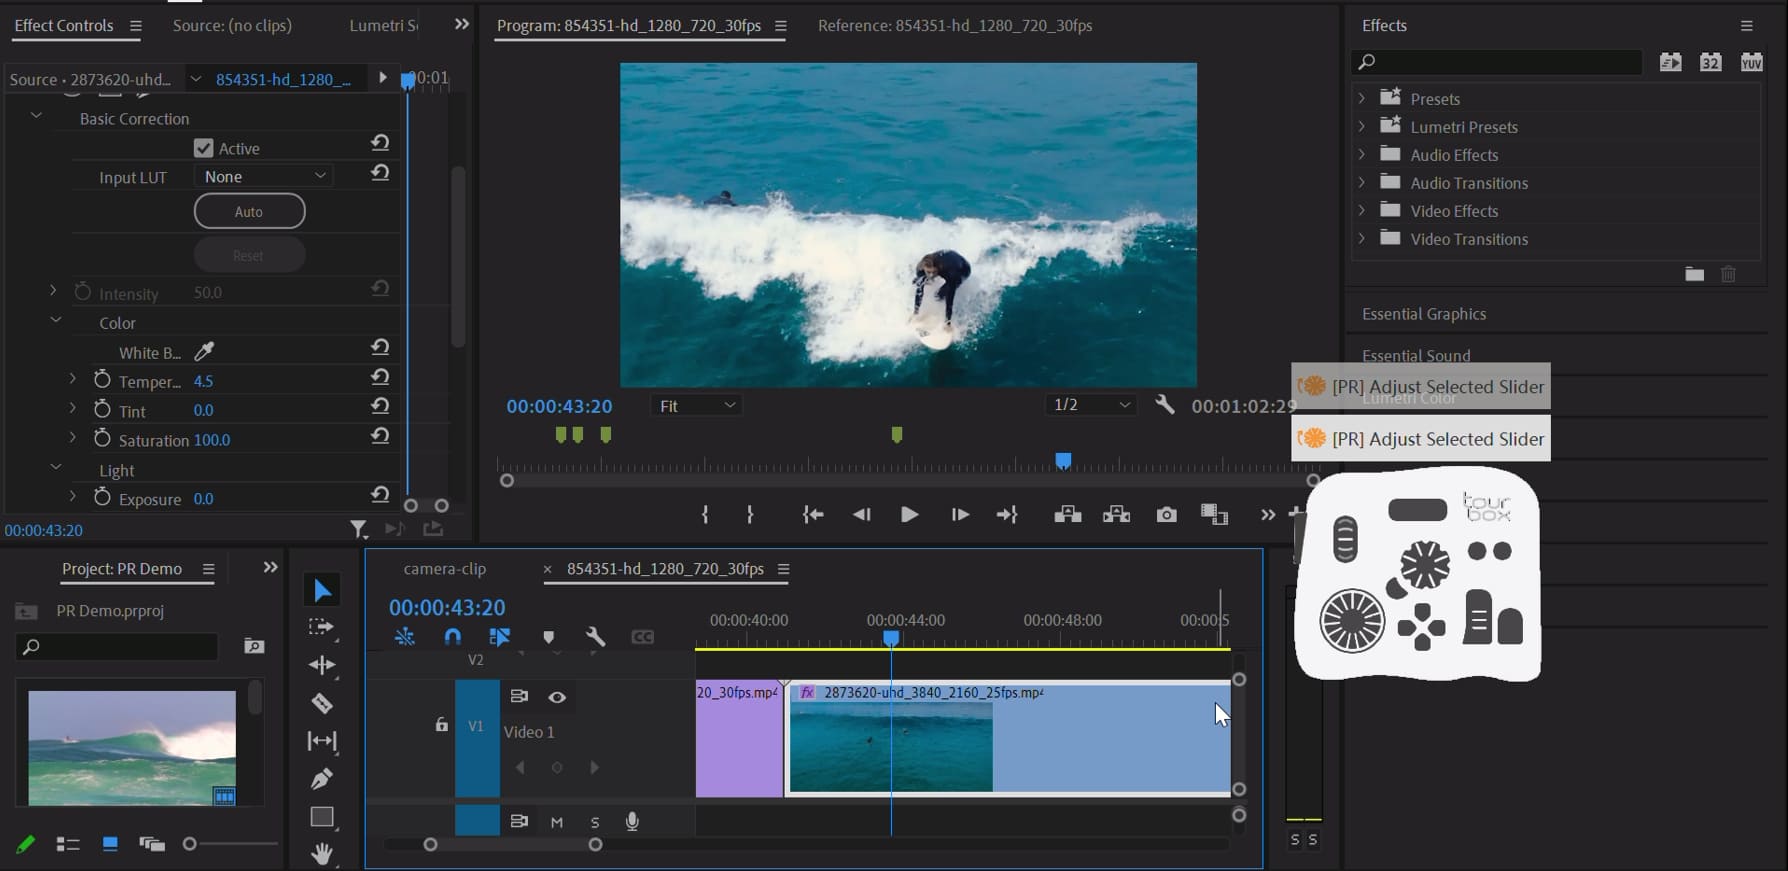
When you're color-grading a clip in Premiere Pro, simply press the designated buttons on TourBox to activate the corresponding parameter adjustment sliders.
All you need to do is go back to the TourBox Console and assign the "Adjust Selected Slider" function to the Knob and the "Reset Selected Slider" function to the press action of the Knob.

Once you're back in Premiere Pro, you can press the TourBox buttons to activate the respective adjustment sliders and use the Knob to tune specific parameters finely. Pressing the Knob will reset the adjustments if needed.
Method 3: Using TourMenu
A more efficient and organized approach than the previous methods is to group similar parameter adjustment sliders into a TourMenu.
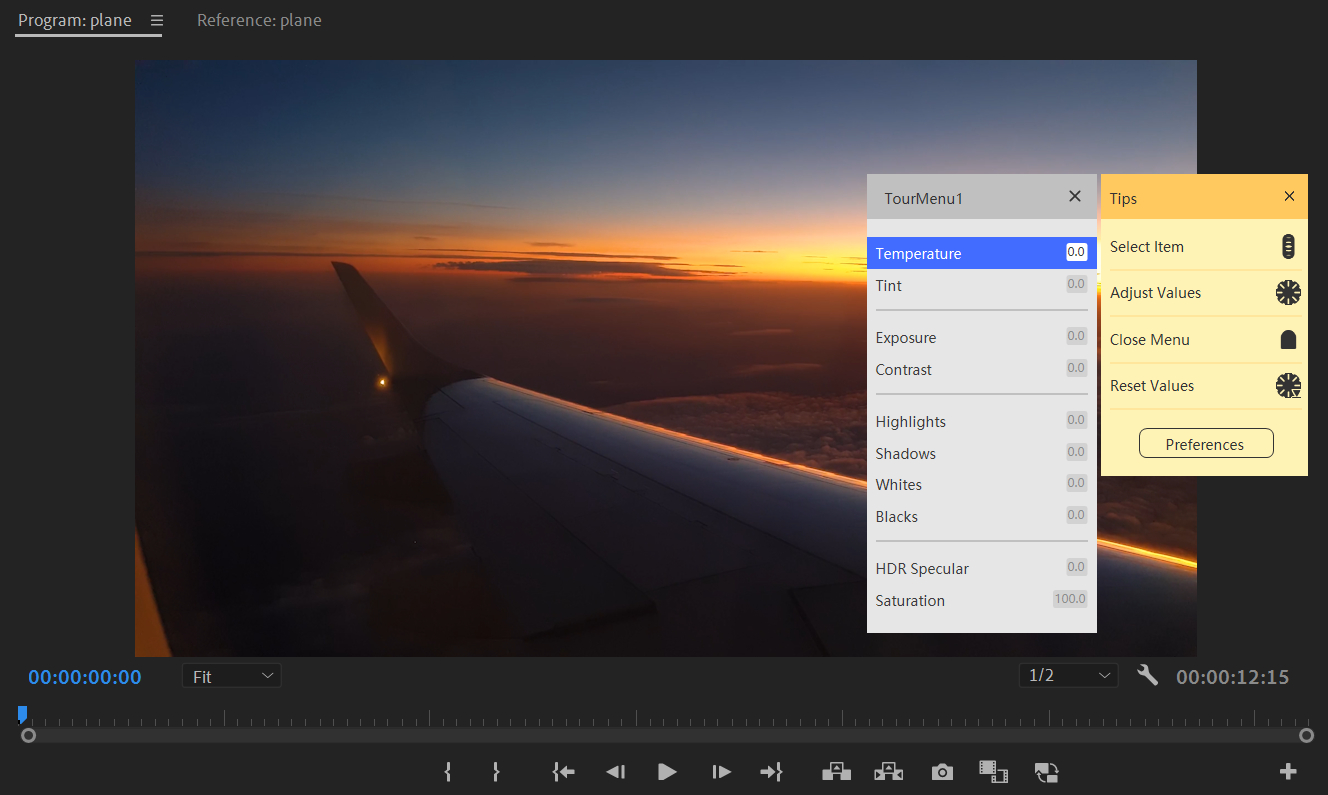
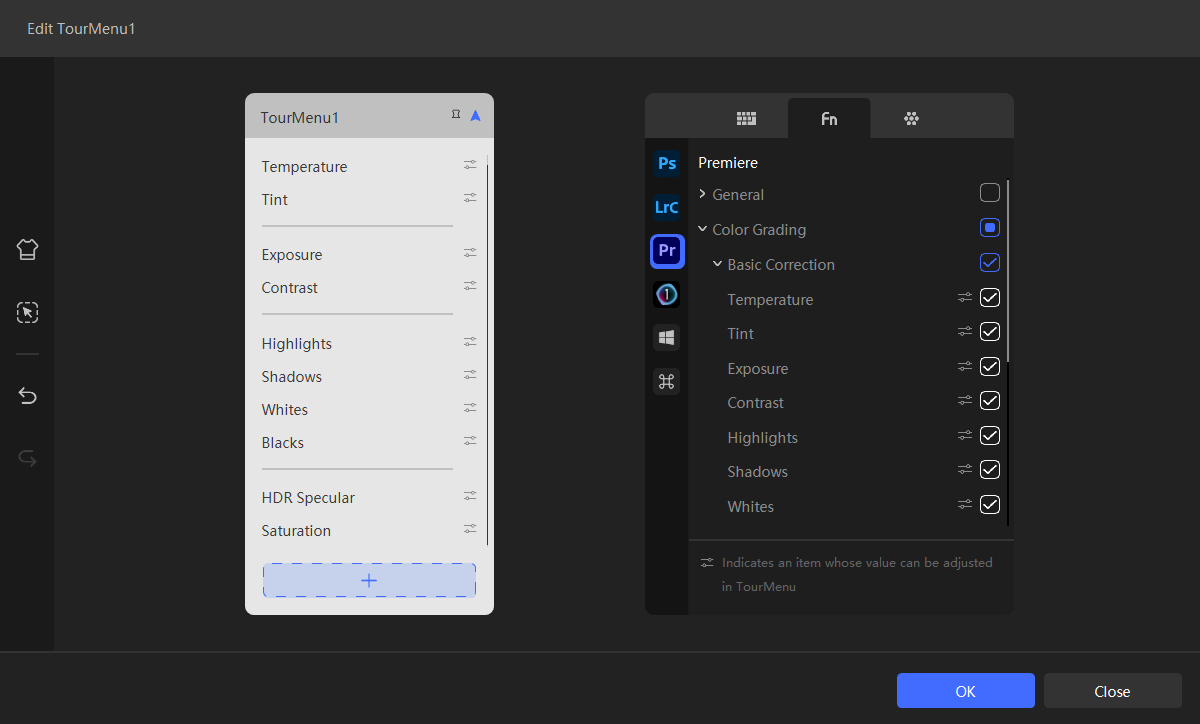
As shown in the image below, you can gather all the color grading functions from the Basic Correction section of Premiere Pro's Lumetri Color Effect into a single TourMenu.
Adding dividers between them helps distinguish the functions on the TourMenu more easily.
During your work in Premiere Pro, you can bring up this TourMenu by pressing the designated TourBox button.
Using the Scroll wheel on TourBox, you can navigate through the TourMenu and select the desired Basic Correction function, and then use the Knob to adjust the parameters. If you're not satisfied with the adjustments, simply press the Knob to revert to the initial settings.
So there you have it. Here are the three methods we've shared for using TourBox to assist with color grading in Premiere Pro. Now, go ahead and try them out on your Premiere Pro projects. Get ready for a more efficient and enjoyable color-grading experience!