[DaVinci Resolve Tutorial] Cut Page
Welcome to our ongoing series on mastering DaVinci Resolve. In our previous two tutorials, we've explored the Edit Page as well as the Effects and Keyframes of DaVinci Resolve.
Now, we're about to dive into the unique workflow of DaVinci Resolve: The Cut Page.

In this article, you will learn:
- What Makes DaVinci Resolve's Cut Page Unique?
- How to Trim Videos in Cut Page?
- Hidden Feature in the Cut Page: Auto Color Correction
What Makes DaVinci Resolve's Cut Page Unique?
Designed with speed and efficiency in mind, the Cut Page is a revolutionary tool that streamlines the editing process, making it faster and more intuitive than ever before.
To fully appreciate the innovative features and advantages of the Cut Page in DaVinci Resolve, a certain fundamental understanding of DaVinci Resolve is required.
When comparing the familiar Edit Page to the Cut Page, you'll notice some striking differences:
- Firstly, the Cut Page only features a single Viewer. The Timeline Viewer and Source Viewer from the Edit Page are merged together on the Cut Page.
- Secondly, the media pool, effects, and titles, along with various workspaces, are all located in the upper left corner of the Cut Page. This design saves a significant amount of space, leaving room for an enlarged timeline and a timeline thumbnail.
To effectively edit using the Cut Page, it's important to understand its logic.
Visualize this scenario: all your footage is stored on a reel of tape. The characteristic of a tape is that it must be read sequentially; you can't alter its order at will.
In other words, you can think of this tape as a locked timeline. And the Cut Page is designed to make cuts on this kind of locked timeline.

How to Trim Videos in Cut Page?
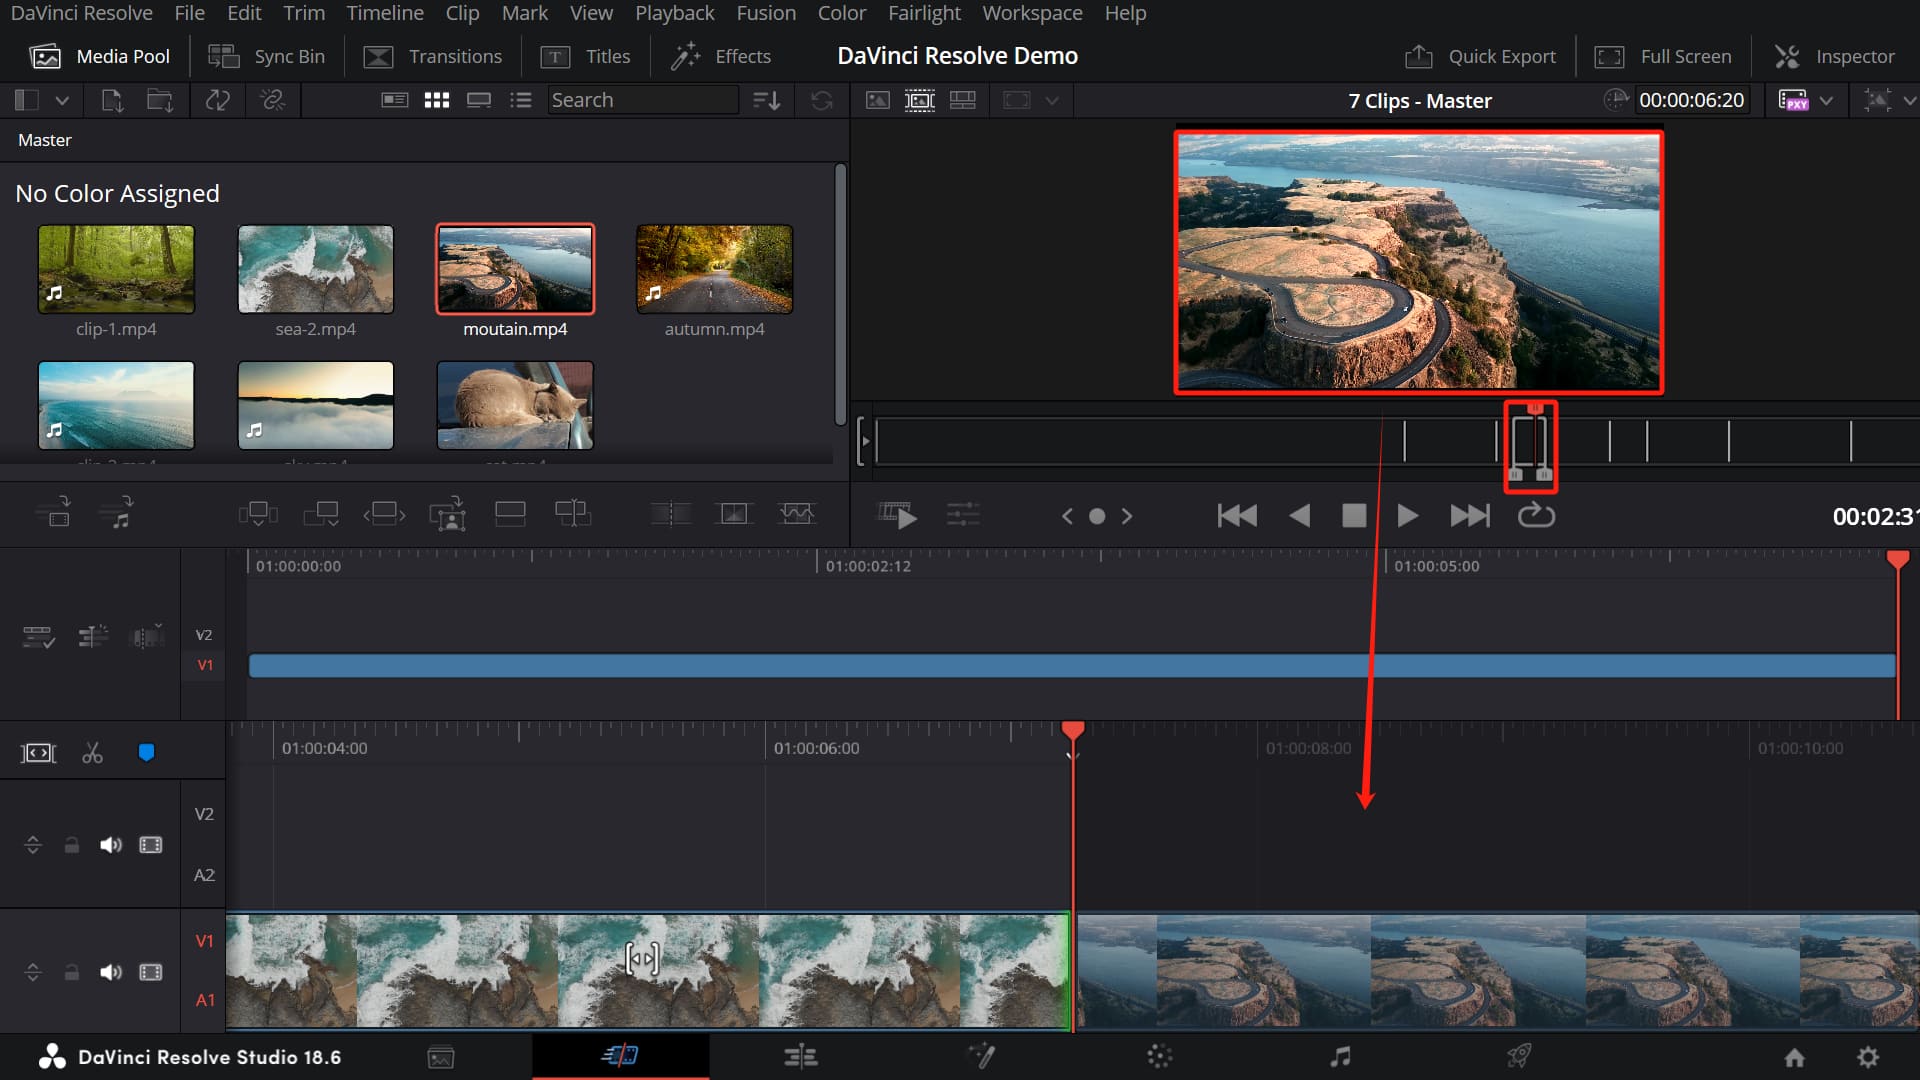
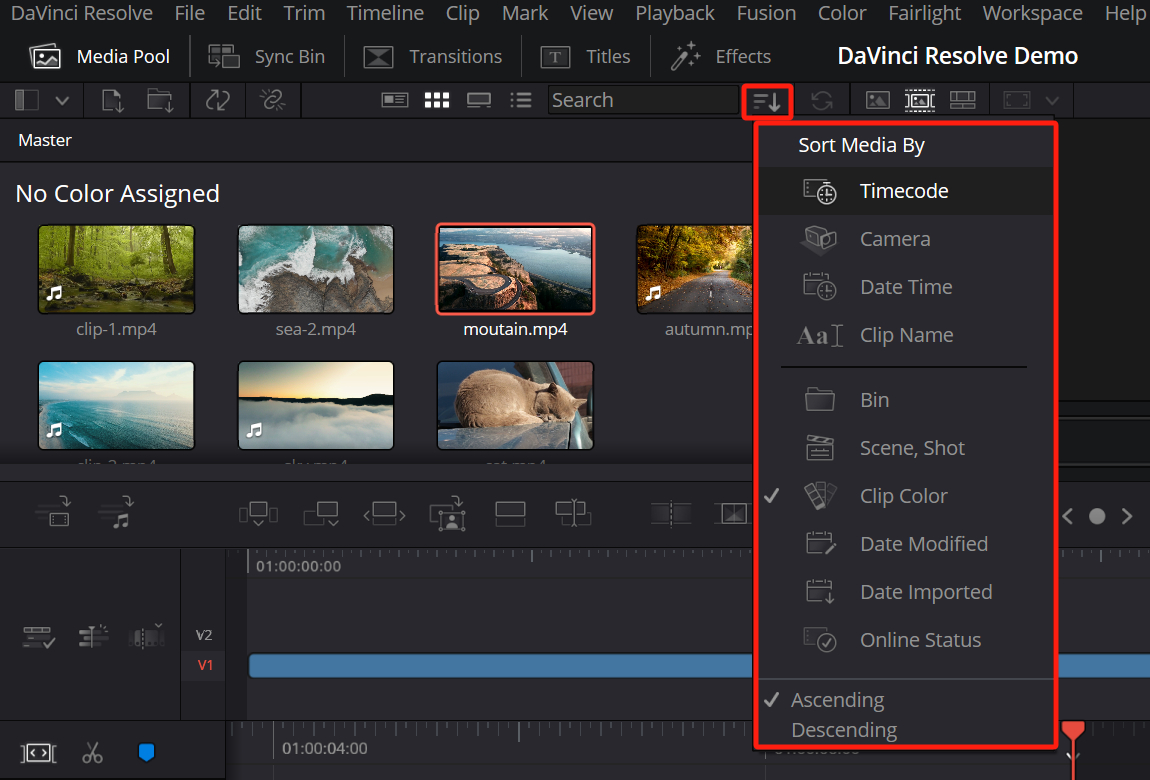
Let's start by looking at the Media Pool on the Cut Page. At first glance, it doesn't seem much different from the Media Pool in the Edit Page. You can create media folders and organize your sorted materials into them.
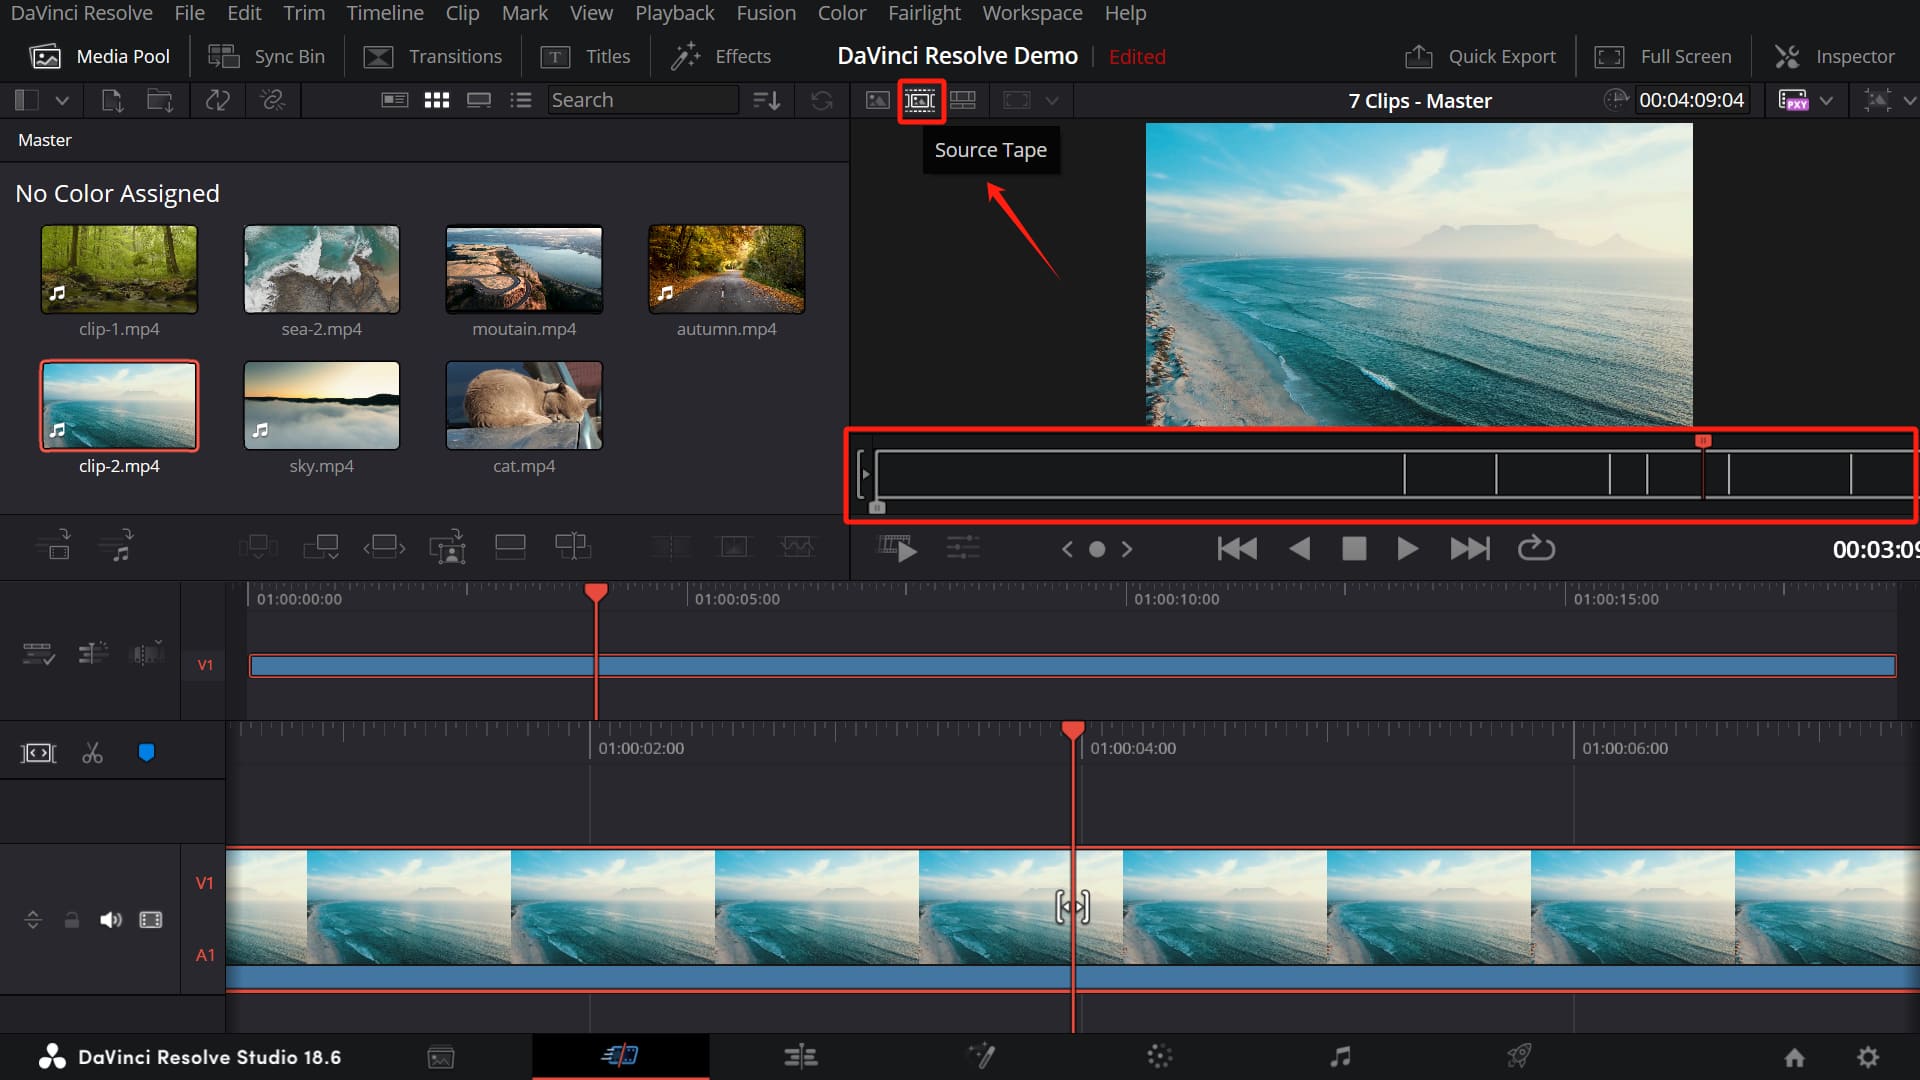
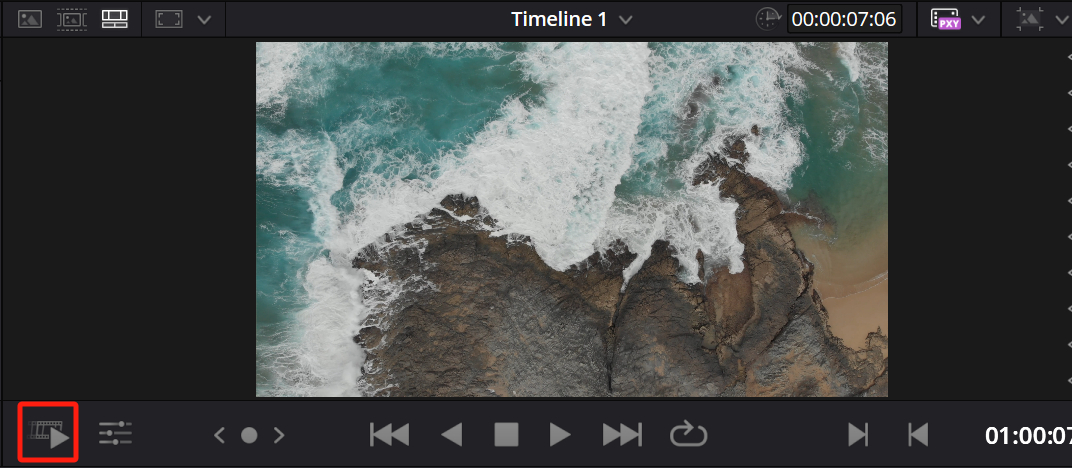
By clicking the "Source Tape" button in the upper left corner of the Viewer, in addition to the timeline and source monitoring, you activate a third viewing mode - the Source Tape mode.
This is as if you're looking at a tape where all the media in the media pool are merged together.
You'll notice vertical white bars appearing under the Viewer. If you've imported a lot of materials, there will be many of these white bars.
These bars are there to help you identify the beginning and end of each piece of material.
At first glance, it might seem like the Cut Page’s features are overly complex. So where exactly does its advantage lie? And how should you use this Cut Page to edit your videos?
Let's compare the steps needed to select a piece of footage.
In the Edit Page, you need to double-click on the material in the media pool and start playback. You use the I (In) and O (Out) keys to mark the start and end points of the required material.
Then you drag the material onto the timeline, go back to the media pool, double-click to playback again, and mark the in and out points. Then, again, drag it onto the timeline.
Sounds quite tiring, doesn't it?
In contrast, on the Cut Page, all your materials are integrated together. You just need to playback, press the I and O keys, then drag the Viewer screen into the timeline, and continue to playback, repeating the same operation.
This is a significant advantage of the Cut Page. You can quickly sift through a large amount of material, without wasting time on repetitive tasks.
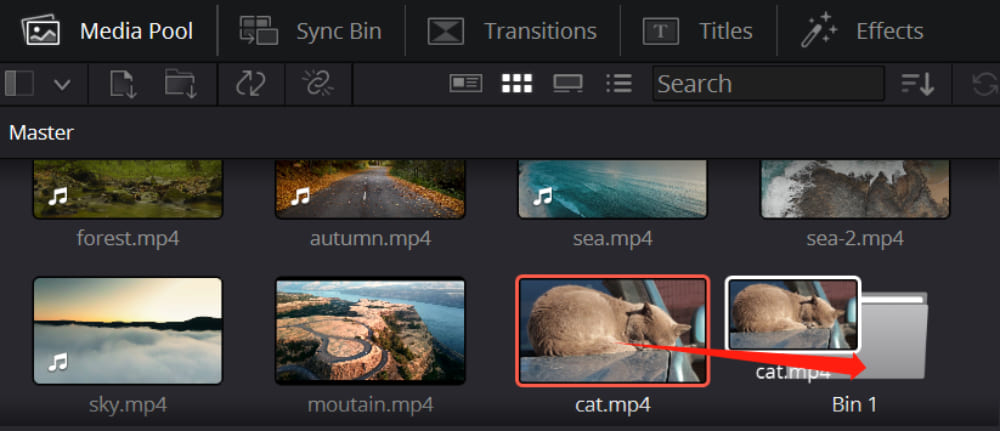
One modern aspect of the Cut Page is its virtual tape logic. You can do a test: create three bins in the media pool, and put some footage into each bin.
When you click on one of the bins, you'll find that the materials in this bin form a tape.
However, when you go back to the previous level, you'll see that DaVinci Resolve recombines the materials from these three bins into a new tape, i.e., a large tape containing all the materials from the three bins.
This may be a bit hard to understand at first. Each time you enter a new bin, DaVinci Resolve creates a new tape. So you can accurately pinpoint the materials you want to quickly browse through, according to your needs.
If you have a significant amount of material, and it's well classified, you can continually browse through corresponding materials, quickly preview, mark points and import them onto the timeline.
The most convenient feature is that there are multiple ways to change the arrangement of materials. You can quickly adjust according to your needs, which will directly affect the tape.
In essence, the core concept of the Cut Page is a smart timeline that adapts according to your needs.
Moreover, DaVinci Resolve offers several small features to enhance your editing experience. For example, the "Fast Review" in the lower-left corner of the Viewer automatically adjusts playback speed based on the length of your footage.
That is, longer material will be sped up, and shorter material will play at normal speed.
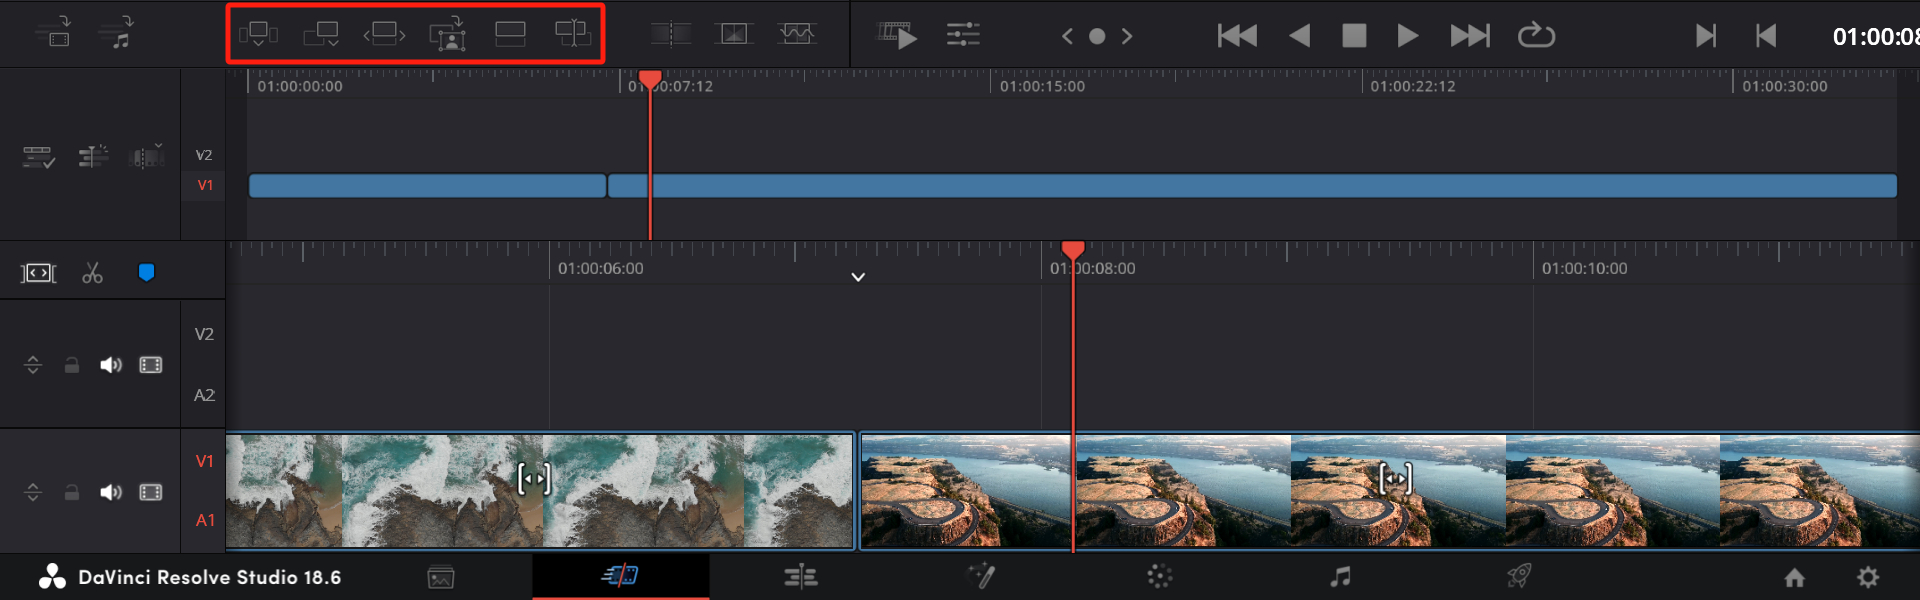
The Cut Page also provides a plethora of practical tools, which can be found above the timeline.
Each of these functions is designed to make your editing process in DaVinci Resolve's Cut Page quicker, more efficient, and truly intuitive. Once you've had a hands-on experience with these tools, you'll get a clear understanding of how they work.
- Smart Insert: This is a slick and intelligent tool that identifies the closest edit in the timeline and inserts the clip at that point without interrupting the overall flow.
- Append: It automatically adds your selected clip to the end of the timeline. No more fumbling about, trying to place your clip at the end of the sequence.
- Ripple Overwrite: It lets you replace a clip in the timeline with another one, adjusting the timeline's length to accommodate the new clip's duration.
- Close Up: Ever want to emphasize a particular moment in your footage? The Close Up feature duplicates the clip and automatically applies a zoom-in effect, creating a close-up shot.
- Place on Top: This is a handy tool for layering your clips. With a single click, you can add a clip on top of existing ones in the timeline. It's perfect for adding cutaway shots or creating layered video effects.
- Source Overwrite: This feature allows you to replace a clip in the timeline with a new one, but here's the kicker - it maintains the same duration as the original clip. It's a great way to swap out clips without messing with the timing of your sequence.
Here, we want to highlight the fascinating Close Up feature. When you select a clip on the timeline, you can click on Close Up. If there are people in the frame, DaVinci Resolve will use its AI engine to automatically detect facial features.
Whenever a face appears, the clip will automatically zoom in, keeping the focus on the face. This means you don't have to manually adjust the position and recompose the shot. It's an interesting feature worth trying out if you're interested.
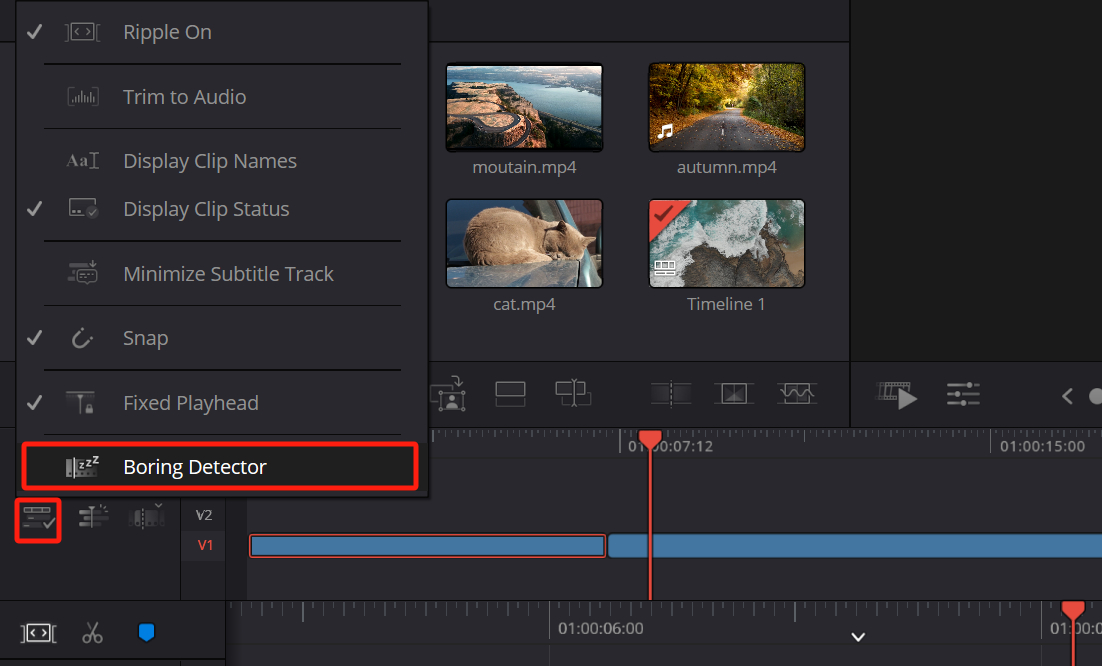
There is an intriguing feature known as the "Boring Detector" on the Cut Page.
This tool allows you to set parameters for what you deem to be "too long" or "too short" for a clip on your timeline. Once these parameters are set, the Boring Detector scans your video and highlights any portions that exceed these parameters.
So, if a clip is running longer than your set preference, it'll flag it up for you. This gives you the opportunity to go back and decide whether you need to trim it down or add something to keep it engaging.
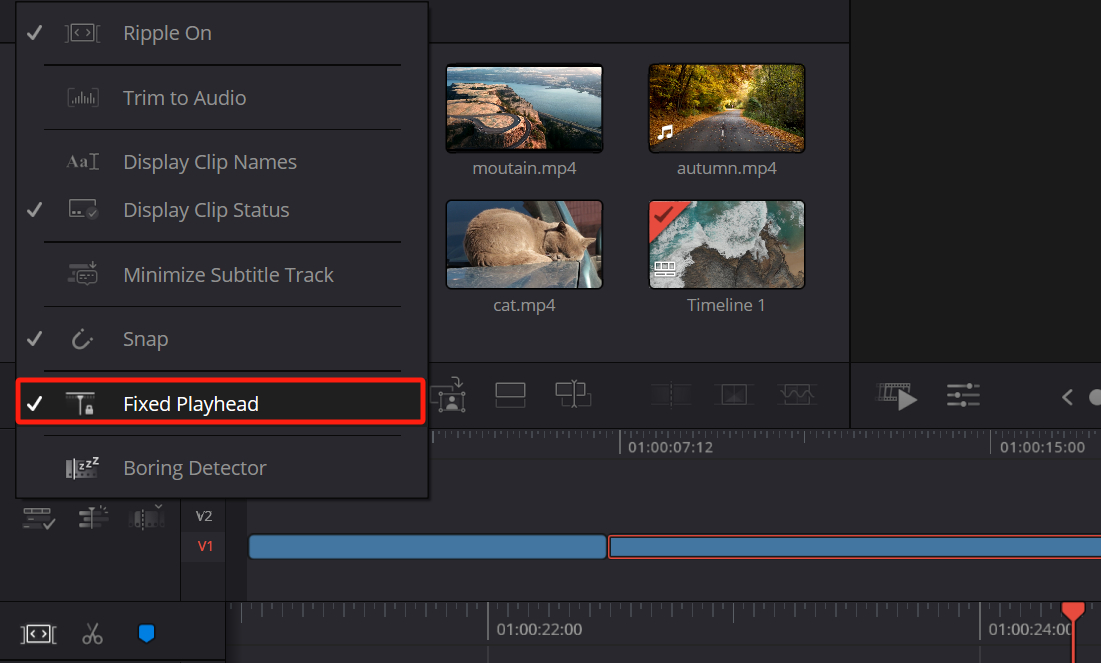
The Fixed Playhead feature in DaVinci Resolve's Cut Page is an incredibly convenient and unique tool, delivering a more fluid and dynamic editing experience.
Traditionally like Edit Page, when you're scrubbing through your timeline, the playhead moves, but the timeline stays static.
But with the Fixed Playhead, it's the other way around. The playhead stays in the middle of the screen, and the timeline moves beneath it.
This is especially useful when you're working on a long project and want to quickly navigate through your footage.
It keeps the playhead and the frame you're working on in clear view at all times, allowing you to see exactly where you are in the timeline. So, no more trying to chase a moving playhead with your mouse.
In short, the Fixed Playhead makes the editing process smoother and more intuitive. It's like having a spotlight on the exact moment you're working on, keeping your focus sharp and centered.
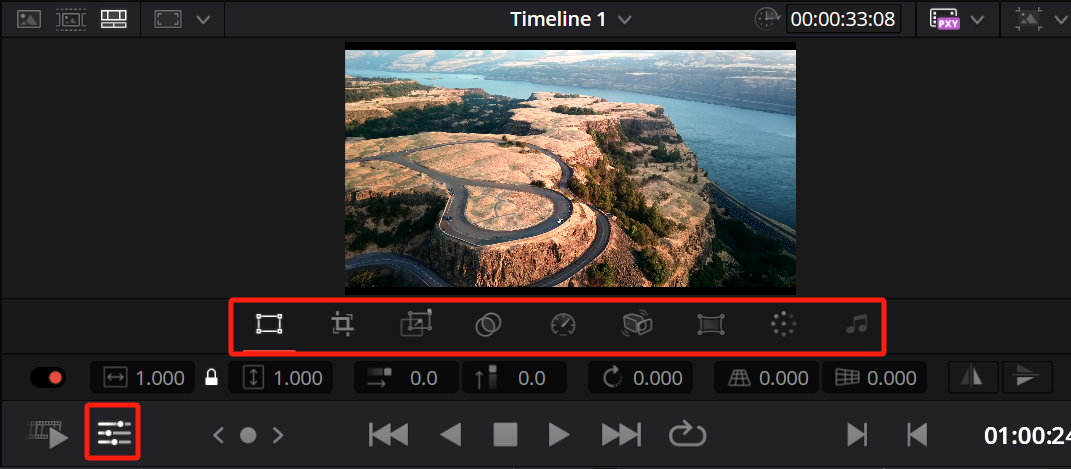
In the Cut Page, you can also utilize the transform, crop, and other tools found in the Edit Page. These tools are tucked away under the Tool button located in the lower-left corner of the Viewer.
The usage isn't complex, and they operate on the same principles as the tools in the Edit Page. We won't delve into the specifics here, but rest assured, they're straightforward to use.
Hidden Feature in the Cut Page: Auto Color Correction
In the previous section, we did a basic introduction to the usage of the Cut Page in DaVinci Resolve. If you've made it this far, you should be able to use the Cut Page for video editing.
But there's a highly practical hidden feature in the Cut Page: Auto Color Correction.
All you need to do is select the material on the timeline and press the 'C' key on your keyboard. DaVinci Resolve will then automatically color correct the footage for you.
This feature is tremendously useful. As you've gleaned from our introduction and your own exploration, the Cut Page is ideally suited for rough cuts of a video or when you have an urgent project that requires quick editing and exporting.
Often, you simply don't have the time for detailed color correction. In such cases, the Auto Color Correction feature in the Cut Page can greatly boost your workflow efficiency.
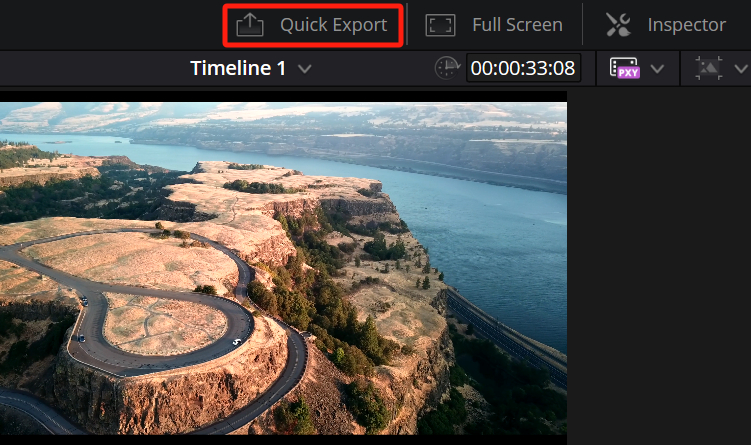
Once your project is completed, you don't even need to go through the export panel. Just click on the Quick Export in the top right corner of the Cut Page, and you can complete your creation directly.
The Cut Page is an innovative feature that can significantly enhance your work efficiency. However, it's not designed to completely replace the Edit Page.
For fine cuts of a video, you'll still need to use the Edit Page. However, for rough cuts, the Cut Page can be more efficient.
Product Recommendation:
As we delve deeper into the power of DaVinci Resolve's Cut Page, it's clear that efficiency and speed are at the heart of this feature.
The Cut Page is specially designed for fast-paced editing, offering a streamlined interface where you can quickly trim clips, add transitions, and arrange your timeline.
However, while the Cut Page is a significant step towards a more efficient workflow, there's another tool that can take your editing speed to the next level: the TourBox.

TourBox is a controller designed specifically for digital artists, videographers, and anyone who frequently uses creative software like DaVinci Resolve. It offers a new level of control and speed to your editing process, complementing the efficiency of the Cut Page.
The TourBox console allows you to set up custom shortcuts for your most-used tools and functions in DaVinci Resolve. Imagine being able to switch between the edit and cut pages, trim clips, or adjust the timeline with a simple twist of a dial or press of a button.

The console's knobs and dials provide a level of precision that's difficult to achieve with a mouse or trackpad. This is especially useful when making fine adjustments to your edits.
In essence, TourBox can be a valuable addition to your editing suite. It amplifies the speed and efficiency advantages of DaVinci Resolve's Cut Page, allowing you to edit faster and more intuitively.
We have concluded our tutorial on the Cut Page in DaVinci Resolve. Please stay tuned for more tutorials in our DaVinci Resolve series.