[DaVinci Resolve Tutorial] How to Apply LUTs?
In this tutorial, we want to share something that will be incredibly useful for your work in DaVinci Resolve: LUTs. We will explain what LUTs are, how they can be used, and how to make the most of them.
Without further ado, let's dive right in!

In this article, you will learn:
- What Is LUT?
- How to Find the Right LUT for You?
- How to Add LUTs to DaVinci Resolve?
- Types and Applications of LUTs
- Additional Tips for Using DaVinci Resolve LUTs
What Is LUT?
Before we dive into our tutorial on using LUTs in DaVinci Resolve, let's first understand what exactly a LUT is. LUT stands for "Look Up Table," and as the name suggests, it is a table that maps one color to another.
Imagine this table containing all the colors in the footage. It can automatically replace each pixel with a corresponding color, transforming the overall look of the footage.
You can also think of a LUT as a universal preset that can be shared with others by uploading it online.
LUT files typically have a ".cube" extension, but they are not limited to DaVinci Resolve. You can import them into various editing software without worrying about compatibility issues.
How to Find the Right LUT for You?
All you need to do is search for LUTs online, and you'll find a plethora of options available for download. We recommend searching for LUTs specifically developed for your camera (e.g., search for LUTs for Canon cameras).
This will typically yield better results tailored to your specific camera's characteristics.
How to Add LUTs to DaVinci Resolve?
Now, let's learn how to import the downloaded LUTs into DaVinci Resolve. The process is straightforward.
Navigate to the top toolbar of DaVinci Resolve and select the "File" option. From the dropdown menu, click on "Project Settings."
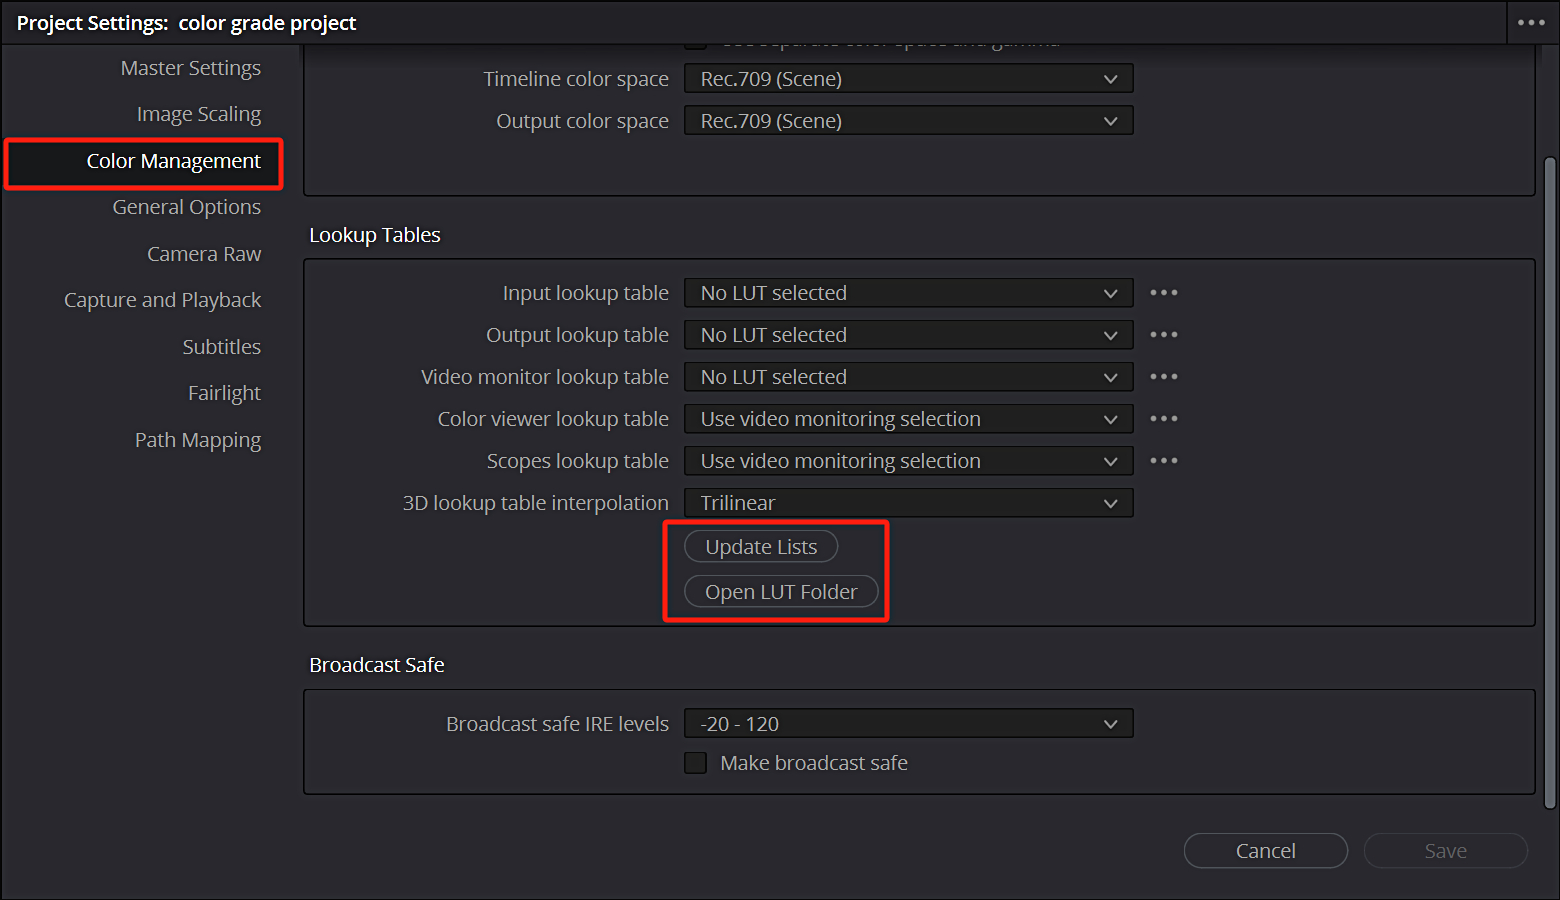
In the Project Settings panel that appears, click on "Color Management." Within the "Lookup Tables" section, click on "Open LUT Folder." This will open the folder where DaVinci Resolve stores all your LUT files on your computer.
In this folder, create a new folder with a name of your choice. Copy and paste the downloaded CUBE files into this new folder.
Once you have placed the CUBE files in this folder, return to the same "Lookup Tables" section in DaVinci Resolve. Click on "Update Lists" to complete the import of the LUTs.
So, how do you access the LUTs you just imported in DaVinci Resolve? There are two methods you can use:
- Node Interface
- LUTs Interface
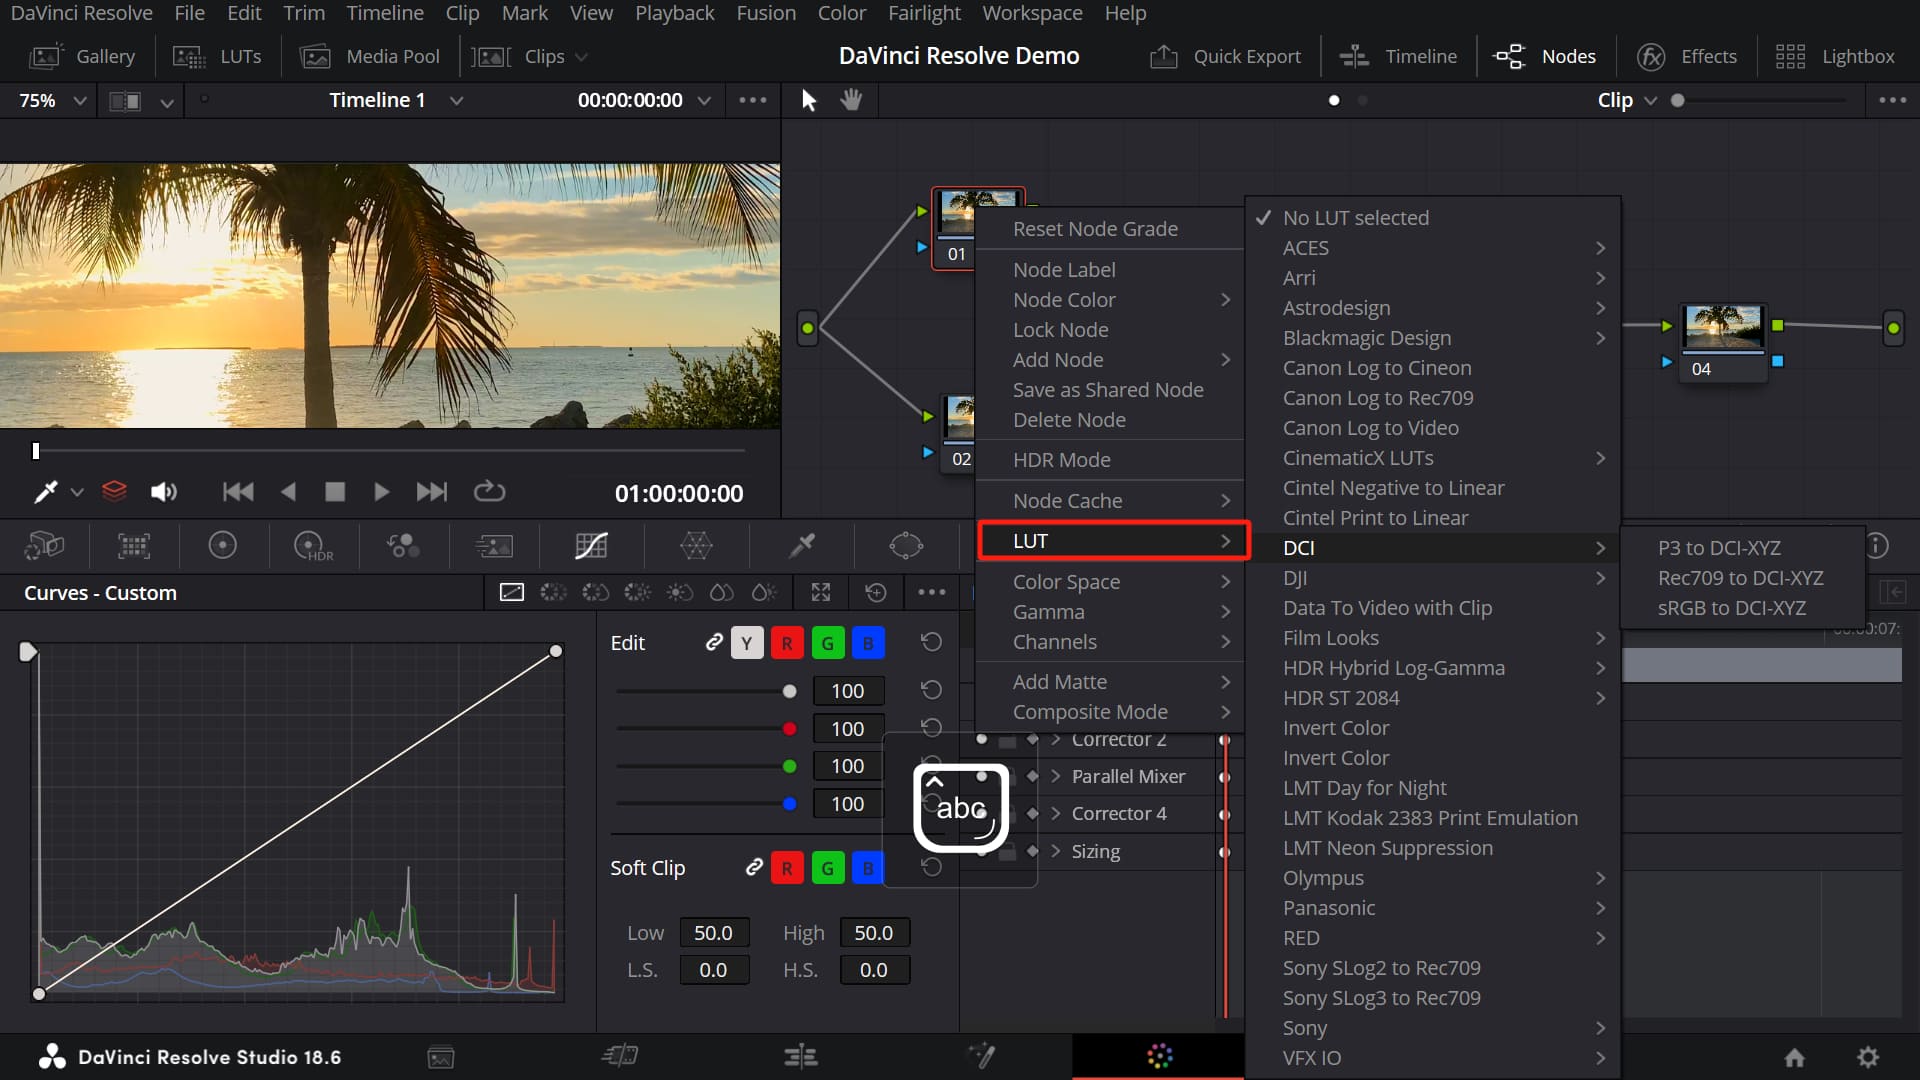
Node Interface: The first method is through the Node interface. Right-click on a node and select LUT from the dropdown menu. Find the desired LUT and apply it to the node.
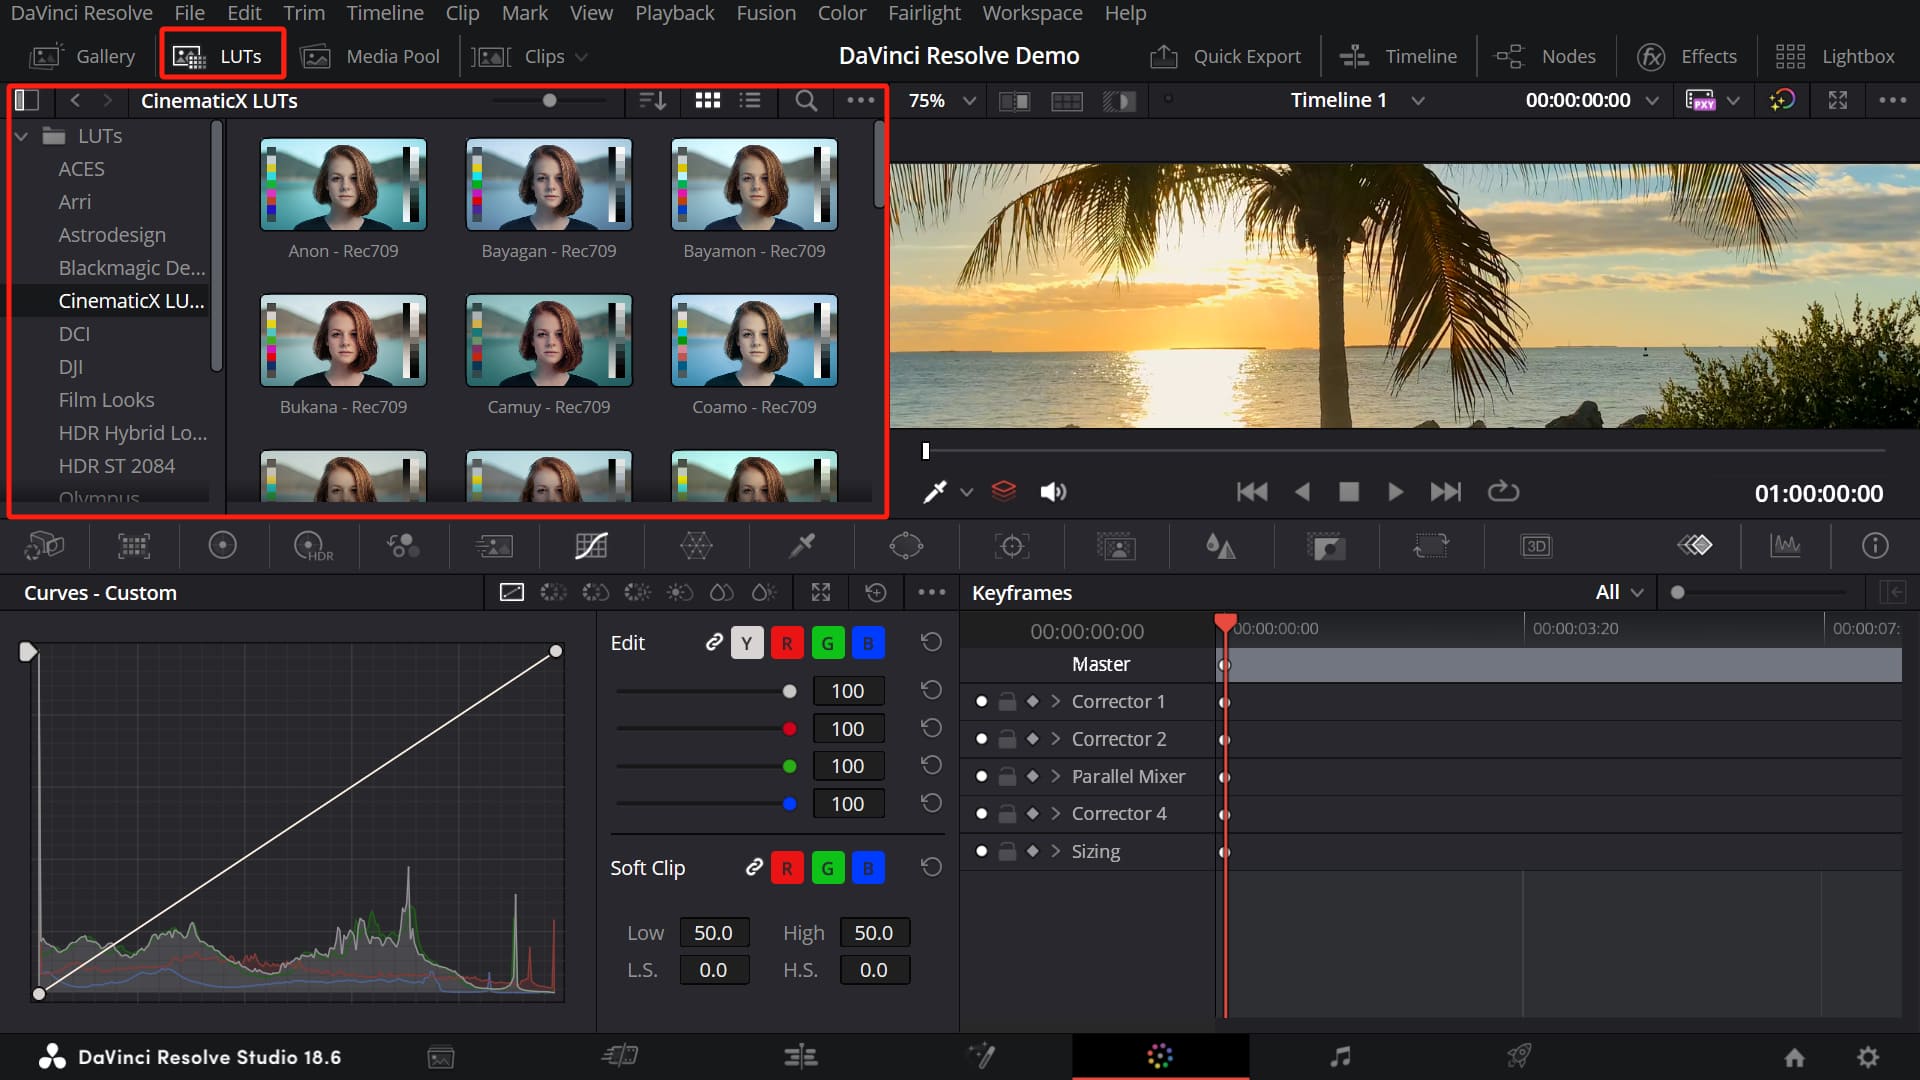
LUTs Interface: The second method is through the LUTs interface on the left side of DaVinci Resolve. Simply hover your mouse over different LUTs, and you will quickly preview the effects of each LUT.
Now that you have successfully imported the LUTs, it may seem like you've just added a filter. However, using LUTs is just the starting point, not the endpoint, of your color grading journey.
Commonly, you will need to make additional adjustments to the footage after applying a LUT to take it to the next level. Don't make the mistake of simply exporting the footage after applying a LUT. The world of color is not a one-size-fits-all solution.
Types and Applications of LUTs
LUTs can generally be categorized into two types:
- Viewing LUTs: Viewing LUTs (or maybe Correction LUT would be more graphic) bring your footage to a reasonable starting point for color grading. Using correction LUTs will make the footage look most natural and balanced.
- Stylized LUTs: Stylized LUTs are configurations that truly change the overall style of the footage. Different stylized LUTs can give you completely different color aesthetics.
Of course, not all footage requires both a viewing LUT for color correction and a stylized LUT for artistic styling. If your footage already has good colors straight from the camera, you may only need a stylized LUT to enhance the visual style.
For more advanced color grading in DaVinci Resolve, viewing LUT is still very important.
If you are a professional in the film and video industry, you may come across footage that has a dull and flat look. This type of footage is called Log Footage.
Log Footage typically retains a lot of highlight and shadow information, as well as a wide color gamut, which goes far beyond what a regular computer monitor can display. This can result in a distorted and desaturated footage when viewed on a monitor.
However, with a correction LUT, you can transform the data in Log Footage to a range that your monitor can display correctly, resulting in a normal-looking footage.
Why do we shoot Log Footage instead of directly capturing regular footage? The reason is that directly capturing regular footage would lose a significant amount of highlight and shadow details.
By shooting Log Footage, which preserves a lot of data from the start, you can recover more information from the footage. This is also an important factor in creating a cinematic look in your videos.
If you're interested in learning more about shooting Log Footage, you can watch the YouTube video produced by B&H Photo Video below.
Nowadays, many mirrorless cameras have the capability to shoot Log Footage. If you enjoy capturing the world through a camera, it might be worth considering whether the camera you're looking to purchase has this feature.
Different camera manufacturers have developed different Log Footage formats. So, it's important to first understand the specific Log Footage format you'll be shooting.
Once you know the format, you can easily find the corresponding Viewing LUTs for that Log format on the official website of the camera manufacturer.
The LUTs you find online may sometimes combine Viewing LUTs and Stylized LUTs to simplify the process for you. All you need to do is find the LUT that is suitable for your camera and use it directly.
If you're into photography, you've probably heard of Raw. But what's the difference between Raw and Log? Let's make a simple introduction so you don't get confused:
- Raw is data: Raw is data that needs to be processed before you can see the image. Shooting in Raw requires a large storage space.
- Log is a video format: You can think of it as a filter applied to the footage, which is still saved as a video. However, Log has low contrast and muted colors, allowing more flexibility in post-production. Shooting in Log requires a smaller storage space.
Additional Tips for Using DaVinci Resolve LUTs
In this final chapter of our DaVinci Resolve tutorial on LUTs, we want to share some tips for using LUTs effectively.
1. What If the LUT Effect Is Too Strong?
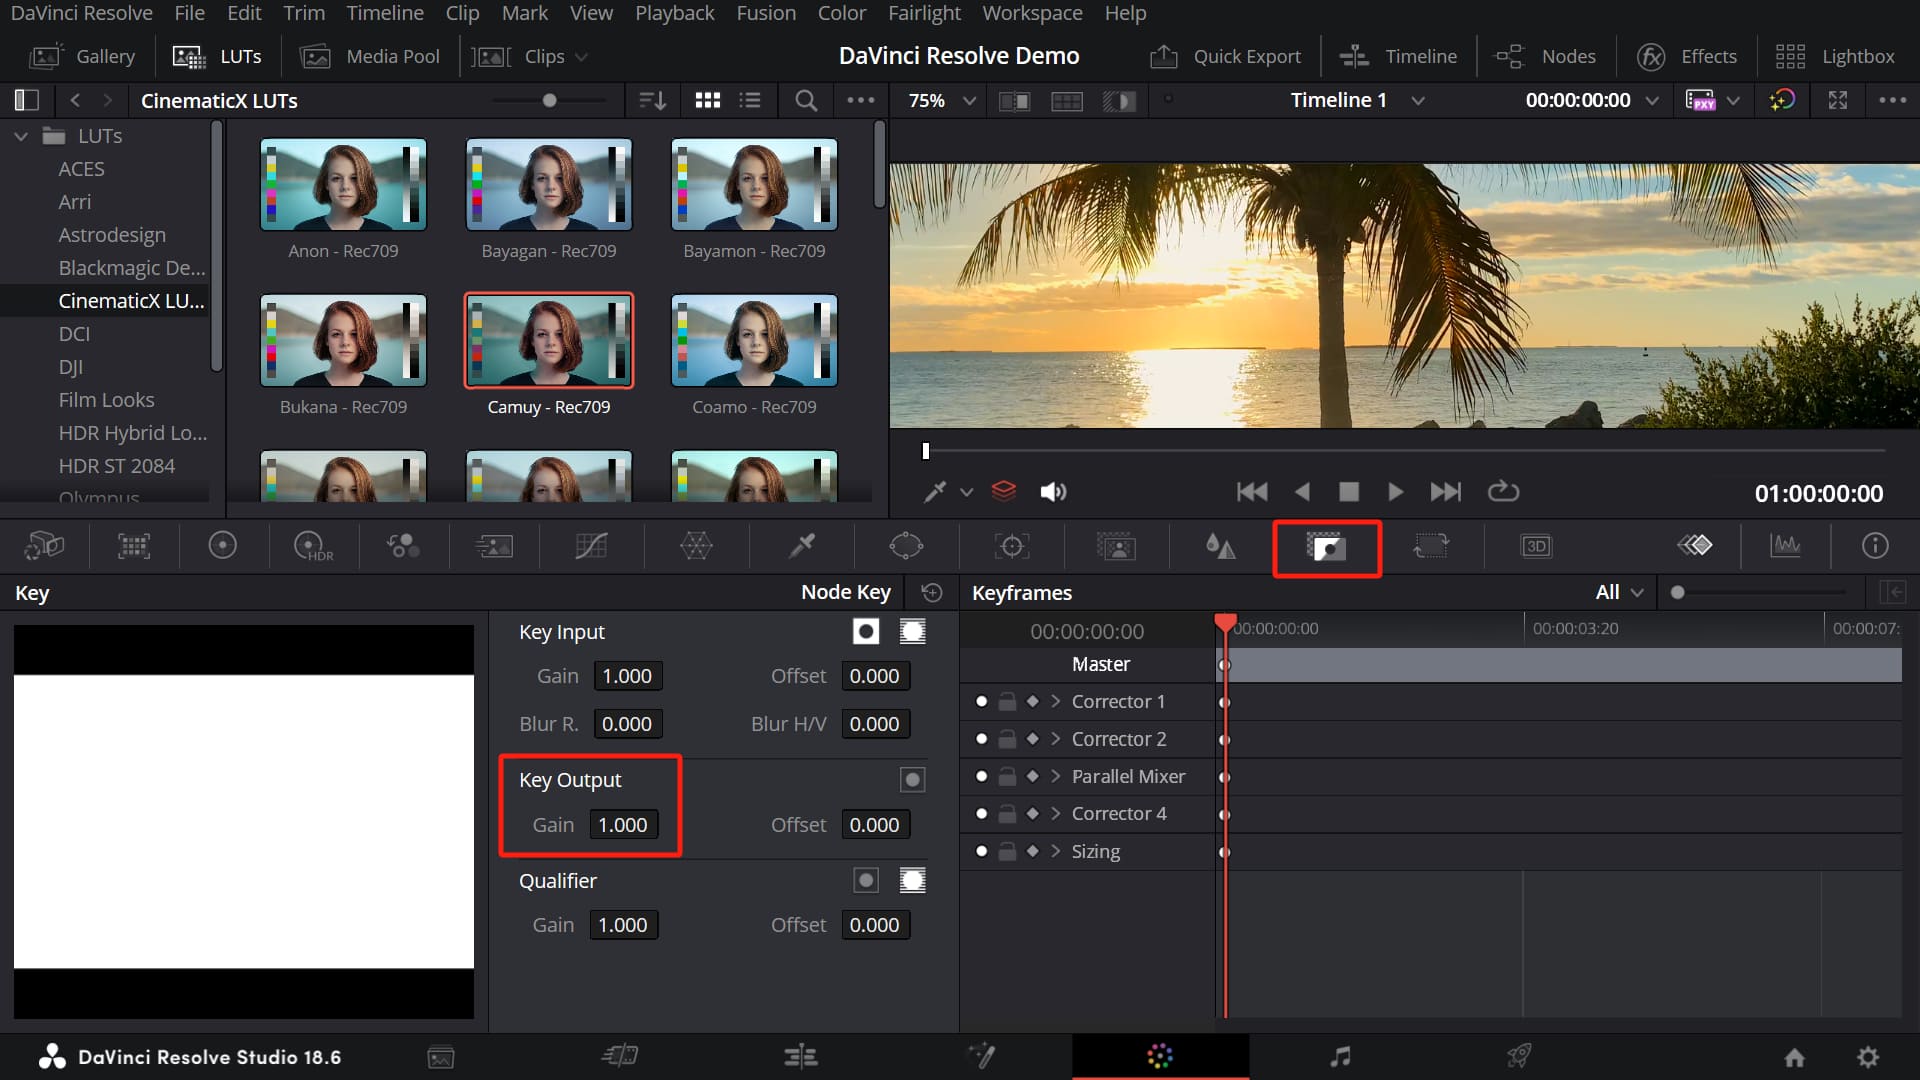
Sometimes, when you apply a stylized LUT that perfectly matches your footage, you may find that the effect is a bit too strong. In this case, you can slightly reduce the intensity of the LUT.
As shown in the image below, you can find the Key in the workspace panel at the bottom of the Color page. Adjust the Key Output value according to your needs.
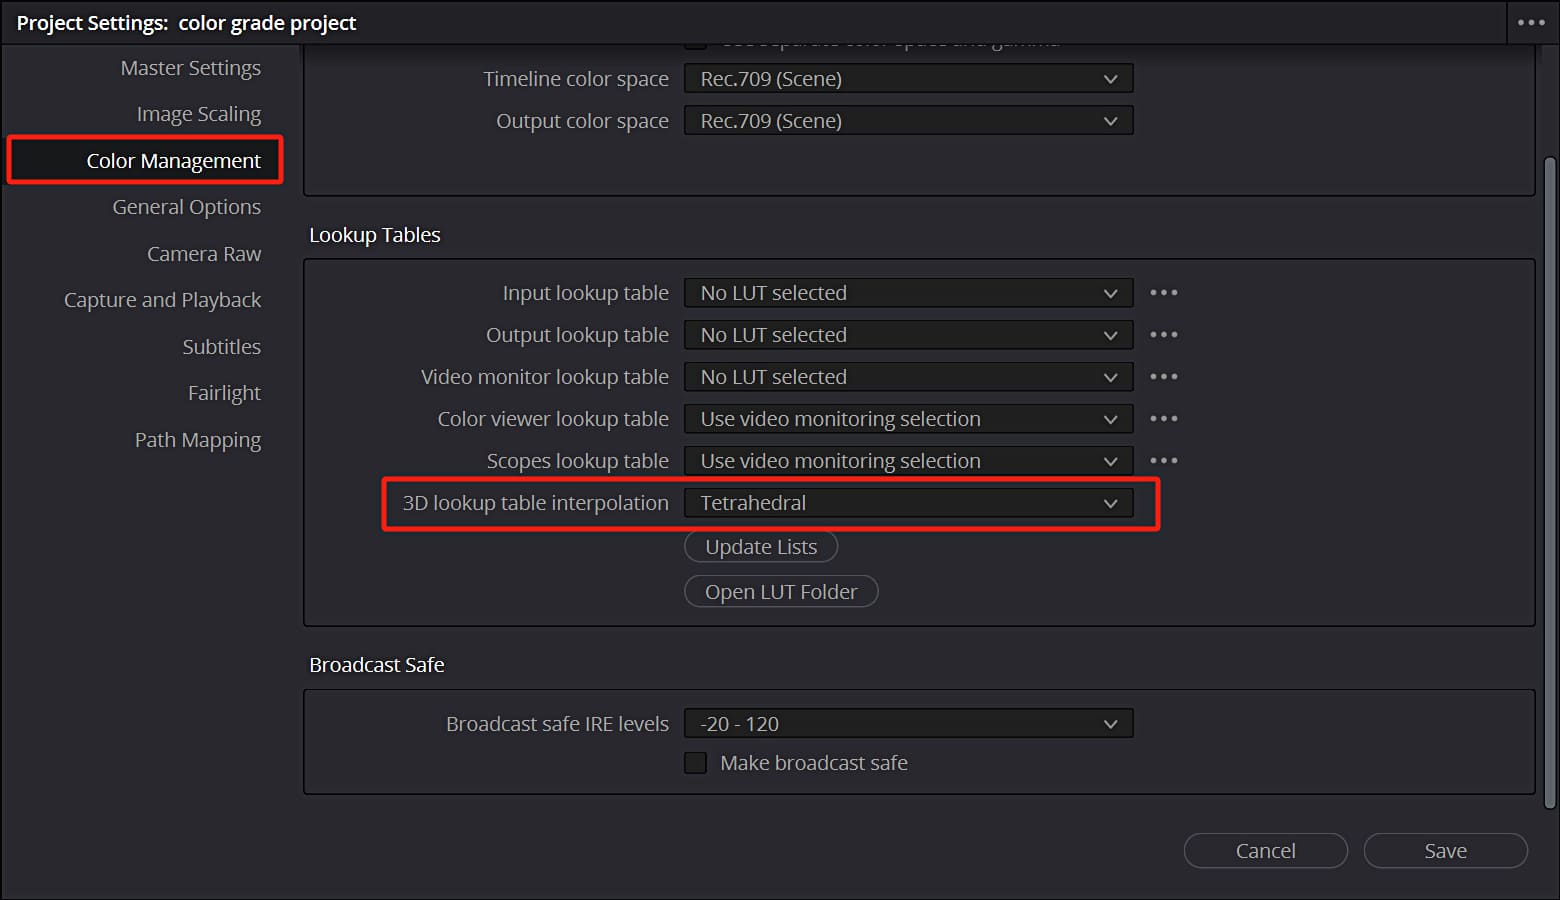
2. How to Remove Noise That May Occur When Using LUTs?
Sometimes, when applying a LUT, you may notice strange noise in the footage. This is often due to the limited accuracy of the LUT.
The solution is quite simple. Navigate to File, click on Project Settings, and in the Color Management panel, change "3D lookup table interpolation" to "Tetrahedral." Then, save your project.
Product Recommendation
As we come to the end of our tutorial on LUTs in DaVinci Resolve, we would like to recommend an incredible tool that can greatly enhance your editing experience: TourBox.
TourBox is a versatile and intuitive controller specifically designed for creative software, including DaVinci Resolve. With its ergonomic design and customizable buttons, TourBox allows you to streamline your workflow and boost your editing efficiency.

Imagine having all your most-used editing functions at your fingertips. With TourBox, you can easily adjust color grading parameters, fine-tune exposure, navigate timelines, and perform various editing tasks with precision and speed.
Its responsive dials and buttons provide a tactile and immersive editing experience, giving you more control and precision in your creative process.
What sets TourBox apart is its compatibility and seamless integration with DaVinci Resolve. It comes with pre-configured settings that are optimized for DaVinci Resolve, allowing you to jump right into your editing without any hassle.

Furthermore, TourBox is highly customizable, allowing you to personalize the controls to match your editing style and preferences.
So, why not pair your DaVinci Resolve experience with TourBox and see how it unleashes your creativity?