DaVinci Resolve Pages Explained: Understanding the Core Workflow
Many beginners who are new to DaVinci Resolve get confused by its many pages: Edit, Color, Fusion, Fairlight, Deliver... How are you supposed to use all of them? Do you need to learn every feature before you can get started?
In fact, DaVinci Resolve is built on a very simple idea: each task has its own page. You do not need to understand every feature from the start. Just choose the right page for each step, focus on one job at a time, and your post-production workflow will actually become more efficient.
Today, we will look at the main pages in DaVinci Resolve and how they work, so even beginners can get started faster.

In this article, you will learn:
- Why Are the Pages in DaVinci Resolve Separated?
- The 5 Main Pages in DaVinci Resolve
- What Should a Beginner's Workflow in DaVinci Resolve Look Like?
- Beginner Tips to Avoid Common Mistakes
- Conclusion
Why Are the Pages in DaVinci Resolve Separated?
DaVinci Resolve's page setup is really about helping you stay focused. Each page keeps only the tools you need for that task, with no extra distractions. That makes it easier to avoid mistakes and work faster.
It is a lot like a professional kitchen. There is one station for cutting, one for cooking, and one for washing dishes. You do not put every tool in one pile.
Video post-production works the same way. When you are editing, you do not need to worry about color settings. When you are working on audio, you do not need to be distracted by visual effects. The process stays clear, and the final result is easier to control.
This setup is also great for teamwork. Editors can work in the Edit page, colorists can focus on the Color page, audio engineers can handle the Fairlight page, and everything can be brought together in the Deliver page at the end. Everyone can work without getting in each other's way.
The 5 Main Pages in DaVinci Resolve
1. Edit Page: The Starting Point of Post-Production
- Core functions: All basic video editing tasks, including importing
- Best for: The first step after you get your footage. This is where you build the rough cut and the fine cut, and shape the overall structure of the video.
- How it works: The workflow is similar to the editing pages in Premiere Pro and Final Cut Pro. You can simply drag clips around to arrange them, so it is easy to learn.
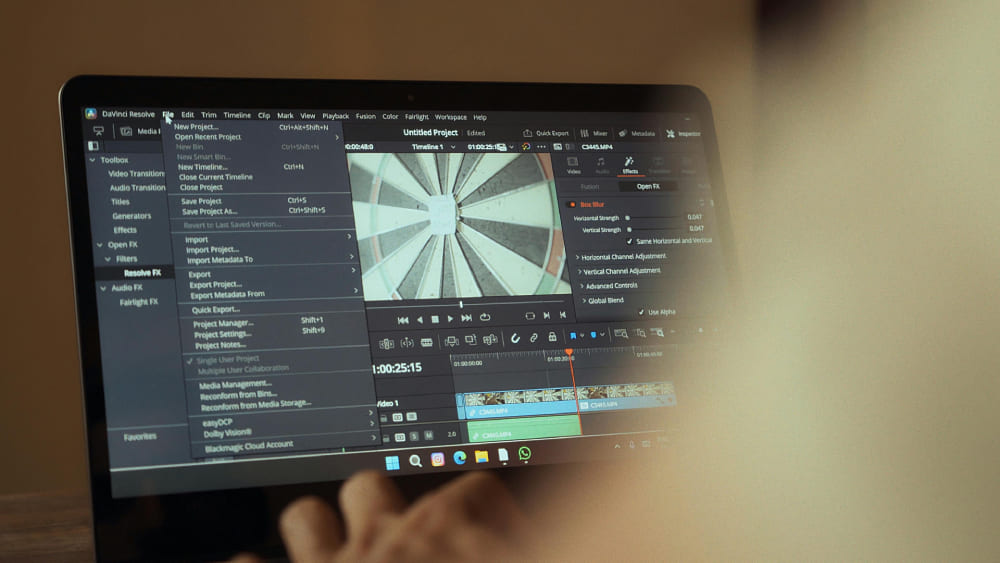
In DaVinci Resolve, you can cut, trim, and arrange clips in both the Cut page and the Edit page.
The Cut page is built for speed. It is best for quickly reviewing footage and putting together a fast first version. It works well for projects with tight deadlines or for rough-cutting clips. The Edit page is more detailed. It offers stronger trimming tools and more complete timeline control. It is better for building structure, fine-tuning pacing, and doing serious editing work.
In most post-production workflows, the Edit page feels more like the main workspace than the Cut page. It is usually the center of the final edit. That is why we recommend starting with the Edit page, not the Cut page, when you want to shape the video into a solid first cut.
On the Edit page, you can first arrange your clips, tell the story clearly, and lock in the pace. After the structure is stable, you can move on to color, audio, effects, and export. This helps avoid constant changes later and keeps your workflow more efficient.
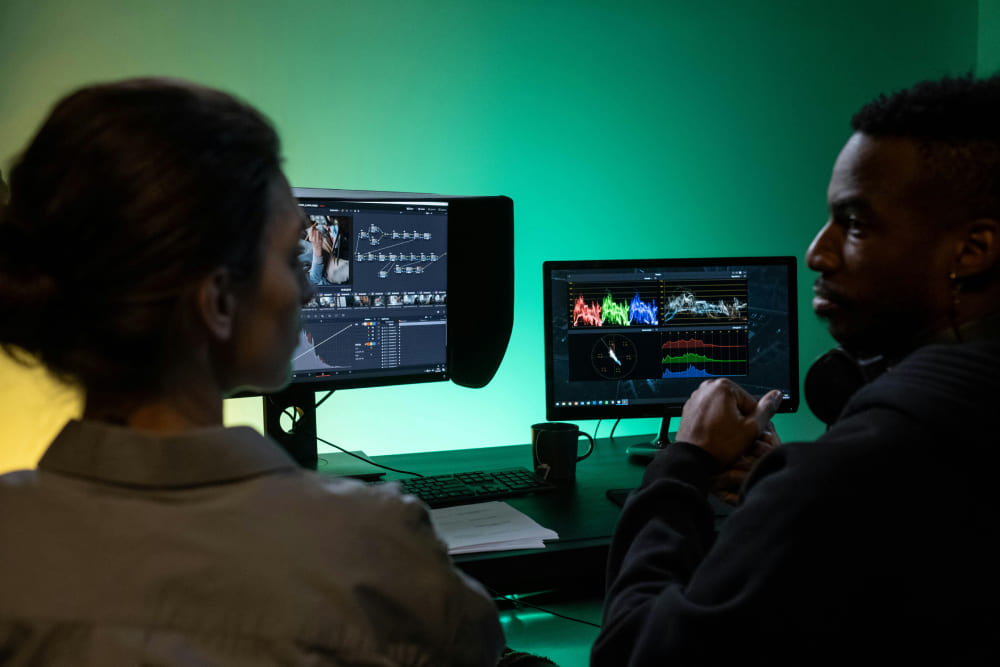
2. Color Page: The Soul of the Video's Look
- Core functions: Color grading, color correction, style work, skin tone fixes, cinematic looks, and more.
- Best for: After editing is done, this is where you unify the overall color and improve the look of the video.
- Main advantage: Every tool on the Color page is built for color work. Curves, color wheels, effects, and the node editor are all here for one purpose, so there is nothing extra to distract you. That makes it easier to focus on color itself.
Color grading is one of DaVinci Resolve's biggest strengths. It is also a major reason why so many people choose Resolve as their go-to video editing software.
You can think of the Color page as the key step where the video's overall look is set. The Edit page builds the story and pacing first. Then the Color page brings everything together by shaping the color, brightness, contrast, and mood. That is what makes the whole video feel more polished, more professional, and more stylish.
Color grading usually comes after editing and before export. It is the step that gives the final cut its finished look. Resolve offers tools like curves, nodes, Power Windows, tracking, and HDR grading in this workspace. But these tools can be very hard to use with just a mouse, so you may want an editing keyboard or a controller.

Among the many editing keyboards and controllers on the market, TourBox is a very cost-effective choice. In addition to using its physical controls to work with your timeline more freely, you can also use its built-in, exclusive HoverAdjust feature to easily control many of Resolve's color tools and settings.

If you want to see how TourBox can make your DaVinci Resolve workflow cleaner and more efficient, check out our Resolve use case page to learn more.
3. Fusion Page: The "Magic Room" for Effects and Graphics
- Core functions: Create advanced effects, motion graphics, and text animations, such as particle effects, animated transitions, and logo reveals.
- Best for: Use this page when you need special effects in your video, such as text effects in a product promo or compositing for a story scene.
Beginners do not need to dive into this page right away. If you only need simple subtitles or basic transitions, the Edit page is enough. Learn Fusion later, when you actually need more complex effects.
4. Fairlight Page: The "Professional Studio" for Audio
- Core functions: Audio editing, mixing, noise reduction, and sound effects. For example, you can adjust voice levels, remove background noise, and add background music.
- Best for: Use this page after the video and color work are finished, when it is time to focus on audio.
- Main advantage: The Fairlight page supports multi-track mixing and includes professional audio meters and sound libraries. It can solve most audio problems in post-production, so you do not need to open extra software like Audition.
Audio is the "second language" of video. Even if the image looks great, poor sound can still make the whole video feel weak. That is why this page is worth spending time on.
5. Deliver Page
- Core functions: Set export settings, choose the format, and render the final video.
- Best for: The last step after all post-production work is done.
- How it works: Choose a preset, adjust the resolution, frame rate, and bitrate, then render it with one click.
Before exporting, remember to preview the video and make sure the picture and sound are both fine. For important projects, it is a good idea to back up the original project file in case the export fails and you need to render it again.
What Should a Beginner's Workflow in DaVinci Resolve Look Like?
You do not need to learn every page at the start. A step-by-step workflow — Edit → Color → Audio → Effects → Export — is usually more efficient:
- Start on the Edit page to organize your clips and do the fine cut, so you can lock in the structure of the video.
- Then go to the Color page to unify the look and improve the overall image quality.
- Next, move to Fairlight to handle audio, such as noise reduction, mixing, and adding background music.
- If you need more advanced effects, open Fusion to create them. Beginners can skip this step at first.
- Finally, go to the Deliver page to set your export settings and render the video.
This workflow helps reduce rework and saves a lot of time. A bad example is color grading before editing. If you do that, you may have to keep readjusting your color range every time you move clips around, which wastes a lot of time.
Beginner Tips to Avoid Common Mistakes
- Do not work on multiple pages at the same time. For example, if you edit and color grade at the same time, it is easy to move clips by mistake or mess up your settings. Follow the workflow and handle each page one by one.
- You do not need to master every page right away. For beginners, learning the three main pages — Edit, Color, and Deliver — is enough to make most short videos and promo videos. You can learn Fusion and Fairlight later.
- Remember to save your project file often. It is a good idea to save after working on each page, so you do not lose your work if the software crashes.
Conclusion
DaVinci Resolve's multi-page layout is not a barrier. It is a tool that helps you work more efficiently.
So do not be afraid of the complex interface. Start with the Edit page and move forward step by step. You will find that DaVinci Resolve is actually easier to use than it first looks. Once you get used to the page-based workflow, your post-production speed can improve by more than twice.