How to Add & Create Transitions in DaVinci Resolve?
Transitions are key tools in video editing. They connect your story and set the pace.
Adding transitions in DaVinci Resolve is very simple. And if you want to create more advanced effects, you can do that on the Fusion page.
In this article, we'll take you from the basics to advanced tips so you can master transitions in DaVinci Resolve.

In this article, you will learn:
- Basic Steps: How to Quickly Add Transitions in DaVinci Resolve?
- Advanced Steps: How to Create a Custom Transition?
- Conclusion
Basic Steps: How to Quickly Add Transitions in DaVinci Resolve?
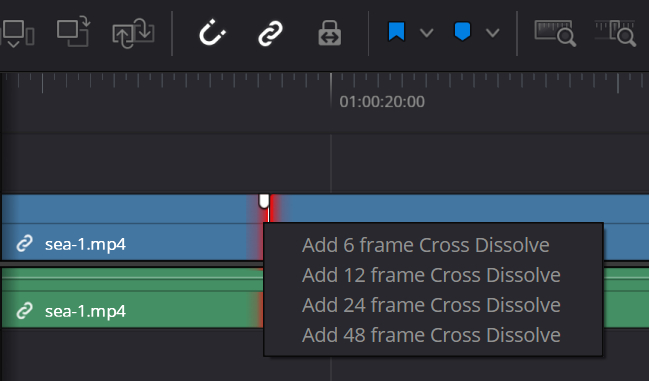
First, drag two clips into the timeline in the Edit page, so they touch each other. Then, right-click where they meet and choose "Add 6 Frame Cross Dissolve." Based on your needs, you can also add a cross-dissolve transition with more frames.
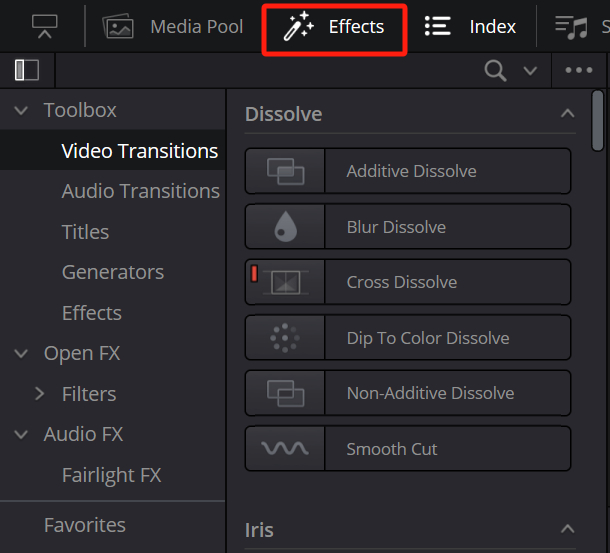
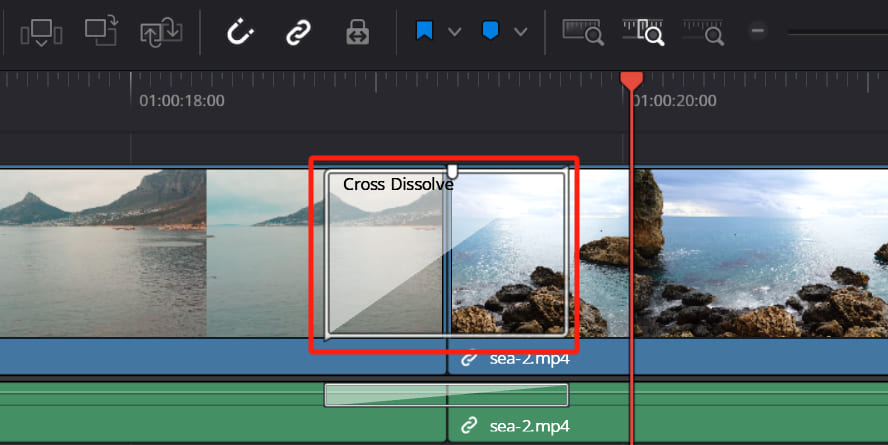
If you need a fancier transition, like a slide or zoom, go to "Effects" → "Video Transitions." Pick the one you like and drag it to where the two clips meet.
If you don't see the transition on the timeline, simply zoom in on the track until it appears.
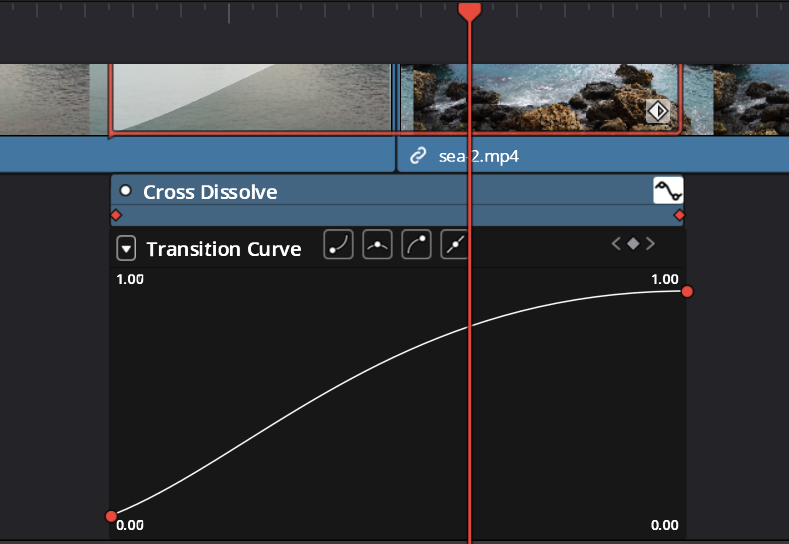
You can also adjust the transition. Double-click the transition icon to open the Inspector, where you can change the duration. Short transitions (6-10 frames) work well for fast edits, while longer ones (30 frames or more) are great for smoother, emotional changes.
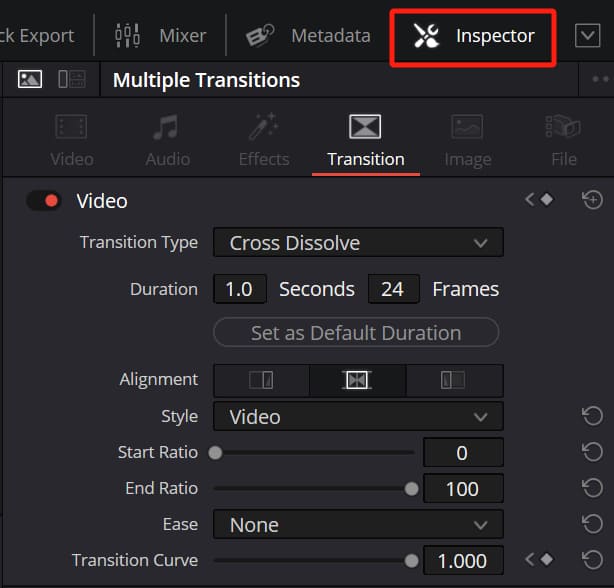
To avoid a choppy look, add an "Ease In/Out" to the keyframe curve.
When editing in DaVinci Resolve, you'll often need to zoom in and move the playhead along the timeline. This is similar to adjusting transitions, where you need to zoom in on the track. When working with lots of clips, using only your mouse and keyboard can slow you down and break your creative flow.

We suggest trying out TourBox, a creative controller that works like a gamepad. With its dial, you can easily zoom and move the playhead without the hassle of a mouse. If you're interested, check out our video editing page to learn more about how TourBox can help your workflow.
Advanced Steps: How to Create a Custom Transition?
Let's start by watching this video. In it, we add a page-turn transition that isn't available in DaVinci Resolve's built-in effects, so we need to create our own.
Making a custom transition means you need to know a bit about the Fusion page in DaVinci Resolve. Click the link below to get a quick overview.
Further Resolve:
[DaVinci Resolve Tutorial] A Beginner's Guide for Fusion Page
Next, we'll use the page-turn transition as an example to show you how to create a custom transition in DaVinci Resolve.
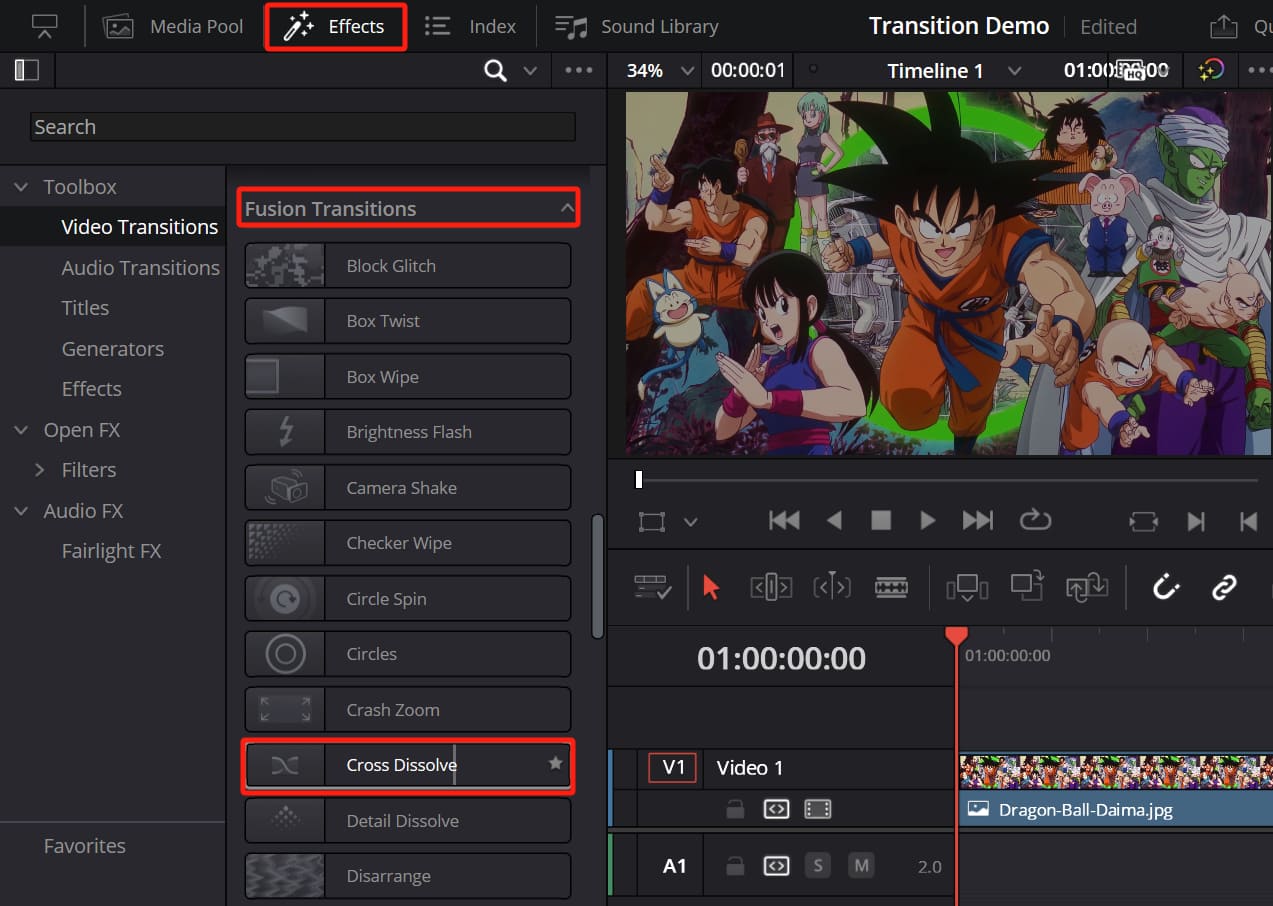
To create a custom transition, start by finding an official Fusion transition in the Video Transitions panel at the top left of DaVinci Resolve. This will be the base for your custom transition.
For example, you can add the Cross Dissolve found under the Fusion Transition category. There's no special reason for choosing it. It's just a matter of personal taste.
Drag the Fusion transition between your two clips and extend its duration as needed.
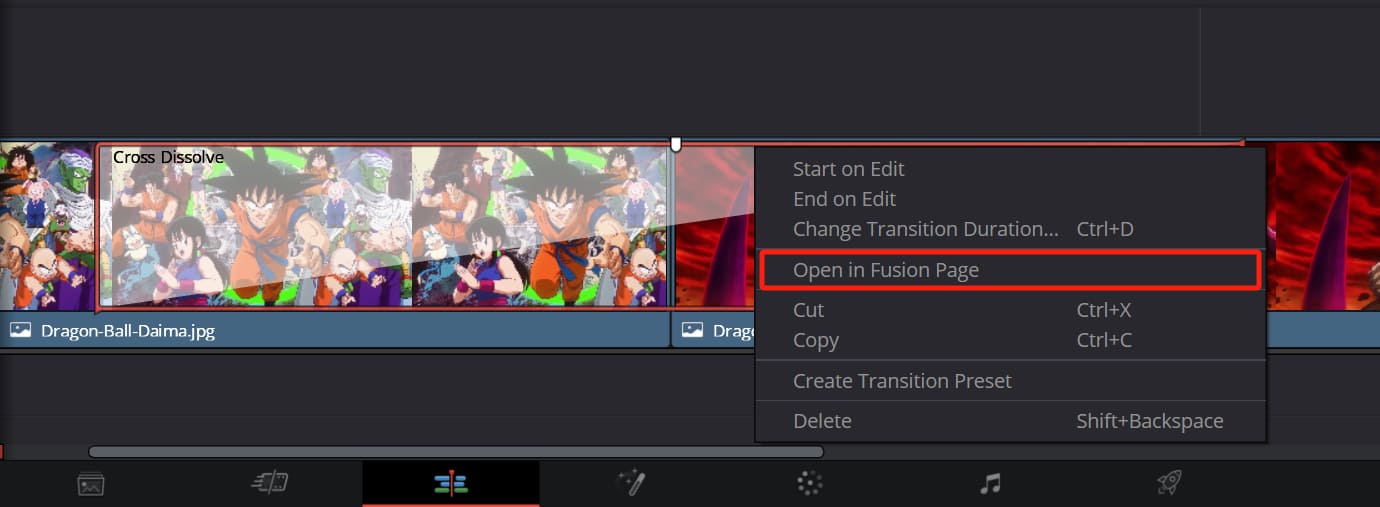
Next, right-click the Fusion transition and select "Open in Fusion Page."
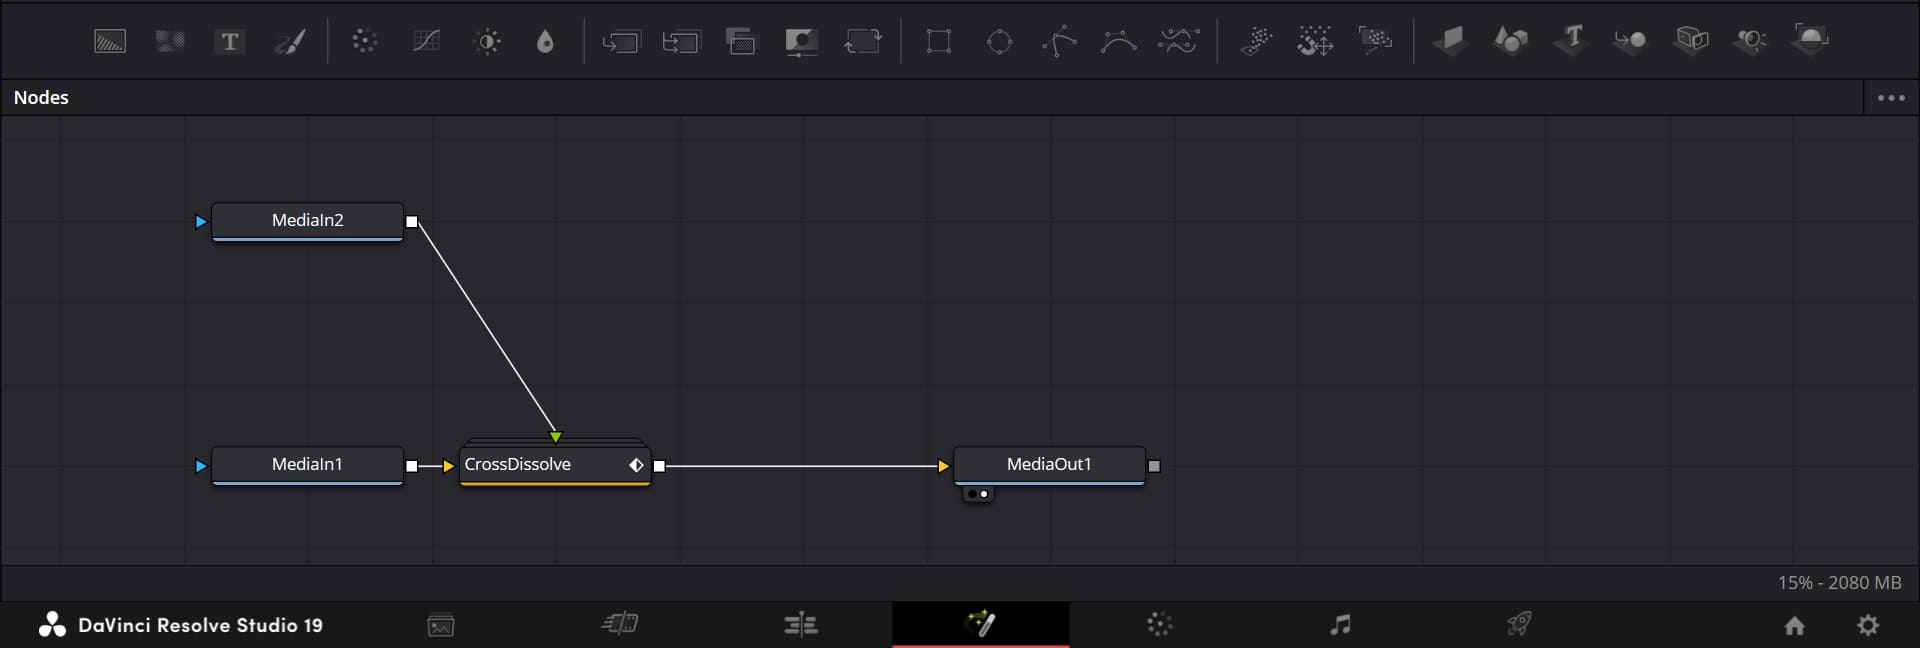
On the Fusion page, focus on the Fusion Nodes panel. You'll see three important nodes: MediaIn1, MediaIn2, and MediaOut1. These are the nodes you need. The middle CrossDissolve node is not needed, so delete it.
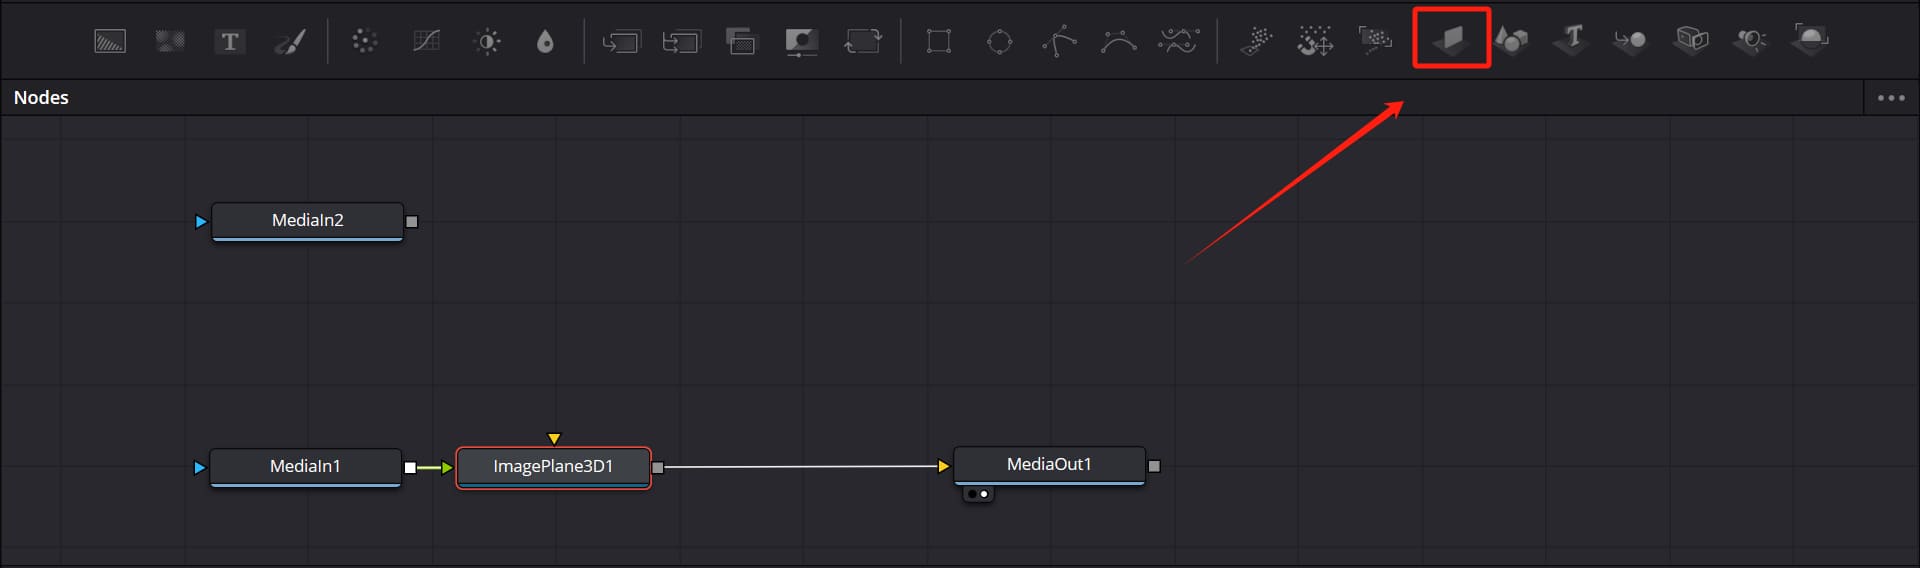
Since we want to create a page-turn effect using 3D nodes, you need to convert the first clip (MediaIn1) into a 3D image. To do this, select the MediaIn1 node and add an ImagePlane3D node right after it.
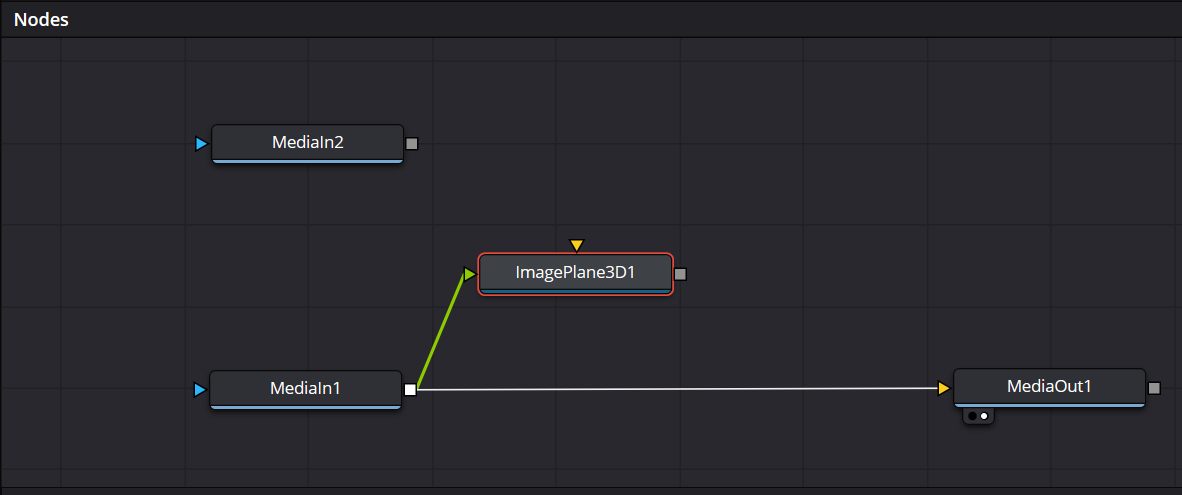
We drag the ImagePlane3D1 node and see that it doesn't connect directly to the MediaOut1 node (all Fusion nodes must eventually output to a MediaOut node). Even if we try to force the connection, the ImagePlane3D1 won't link to MediaOut1.
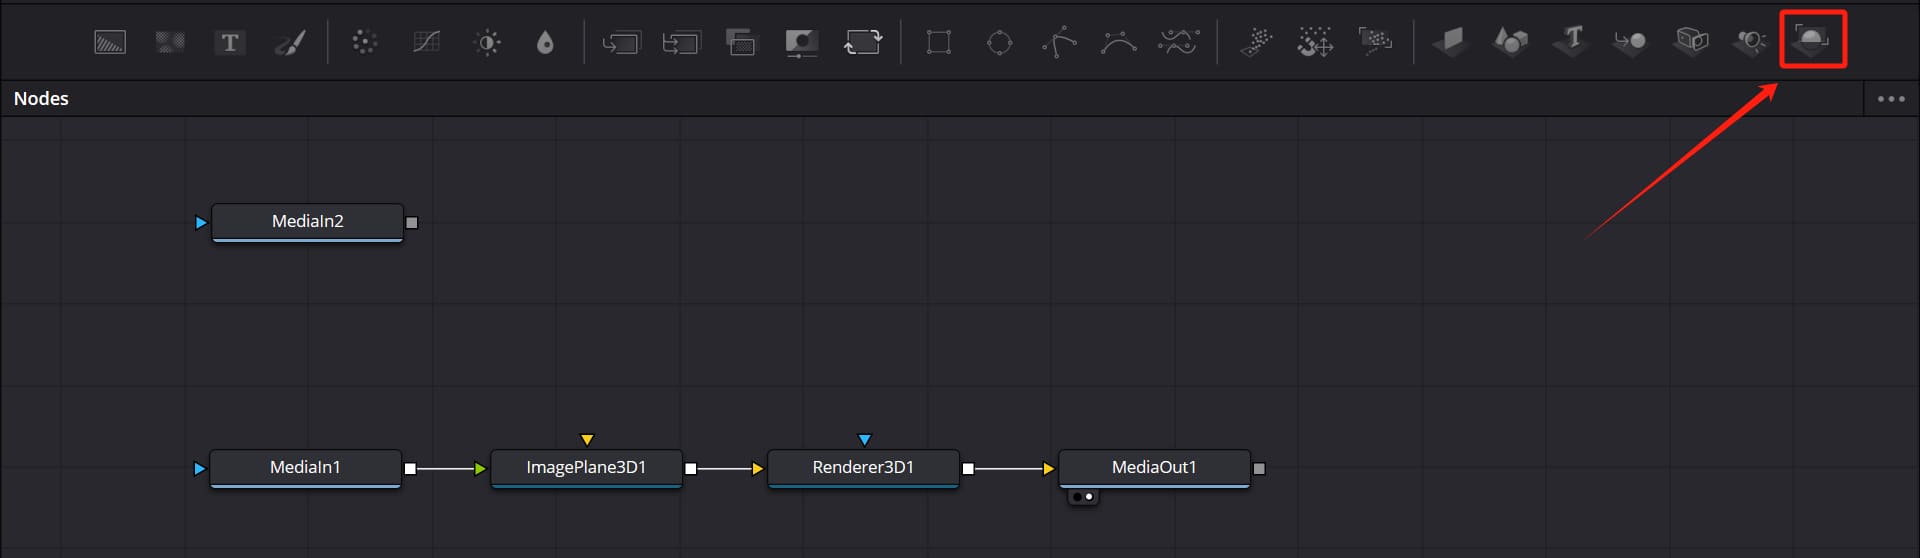
At this point, we need to add a Renderer3D node to output the 3D content. Then, connect it to the MediaOut1 node.
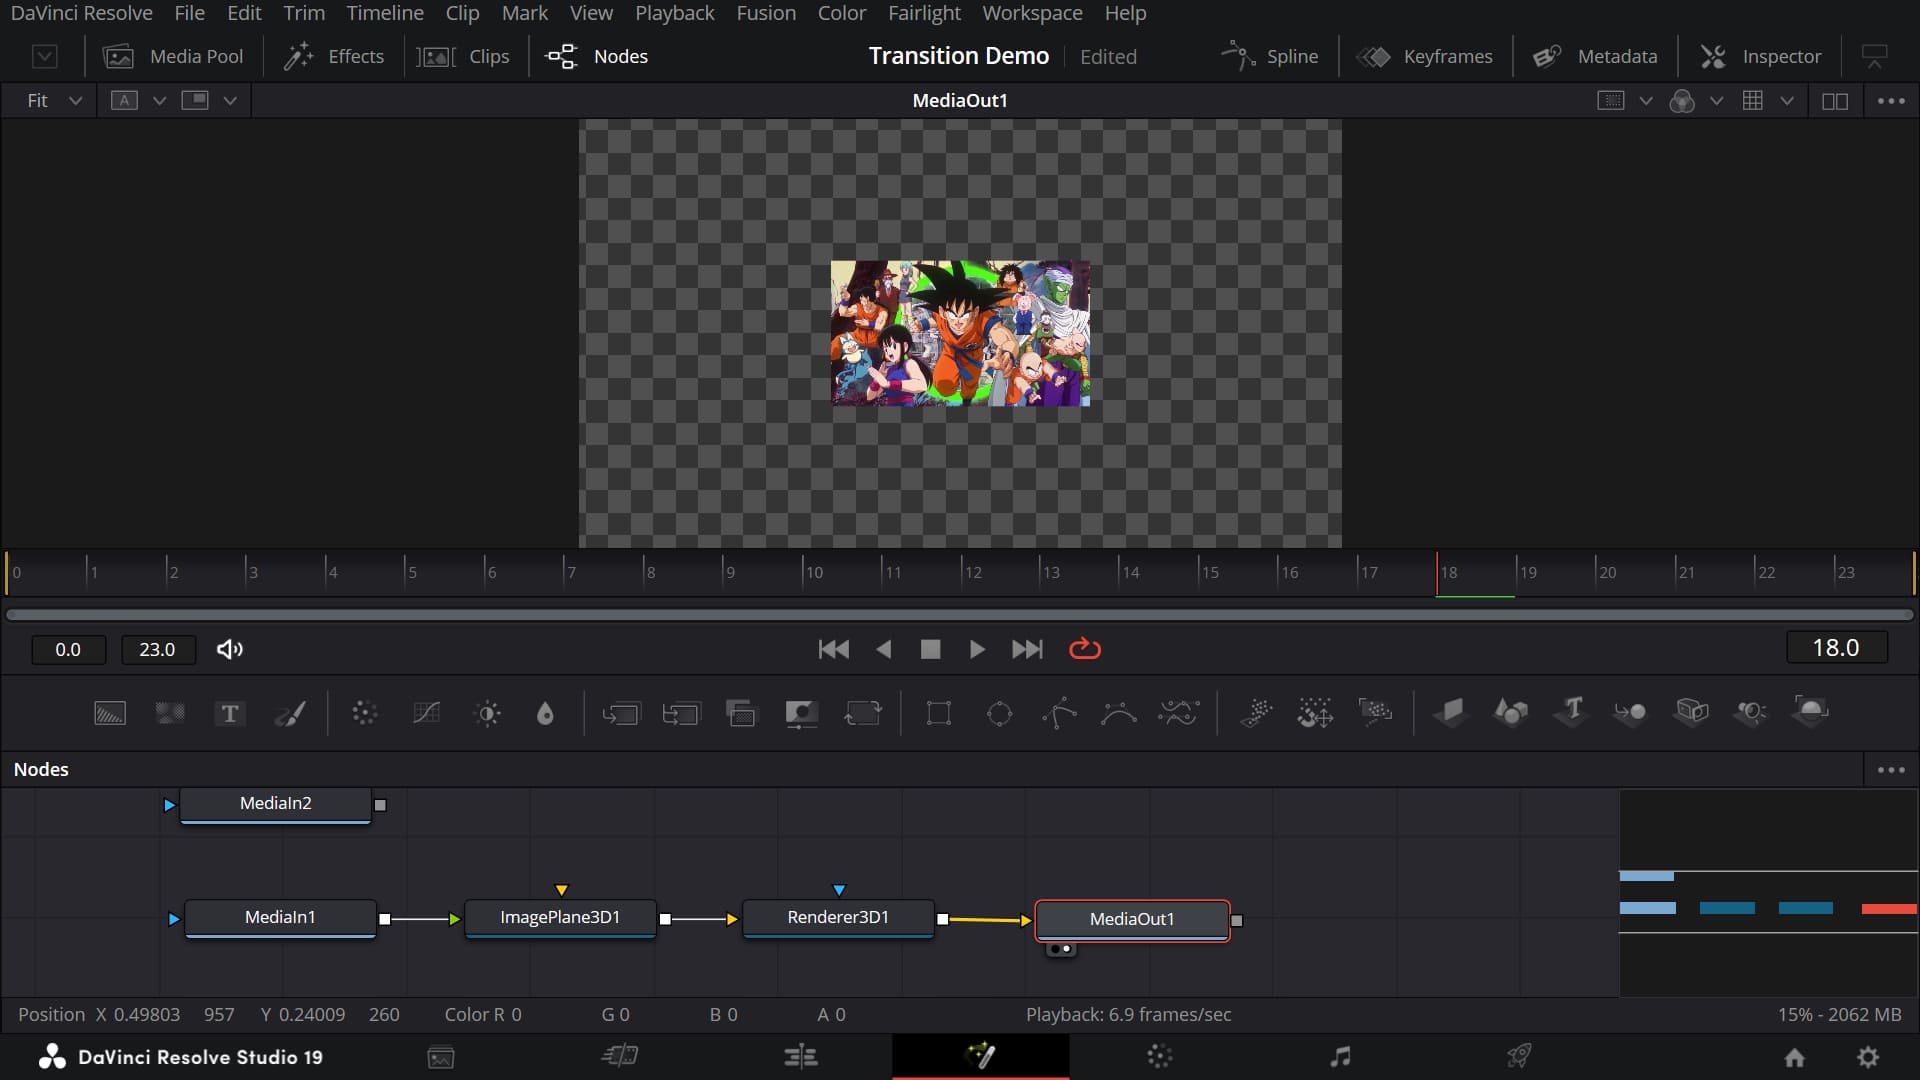
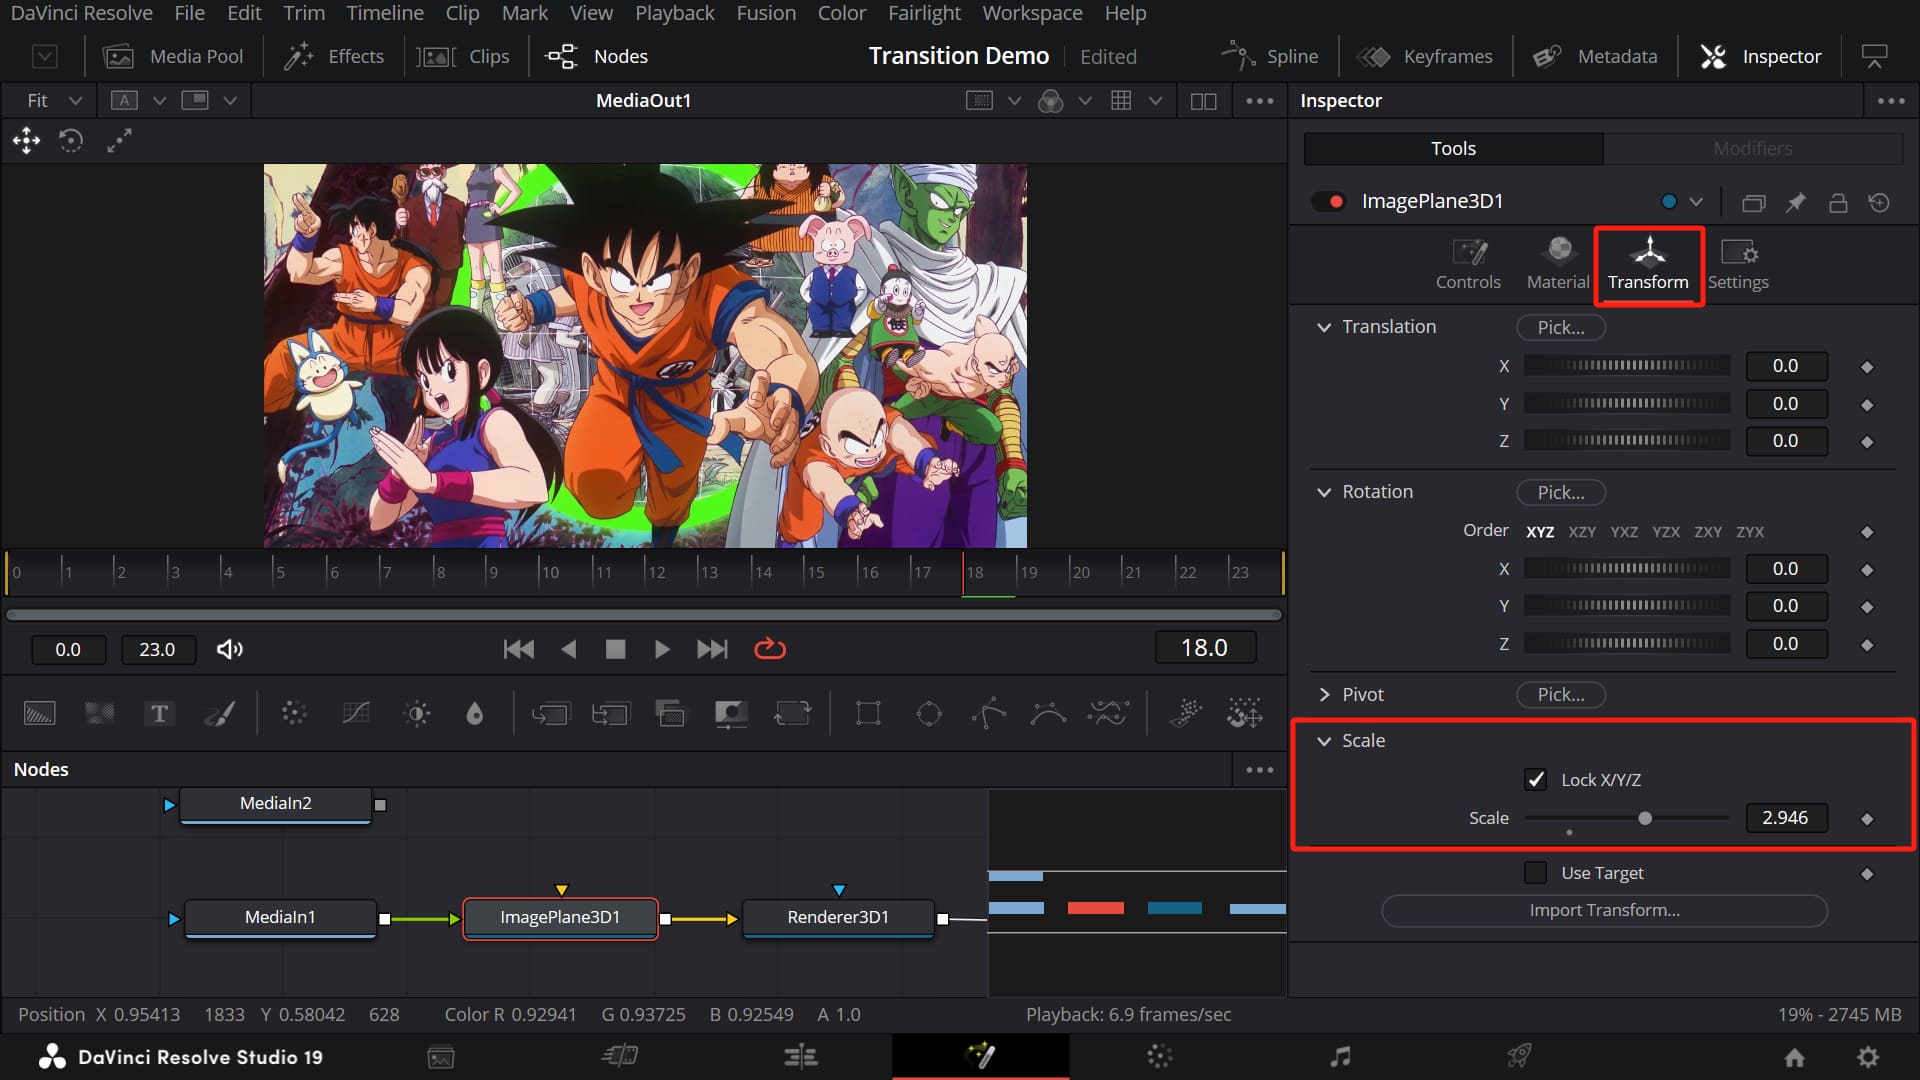
When we select the MediaOut1 node, we see that the image shows correctly, but it looks a bit small.
Next, choose the ImagePlane3D node and go to the Transform tab in the Inspector on the right. Increase the scale so the image fills the screen.
Now comes the most important step. We need to create a scrolling effect to achieve the page-turn transition we want.
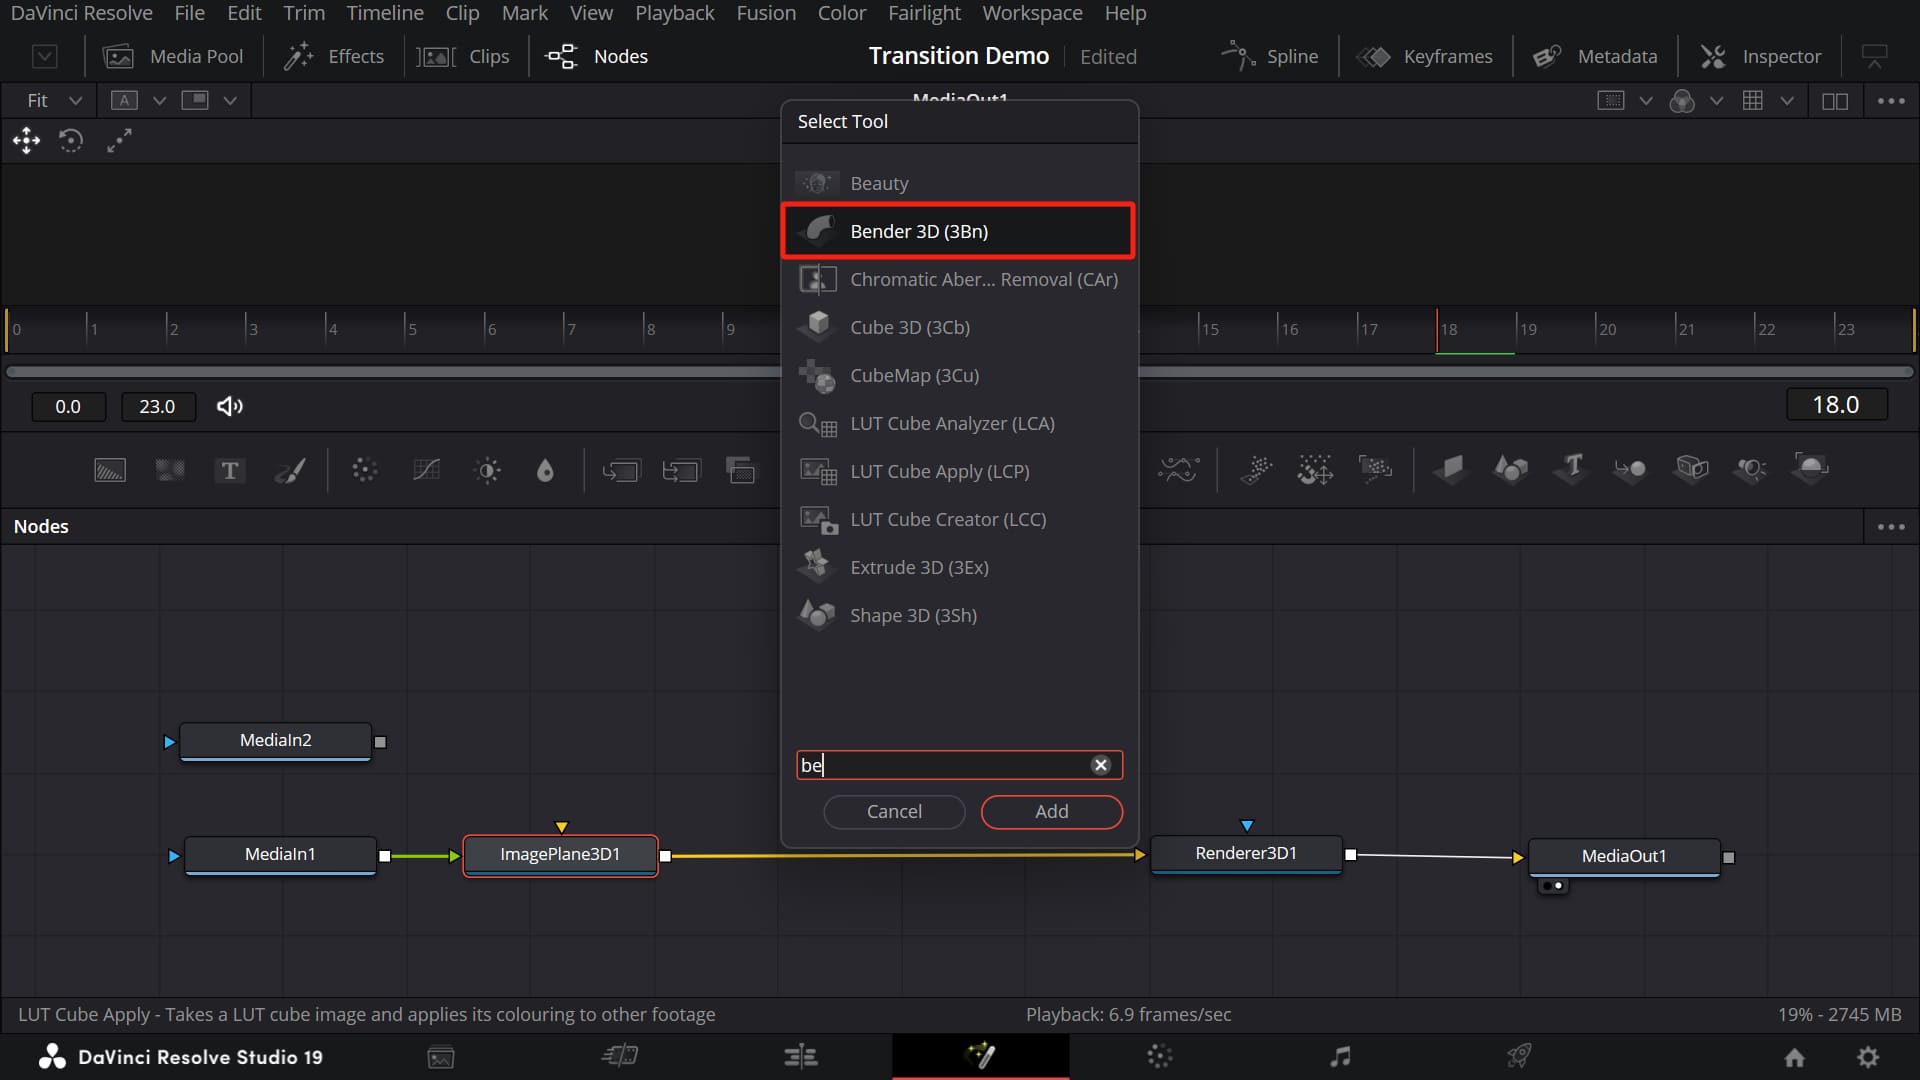
First, select the ImagePlane3D1 node and press Shift+Space to add a Bender 3D node. This is the key node for creating the page-turn effect.
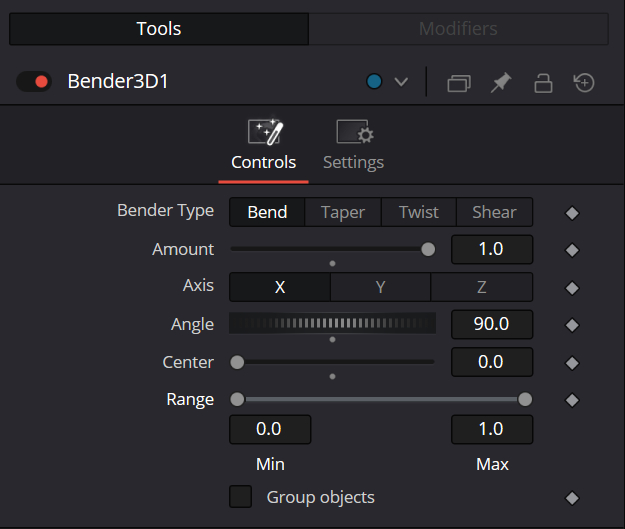
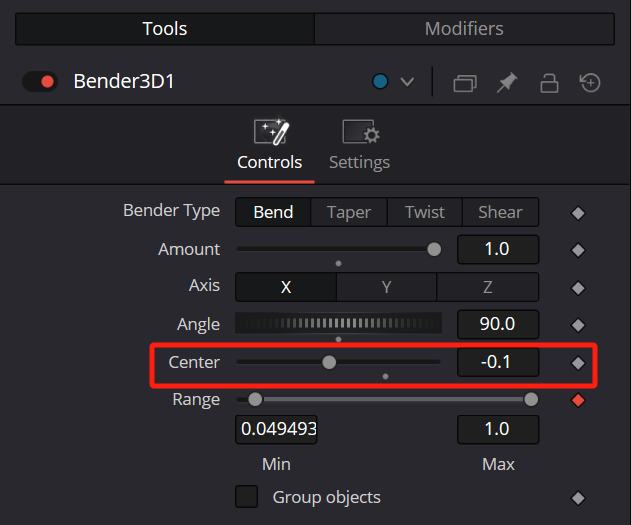
Click on the Bender3D1 node. In the Inspector on the right, you can tweak the settings and see different results. In our case, adjust the parameters under the Bend tab like this:
- Set Amount to 1.0
- Change Axis to x
- Set Angle to 90°
- Change Center to 0
Now, when you move the Range slider, you'll see the image start turning from right to left.
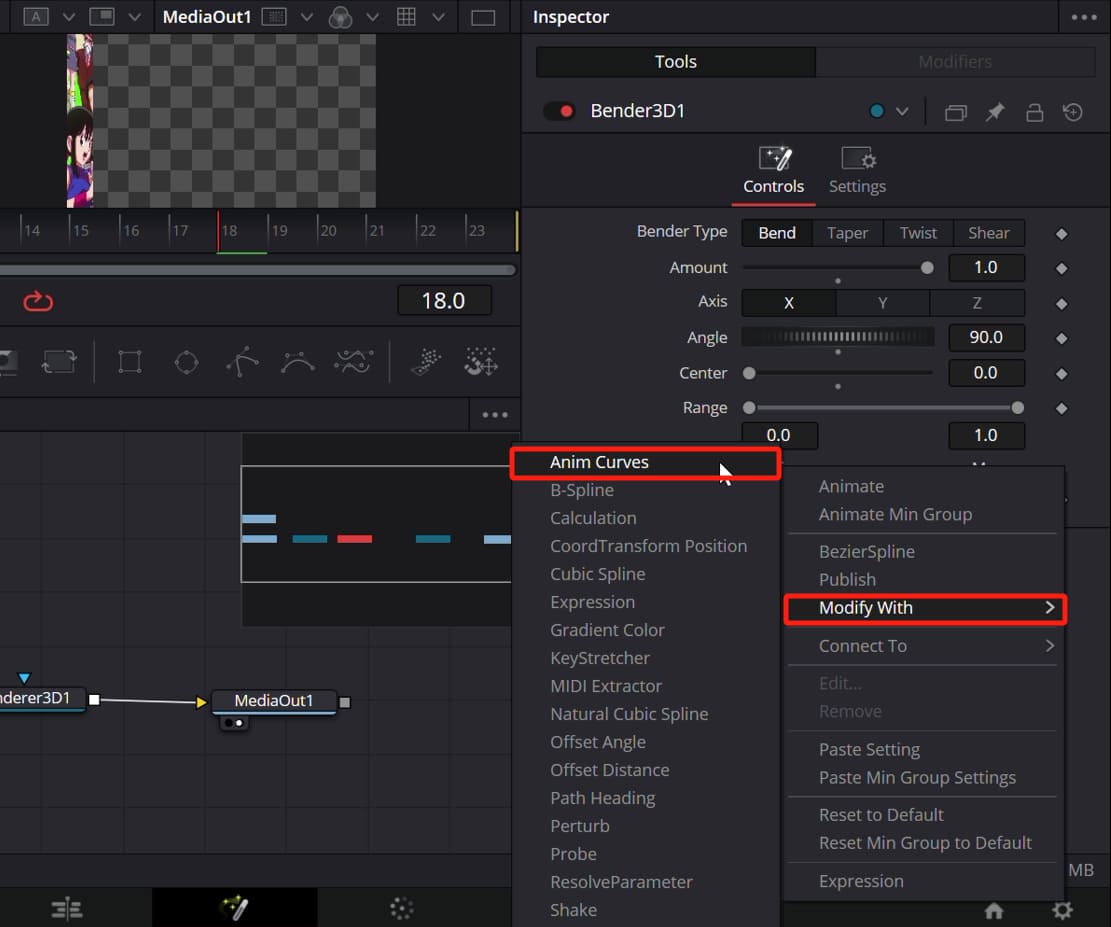
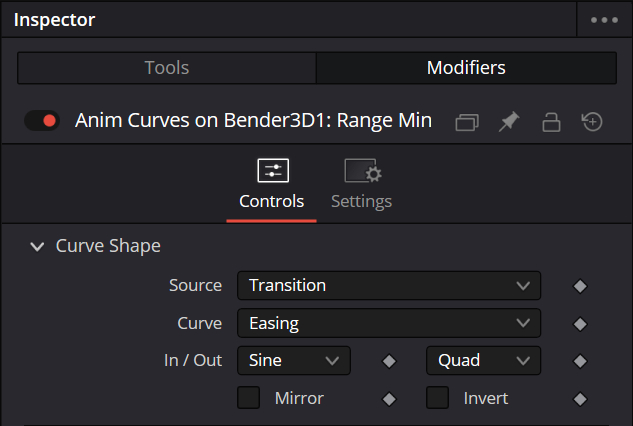
Next, things get pretty simple. We need to animate the Range by changing its minimum value from 1 to 0. Right-click on Min and then choose Modify With > Anim Curves from the menu.
Now, the Modifiers tab at the top is active. Open it to adjust the animation curves so the transition is smoother.
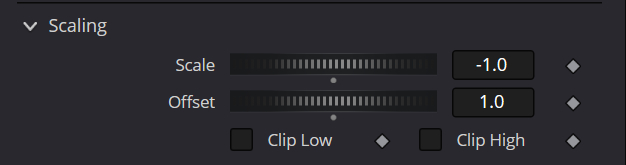
In the Scaling section, think of Scale as the starting value. The final value is the sum of Scale and Offset. In our case, the result should be 0, so set the values accordingly.
Try playing the animation to see the effect. You will notice that the page-turning effect is mostly there. However, there is one problem: the transition animation does not completely move off the screen.
Switch back to the Tools tab and manually enter the value for Center as -0.1 (you cannot set a negative number by dragging the slider; you must type it in).
Then you'll notice that even though everything moves off the screen at the end of the transition, the shifted center makes the animation look wrong. So, we need to animate the Center value too, so that the center point changes during the second half of the transition.
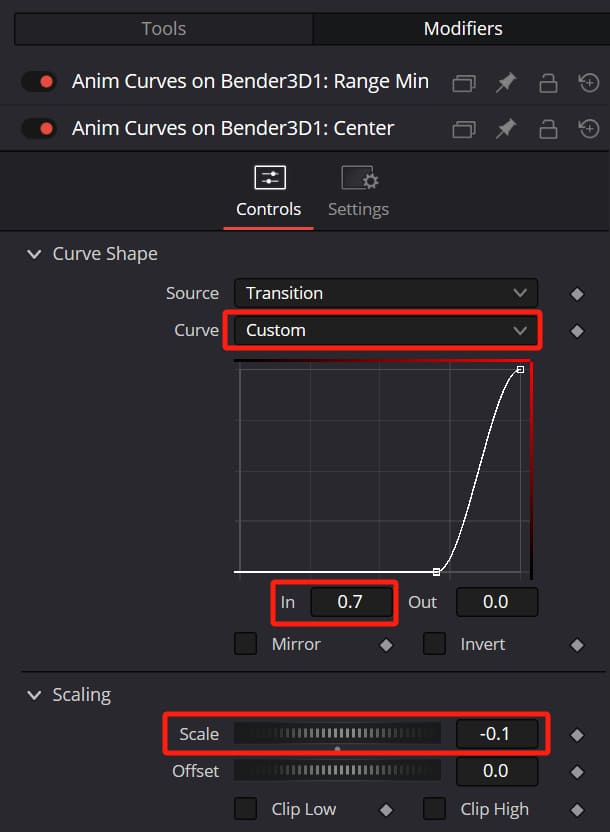
To do this, right-click on Center, select Anim Curves from the menu, and then switch back to the Modifiers tab.
First, change the curve to "Custom." Modifying the curve is simple. Think of the horizontal axis as the full-time range of the transition — just a straight line from 0 to 1.
Next, select the starting point on the left of the curve and change its value to 0.7. Then, press the F key to smooth the curve. This makes the animation start at 70% of the timeline, delaying its beginning.
Finally, set the Scale value below to -0.1.
Play the animation to check the effect, and the page-turning animation works perfectly.
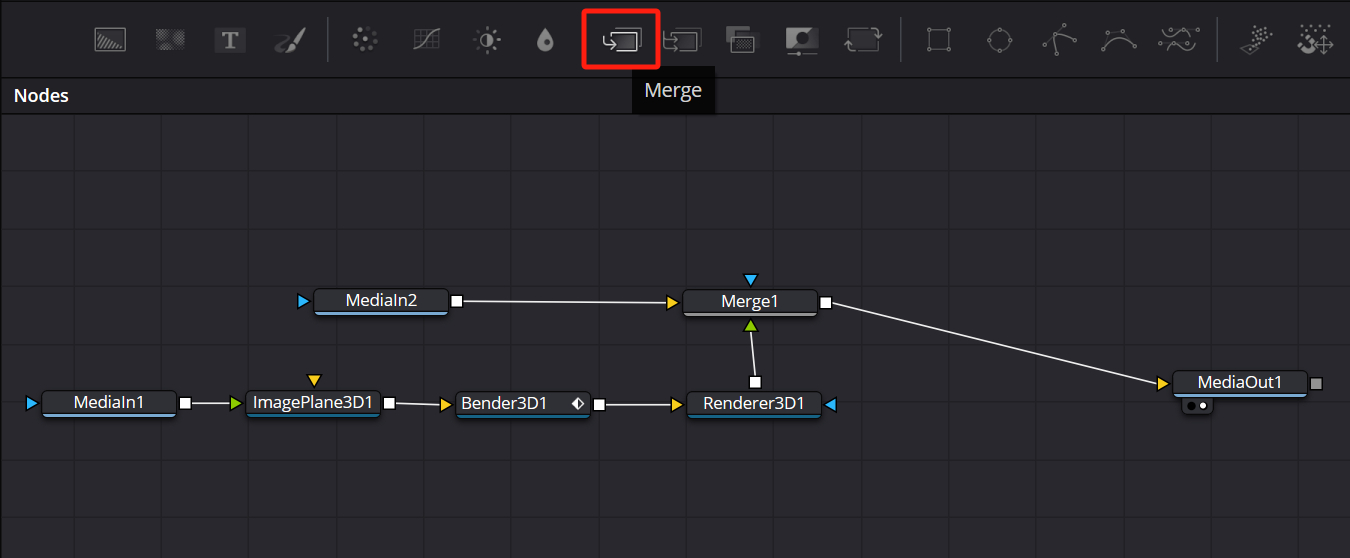
Finally, we need to combine the two clips. To do this, create a Merge node. Connect the output of Renderer3D1 to the green (foreground) arrow on Merge1 and connect the output of MediaIn2 to the yellow (background) arrow on Merge1, as shown in the image below.
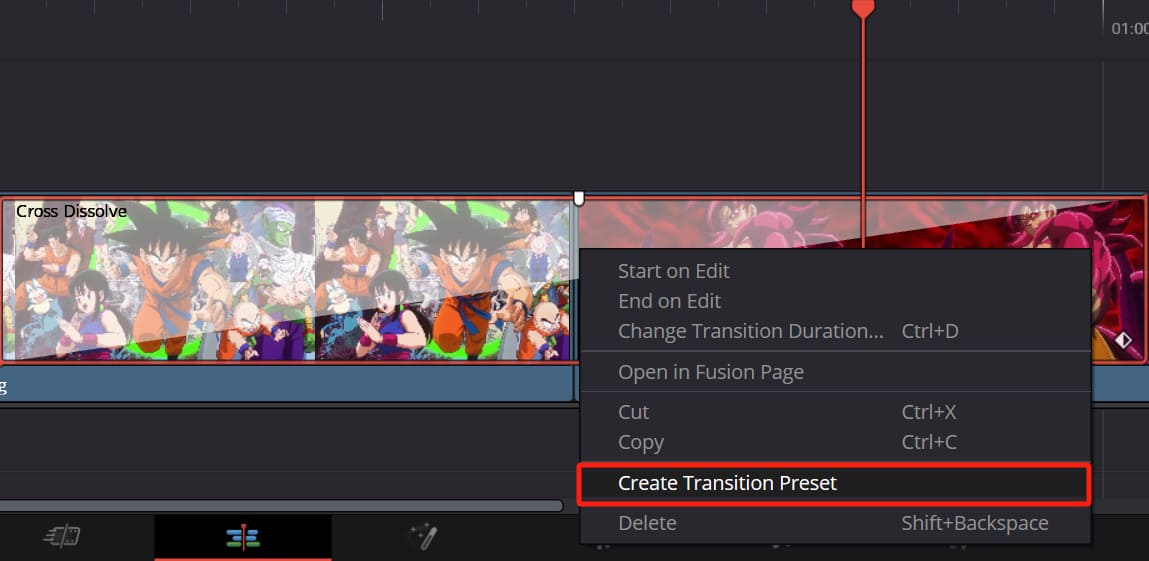
At this point, the page-turn transition is complete. If you like it and want to save it for future projects, right-click the transition in the timeline on the Edit page and choose Create Transition Preset. You can then find it under the User category in the video transitions list.
That's how you create a custom transition in DaVinci Resolve. If you find the Fusion page hard to understand, you can also purchase a professional third-party DaVinci Resolve transition preset to quickly add cool effects to your videos.
Further Reading:
4 Essential OpenFX Plugins for DaVinci Resolve: A Guide to Usage
Conclusion
In this tutorial, we explored how to add basic transitions in DaVinci Resolve and create your own using the Fusion page. We started with simple steps and moved on to creative ideas. We hope these tips give you new inspiration for your editing work.
In closing, if you're into TourBox and you usually edit on an iPad, TourBox Elite Plus might be perfect for you. Click the link below to check it out.

Thanks for reading, and we wish you all the best in your future projects. Keep experimenting and pushing your limits to create more amazing videos.