Unraveling the Mystery: Opacity Vs. Flow in Digital Art Tools
For digital artists and enthusiasts who frequently use image editing and digital painting software, brushes are a common tool. In these programs, you can typically adjust the flow and opacity of brushes.
However, have you ever wondered about the difference between these two settings?
At first glance, the effects of flow and opacity may seem quite similar. Simply explaining their differences can be too abstract. In this article, we will use a simple test demo to help you thoroughly understand the concepts of brush flow and opacity.

In this article, you will learn:
- What's the Difference Between Flow and Opacity?
- Conclusion on the Differences Between Flow and Opacity
- What If You Set Both Opacity and Flow to 50%?
- Advanced Techniques for Using the Brush Tool
What's the Difference Between Flow and Opacity?
To begin, create a Photoshop project and set the spacing slider in the brush settings panel to the minimum value of 1%.
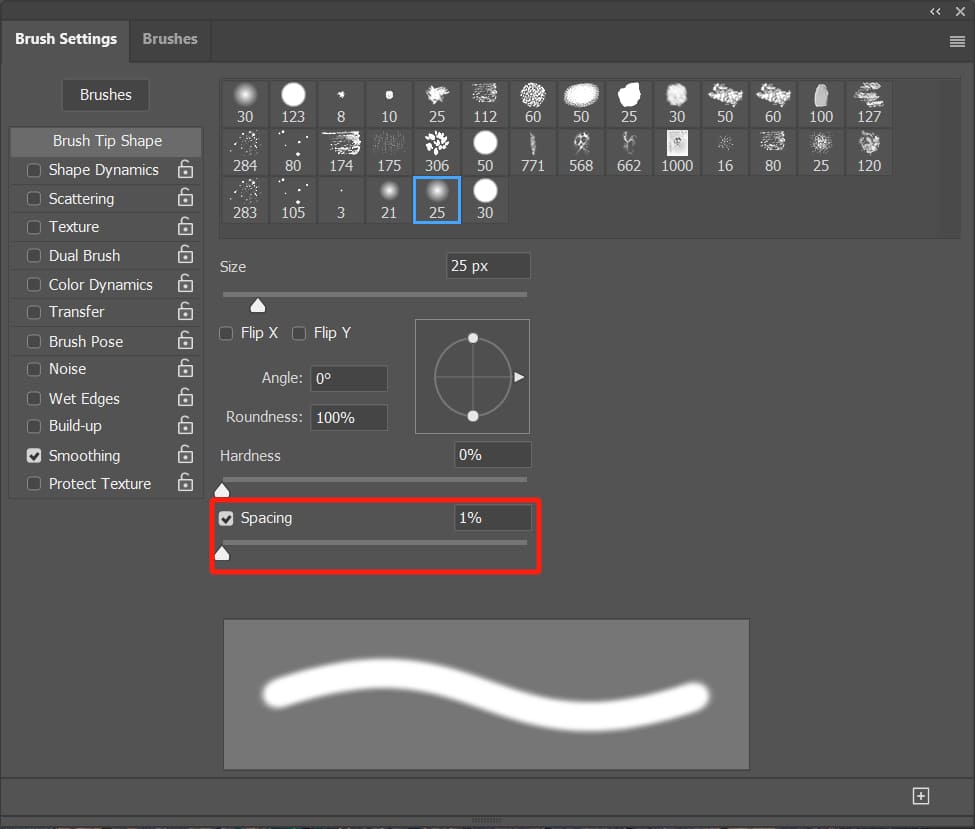
Then, draw three strokes on the canvas based on different variable conditions:
- The first stroke: 50% opacity, 100% flow.
- The second stroke: 100% opacity, 100% flow.
- The third stroke: 100% opacity, 50% flow.
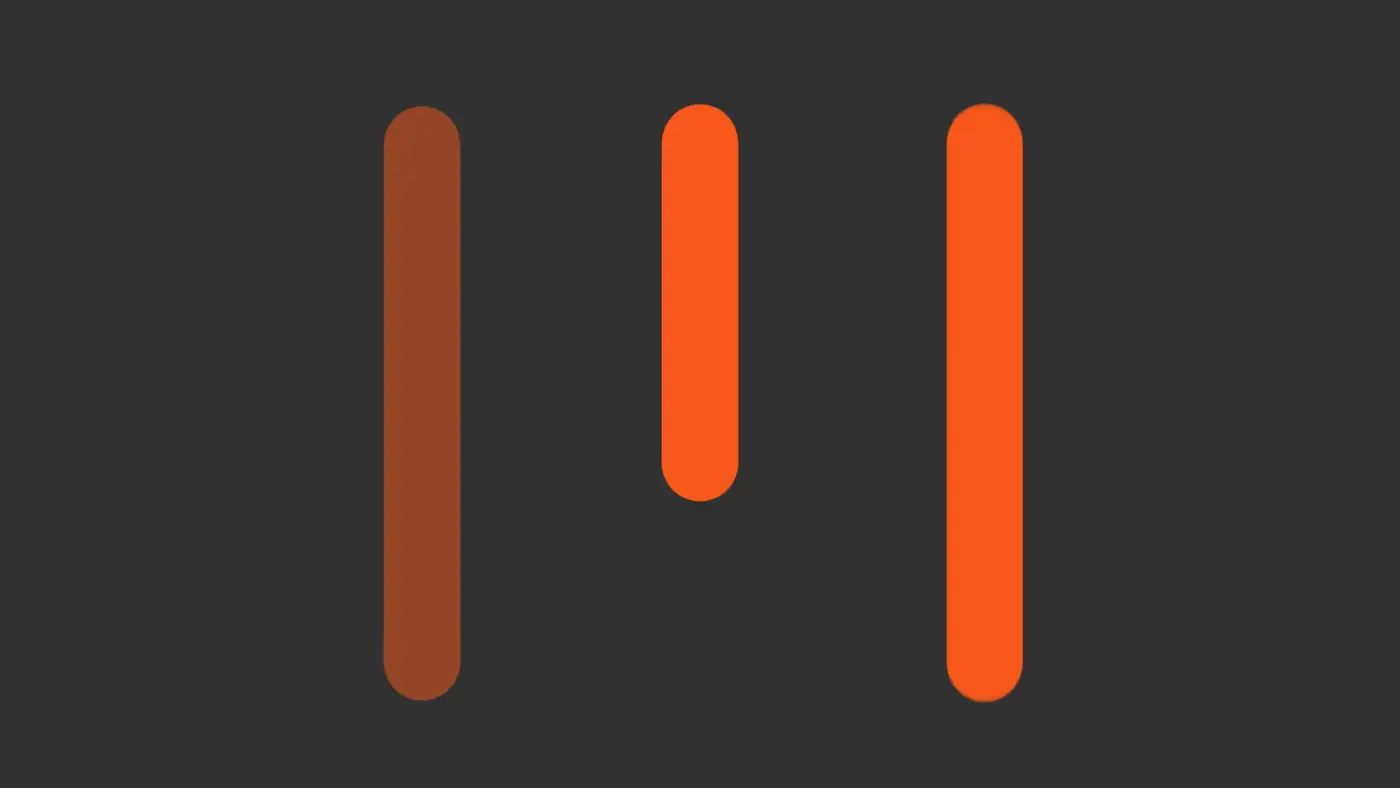
You'll notice in the image above that when opacity remains constant and flow is halved (third stroke), it looks identical to 100% opacity and 100% flow (second stroke).
However, there is a clear distinction between the 50% opacity/100% flow (first stroke) and 100% opacity/50% flow (third stroke) brushes. Yet, this contrast doesn't directly clarify the difference between opacity and flow.
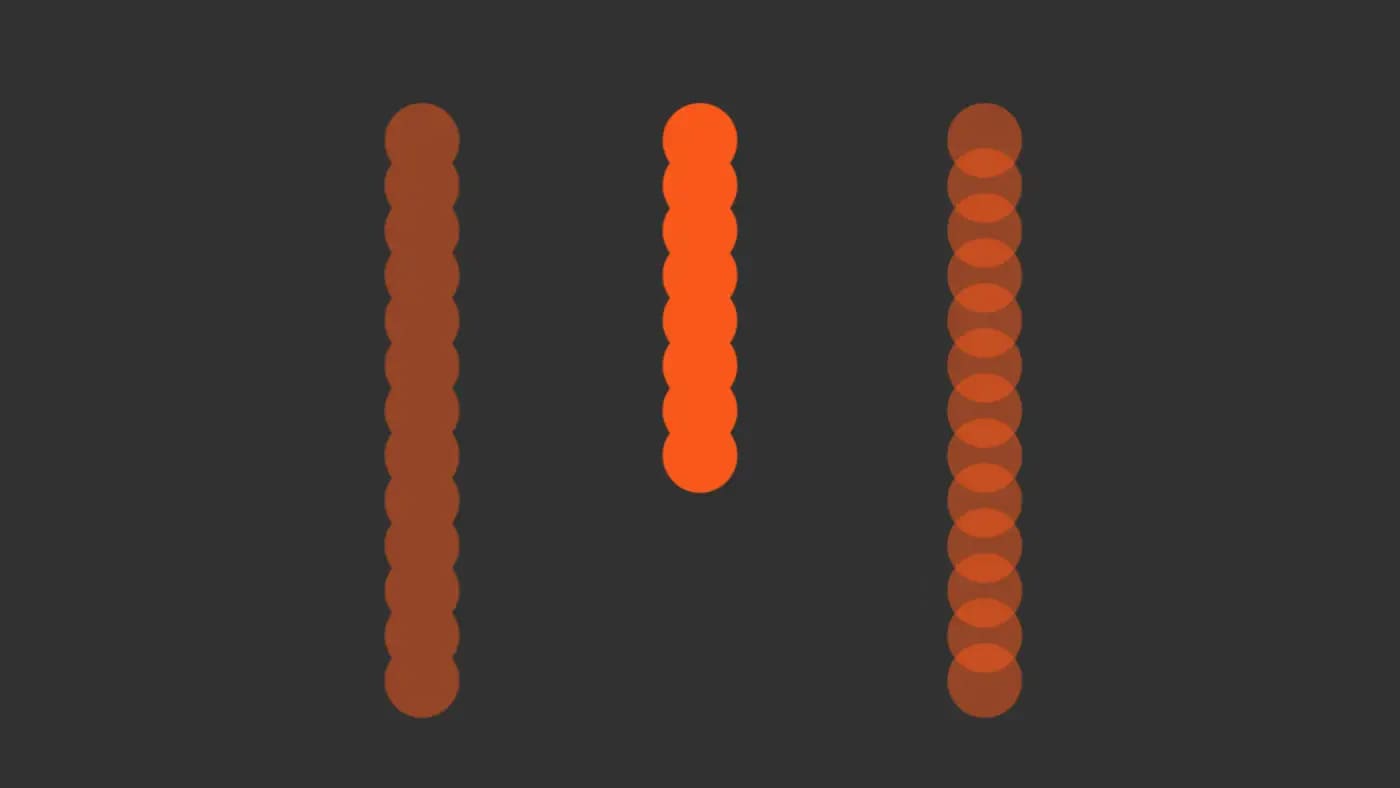
Next, you can adjust the spacing parameter slider in the brush settings panel to 60%.
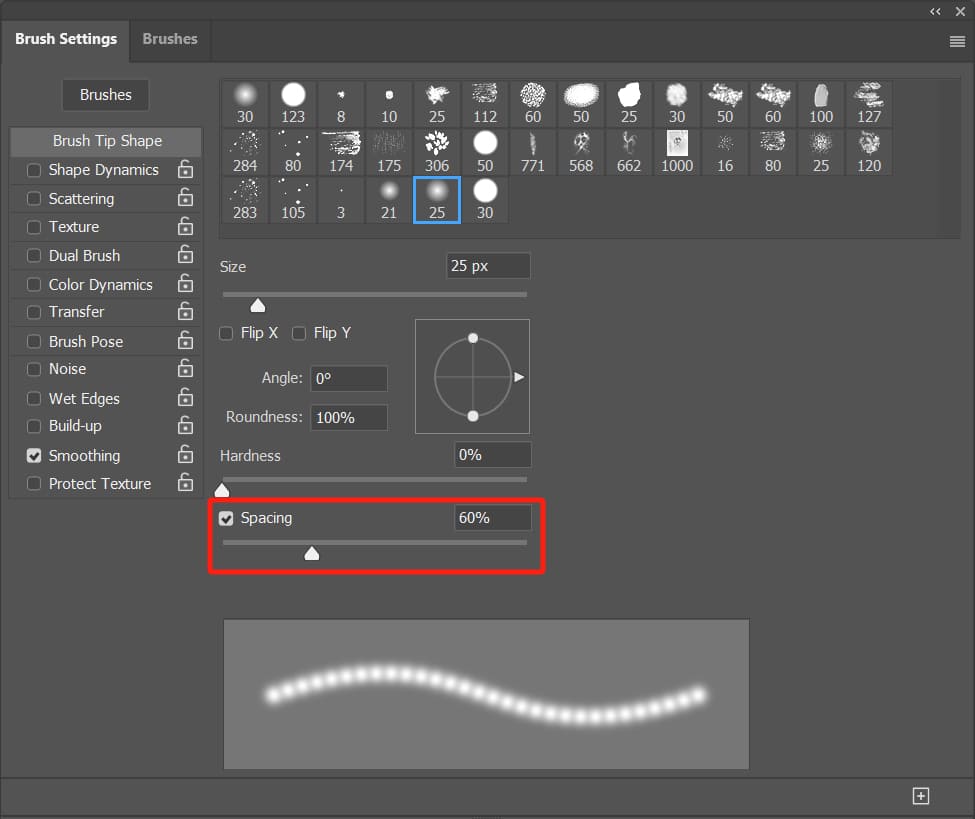
Using the same variables as before, continue to draw three strokes. This time, you'll observe that color overlay occurs when opacity remains constant and flow is halved (third stroke).
Continuing to adjust the brush spacing parameter in the brush settings panel, this time set it to 120%. You will notice that both sides now appear similar, with colors getting lighter compared to the center.
Based on the three tests conducted above, a conclusion can be drawn: flow can stack, while opacity cannot.
What does this mean? It means that if you set the flow to 100% and the opacity to 50%, as long as you keep the mouse/digital pen pressed in the same spot, the opacity will always remain at 50%, never reaching 100% opacity.
However, if you set the opacity to 100% and the flow to 50%, by repeatedly drawing in the same spot without releasing the mouse/digital pen, it will eventually reach the state of 100% flow.
Conclusion on the Differences Between Flow and Opacity
Now, let's revisit the three previous tests:
- In the first test with the brush spacing set to the minimum, even with 50% flow, it's like layering multiple brush strokes with just one stroke, making it appear similar to 100% flow.
- In the second test, with a brush spacing of 60, only some brush strokes overlap, resulting in certain areas noticeably darkening.
- During the third test, with a brush spacing of 120, there is no overlapping of brush strokes at all, giving all colors a 50% appearance.
- Throughout the three tests, opacity remains unaffected by the extent of overlapping brush strokes.
From the conclusions drawn from the three tests mentioned above, it's easy to arrive at the following points:
- Opacity: From the moment you press down and then release the mouse/digital pen, regardless of how you paint, what you create will always match the opacity value you've set.
- Flow: While continuously painting from the moment you press down to the moment you release the mouse/digital pen, even with a flow set as low as 1%, you can achieve the effect of 100% flow through layering.
In essence, flow has a stacking property, while opacity does not.
What If You Set Both Opacity and Flow to 50%?
Even though flow can stack, opacity sets the limit for how much flow can stack, capping it at 50%.
Therefore, no matter how you paint, the maximum stacked flow you can achieve is the opacity value you've set: 50%.
Advanced Techniques for Using the Brush Tool
In digital painting and image editing, you often need to adjust the brush size, opacity/flow settings, angle, and even rotate the canvas or adjust layers to find the perfect angle for fine-tuning details.
However, making these adjustments isn't straightforward. You constantly interrupt your creative flow to tweak brush settings, layers, and canvas properties. This not only lacks efficiency but also disrupts the creative process.
This is where TourBox, a popular creative controller loved by many digital artists, comes in.

TourBox allows you to perform various intricate operations with fewer actions. Without the distraction of cumbersome operations, you can speed up your creative process by 2-3 times!
Further Reading:
TourBox offers presets and built-in functions for multiple software programs, and you can also unleash your creativity with imaginative custom settings.

What's even better is that using TourBox for extended periods won't tire your hands. You're bound to love the positive changes TourBox brings to your creative workflow.
Our discussion on the differences between opacity and flow concludes here. We believe that through these simple tests, you now have a good understanding of what opacity and flow are all about.
If you are interested in TourBox, feel free to check out our photo editing and digital painting pages for more information.