How to Make Flame Text in Photoshop?
Hey there, digital artists and typography enthusiasts! Ever wondered how to set your text on fire—literally? Well, buckle up, because we're about to dive into the sizzling world of creating flame text in Photoshop.
This tutorial is all about turning up the heat on your typography game and learning how to incorporate a flame in text effect that's guaranteed to ignite interest and make your artwork stand out.
This isn't just about adding an effect to your text. It's about transforming your text into a fiery visual feast.
So, ready to light up your Photoshop skills? Let's turn up the heat and get started!

In this article, you will learn:
- Channels in Photoshop: The Foundation of Flame Text Creation
- How to Make Flame Text in Photoshop?
- Further Tips and Tricks for Creating Flames Text in Photoshop
Channels in Photoshop: The Foundation of Flame Text Creation
Before we start playing with fire (metaphorically speaking, of course), we need to lay some groundwork. The first thing we'll tackle in this sizzling Photoshop flame text adventure is the concept of "Channels."
If you're a Photoshop veteran, you've probably dabbled with these before, but for those who are new to the game, let's break it down.
Channels in Photoshop are like the backstage crew of a theatre production—you might not see them in the spotlight, but they're crucial to the final performance.
They work quietly behind the scenes, controlling how colors and selections appear in your image.
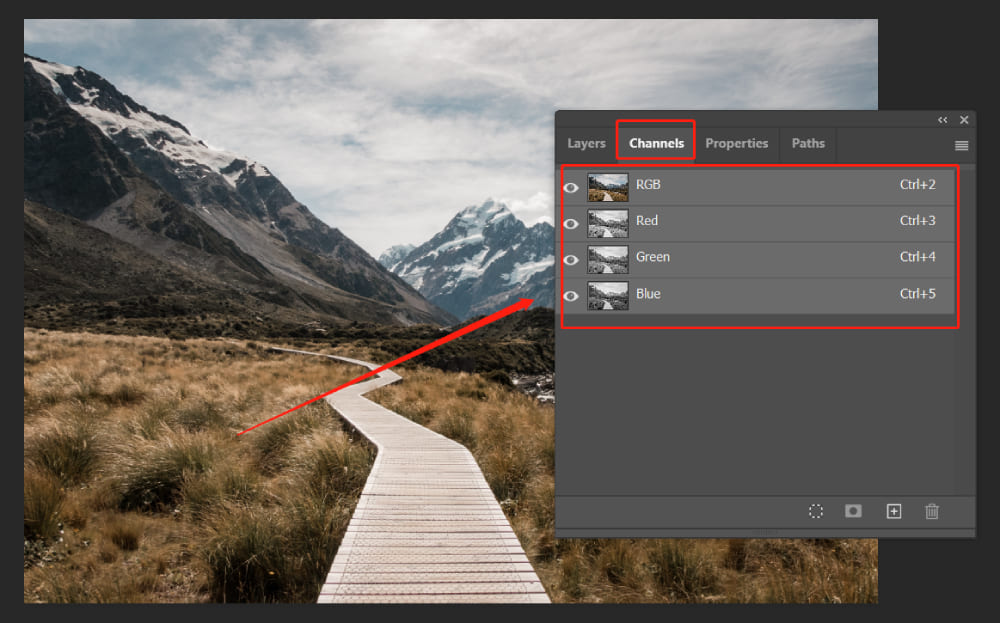
You've probably noticed the Channels panel sitting next to the Layers panel. By default, it shows RGB (Red, Green, Blue) channels, plus a combined RGB channel.
Each of these channels represents a grayscale image of your main image, showing the distribution of the respective color.
Manipulating these channels allows us to control color output, make complex selections, and yes, even create our blazing flame text effect. They're a powerful yet often overlooked tool in the Photoshop toolbox.
So, are you ready to delve into the hidden depths of Photoshop Channels and make a flame-in-text effect? Let's get started!
How to Make Flame Text in Photoshop?
In this section, we'll walk you through the process of creating flame text effects in Photoshop step by step. Let's get started!
Step 1: Open Project and Create a Text Layer
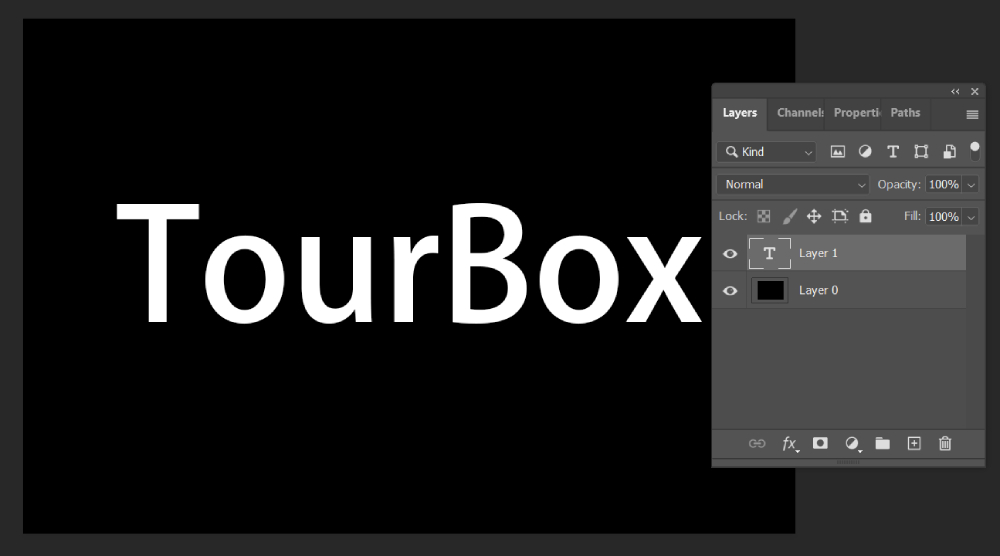
First off, create a new document and set the background color to black.
Next, create a text layer. Set the foreground color to white and type in the text which you want to apply the Photoshop flame composite effect to.
We recommend using a "Serif" typeface, which pairs well with the flame effect, making it more lively. (Note: Here's a website where you can download many fonts for free: dafont)
Step 2: Add Layer Effects and Styles
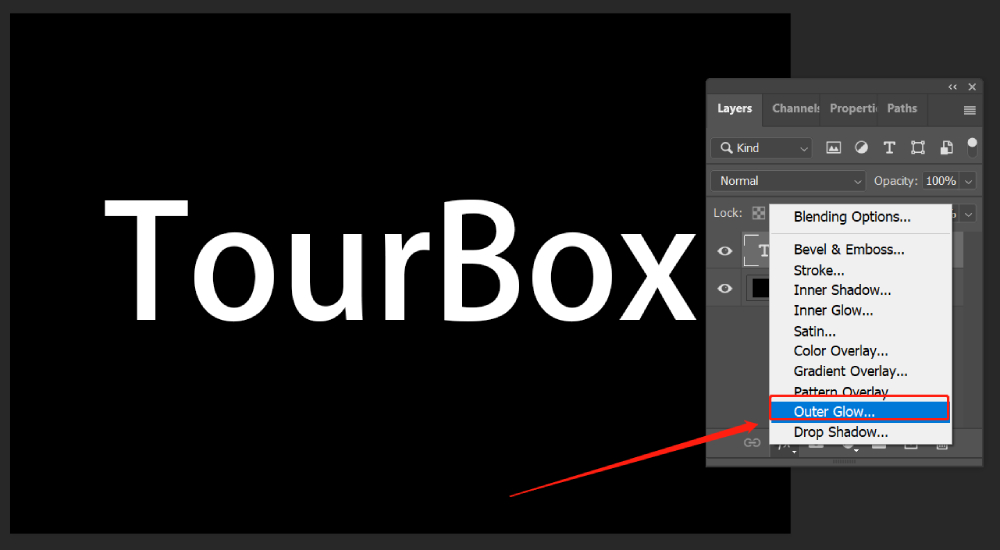
At the bottom of the Layers panel, locate the "fx" icon for "Add a layer style." Click on it and let's start with the "Outer Glow" effect in layer styles.
There are a few settings on the panel. Please refer to the image below and make the following changes:
- Choose the "Color Dodge" blending mode.
- Set the Opacity to 80.
- Select red for the color (Color code #f70300).
- Set the Size in the Elements area to 10 pixels.
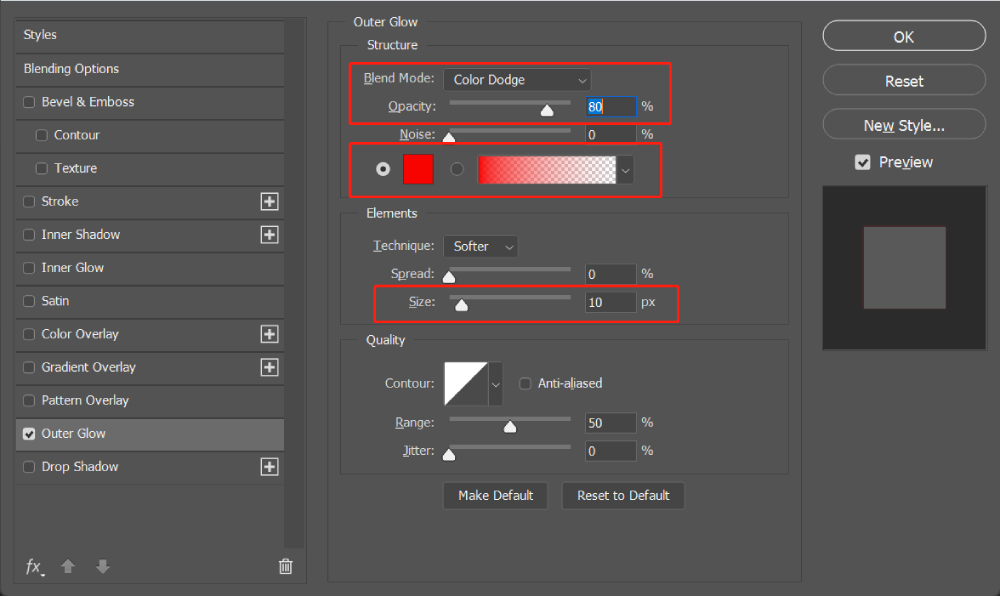
Once you've made these changes, your text should look like the image below. Although we're using the "Outer Glow" effect, what we're actually creating here is more akin to a shadow along the outline of the text.
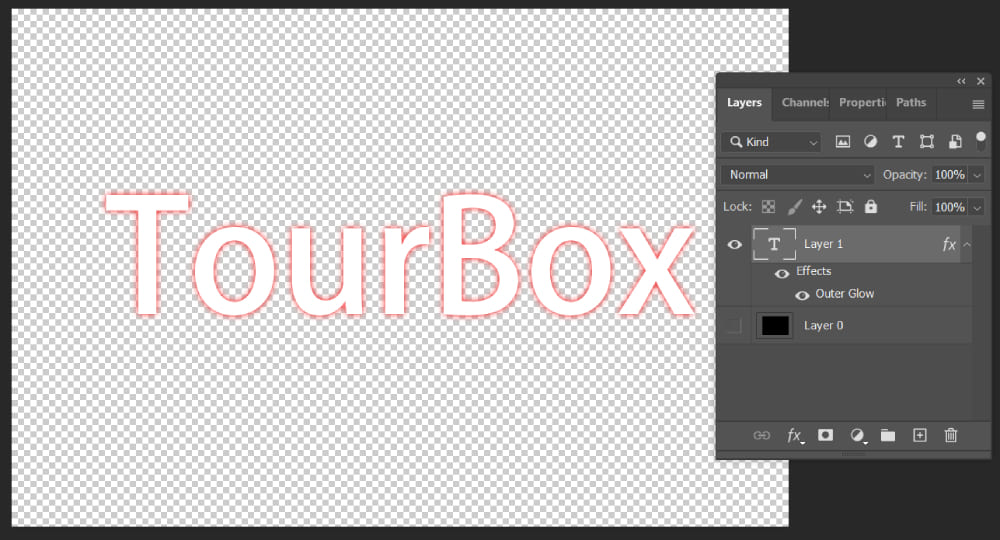
Continuing from the previous step, open the Layer Style panel. Next, we're going to fill in the text using the "Satin" effect.
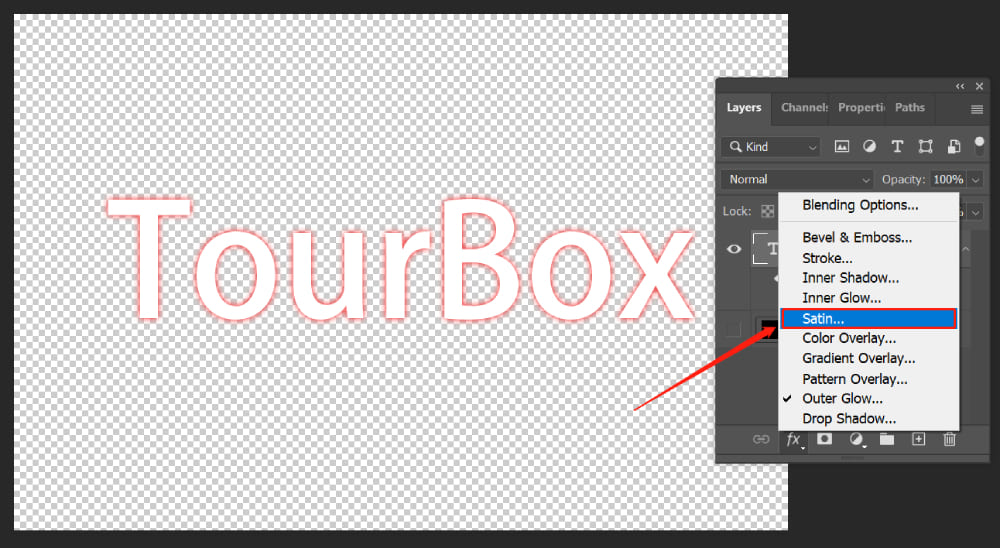
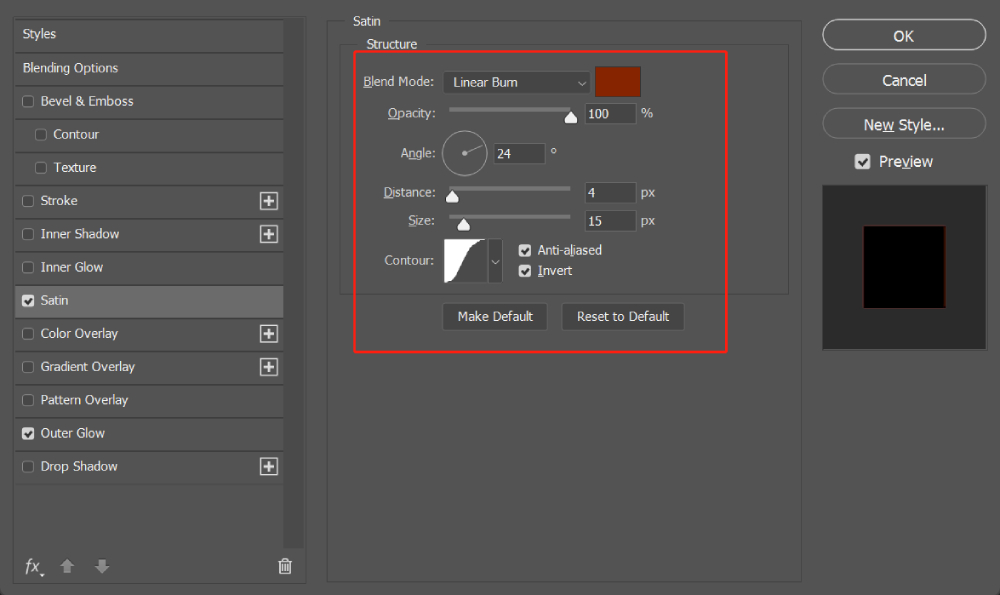
After opening the panel, make the following adjustments:
- Choose the "Linear Burn" blending mode.
- Set the color code to #872400.
- Set the opacity to 100%.
- Set the distance to 4 pixels and the size to 15 pixels. You can also make slight adjustments to these settings, if necessary.
You can refer to the specific parameter settings in the image below. However, these values aren't absolute—you're free to adjust them according to your needs.
Once you've made these changes, your text should look like the image below. Don't worry if the edge of the text reveals a little bit of white.
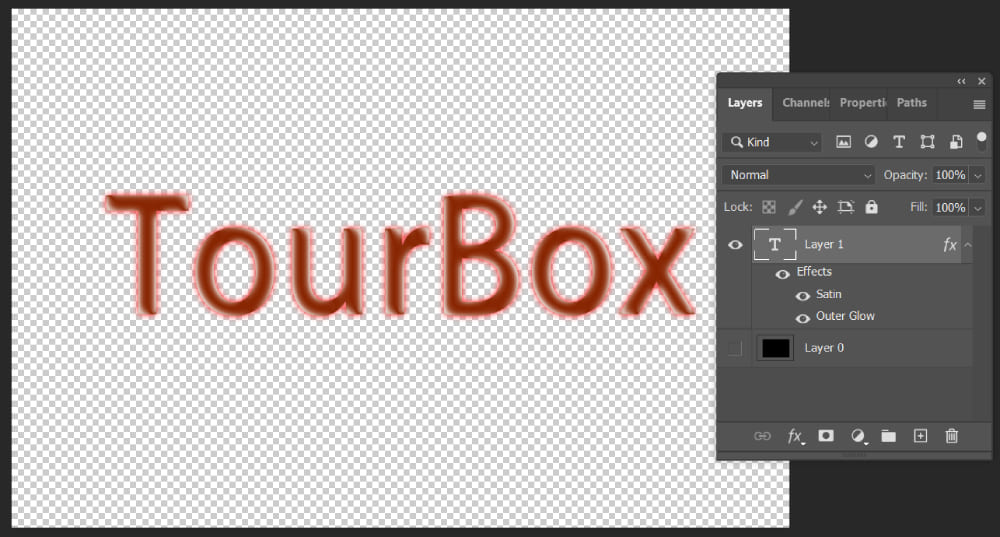
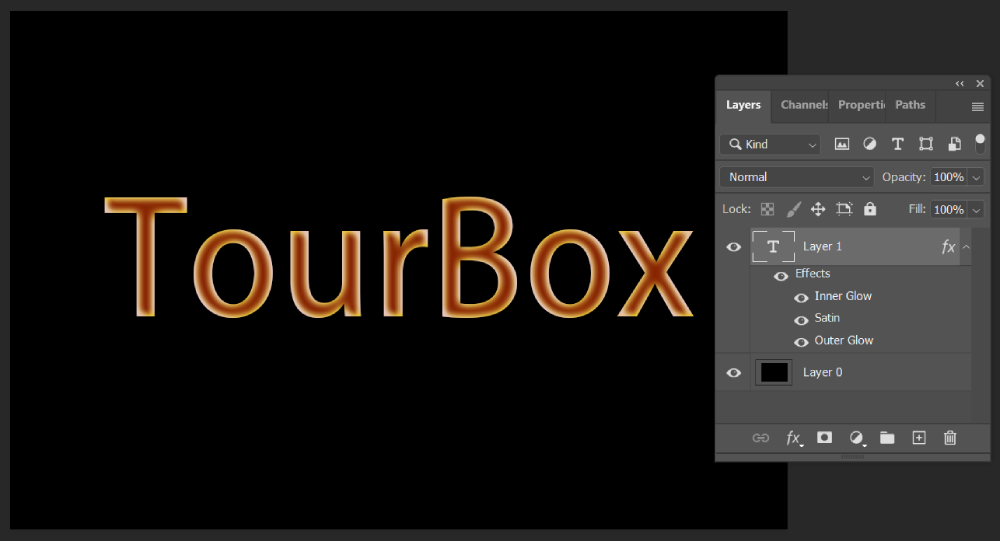
Just like the previous step, after opening the Layer Style panel, we're going to set up the "Inner Glow" to give the text a fiery, bright-edge effect.
Once you've opened the panel, make the following adjustments:
- Choose the "Lighten" blending mode.
- Adjust the opacity to 100%.
- Set the color code to #e5c040.
The rest of the settings can generally be left at their default values. However, feel free to adjust them according to your specific project needs.
After completing the above three steps of adjusting the layer styles, the basic structure of your flames text is essentially complete.
Step 3: Use the Smudge Tool
To give the font a more realistic, burning appearance, let's create a bit of a textured effect.
First, select the "Smudge Tool" from the toolbox on the left. At this point, you'll receive a prompt to rasterize the text before you can continue. Please confirm.
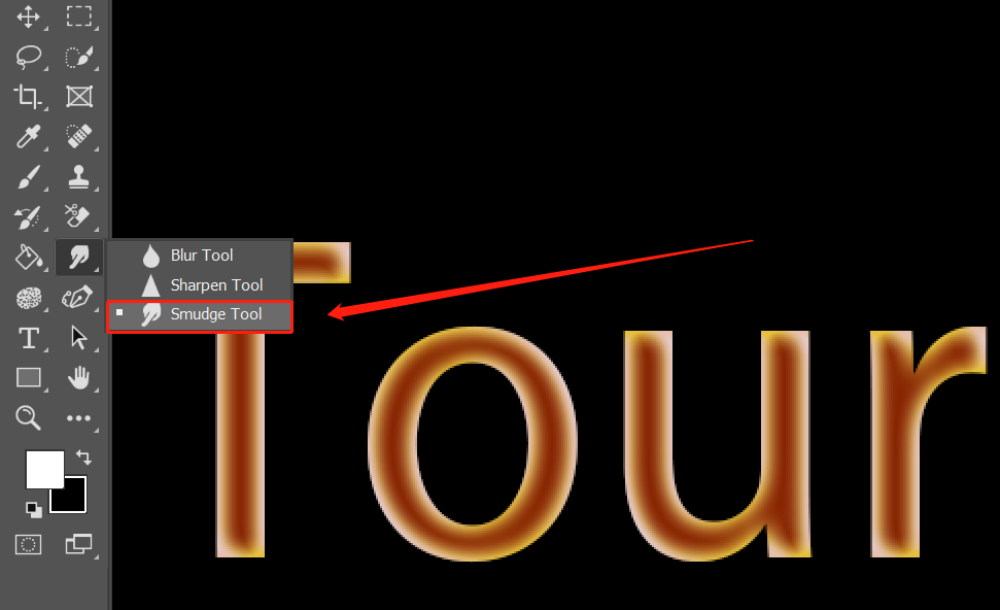
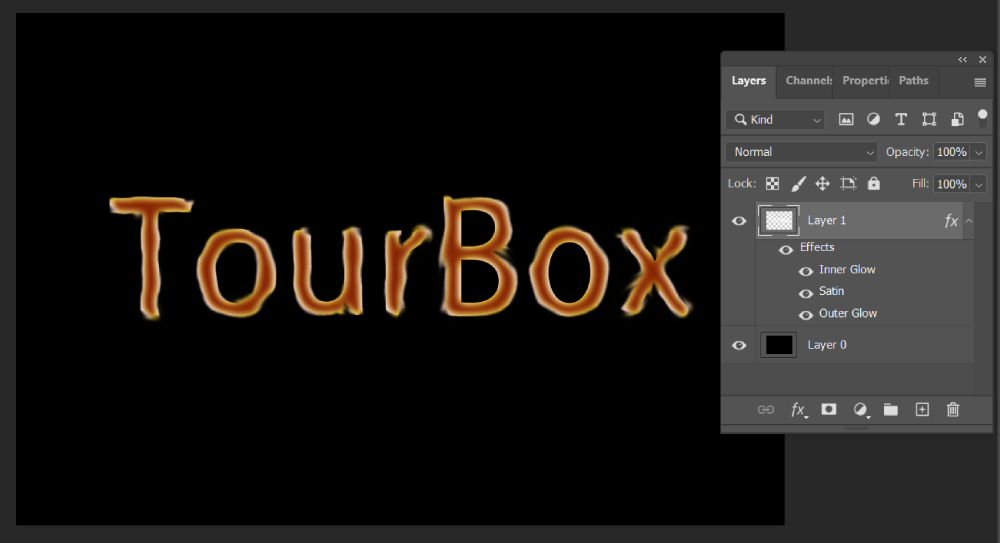
Just as if you were drawing with your finger, create a bit of disorder along the edge of the font to break up the original neatness.
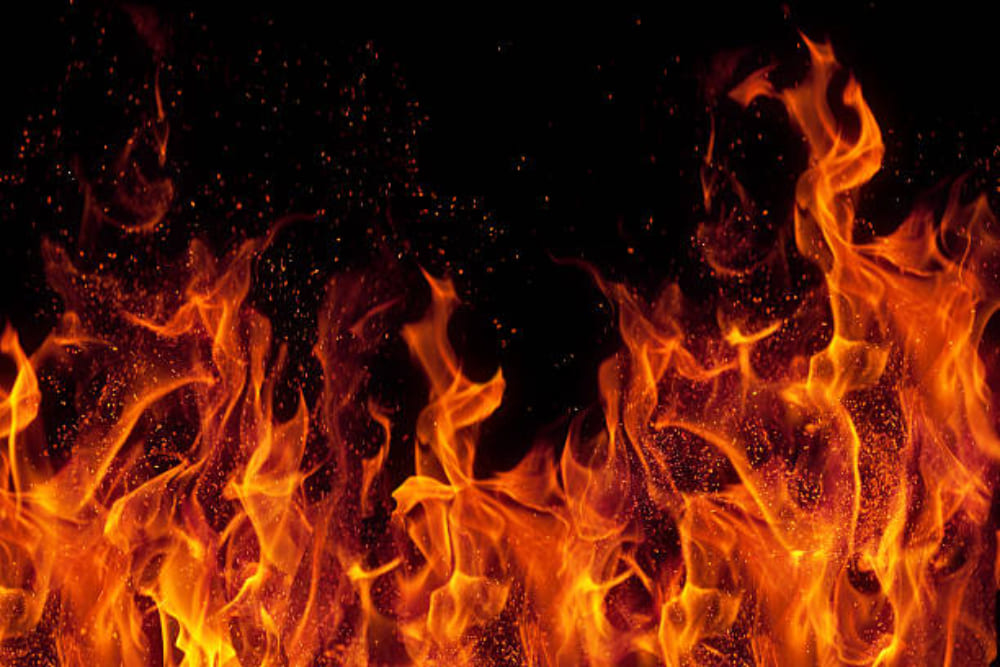
Step 4: Use Channels to Extract the Fire Flame
If you currently have a fire-themed image at hand, feel free to use that. If not, don't worry. You can go to Google Images, search for, and download suitable flame-related images.
Suggestion: Use keywords like "fire flame" for your search and opt for images with a black background. You can refer to the image we selected below as an example.
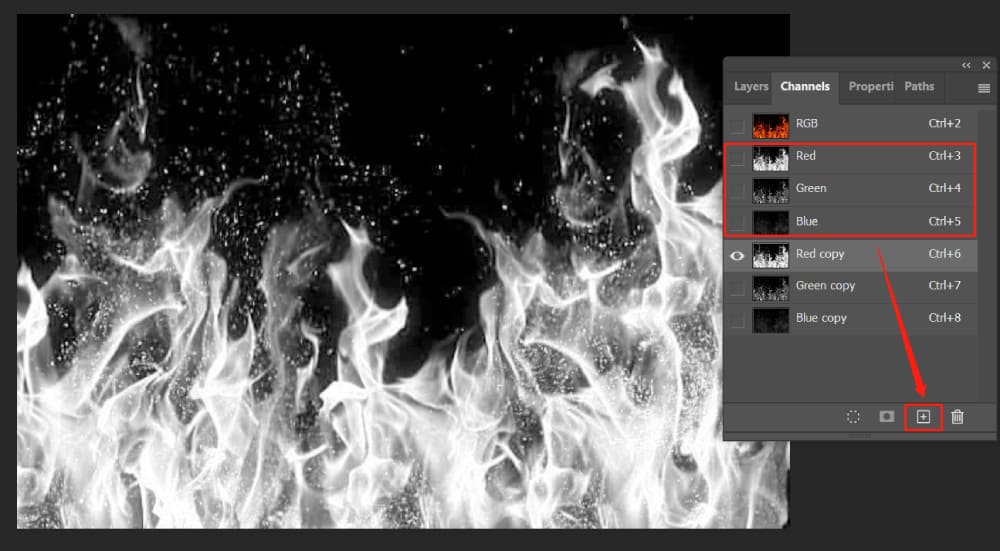
We import the image into our Photoshop project and navigate to the "Channels" panel. Select the Red, Green, and Blue channels individually, and drag each to the "Create new channel" button at the bottom of the Channels panel to create copies of each channel.
See the image below for reference:
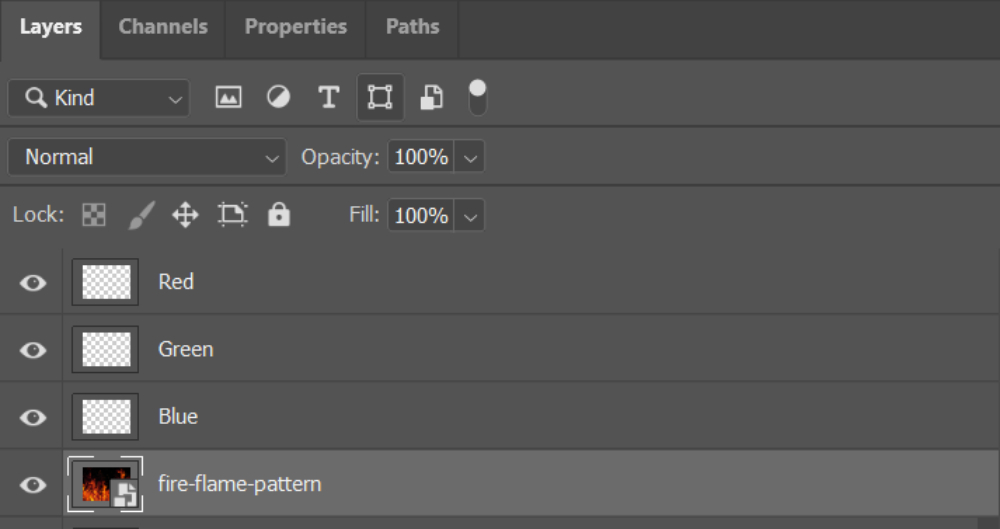
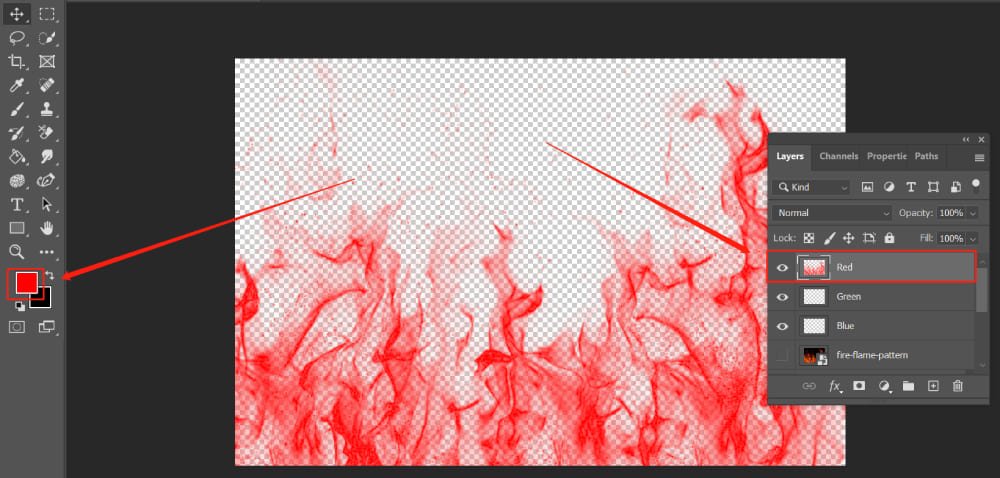
Return to the Layers panel and create three new layers. Rename each of these layers as "Red", "Green", and "Blue", as shown in the image.
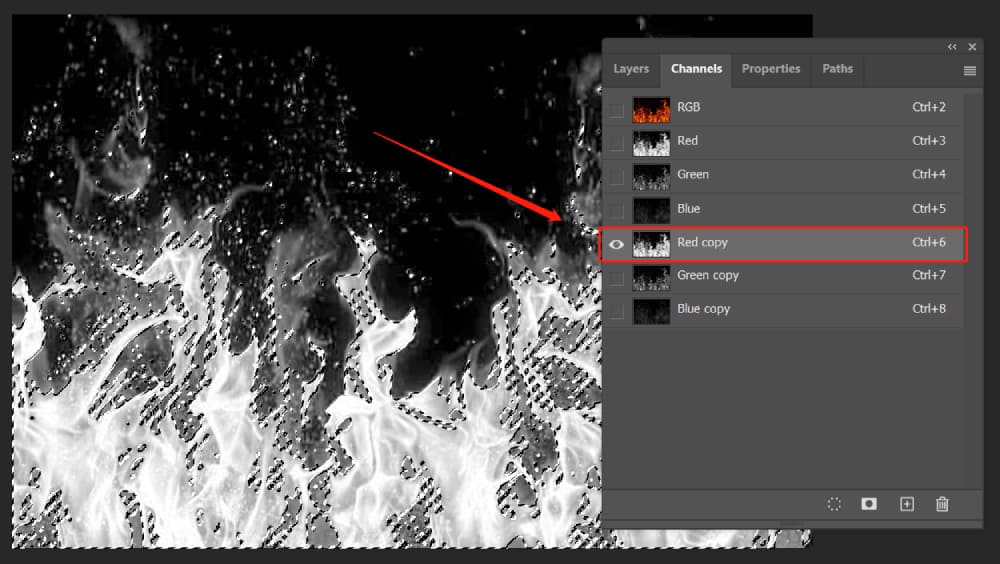
Return to the Channels panel, hold down the Ctrl key and single-click the thumbnail of the "Red copy" channel to obtain the red channel selection, as shown in the image:
Now, switch back to the Layers panel and select the "Red" layer. Then click on the Foreground Color icon to bring up the Color Picker dialog box. Change the R value to 255 and both the G and B values to 0.
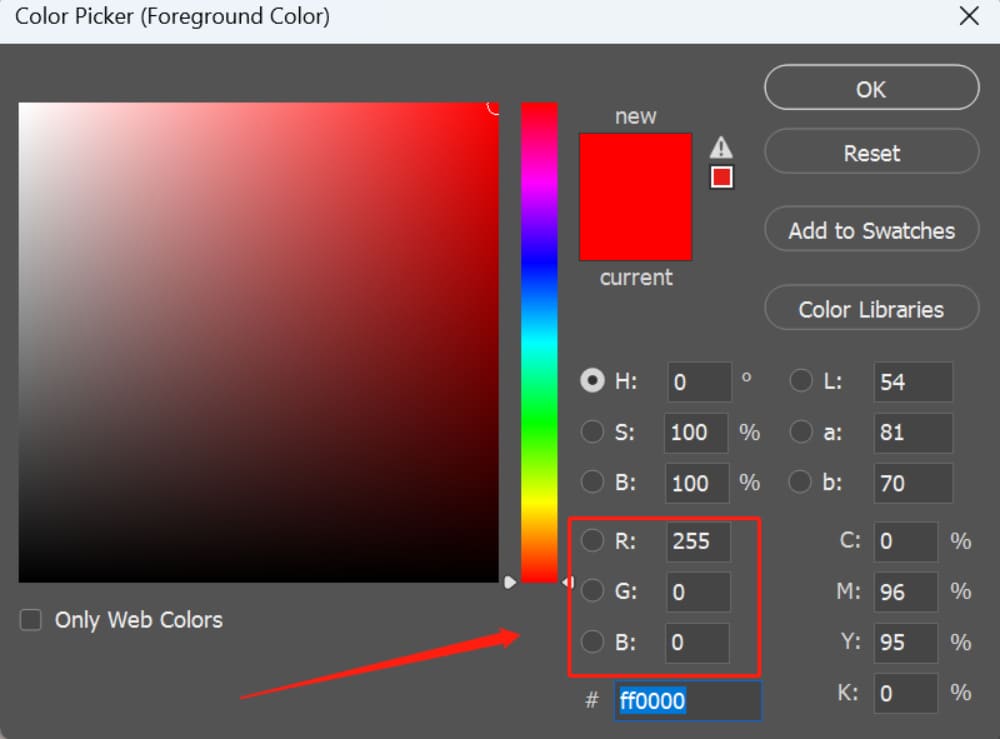
Next, press the Alt+Delete keys to fill the "Red" layer with the foreground color. Use Ctrl+D to deselect. Please refer to the image below for specifics.
We continue by returning to the Channels panel, selecting the Green and Blue copy channels, and filling the "Green" and "Blue" layers following the same steps as above.
Important Tip:
For the green channel information, we need to fill it with green (RGB values as 0,255,0). For the blue channel information, we need to fill it with blue (RGB values as 0,0,255).
At this point, using Photoshop's channels, we've successfully extracted the RGB color information of the flame pattern.
Hide or delete the initial flame pattern. Then, apply the Screen blending mode to both the "Red" and "Green" layers. There's no need to select a blending mode for the "Blue" layer.
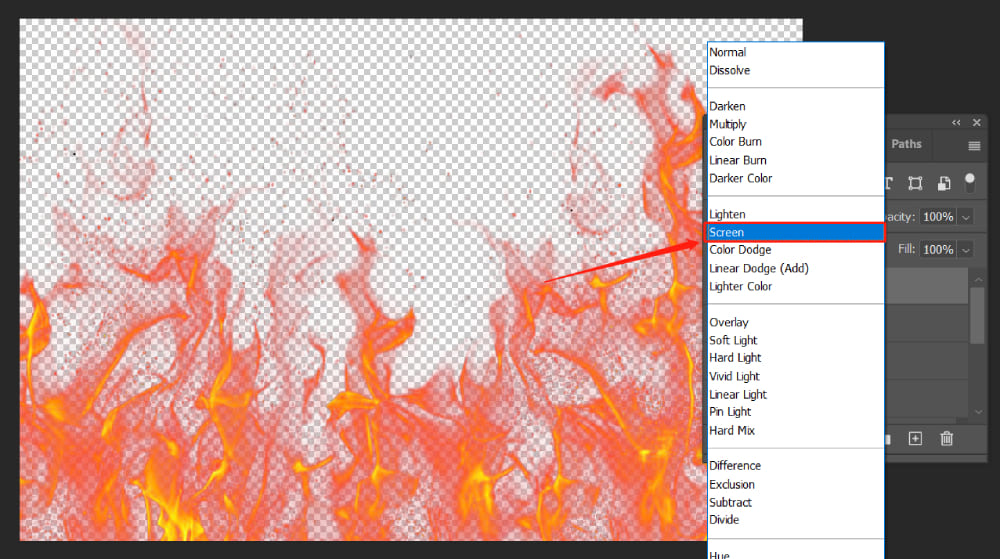
Merge the three layers, as shown in the image. As you can see, we've successfully used Photoshop's channels to extract the flame.
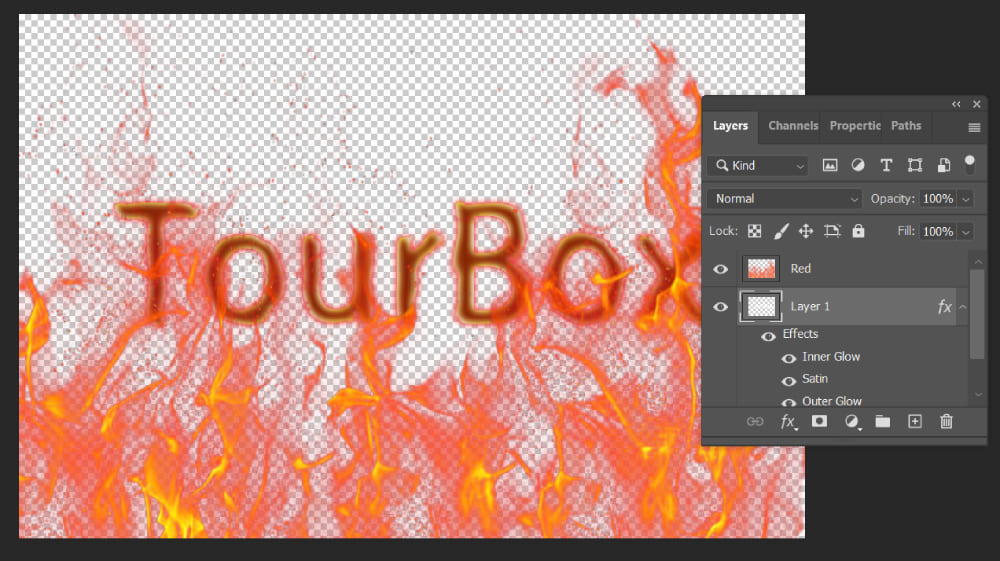
Step 5: Combine Text and Flame
Now, let's proceed to the post-processing stage where we combine the text and the flame!
First, use the "Free Transform" tool (Ctrl + T) to scale the flame layer that we've already removed the background from, to an appropriate size. And move it to the appropriate position.
Optional Step:
At this point, right-click and you can further use the "Transform" function for more precise and detailed position adjustments. Use the grid's push and pull to adjust the direction and curvature of the flame to match the shape of the text. Continue until you are satisfied with the result.
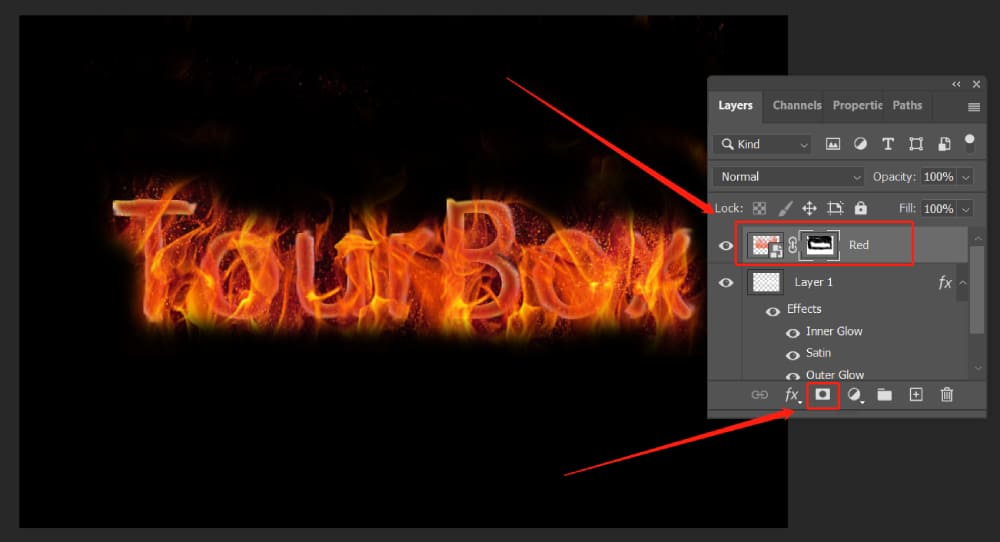
Once you've determined the size and shape of the flame, add a new layer mask to this flame layer.
Use the Brush Tool with black color, and utilizing the layer mask's property of "hiding black and revealing white," brush over and mask out the unnecessary excess parts of the flame that we don't need.
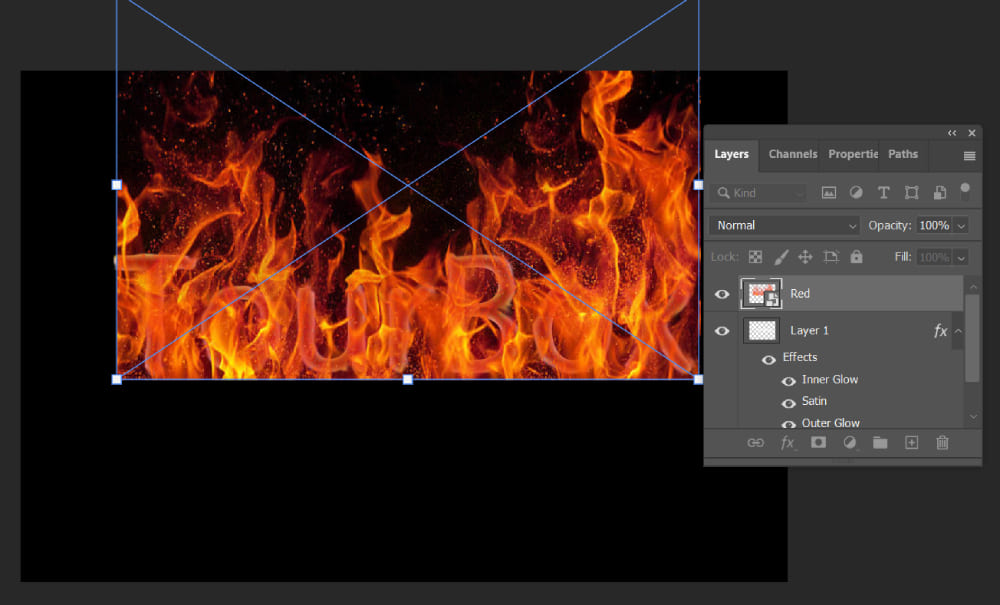
At this point, we have initially completed a text that appears to be on fire.
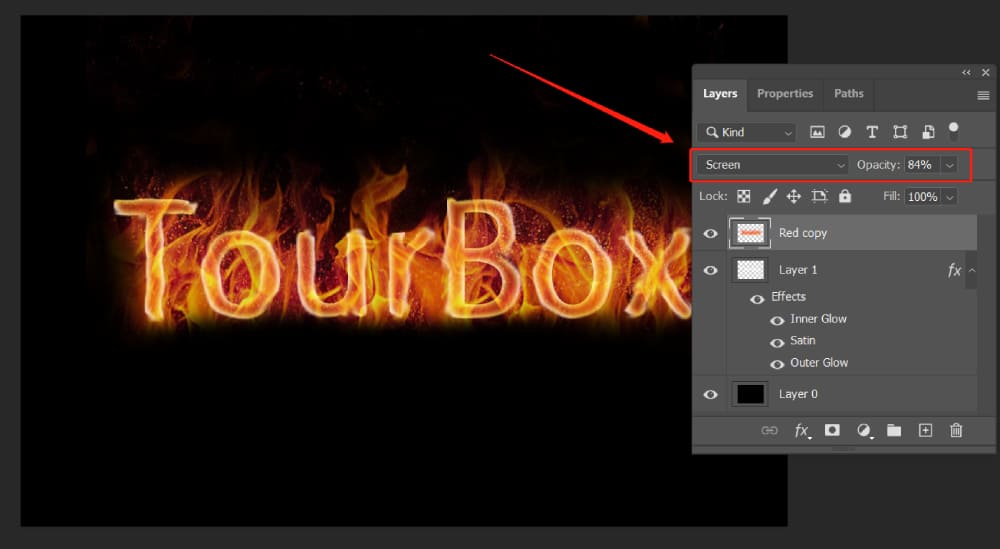
We can repeat the above steps, applying several different styles of flame layers to add some light and shadow as well as detailed parts, making the image appear more enriched.
Then, merge all the flame layers together, use the "Screen" blending mode, and reduce the opacity to integrate the layers.
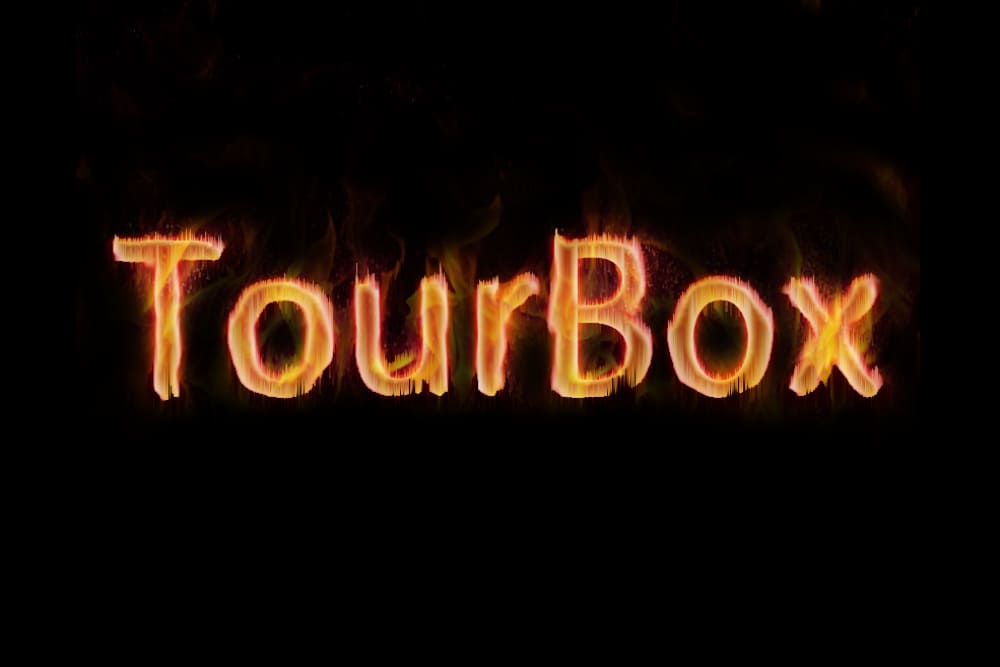
With this, our Photoshop flame text composition is complete!
Further Tips and Tricks for Creating Flames Text in Photoshop
As we near the end of this tutorial on creating flame text in Photoshop, we would like to share a few additional tips and tricks related to our topic.
- One such technique involves making ample use of the features of layer masks to modify the scope of the flame layers.
- Another involves using Photoshop's filters to create some weathering effects (Filter > Stylize > Wind ) on your text, further enhancing the fiery appearance.
Let's take a look at our further refined text effect.
Experiment with these techniques to add a personal touch to your designs and really make them your own!
Before we wrap up, we would like to bring to your attention a great tool that can significantly enhance your Photoshop experience: the TourBox.

This console is designed specifically for photographers and graphic designers. Its intuitive and fully customizable layout allows for seamless navigation and manipulation within Photoshop. It’s a game-changer for anyone looking to streamline their editing process.
TourBox allows you to customize its knobs, scrolls, and buttons to fit your personal workflow. You can assign different functions or shortcuts to these controls based on the software you are using.
Its compact design makes it easy to carry, making it a good option for digital creators on the go.
Remember, the key to mastering Photoshop is practice and exploration, so don't be afraid to try out new things and push the boundaries of what you can create. Happy editing!