Photoshop Frequency Separation: How to Achieve Perfect Portrait Skin?
In portrait photography post-processing, skin retouching is a common technique. In this realm, "Frequency Separation" in Photoshop stands out as a highly effective method.
Unlike simple blur filters like "Surface Blur," Frequency Separation allows for more precise photo editing, enabling you to achieve the desired results with finesse.
So, how do you go about using Frequency Separation in Photoshop?

In this article, you will learn:
- What Is Photoshop Frequency Separation?
- How to Use Frequency Separation in Photoshop?
- How to Create a Frequency Separation Action in Photoshop?
- How to Proceed with Further Refinements?
- Final Thoughts About Photoshop Frequency Separation
What Is Photoshop Frequency Separation?
In simple terms, an image can be divided into high and low frequencies:
- High-frequency information includes details, such as skin textures, hair, scars, etc. You should grasp this concept easily if you've used Photoshop's High Pass Filter.
- On the other hand, low-frequency information comprises broad areas of color, tones, etc.
In Photoshop, you can separate and edit these aspects using Frequency Separation. This allows you to enhance skin texture without affecting tones and adjust skin color without impacting texture.
Compared to other editing tools or filters in Photoshop, this method offers finer control in portrait editing.
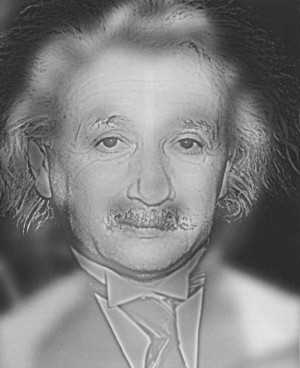
In essence, the photo below is a blend of high and low-frequency images.
An interesting aspect is that if you sit close to the computer, you see Einstein, but from afar, you see someone else. Give it a try.
How to Use Frequency Separation in Photoshop?
To begin, open Photoshop and import the portrait photo you want to enhance using Frequency Separation.
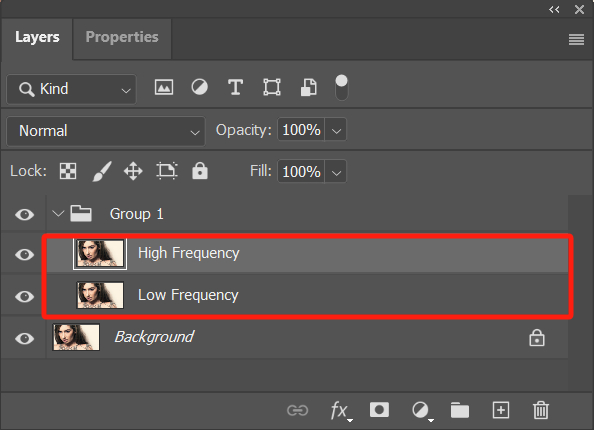
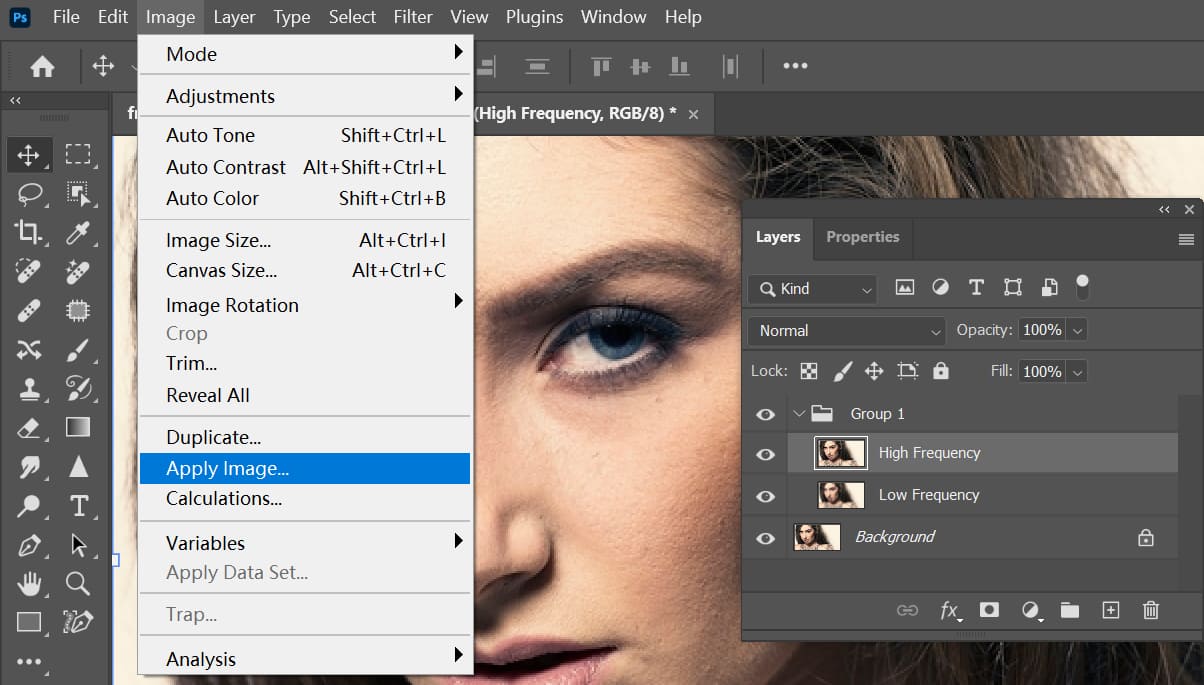
Switch to the Layers panel, create a new group, and duplicate the photo layer twice. Rename them as "High Frequency" and "Low Frequency" respectively.
As shown in the image below, this setup will facilitate your detailed and skin tone adjustments moving forward.
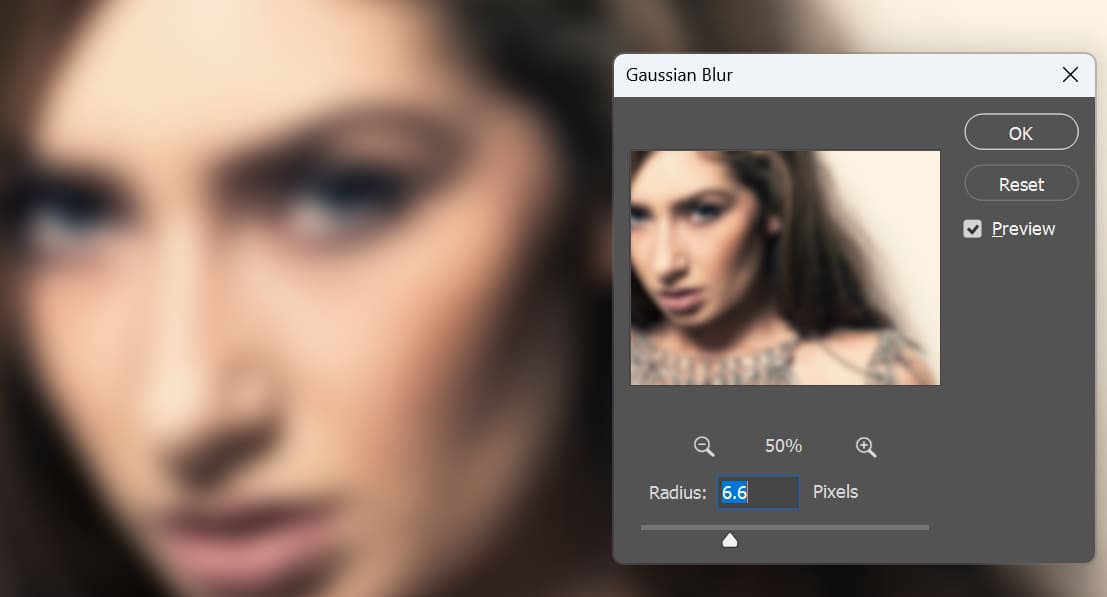
First, temporarily set the High Frequency layer to invisible, then select the Low Frequency layer. In Photoshop's top menu bar, click on Filter -> Blur -> Gaussian Blur.
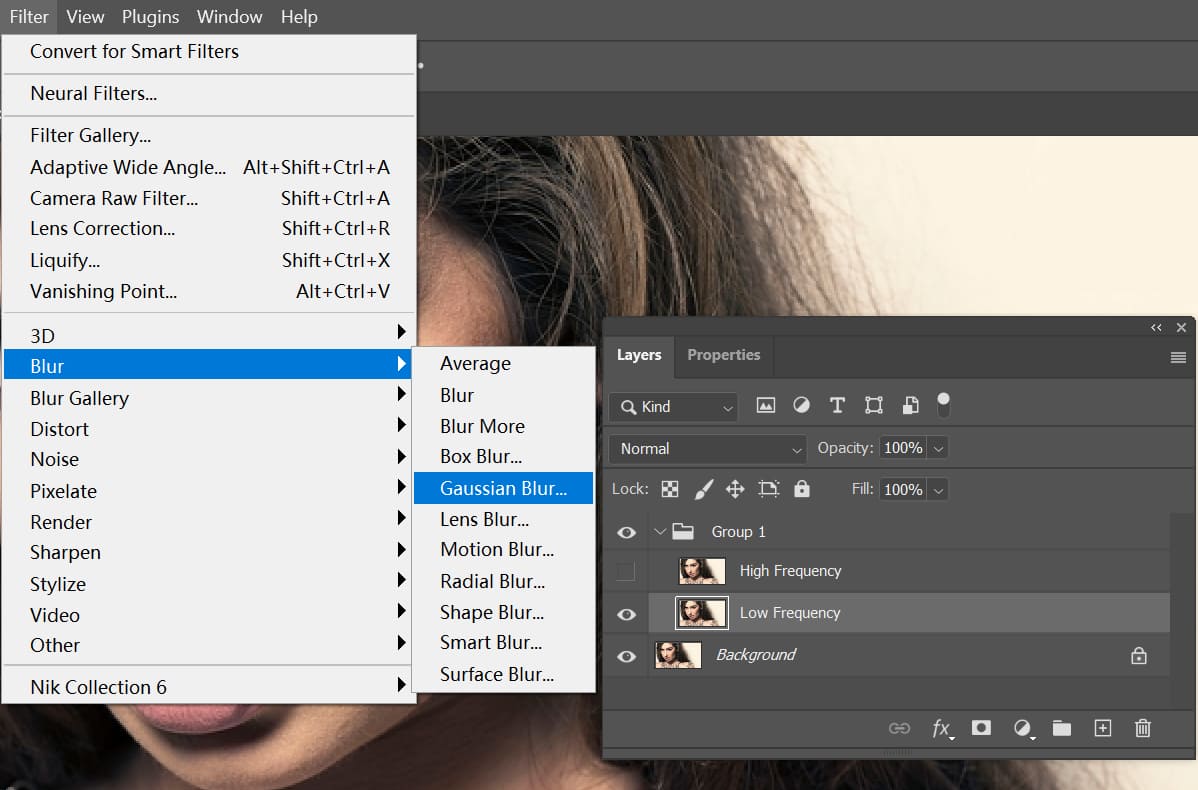
In the Gaussian Blur panel, you'll see a Radius adjustment slider. The Radius value isn't set in stone and depends on the photo. Generally, aim for just enough blur to make the photo texture indiscernible.
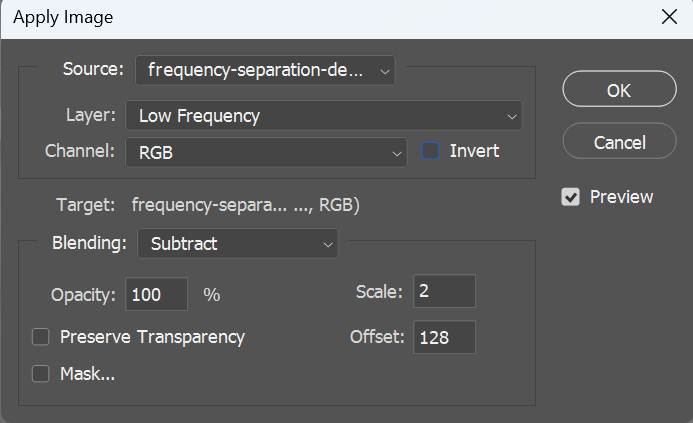
Next, go back to the Layers panel, this time select the High Frequency layer and make it visible again. Then, click on Image -> Apply Image in the top menu bar.
In Photoshop, the "Apply Image" function is used to apply the pixels of one layer to another layer. It is handy for complex image compositing and adjustments. Here are some key points:
- In the Layer option, choose the Low Frequency layer.
- For the Blending Mode option, if the image's bit depth is 8-bit, select Subtract and do not check Invert. But if it's 16-bit, choose Add and ensure Invert is unchecked.
- Set the Scale option to 2 and the Offset to 128.
After completing these steps, the High Frequency layer will resemble the effect of using a High Pass Filter.
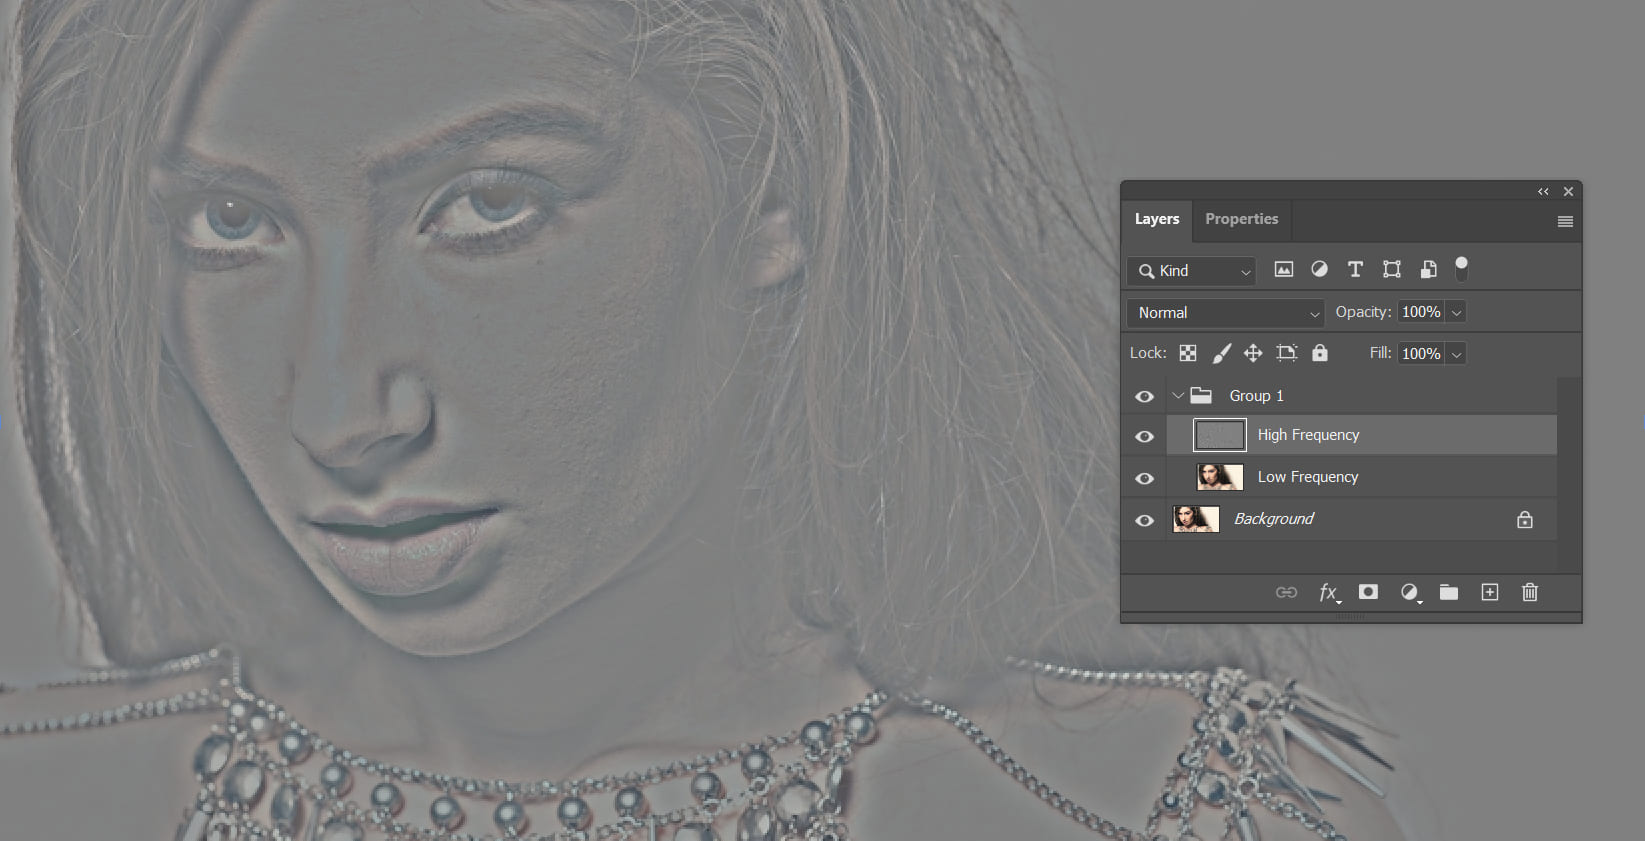
Now, change the Blending Mode of the High Frequency layer to Linear Light to revert it back to its original appearance.

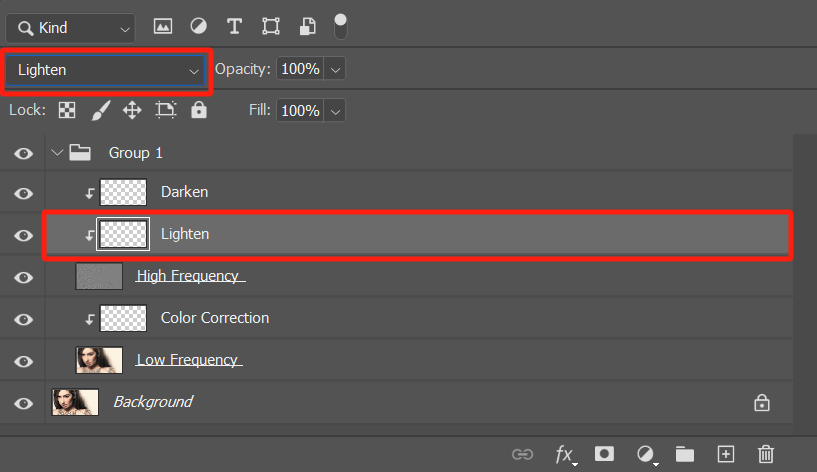
Next comes the crucial step of creating two blank layers above the High Frequency layer and one above the Low Frequency layer.
Then, turn these three blank layers into clipping masks, connecting them to the High Frequency and Low Frequency layers.
As shown in the image, above the High Frequency layer, there are blank layers named Darken and Lighten, with arrows pointing to the High Frequency layer. This signifies that they have become clipping masks, allowing you to make non-destructive edits.
Above the Low Frequency layer, a clipping mask named "Color Correction" has been created.
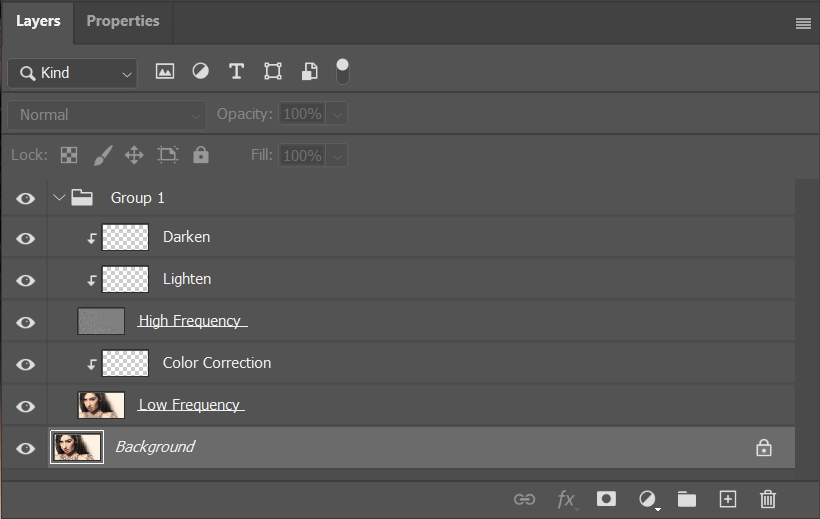
It's crucial to note that the Darken and Lighten clipping masks need to have their Blending Modes set to Darken and Lighten, respectively.
By doing this, you can work on the texture of the light and dark areas in the photo separately using these two layers. This is especially useful when you need to modify skin pores and spots while still preserving the natural texture of the skin.
How to Create a Frequency Separation Action in Photoshop?
By following the steps outlined above, you've actually completed the basic setup for Frequency Separation in Photoshop. Now, you can proceed with further fine-tuning of your photos.
However, have you found the lengthy sequence of steps to be quite cumbersome? When you think about using Frequency Separation again in Photoshop in the future, the idea of repeating all those steps might seem daunting.
At this point, you can simplify everything with Photoshop Actions. This makes the process quick and easy. The next time you need to use Frequency Separation in Photoshop, you can simply run this action.
On the internet, you can find many Frequency Separation actions provided for free by Photoshop experts. Of course, creating your own is also quite straightforward.
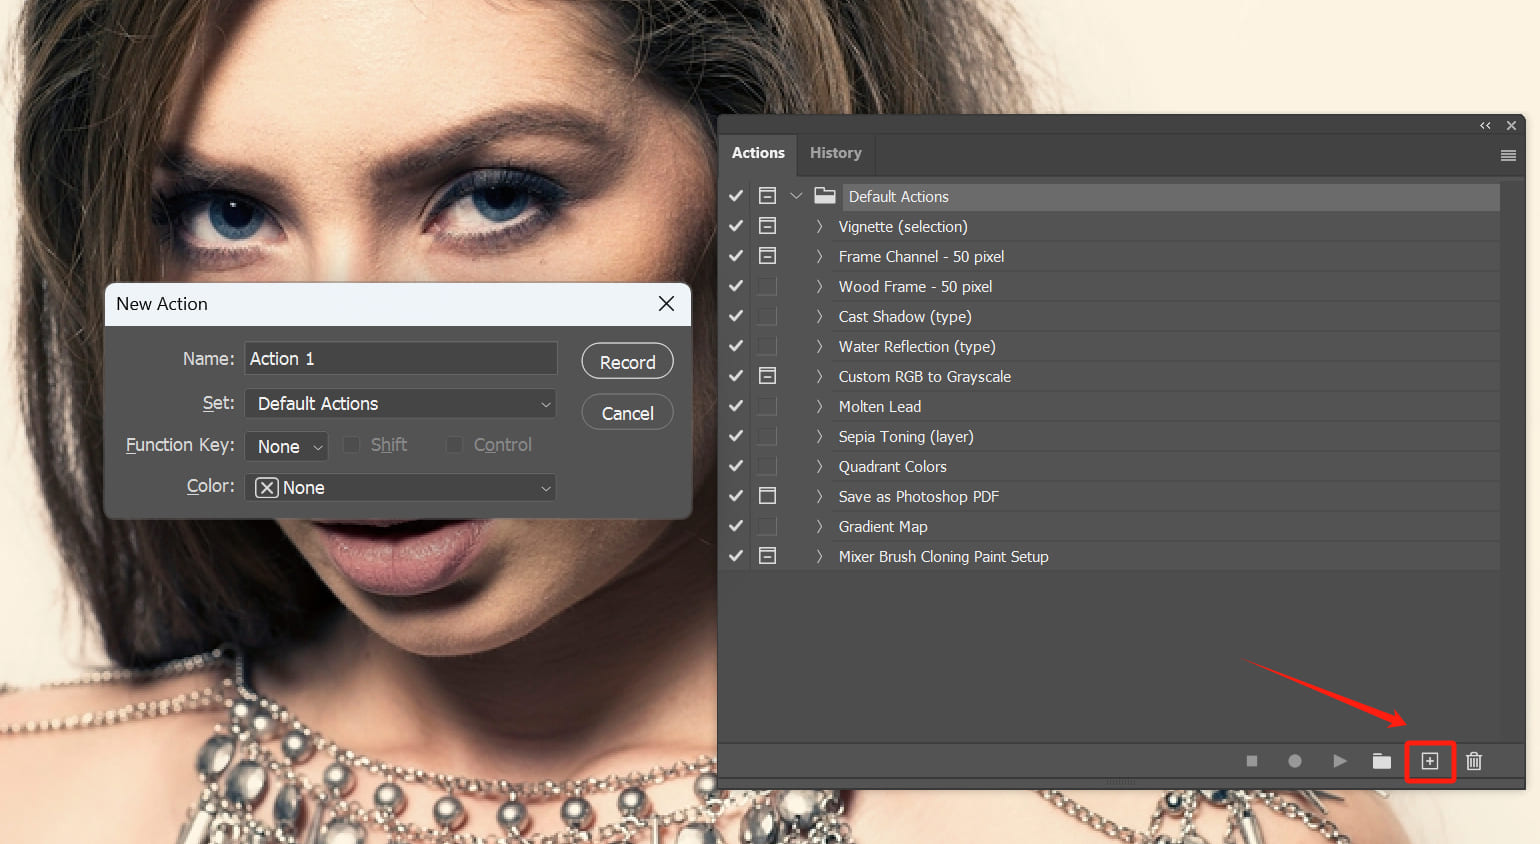
Click on "Window" in the top menu bar of Photoshop to open the "Actions" panel (shortcut: "Alt/Option + F9").
Then, click the "Create New Action" button at the bottom right of the Actions panel, name your new action, and assign a Function Key (Shortcut) if desired.
The process is straightforward. Simply repeat the steps we shared earlier for creating Frequency Separation and record them in the Photoshop action.
Is there a simpler, more efficient method? In that case, you might appreciate the TourBox, a creative controller beloved by many digital artists and photographers.

You can map the Function Key (Shortcut) of the Frequency Separation action to a button on the TourBox. This means that in your next photo editing project, all you need to do is press the TourBox button, and Photoshop will quickly execute the Frequency Separation action.
TourBox also offers a range of customizable settings, allowing you to interact with digital software in limitless ways. What's great is that it provides a gaming controller-like experience, freeing you from the reliance on keyboard shortcuts.
Check out our photo editing page for more information on TourBox.
How to Proceed with Further Refinements?
Once you've completed the basic setup for Frequency Separation in Photoshop, you may notice that there isn't a significant change in the image. This is because you'll need to further refine the photo using tools like brushes.
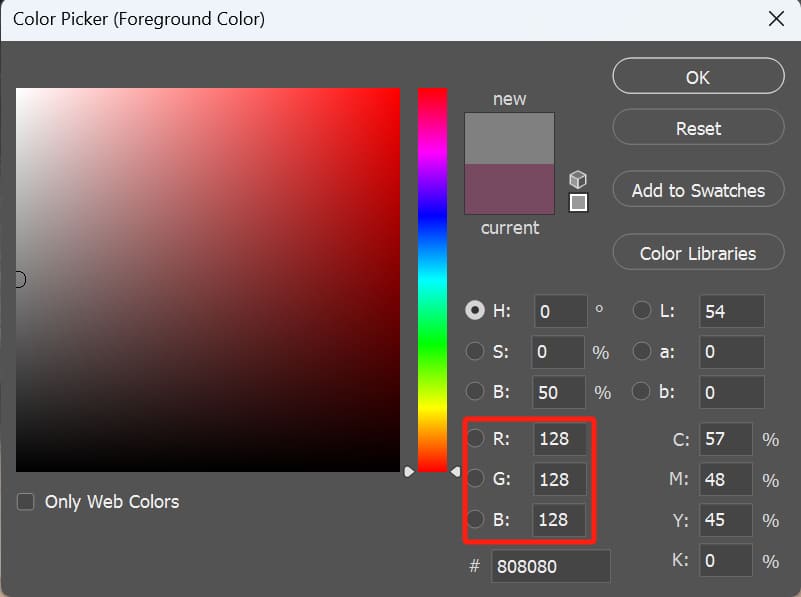
Select the Brush tool from the toolbar on the left. Choose a brush color of gray (specifically RGB(128, 128, 128)).
Further Reading:
Mastering Neutral Gray in Photoshop: Achieving Perfect Control
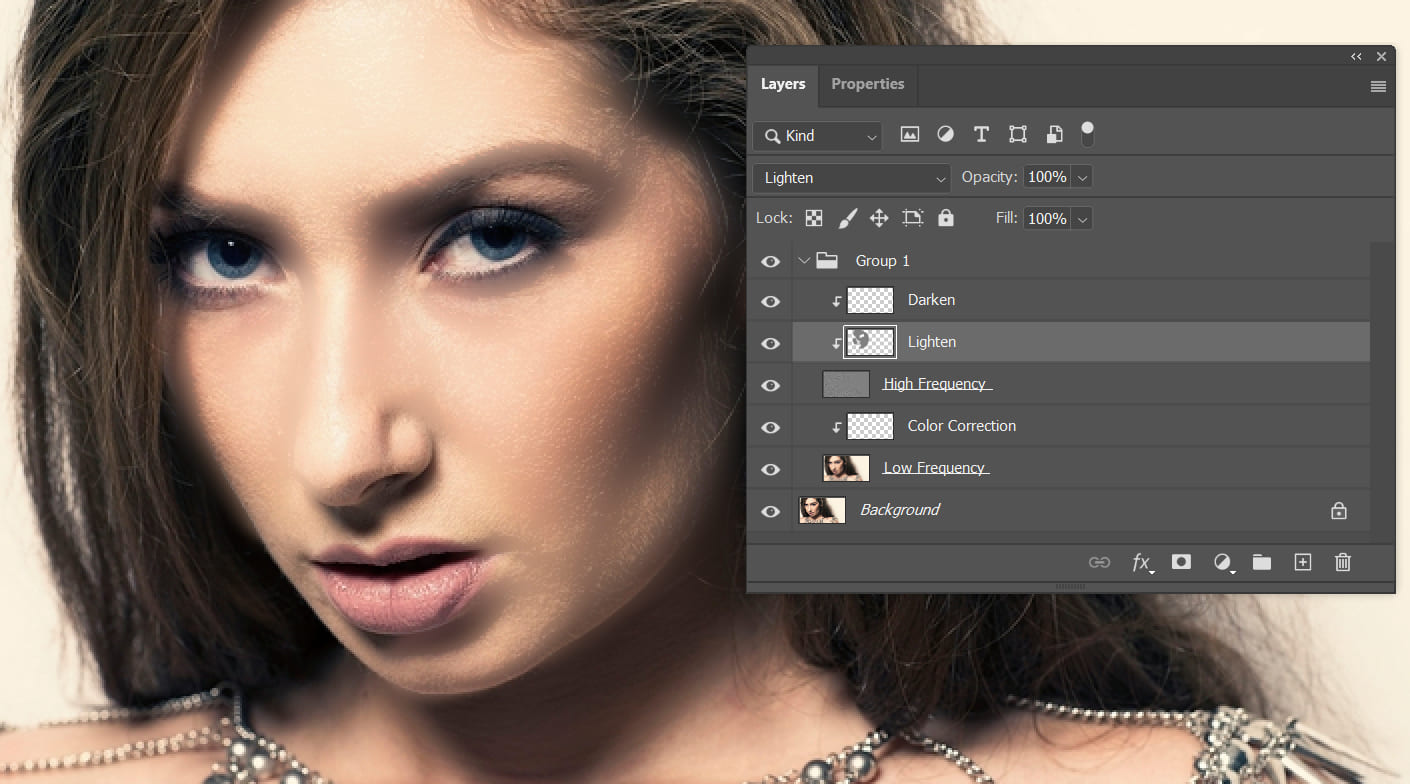
Select the Lighten layer, then use the brush to paint over the entire face (excluding the eyes). Set both the Flow of the brush and the Opacity of the Clipping Mask to 100%.
You can give it a try and observe that all the dark pits and spots on the face have disappeared, leaving only the white facial hair.
Next, switch to the Darken layer and perform the same actions as with the Lighten layer.
If you make the Lighten layer invisible at this point, you will notice that all the white textures and fine hairs vanish, revealing only the black facial blemishes.
The essence of the above process is to use the complementary nature of the two layers to reduce distracting dark spots and pits on the skin while preserving some light textures. This helps avoid making the skin appear overly smooth and artificial.
In practice, adjust the Opacity of the Clipping Masks for Lighten and Darken based on the situation. Usually, the Lighten layer has a higher opacity, but the specific adjustments should be tailored to your photo.
Additionally, when using the brush, you can lower the Flow to prevent excessive blurring in certain areas or make fine adjustments according to your needs.

After you've finished adjusting the high frequencies in your photo, the next step is to make adjustments to the low frequencies in the photo using the Color Correction clipping mask.
As mentioned earlier, the low-frequency information in an image includes broad areas of color and tones. This means that you can make color adjustments in the low-frequency layer of the photo without worrying about damaging the finer details.
Here, we'll demonstrate a simple way to improve overexposure on the bridge of the nose and excessive shadows on the cheeks. Keep in mind that this is a subjective approach, akin to applying makeup to a portrait photo—there's no fixed standard.
Using the brush tool, select a color close to the more "normal" skin tone next to the overexposed area on the nose.
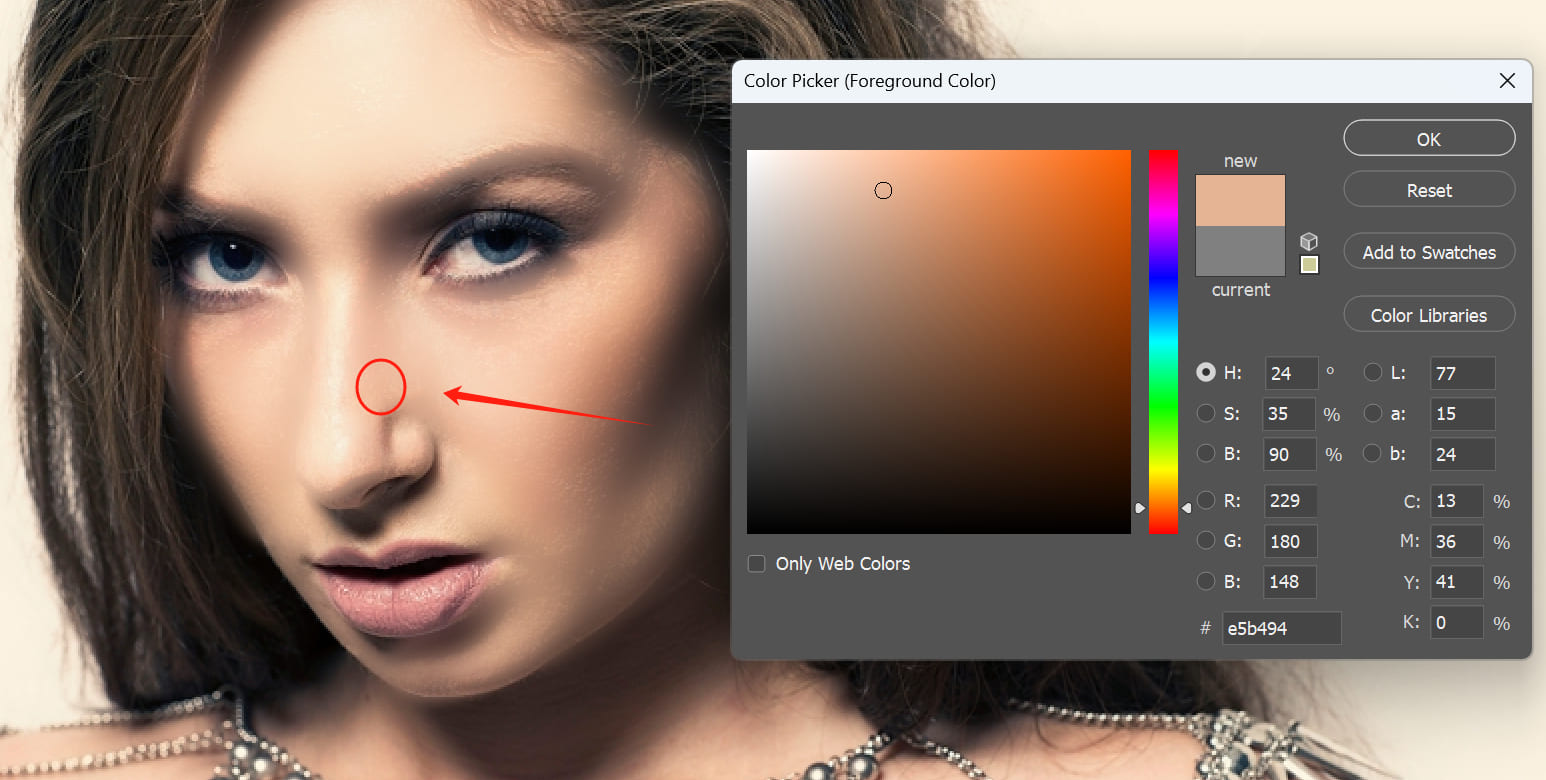
On the Color Correction clipping mask, use the brush with this color to lightly brush over the overexposed area on the nose (with a low Flow setting of only 9%) until you're satisfied.
Repeat a similar process for the cheek area to enhance the skin tone without affecting the texture.
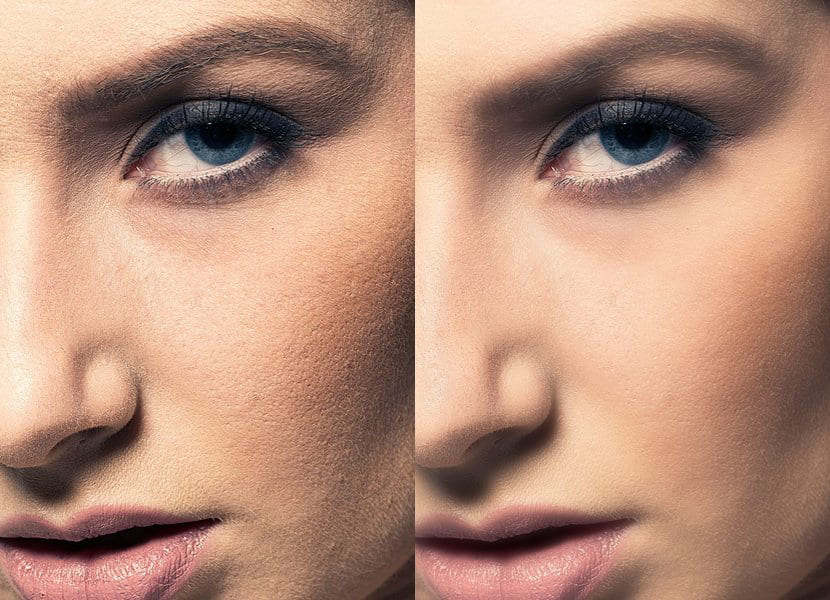
The image below shows a before-and-after comparison of a photo after applying Frequency Separation in Photoshop.
Final Thoughts About Photoshop Frequency Separation
Frequency Separation is just one method in Photoshop, and determining the most natural and beautiful results ultimately depends on your subjective judgment.
The advantage of the Frequency Separation tool is that it gives you enough flexibility to make these decisions.
That's a wrap for our tutorial on using Frequency Separation in Photoshop for refining skin in portraits.

If you find yourself frequently working with digital art software like Photoshop in your daily tasks or creations, you might want to consider TourBox. You're sure to appreciate the changes TourBox can bring to your creative workflow.