How to Adjust White Balance in DaVinci Resolve?
There are many ways to adjust the white balance of video footage. In DaVinci Resolve, you can choose different tools to adjust white balance. Today, we organized those methods for adjusting white balance in Resolve and listed a few useful ones.
When you color grade, consider using these methods. That way, you can pick a quick white-balance adjustment that fits what the footage needs.

In this article, you will learn:
What Is White Balance?
Many people run into this when shooting with a digital camera: footage shot under fluorescent lights can look green, scenes lit by tungsten bulbs can look yellow, and photos taken in daylight shade can strangely look blue. The cause is the white balance setting.
So what is white balance? Simply put, white balance restores things in the image that should be white/gray/black back to true white/gray/black. It removes color casts from the light so the image looks like normal colors.
Of course, if the scene is meant to feel warm or cool (for example, a sunset or stage lighting), you don't need to "fully neutralize the white." Go with what feels right.
You can adjust white balance when you shoot, but a camera sensor cannot adapt like the human eye. If the camera's color setting doesn't match the lighting color temperature, you will get color shifts. That's why we often need to fix white balance in post.
Adjusting white balance in post sounds simple, but it takes some skill in practice. Luckily, there are many ways to handle it. Next, let's look at methods to adjust white balance in DaVinci Resolve.
How to Adjust White Balance in DaVinci Resolve?
First, make sure you have not made any color adjustments before using the white balance tools. You need the original, untouched footage. If you change colors first, you won't be able to balance the shot correctly, and your correction may not work.
Also, we recommend doing white balance on a new node. This makes it easier to fine-tune or undo later.
Further Reading:
Method 1: White Balance Picker / Auto Balance
The first — and most obvious — tool is the white balance picker. You can find the eyedropper icon in the top-left of the options panel on the Color page under Primaries → Color Wheels.
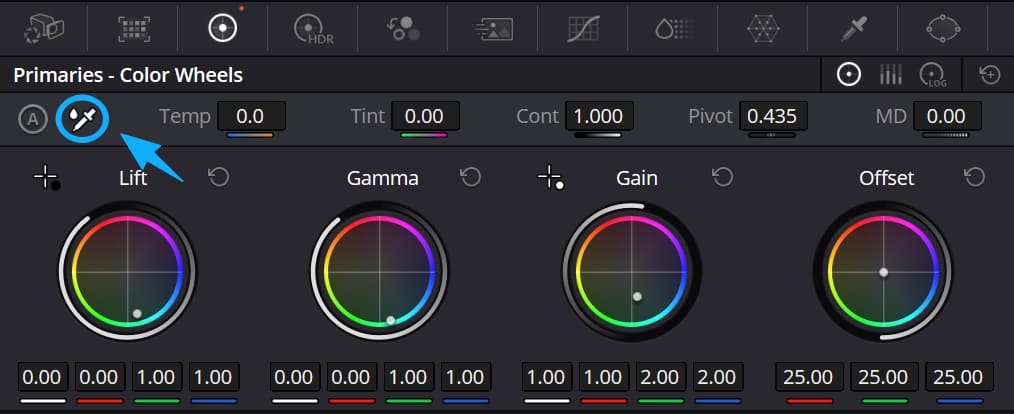
Click it, then move the eyedropper to any area in the image that should be neutral. "Neutral" means anything that shouldn't have color — white, black, or gray. Click and let DaVinci Resolve do the white balance correction for you.
But we know that placing the eyedropper on a truly "neutral" area is not always easy. Sometimes there is no white object in the frame, and using the white balance eyedropper can still cause some color shifts. That might be due to your monitor, the grading environment, or even visual fatigue.
So you can also use DaVinci Resolve's Auto Balance tool, which sits to the left of the white balance picker, and let the AI adjust the white balance for you.

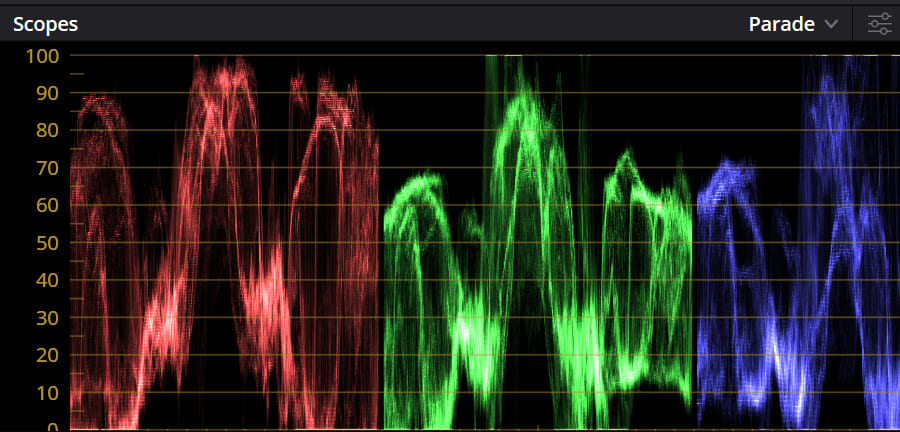
At the same time, check the result with the RGB Parade in Scopes. If one channel is higher or lower than the others, there is a color cast (too red/green/blue), and you'll need to make further adjustments.
Further Reading:
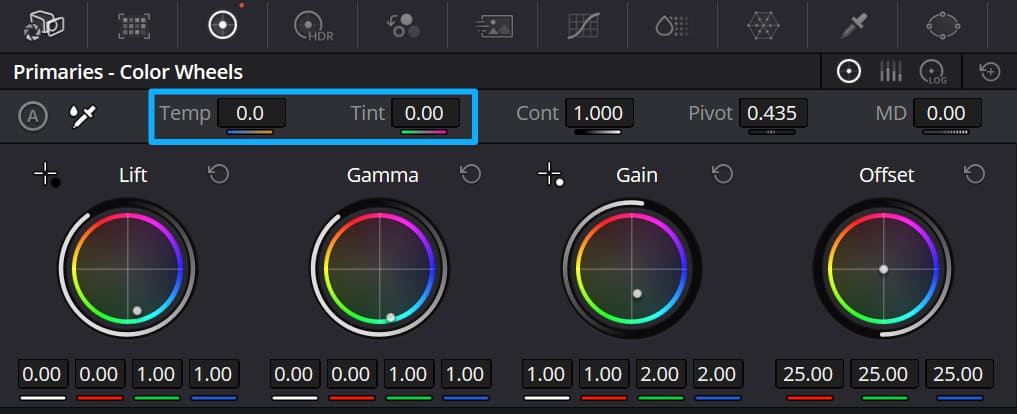
Method 2: Temperature & Tint
This is the most standard and most common method. Any color-grading tool will have these two controls.
Look at the color cast in the image. Use Tint to adjust the balance between green/cyan and magenta. Use Temp to adjust the balance between blue and yellow to make the image cooler or warmer. Then check the Parade on the scopes and fine-tune the R/G/B channel balance.
As a rule, pulling the R, G, and B channels to similar heights in the Parade at the relevant brightness range is a good way to confirm white balance.
Method 3: Primary Color Wheels
Sometimes highlights or shadows have a color cast. Another way is to use the Primary Color Wheels. Specifically, you adjust the darks, midtones, and highlights values in the Primary Color Wheels — the Lift, Gamma, and Gain wheels.
As for the Offset wheel, avoid using it or using it too much. It affects the black and white levels and can ruin contrast or make blacks hard to bring back. After using Offset, you often have to go back and tweak Lift, Gamma, and Gain.
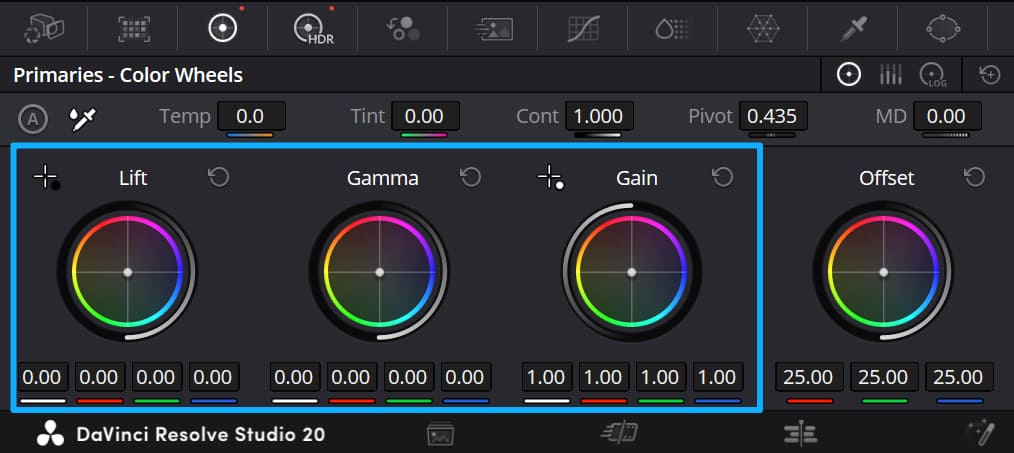
First, you can use the black-point and white-point pickers. They sit just above Lift and Gain (they work similarly if you use Primaries Bars or Log).
Choose the point you want to set, then — like the white-balance picker — move the cursor over your footage and click a point that should be pure black or pure white, depending on which picker you used. Resolve will then adjust the wheels accordingly.
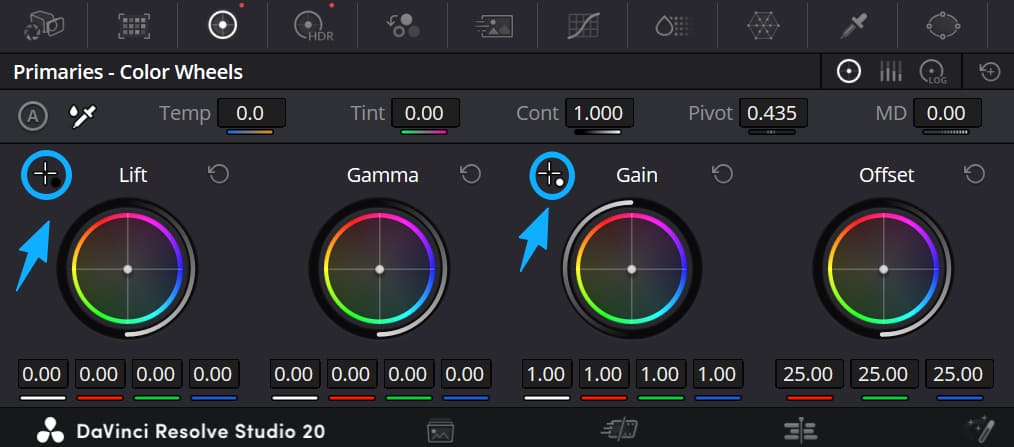
You can drag the dot on the color wheel to correct color, or change the numeric values below the wheels. This method uses three wheels, so there are many controls, and it's easy to make mistakes. But with patience, you can make very fine adjustments.
To be honest, if you only use the mouse to move the wheels or type in numbers, it's hard to get a clear feel for the grade. Also, when you drag curves, wheels, or other controls with the mouse, values can jump or drift when you release the mouse. That makes it hard to hit the exact value you want.
If you often color grade video in DaVinci Resolve, you may consider buying an editing keyboard or controller. Blackmagic Design's Speed Editor is a good choice. But if you want a more affordable controller that works with many creative apps, consider our TourBox.

TourBox is not just a simple hotkey mapper. Its core value isn't "map more keys." We built many built-in features for creators' workflows, like HoverAdjust, which was developed for color grading in Resolve.
HoverAdjust turns on when your mouse hovers over a wheel, slider, curve, or value box. Then you can use TourBox's physical knob to change the grade control instead of painfully dragging with the mouse.

If you're interested in the TourBox, check our DaVinci Resolve page to learn more.
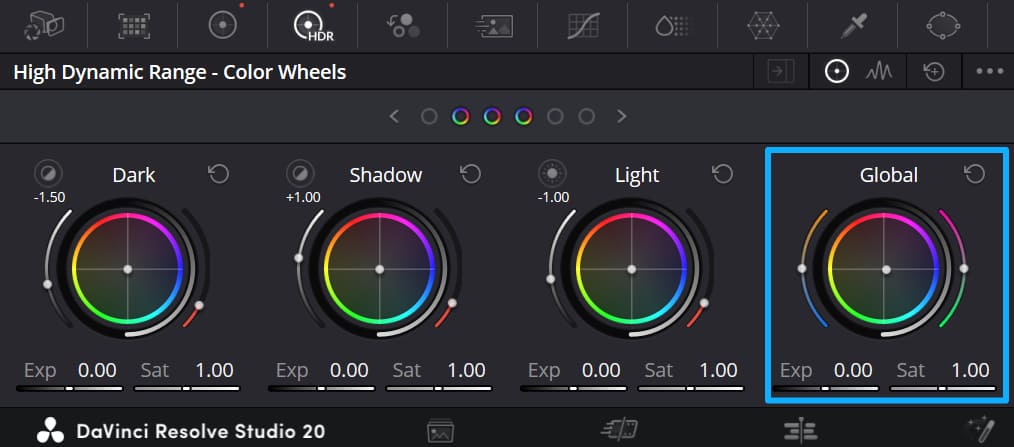
Method 4: HDR Global Color Wheel
This tool is the most useful way to correct color balance. You can solve color-balance issues with just one Global wheel. It offers two control modes: you can use the wheel or enter numeric values. If your mouse control is steady and responsive, use the wheel. If not, use numbers — both will get the job done.
The Global wheel is built around display gamma. That means when you adjust the Global wheel, you are doing a color change similar to how the camera captured the light — like changing the camera's color temperature or filters. This lets you change the image's color temperature and tint the same way you would by adjusting camera settings on set.
The HDR Global wheel is different from the Primaries Offset wheel. The Global wheel behaves more naturally for the working color space or encoding (for example, it can protect highlights or keep color relationships better). So for workflows that need precise color, HDR Global is usually the better choice.
Drag the dot on the wheel to change the red, green, and blue waveforms in the Parade. When the three channels sit at the same level, the white balance is done.
Conclusion
In this article, we share 4 useful methods and tips for adjusting white balance in DaVinci Resolve. No matter which method you use, it's crucial to use the RGB Parade and Waveform scopes to help you check, because they give you more accurate measurements and help you correctly balance the image instead of judging color by eye alone.