Four Methods: How to Copy Color Grade in DaVinci Resolve?
Color grading is a crucial aspect of video editing, as it sets the mood, enhances storytelling, and adds a professional touch to your footage. However, it can be time-consuming to manually recreate the same color grade across multiple clips or projects.
In this tutorial, we will explore several methods to effectively copy color grades in DaVinci Resolve. By mastering these techniques, you'll be able to save time, maintain consistency, and elevate the quality of your video projects.
So, let's dive in and discover the various methods to effortlessly copy color grades in DaVinci Resolve.

In this article, you will learn:
- How to Copy Color Grade in DaVinci Resolve?
- Final Thoughts About Copying Color Grade in DaVinci Resolve
How to Copy Color Grade in DaVinci Resolve?
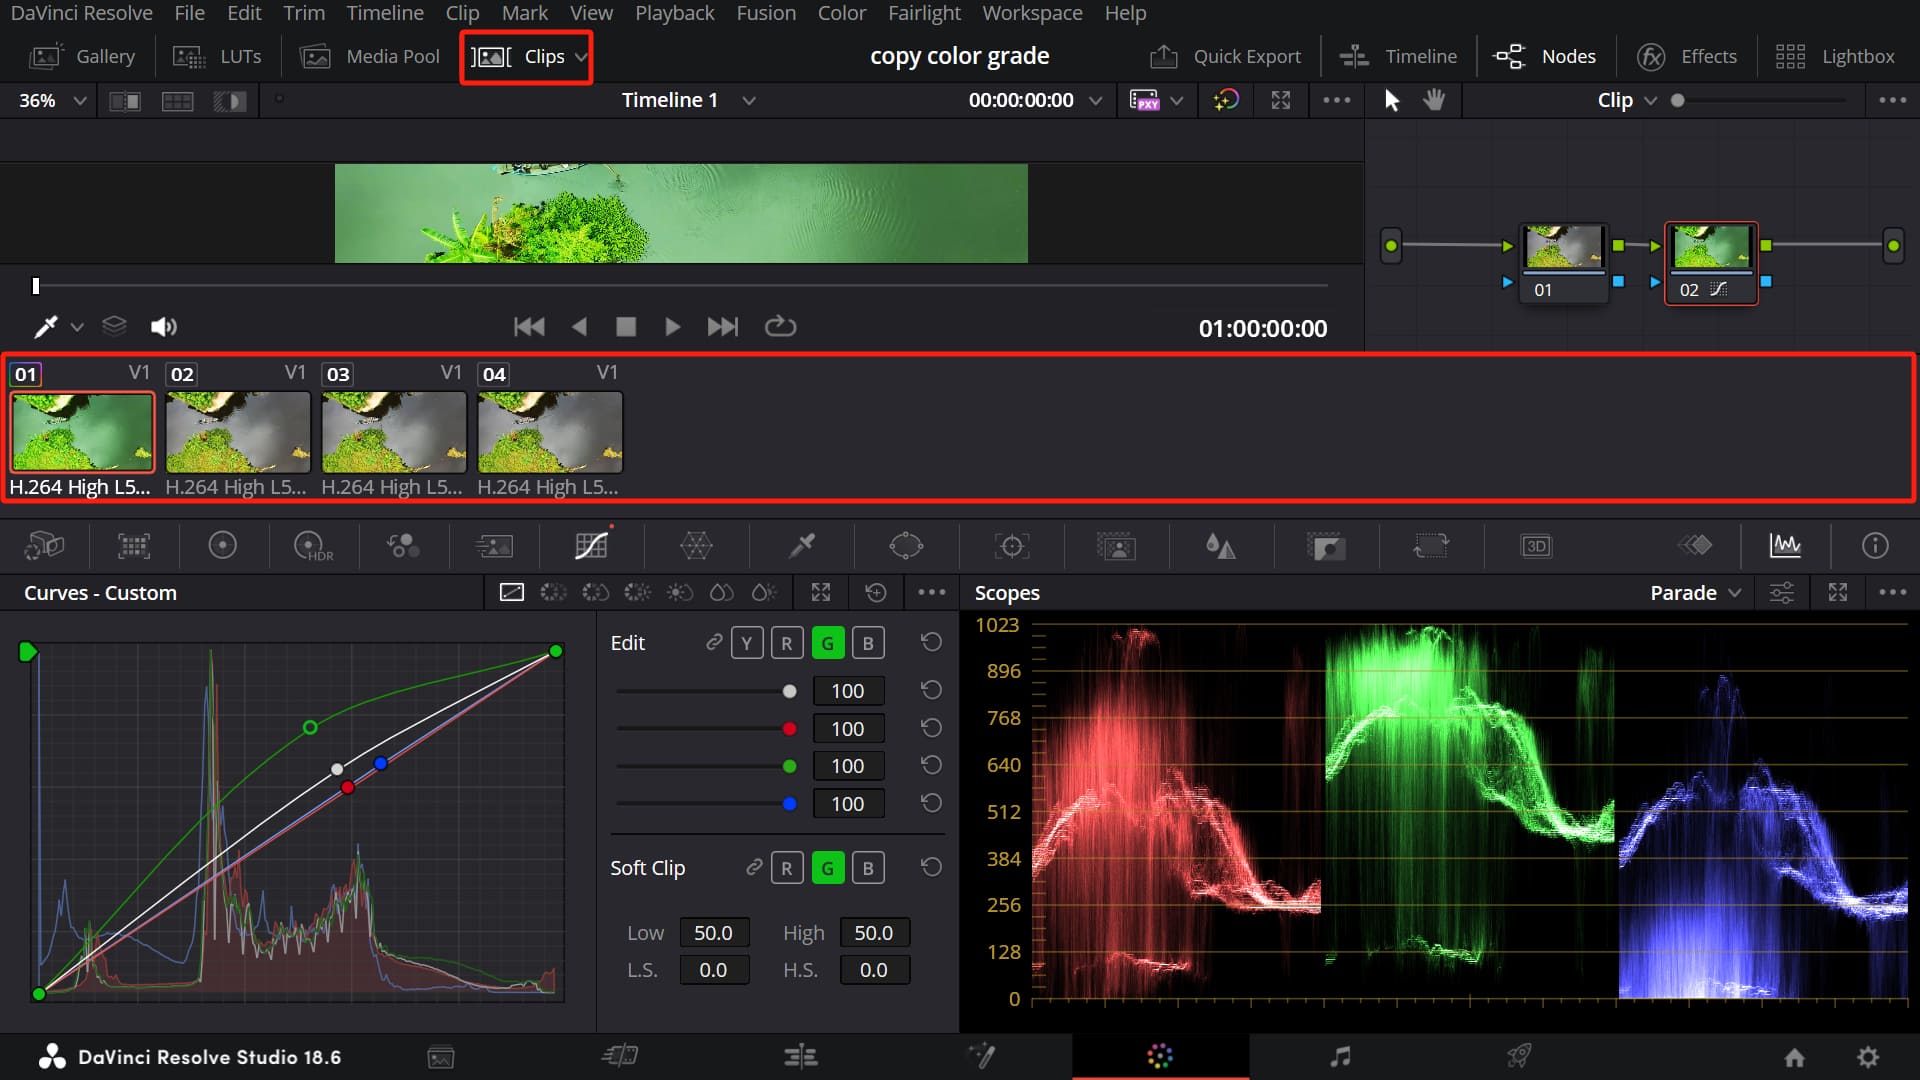
Let's get started by importing our footage into DaVinci Resolve. To demonstrate the effects, we've created four clips using the same footage on the timeline.
Switch to the Color page. Here, you can click on the Clips option at the top of the Color page. It's like a thumbnail view that allows you to see the changes in each clip more clearly.
We've applied a stylized color grade to the first clip. Using the Custom Curves tool, we made the overall image greener. Now, we want to copy the same color grade to the other clips. So, is there a quick way to do this?
Method 1: Using the Mouse Scroll Wheel
The first method is the easiest and most efficient way to copy color grades. Here's how you do it:
- First, select the second clip that you want to apply the color grade to.
- Then, find the first clip that already has the desired color grade and simply press the scroll wheel of your mouse (the wheel you use for scrolling web pages).
If you need to copy the color grade to multiple clips at once, it's just as simple. Just select all the clips you want to apply the color grade to. Then, repeat the previous step by pressing the scroll wheel on any of the already color-graded clips.
Extra Tips:
- If you only want to select some of the multiple clips, you can hold down the Ctrl key and click the left mouse button on the clips you want. Once you're done selecting, release the Ctrl key.
- If you need to select multiple clips in a sequence, you can click the left mouse button on the first clip you want to select, then hold down the Shift key and click the left mouse button on the last clip you want to select. This will select all the clips in between.
In the video below, we'll provide a simple demonstration of this process.
Method 2: Applying Grade From One Clip Prior
In this method, you can use keyboard shortcuts to copy color grades in DaVinci Resolve. However, please note that the specific keyboard shortcuts may vary depending on your operating system (Windows or Mac).
To access the keyboard shortcuts settings in DaVinci Resolve, click on the "DaVinci Resolve" menu option at the top left corner of the interface, then select "Keyboard Customization". This will bring up the keyboard customization panel.
In the Commands section, select "Color", and in the right-hand side command settings, locate "Apply Grade from One Clip Prior". Set a keyboard shortcut combination that suits your preference.
Just as the name suggests, this keyboard shortcut allows you to copy the color grade from the previous clip. To do this, select the clip you want to copy the color grade to and press the assigned keyboard shortcut.
It's important to note that this shortcut only copies the color grade from the previous clip. You can also set a shortcut to copy the color grade from the clip before the previous one, but this method is less commonly used and may not be as convenient in practical color grading scenarios.

Method 3: Using Stills
The third method involves using stills in DaVinci Resolve, which is another commonly used technique for duplicating color grades.
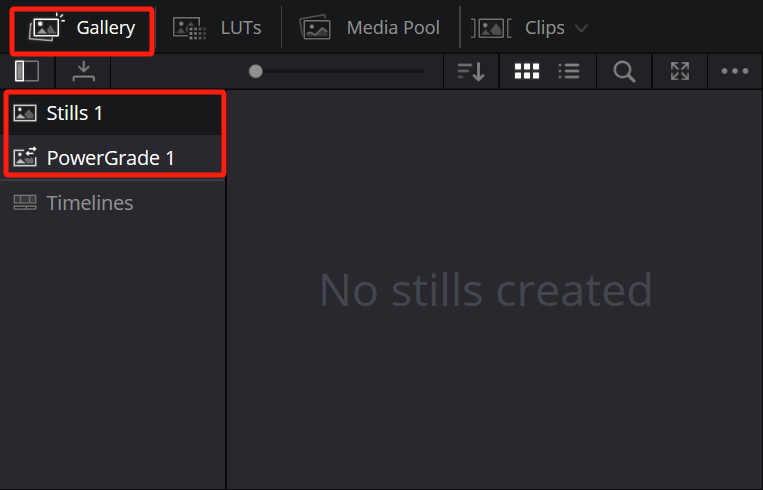
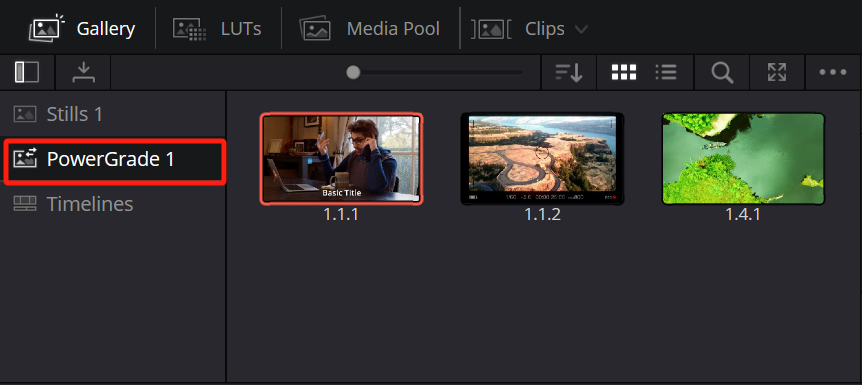
To begin, click on the Gallery panel at the top left corner of DaVinci Resolve. You'll see options for Stills and PowerGrades. If you haven't created any stills yet, you'll see a prompt saying "No stills created".
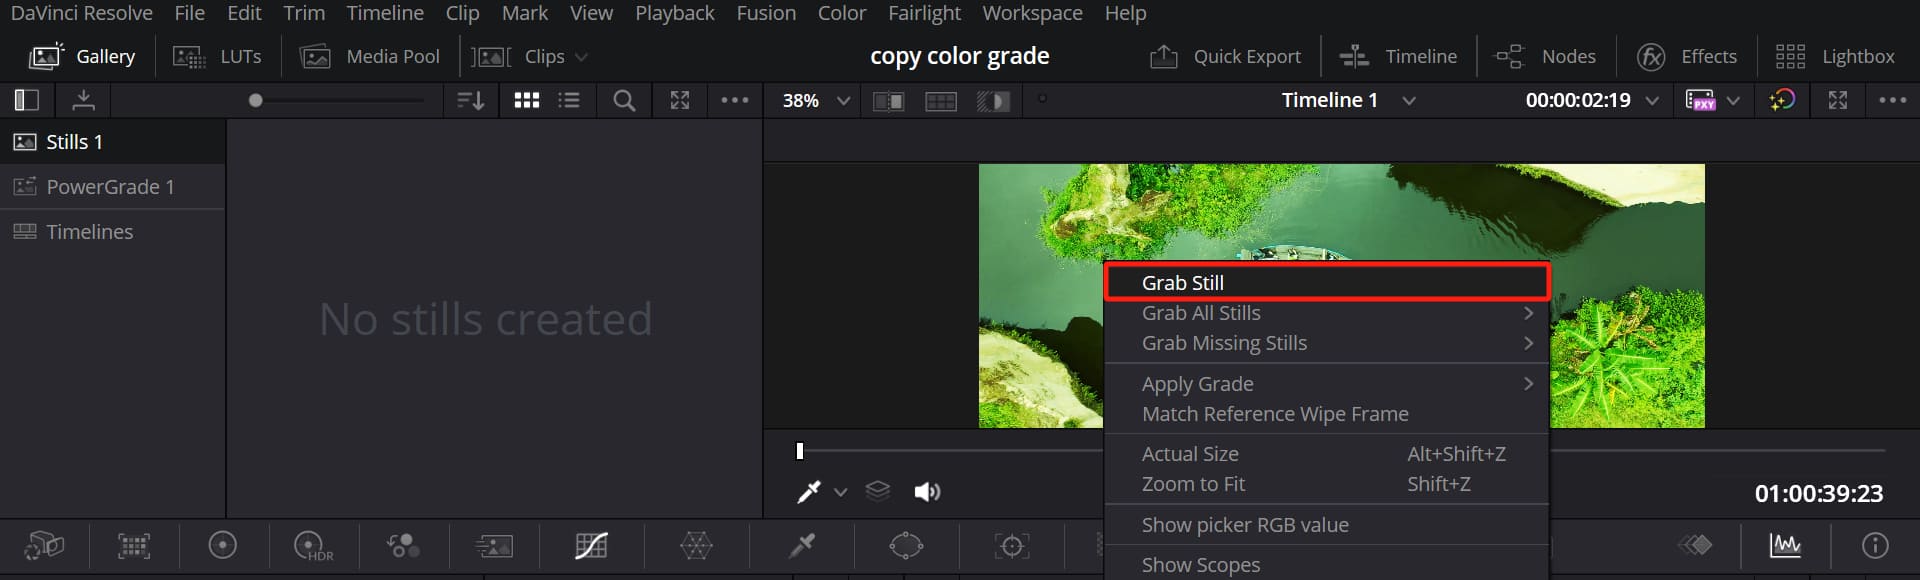
Once you've applied the desired color grade to a clip, right-click on the image in the Viewer and select "Grab Still". You'll notice that a screenshot of the current frame appears in the Stills panel. However, what you've actually done is copy the nodes of the current frame.
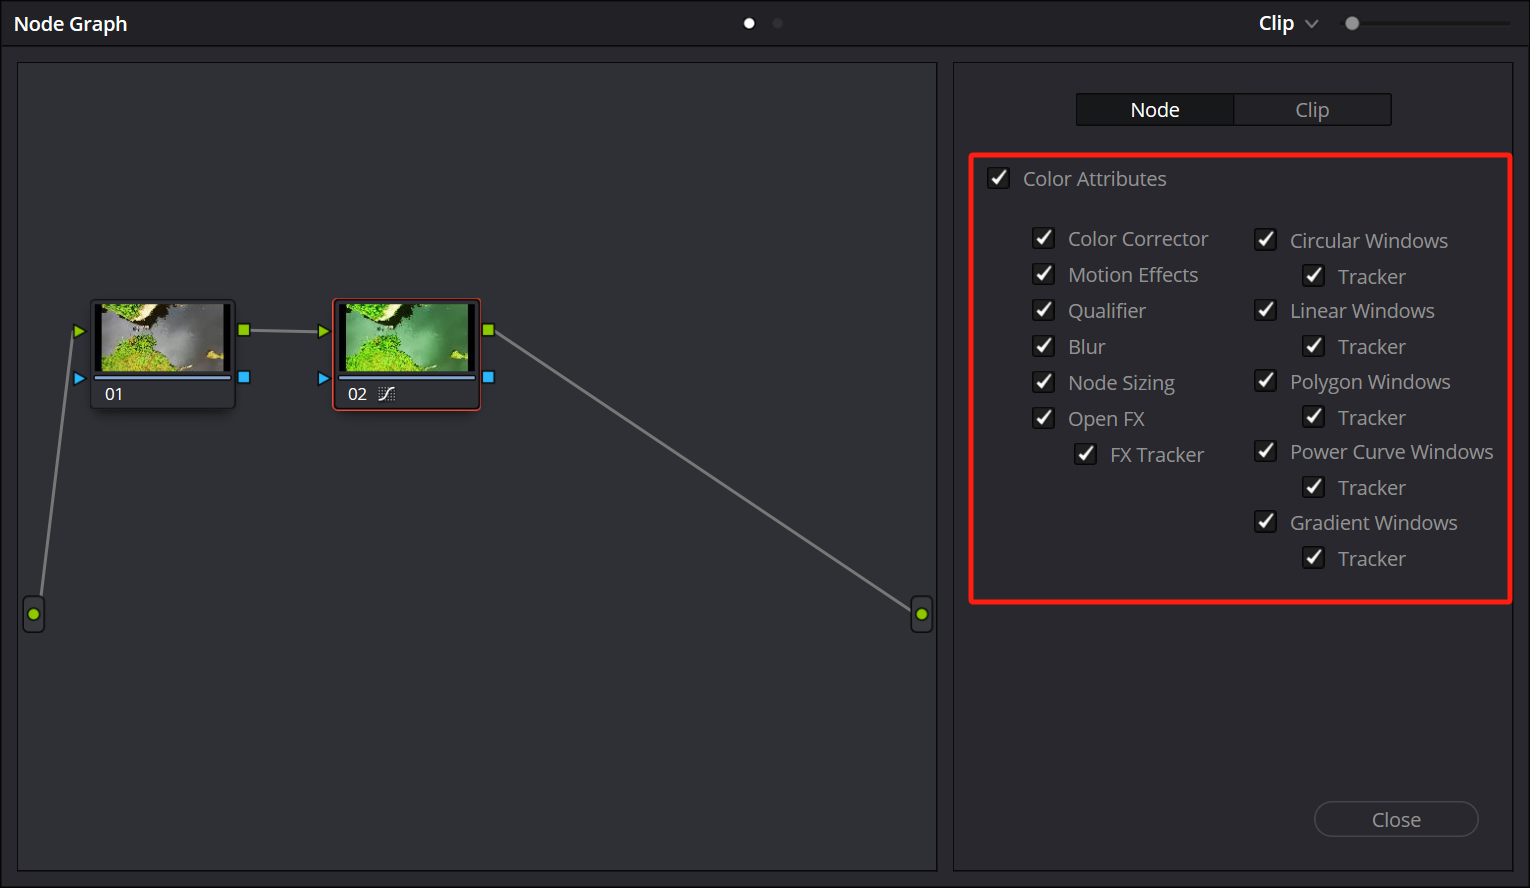
You can right-click on the still in the Stills panel and select "Display Node Graph". This will open a Node Graph panel.
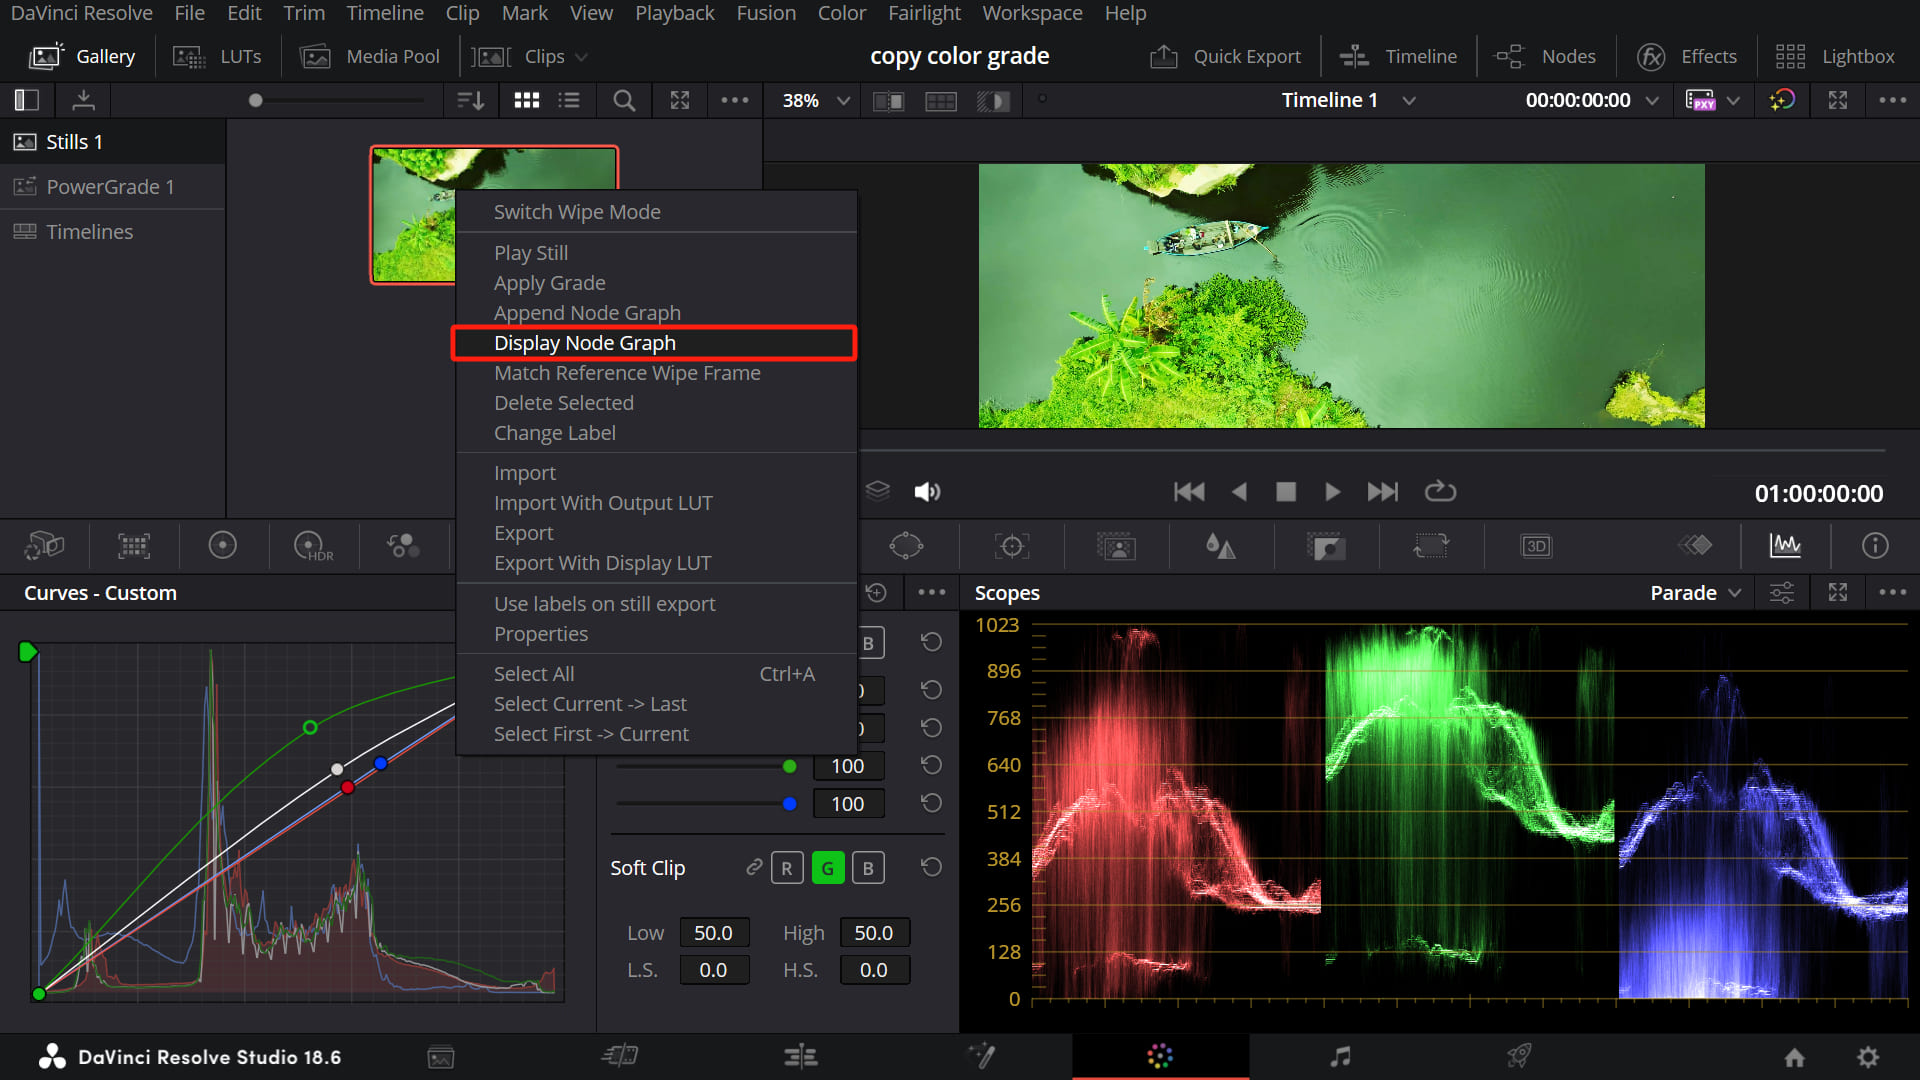
In the Node Graph panel, you'll see various color attributes that you can enable or disable. You can choose the ones that suit your needs, or simply leave them at their default settings.
Next, select the clip you want to copy the color grade to in the Clips panel. Right-click on the still you just grabbed in the Stills panel and choose "Apply Grade".
In the video below, we'll provide a simple demonstration of the process for using stills to copy color grades.
Stills are not only useful for copying color grades, but they also have other powerful functions which we won't go into detail here. However, PowerGrade is a feature that takes it to the next level.
PowerGrade allows you to copy color grades across projects. To use PowerGrade, simply save the still from Grab Still into PowerGrade (by selecting PowerGrade and then repeating the Grab Still process).
Think of PowerGrade as a cloud storage for your color grades. When you start a new project, you can quickly apply previously saved color grades from PowerGrade.
Method 4: Using Memories
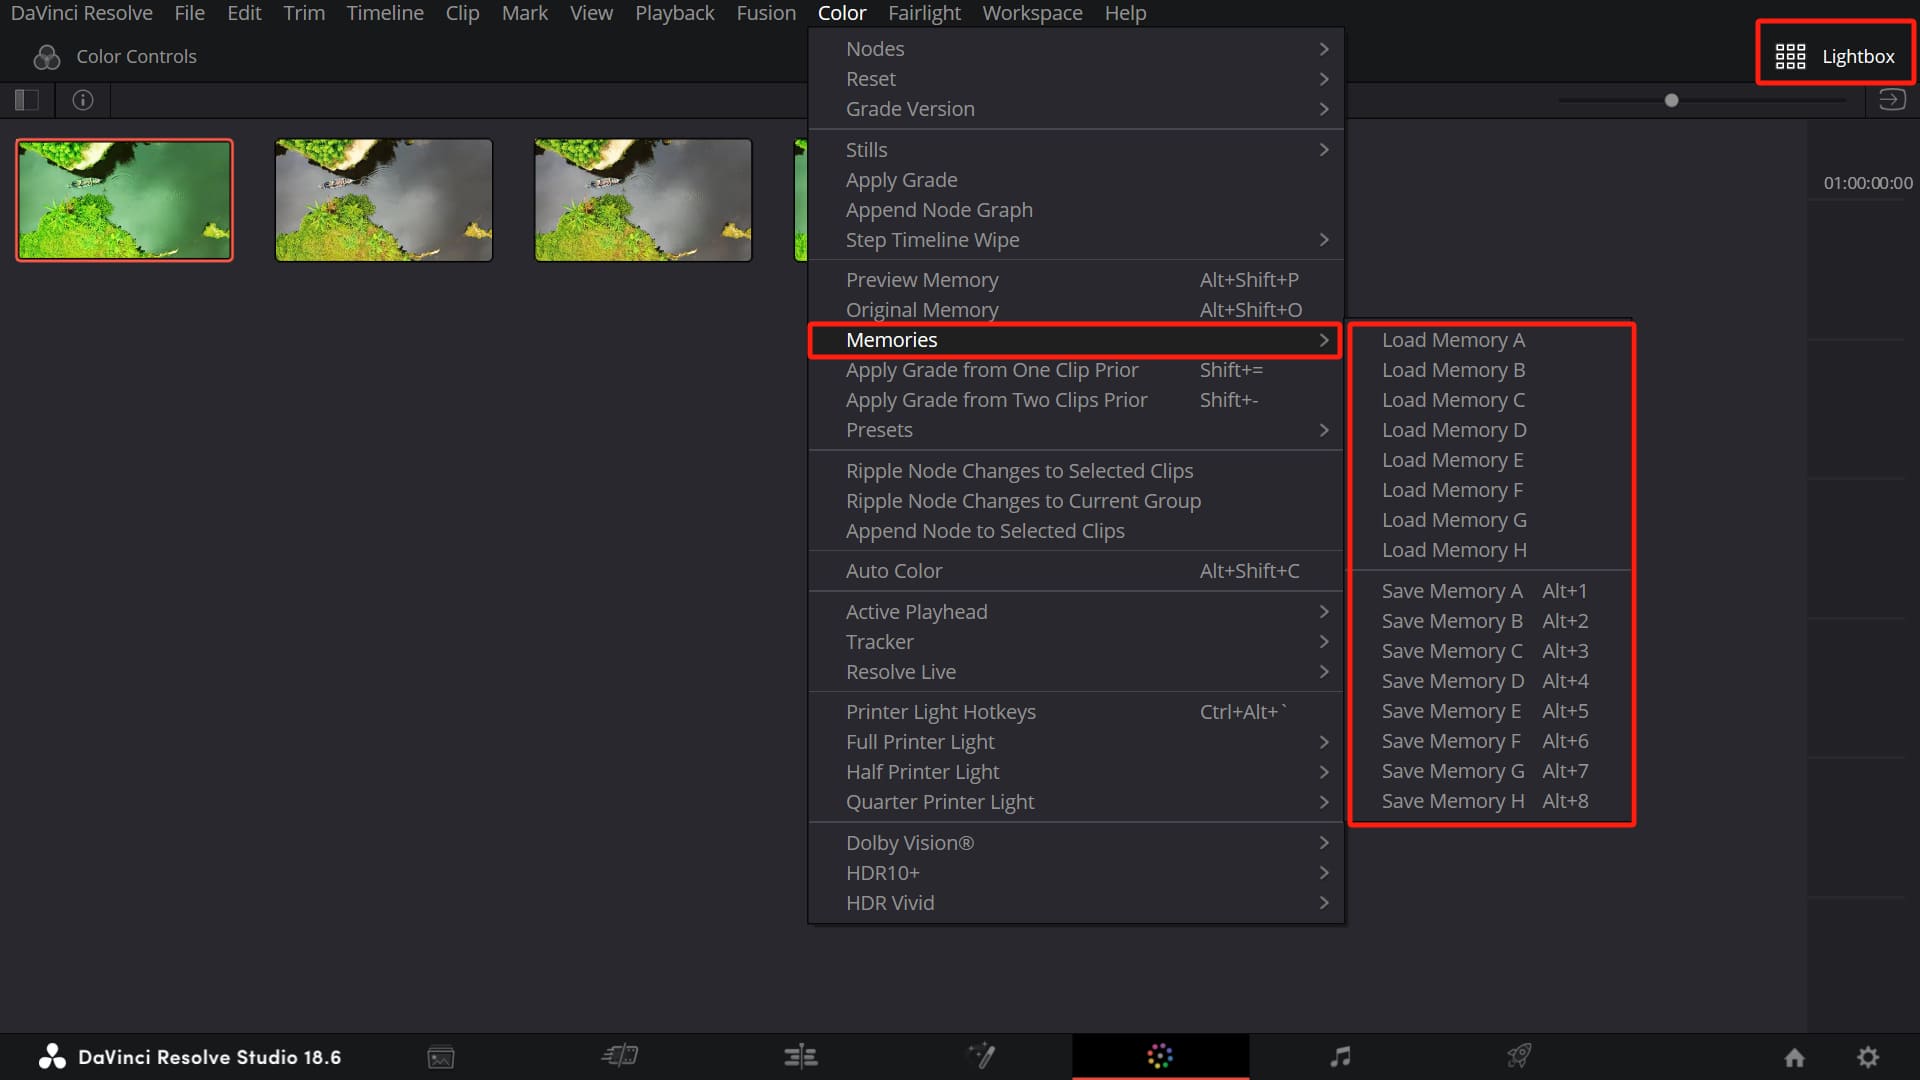
There's another method where you can save color grades using Memories. After you've applied color grading to a clip, click on the "Color" option in the menu bar at the top. From the dropdown menu, select "Memories" and choose one of the A-H slots to save your adjustments.
If you want to copy the color grade to a new clip, simply click on the "Memories" menu again and load the saved Memory you want to apply.
Using Memories is particularly useful for making bulk adjustments to multiple clips. If you have several clips that need the same adjustments, you can click on the Lightbox icon in the top right corner, select all the clips you want to adjust, and then load the saved Memory to apply the adjustments uniformly.
Final Thoughts About Copying Color Grade in DaVinci Resolve
As you've learned throughout this tutorial, there are various methods to copy color grades in DaVinci Resolve. While it's always helpful to be aware of these additional techniques, mastering the Mouse Scroll Wheel and utilizing Stills should suffice for most color-grading tasks.
However, if you're looking to enhance your color grading experience and streamline your workflow even further, we highly recommend considering TourBox. This innovative device is specifically designed for creative professionals, including video editors and colorists.

Whether you're adjusting color parameters, fine-tuning grades, or navigating through your timeline, TourBox can significantly enhance your efficiency and precision. It's a versatile tool that can save you valuable time and provide a more immersive editing experience.
So, if you're ready to take your color grading skills to the next level and elevate your editing process, we highly recommend giving TourBox a try. It's a game-changer that can revolutionize the way you work in DaVinci Resolve and other editing software.