How to Crop a Single Layer in Photoshop?
Image this scenario: while working with images in Photoshop, you have a project with multiple layers, but there's one layer that contains an image that is either too long or too large, and you want to crop it individually.
However, when you select the Crop tool and attempt to crop, you realize that the entire project's layers are being affected. Importing a pre-cropped layer from an external source would be time-consuming and inefficient.
In this tutorial, we will show you how to crop a specific layer in Photoshop without affecting the rest of your project. Let's dive in and learn how to accomplish this!

In this article, you will learn:
How to Crop a Layer in Photoshop?
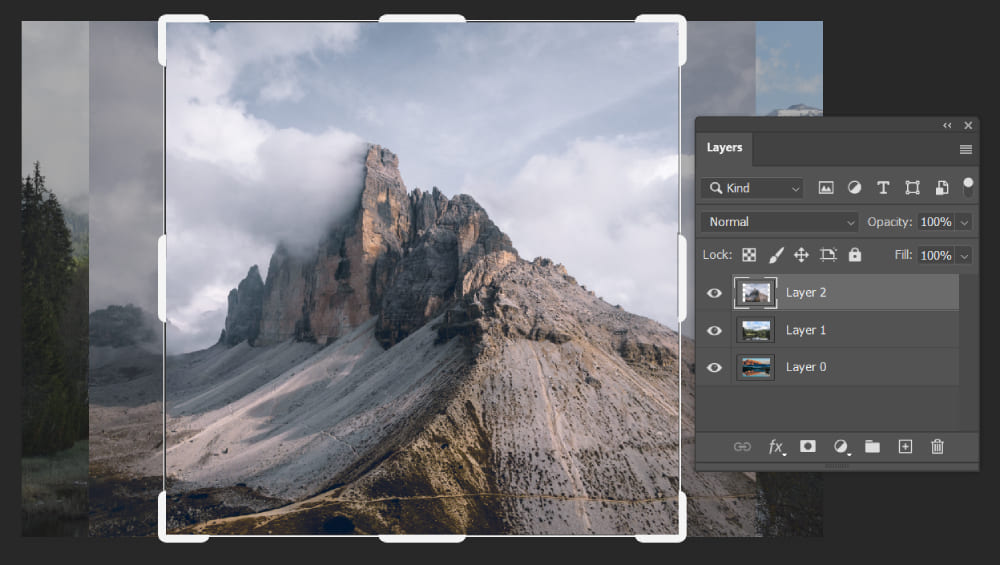
Let's open a project with multiple layers. Select the layer containing the image you want to crop, as shown in the example below.
In this case, let's say we want to crop "Layer 2." However, as mentioned at the beginning of this tutorial, if we directly use the Crop Tool, we'll notice that all layers will be cropped.
The solution is to avoid using the Crop tool and instead employ alternative methods to crop the layer. There are three methods to crop a layer individually, and we'll discuss each one below.
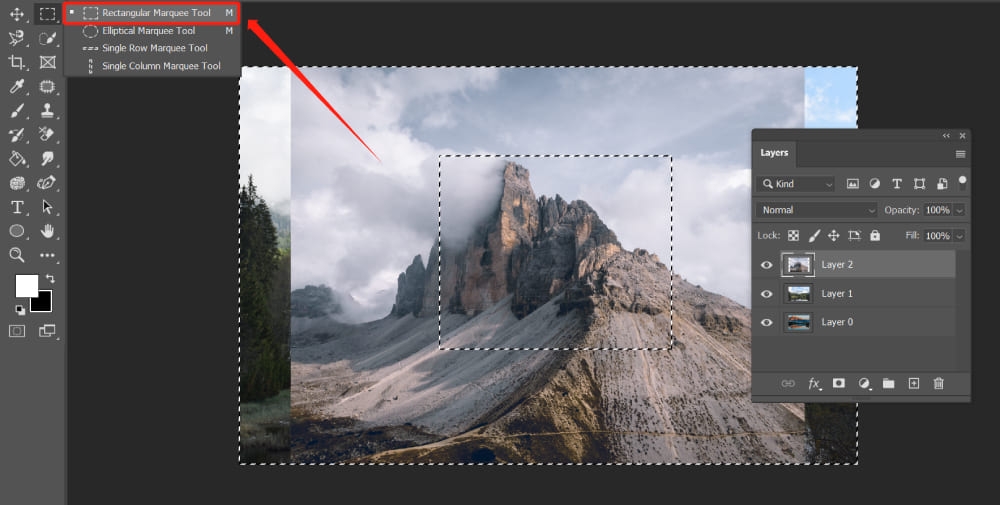
Method 1: Rectangular Marquee Tool
Start by selecting the Rectangular Marquee Tool from the toolbar on the left side of Photoshop. Use it to create a selection around the portion of the image you want to keep.
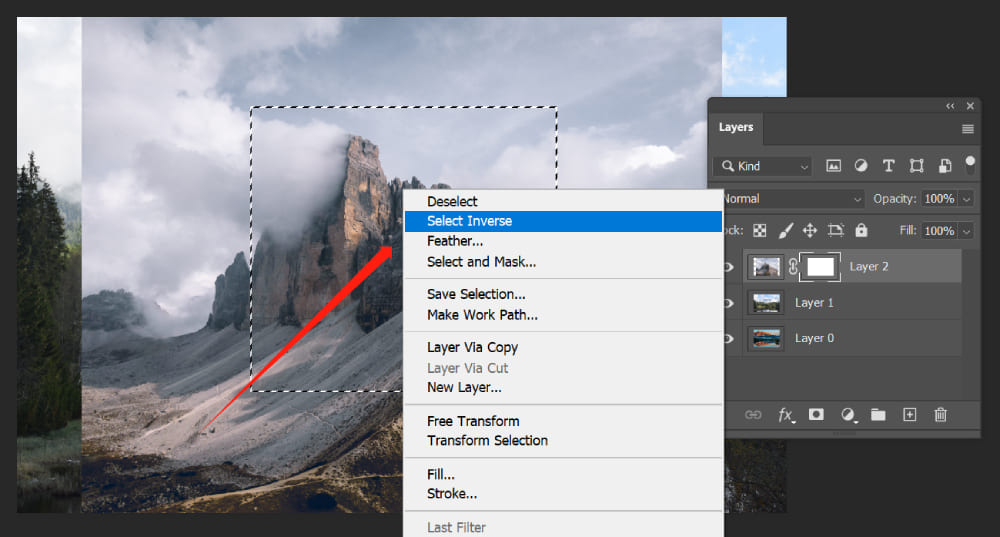
Once you have a dashed selection area, right-click inside and choose "Select Inverse".
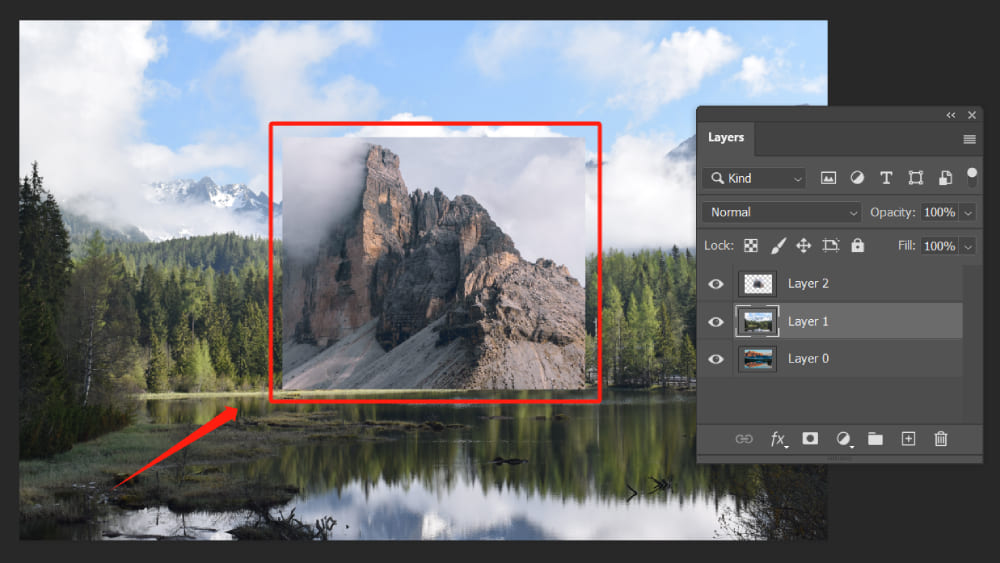
After selecting "Inverse," you'll notice that the entire project's layers are now selected. Don't worry. This is expected.
Press the Delete key on your keyboard, and then press "Ctrl+D" to deselect the area. You will now see that the image of the desired layer has been successfully cropped.
Additional Tips:
If Photoshop presents a warning dialog stating that the request cannot be completed because Smart Objects cannot be directly modified, you can rasterize the layer first and then repeat the above steps.
For more information about Smart Objects and how to rasterize in Photoshop, please refer to this tutorial: Master the Power of Smart Object in Photoshop: An Essential Tutorial
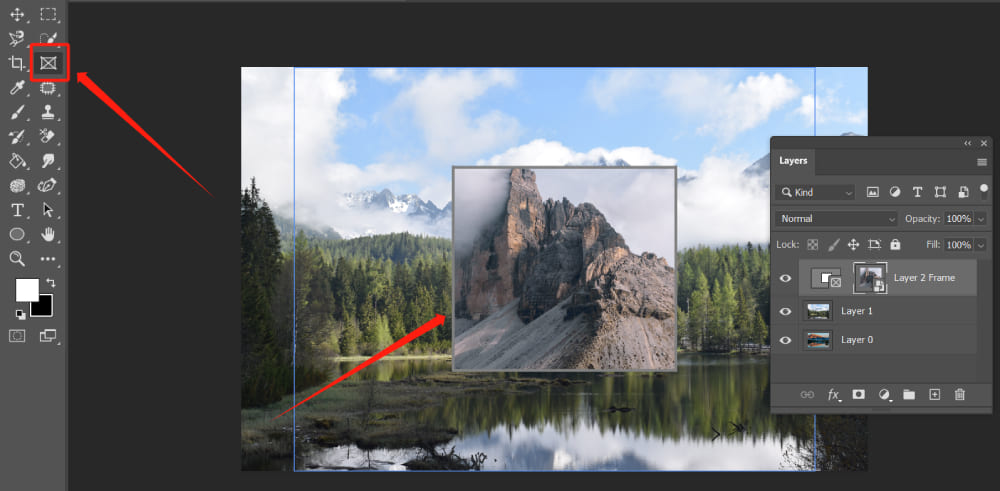
Method 2: Frame Tool
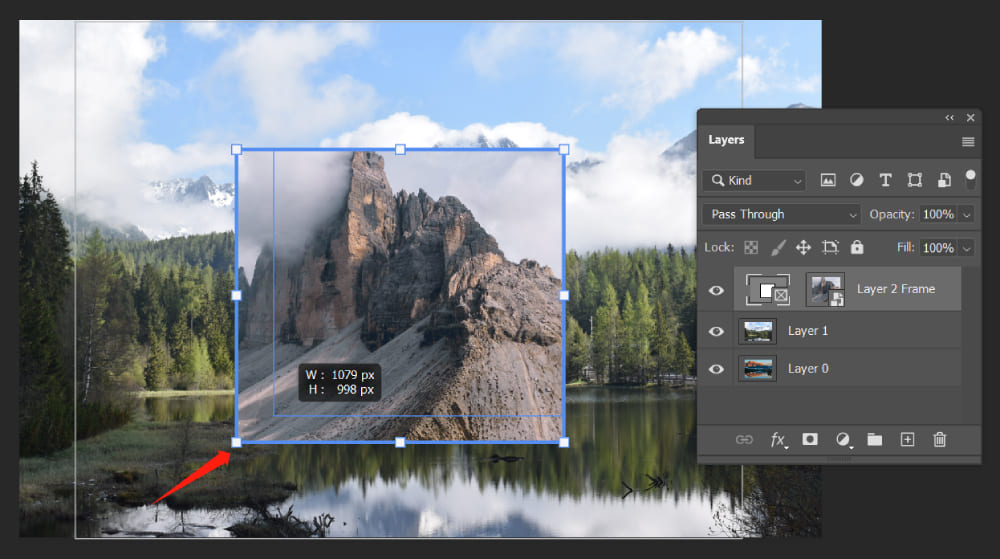
Let's explore the second tool we have for you in Photoshop: the Frame Tool. With this convenient feature, you can effortlessly create frames to isolate and crop specific areas of your layers. Let's delve into the process.
Start by selecting the Frame Tool from the toolbar on the left side of the screen. You can easily spot it as the icon resembles a rectangle with diagonal lines.
Click and drag on the canvas to create a frame around the portion of the layer you want to keep. Adjust the size and position of the frame as needed.
Once the frame is in place, you can move it by clicking and dragging the edges or corners. If you click and drag inside the frame, you can reposition the image within the frame.
To apply the crop, simply double-click inside the frame or click outside the frame area. Photoshop will automatically trim the layer to fit within the frame, discarding any unwanted regions.
The Frame Tool offers a convenient and efficient way to crop layers in Photoshop, allowing you to focus on the specific areas you want to highlight. Give it a try and experience the power of this tool firsthand.
Method 3: Layer Mask
The third method for cropping layers is to use Layer Mask in Photoshop. With Layer Mask, you can precisely control which parts of a layer are visible or hidden.
Technically speaking, using a Layer Mask is not considered the same as cropping a layer, but it achieves a similar effect to cropping an image. Here's how you can use a Layer Mask to achieve this:
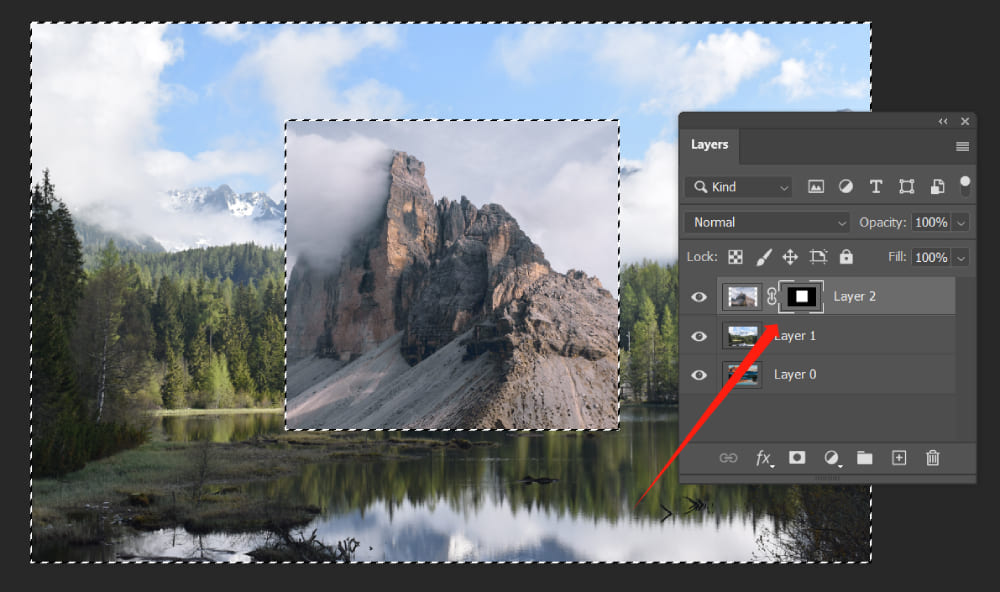
Select the layer you want to crop in the "Layers" panel. At the bottom of the "Layers" panel, click the "Add Layer Mask" button. It looks like a square with a circle inside.
A Layer Mask will be added to the selected layer and displayed as a white thumbnail next to the layer thumbnail. Make sure to select this white thumbnail. When the thumbnail is active, you'll notice a border around it.
After activating the Layer Mask, you can use the Rectangular Marquee Tool to select the area you want to crop. Then right-click on the selected area and choose "Select Inverse."
Select the Brush Tool from the toolbar on the left side of the screen. Set the brush color to black. This will allow you to hide parts of the layer.
Brush over the areas you want to hide or crop outside of the selected area (the inverted selection). When you brush with black, those areas will become transparent, revealing the layer below.
Don't worry about affecting the selected area or the layer below it. The Layer Mask only affects the current layer, and you have protected the selected area by inverting the Rectangular Marquee Tool selection.
If you make a mistake or want to restore any hidden parts, simply switch the brush color to white and brush over those areas. White will make the layer visible again.
Layer masks enable you to non-destructively trim layers in Photoshop, allowing for easy adjustments and changes. Although this process may seem a bit intricate, its non-destructive nature will make you appreciate this feature.
If you want to learn more about layer masks, please check out this tutorial: How to Use Layer Masks to Create Stunning Effects in Photoshop?
Final Thoughts About Cropping Layers in Photoshop
As you continue to explore the vast capabilities of Photoshop, we would like to recommend a powerful tool that can further streamline your editing workflow: TourBox.

TourBox is a powerful device designed specifically for creative professionals like photographers and graphic designers. It seamlessly integrates with Photoshop and offers a range of customizable controls that can greatly enhance your editing experience.
With TourBox, you can easily navigate through layers, adjust brush sizes, and perform various editing tasks with just a few intuitive gestures. It's a game-changer that can significantly boost your productivity and help you achieve stunning results in no time.
Our tutorial on how to crop a layer in Photoshop comes to an end. If you're interested in learning more about design, photography, and post-processing, check out here.