How to Select an Object in Photoshop: A Beginner's Guide
Mastering selecting an object is a fundamental aspect of photo editing. Many editing techniques require the ability to select objects accurately, making it an essential lesson in learning Photoshop and post-processing.
The key to selecting an object is isolating the desired subject within an image. This involves understanding the concept of creating a selection, which represents a specific area you choose.
In this tutorial, we will share various methods and techniques on how to select an object in Photoshop, allowing you to grasp the process quickly. By following these steps, you'll be well on your way to becoming proficient in the art of selecting objects in your photo editing journey.

In this article, you will learn:
- How to Select an Object in Photoshop?
- How to Quickly Switch Tools in Photoshop?
- Other Tools to Select an Object in Photoshop
- What to Do After Selecting an Object?
- Final Thoughts About Select an Object in Photoshop
How to Select an Object in Photoshop?
In Photoshop, the most basic tools to select objects are categorized into three groups: Marquee Tools, Lasso Tools, and Selection Tools. Each tool group consists of several tools specific to that category.
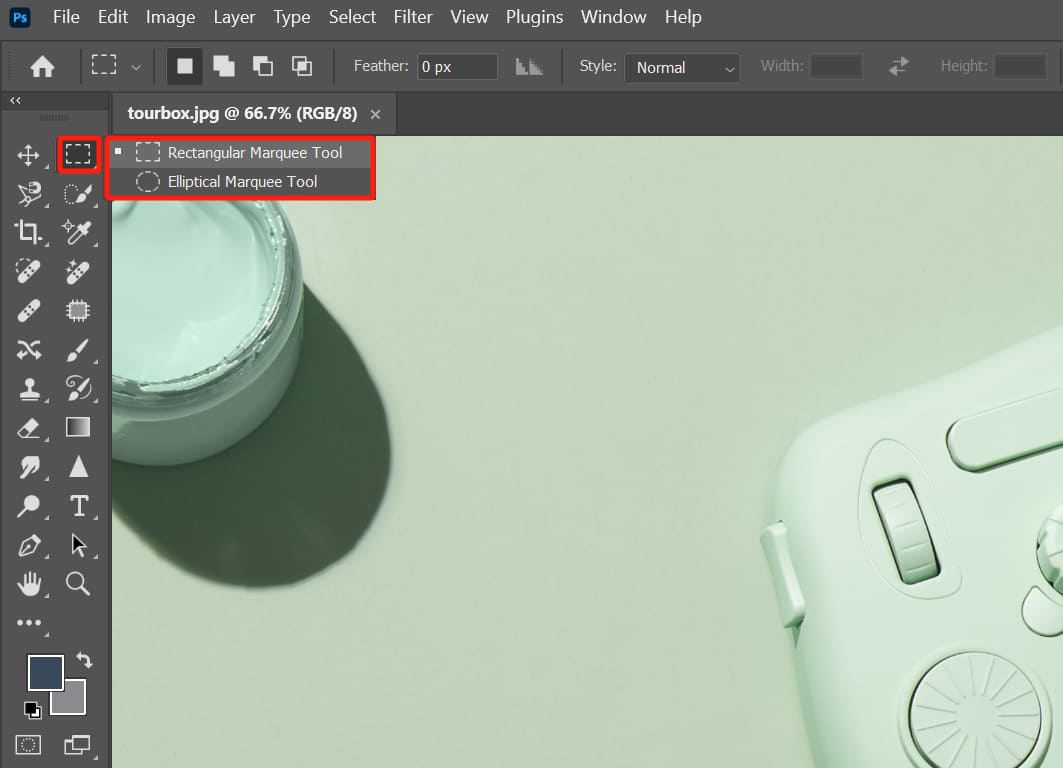
1. Marquee Tools
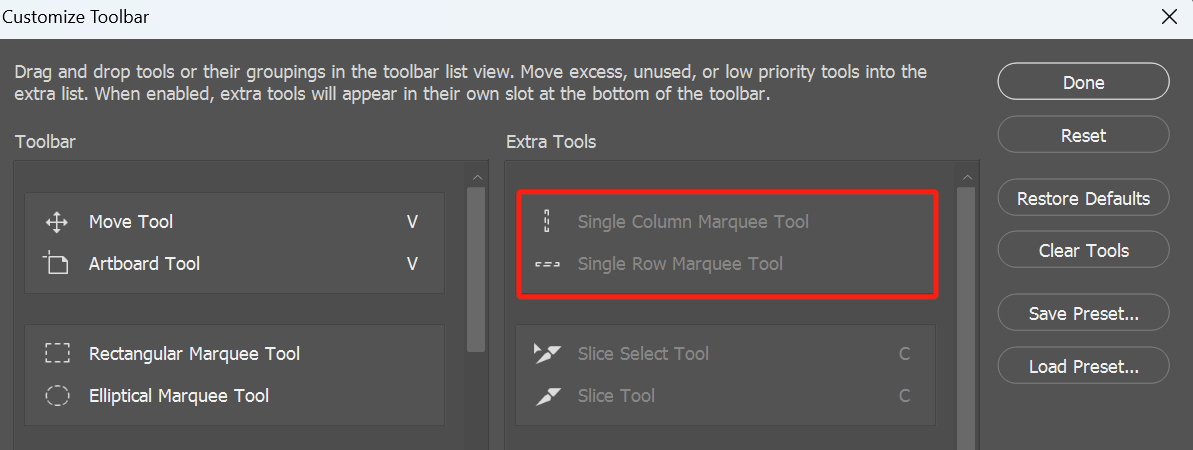
Under Marquee Tools, you'll find the Rectangular Marquee Tool, Elliptical Marquee Tool, as well as the Single Row and Single Column Marquee Tools.
If you can't locate the Single Row and Single Column Marquee Tools under the Marquee Tools category, you can customize your toolbar by accessing the "Customize Toolbar" panel and adding these two tools to the Marquee Tools group.
The Rectangular Marquee Tool is straightforward to use. Simply use this tool to draw a rectangle on the canvas, and the area within the rectangle becomes the selected region.
The selected area is outlined by a moving dashed line known as the "marching ants".

The same principles apply to the other marquee tools; they mainly differ in shape. Marquee tools have regular shapes, making them ideal for selecting objects with well-defined shapes.
For example, they work well when you need to select a basketball or a monitor for cutting out or editing purposes.
2. Lasso Tools
The Lasso Tools differ from the Marquee Tools in that they have an irregular shape that you can freely draw.
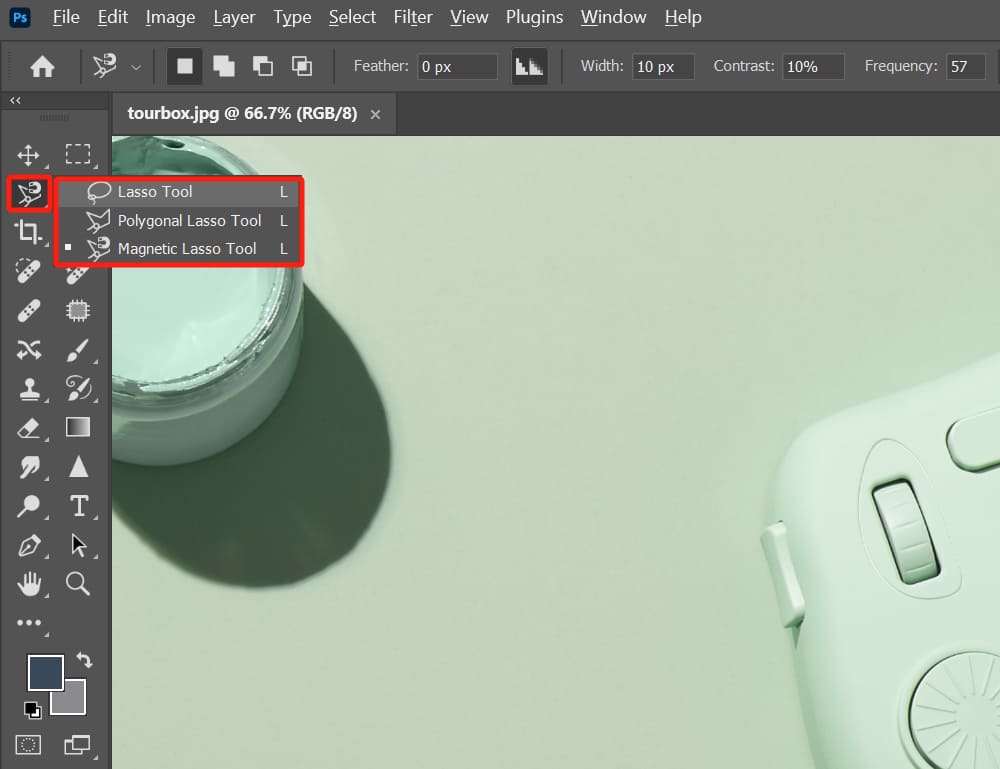
The selections made with the Lasso Tools may not be as precise, but they are convenient to use, especially for scenarios where high selection accuracy is not required and you need to quickly select a small area of content.
For example, you can use the Lasso Tools to quickly select a specific region in an image for content-aware fill or to perform generative fill.
Further Reading:
In this article, we have discussed Photoshop's content-aware fill and generative fill. If you're interested, you can check out here: "How to Use Content Aware Fill in Photoshop?".
There are two additional types of Lasso Tools: the Polygonal Lasso Tool and the Magnetic Lasso Tool. Both of these are suitable for objects with well-defined edges.
As the name suggests, the Polygonal Lasso Tool allows you to draw a selection in the shape of a polygon, while the Magnetic Lasso Tool automatically snaps to the object's edges, creating a selection.
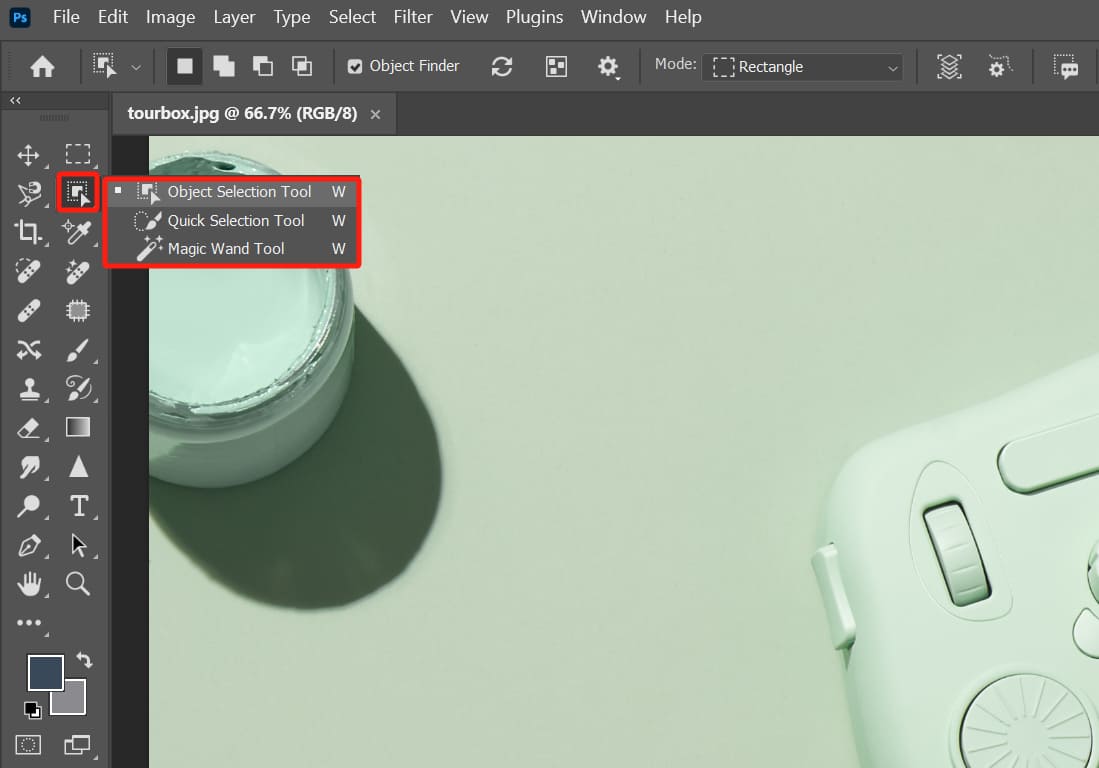
3. Selection Tools
The tools under the Selection Tools category are widely used in image editing because they are convenient and suitable for most situations. With these selection tools, you don't have to spend a lot of time manually creating selections in your images.
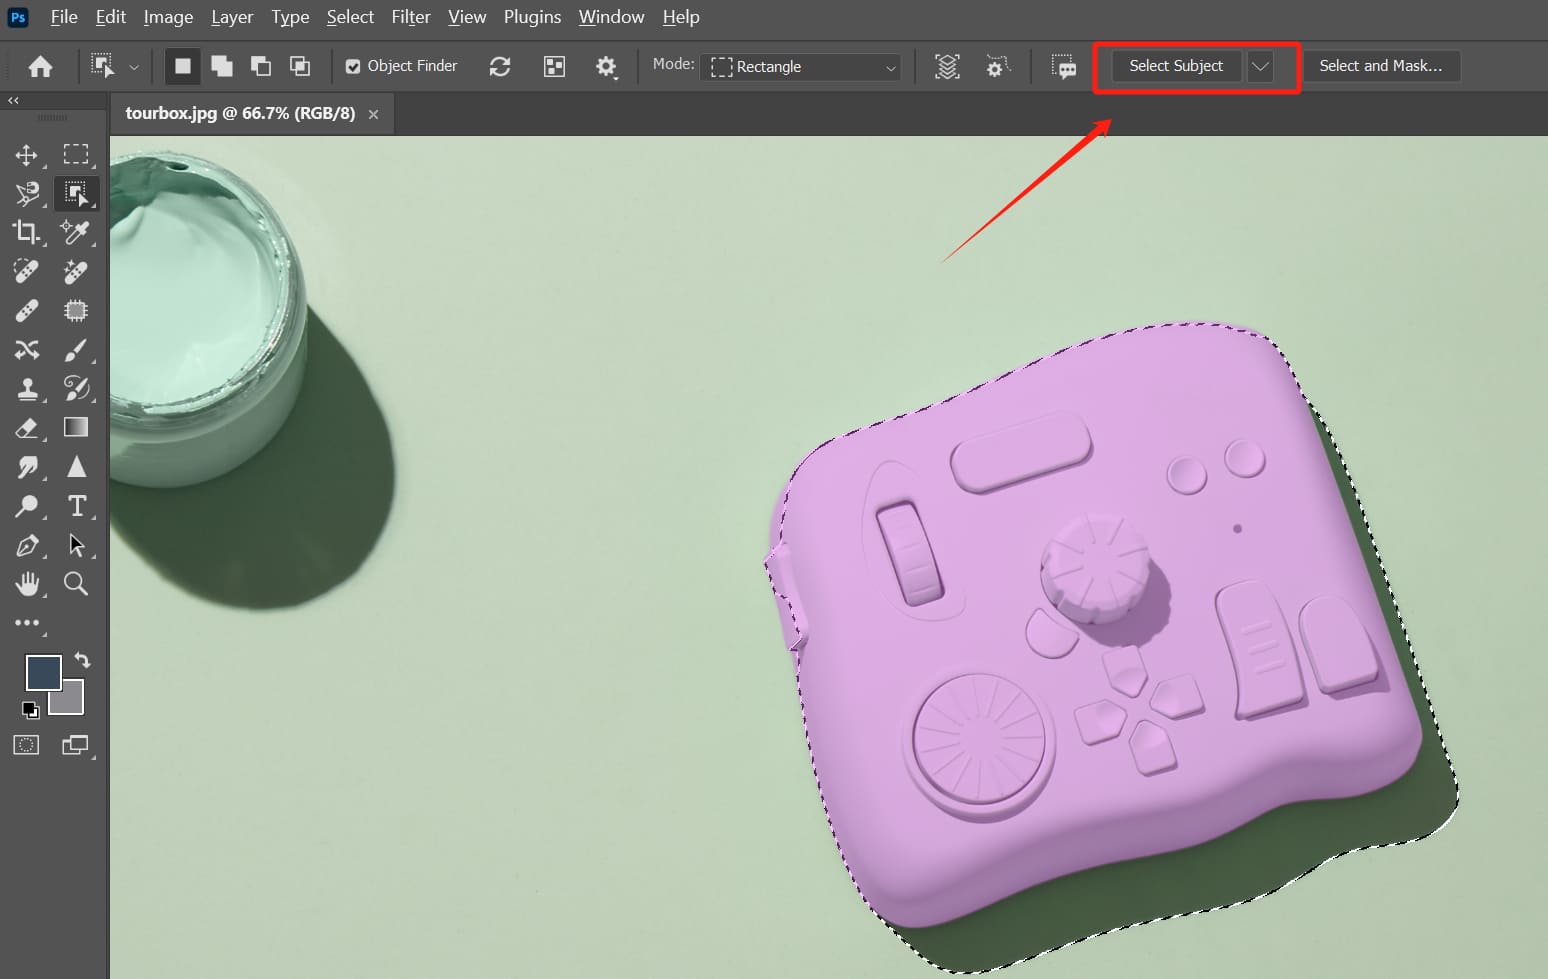
In Photoshop, each selection tool has a "Select Subject" button in its options bar. Clicking on it automatically selects the main subject. This feature is particularly useful for photos with clearly defined subjects, such as portraits. It is similar to the Object Selection Tool.
However, the "Select Subject" feature doesn't offer the same level of precision as the Object Selection Tool. In the example photo below, we used the "Select Subject" button, and you can see that even the shadow areas were selected, and the object itself wasn't fully selected.
In the options bar of each selection tool, there is also a "Select and Mask" feature, which was previously known as "Quick Mask" in older versions of Photoshop.
It is an advanced version of the selection tools that provides more control. It allows you to fine-tune the edges and automate the selection process. You can try using this feature to assist you in making selections.

The first selection tool is the Object Selection Tool. This tool is very straightforward—simply click on an object in the image, and Photoshop will intelligently analyze and select the object for you.

The second selection tool is the Quick Selection Tool. It offers more autonomy and control.
You manually make selections and make adjustments within the image. If you accidentally select too much, you can hold down the Alt/Option key to subtract from the selection. Additionally, you can adjust the brush size, hardness, and spacing to improve the precision of your selection.
The third selection tool is the Magic Wand Tool. The Magic Wand Tool works on a similar principle and is commonly used to remove backgrounds that have clear distinctions.
Further Reading:
How to Use the Magic Wand Tool in Photoshop: A Beginner's Guide
These tools require the object's edges to be well-defined and have noticeable differences from the background. If the subject's boundaries are blurry or indistinct from the background, the accuracy of the selection may be compromised.
Further Reading:
How to Invert a Selection in Photoshop: Quick and Easy Guide
How to Quickly Switch Tools in Photoshop?
Have you noticed that whether it's the Marquee Tools, Lasso Tools, or Selection Tools, these tool categories share the same keyboard shortcuts?
If you don't want to manually switch between tools in the Photoshop toolbar, you can try using the "Shift + shortcut key" to toggle between them.
Let's take the tools under the Lasso Tools category as an example. The Lasso Tool, Polygonal Lasso Tool, and Magnetic Lasso Tool all have the default shortcut key "L." However, pressing "Shift + L" allows you to cycle through these three tools.
Of course, there is an even simpler and more user-friendly method: using TourBox, a creative controller beloved by digital artists and photographers.

You can assign "Shift + L" to a button on TourBox, allowing you to quickly switch between Photoshop tools that share the same shortcut key, just like operating a game controller.
Further Reading:
[TourBox Tips] How to Switch Same Shortcut Key Tools in Photoshop?
After all, nobody wants to memorize a massive number of keyboard shortcuts or search through lengthy command menus to find the right command. TourBox allows you to focus on your creative work, and its excellent tactile feel ensures that your hand won't feel tired even after extended periods of work.
Check out our photo editing page to see how TourBox can change everything for you.
Other Tools to Select an Object in Photoshop
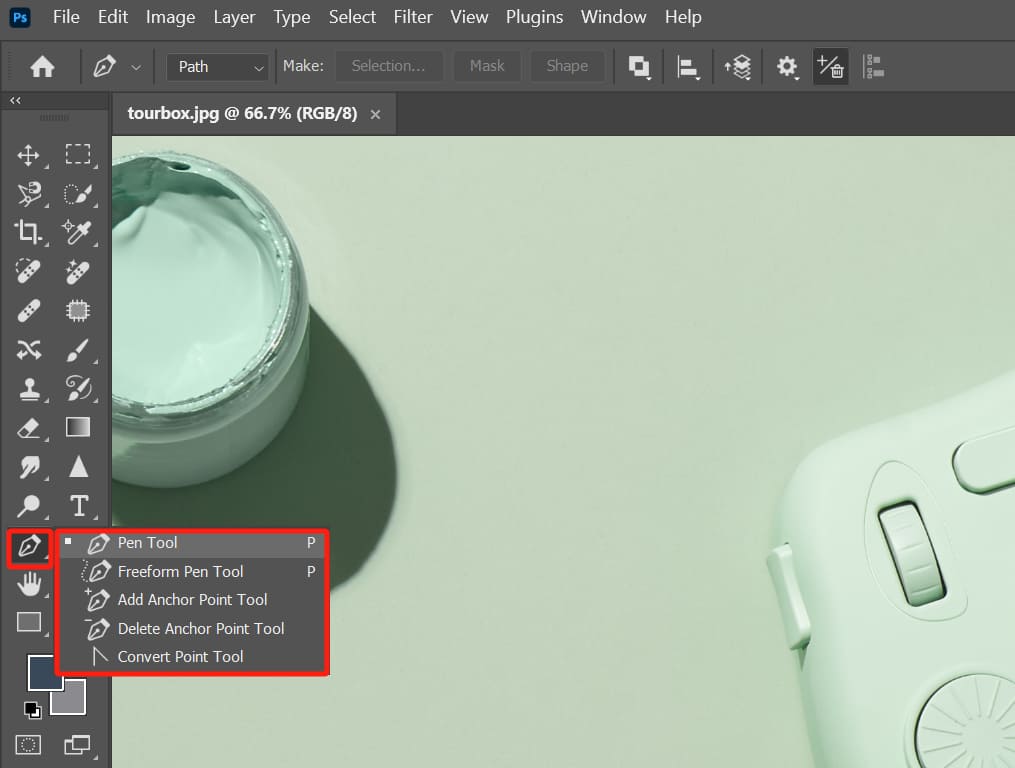
In Photoshop, the Pen Tool and Shape Tool can also be used to create selections.
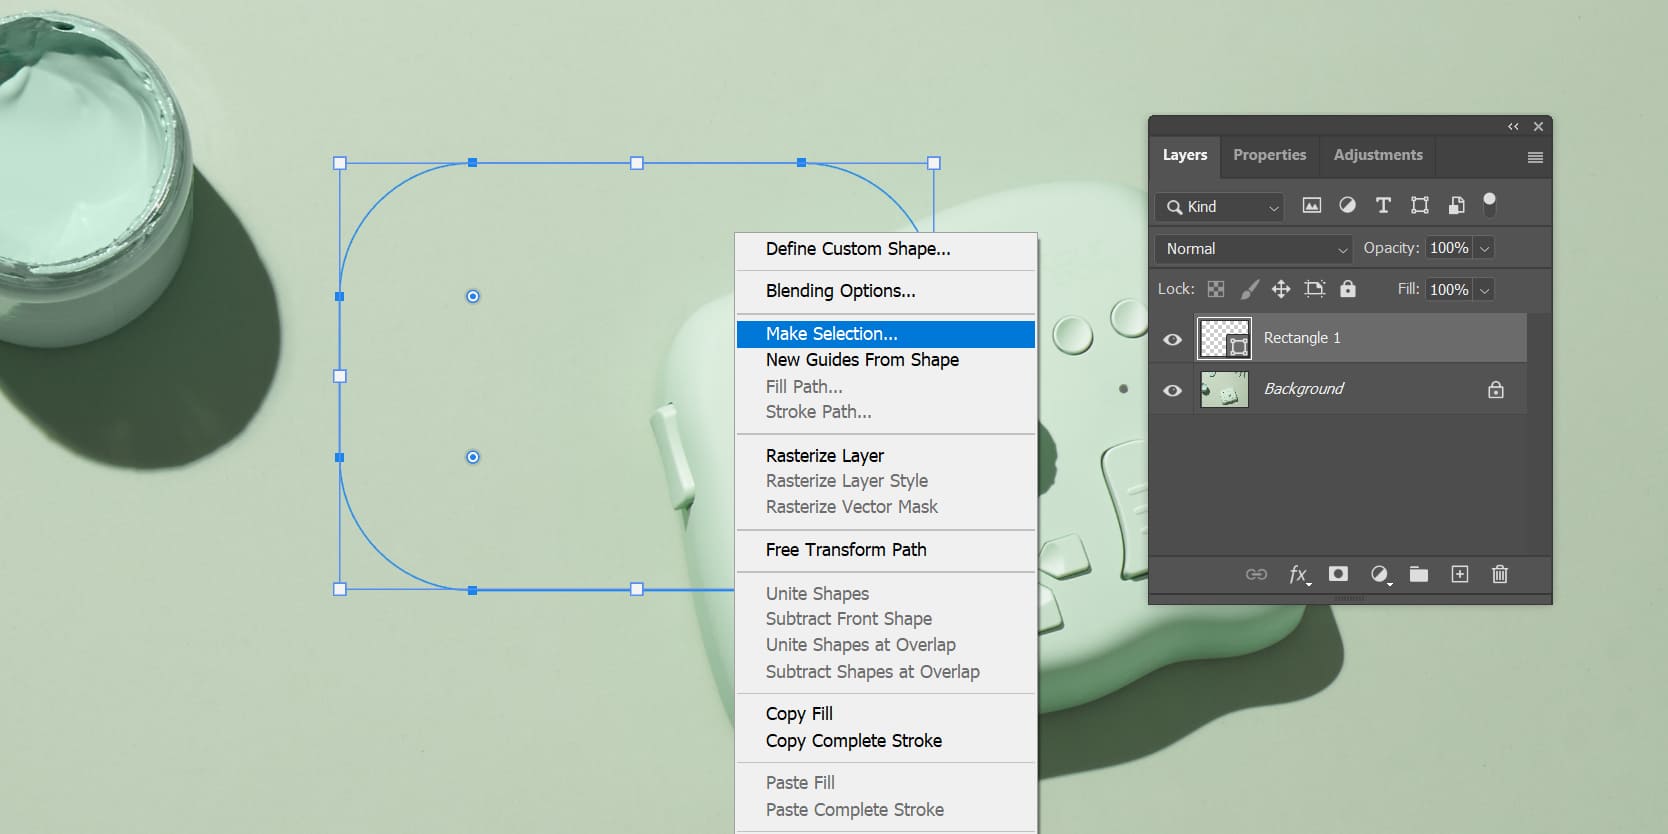
However, the Pen Tool and Shape Tool don't directly draw selections. The Pen Tool creates paths by default, while the Shape Tool creates shapes. To perform object selection, you need to convert the paths or shapes into selections.
The Pen Tool is widely used in Photoshop for creating selections. It has some similarities to the Lasso Tool, allowing you to freely control the desired area. But unlike the Lasso Tool, one creates paths, and the other creates selections.
The Pen Tool has anchor points that you can manipulate to control the direction of the path. This means that the Pen Tool offers more precision and control compared to the Lasso Tool.
Additionally, within the Pen Tool category, you can find the Freeform Pen Tool and the Anchor Point Tool. These are advanced versions of the Pen Tool, with similar underlying principles.
The Shape Tool is somewhat similar to the Marquee Tool and is suitable for drawing regular shapes. However, the shapes created with the Shape Tool are solid closed lines, commonly referred to as shapes.
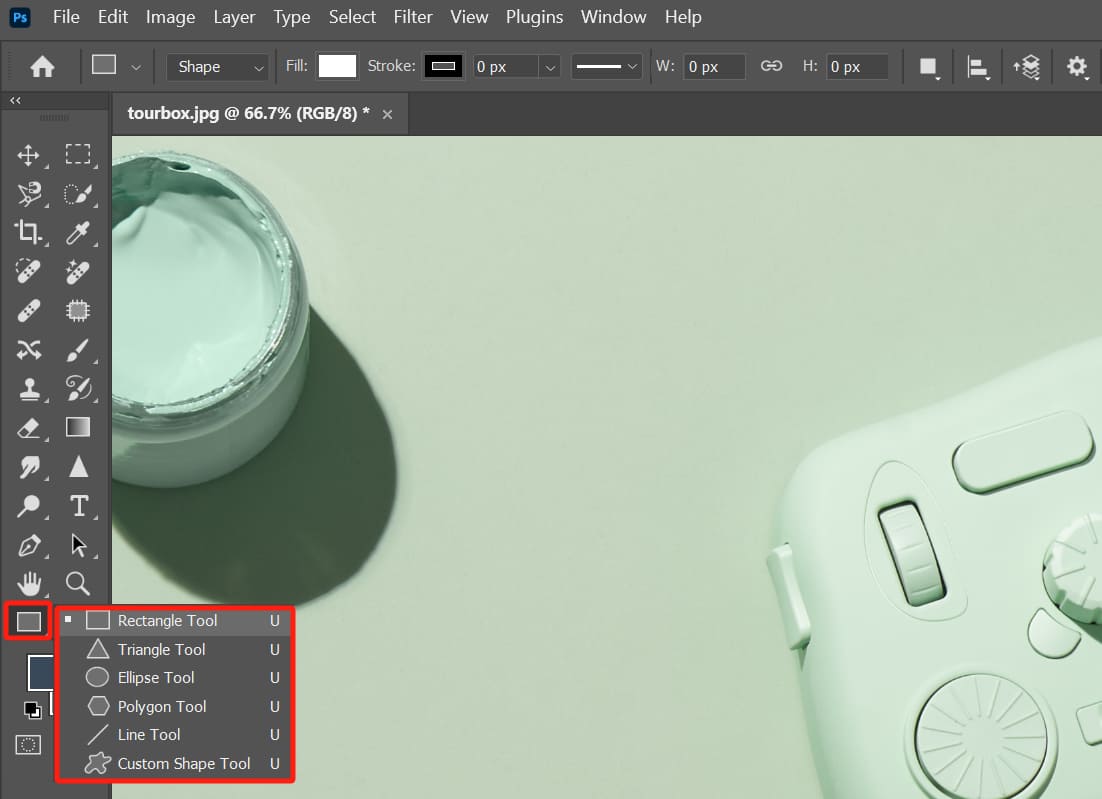
Once you convert them into selections, they function similarly to the Marquee Tool.
What to Do After Selecting an Object?
Once you have made a selection, you can proceed with further actions. You can directly delete the unwanted areas, or you can copy or cut out the selected object. However, it's generally advisable to avoid such operations whenever possible.
In photo editing, it's important to strive for non-destructive editing, which means avoiding damage to the original image.
If you delete or cut out the content you want to extract, you will be altering the layer. If you later want to make adjustments, you'll find that it becomes irreversible.
Your original layer has been damaged, and the deleted parts are gone. If you want to make adjustments, you'll have to start over with the original image, which can be quite time-consuming.
Therefore, you can use layer masks to facilitate your operations. After making a selection, simply click on the mask to create a selection mask on the original layer. A mask is like a solid board where white represents transparency and black represents opacity.
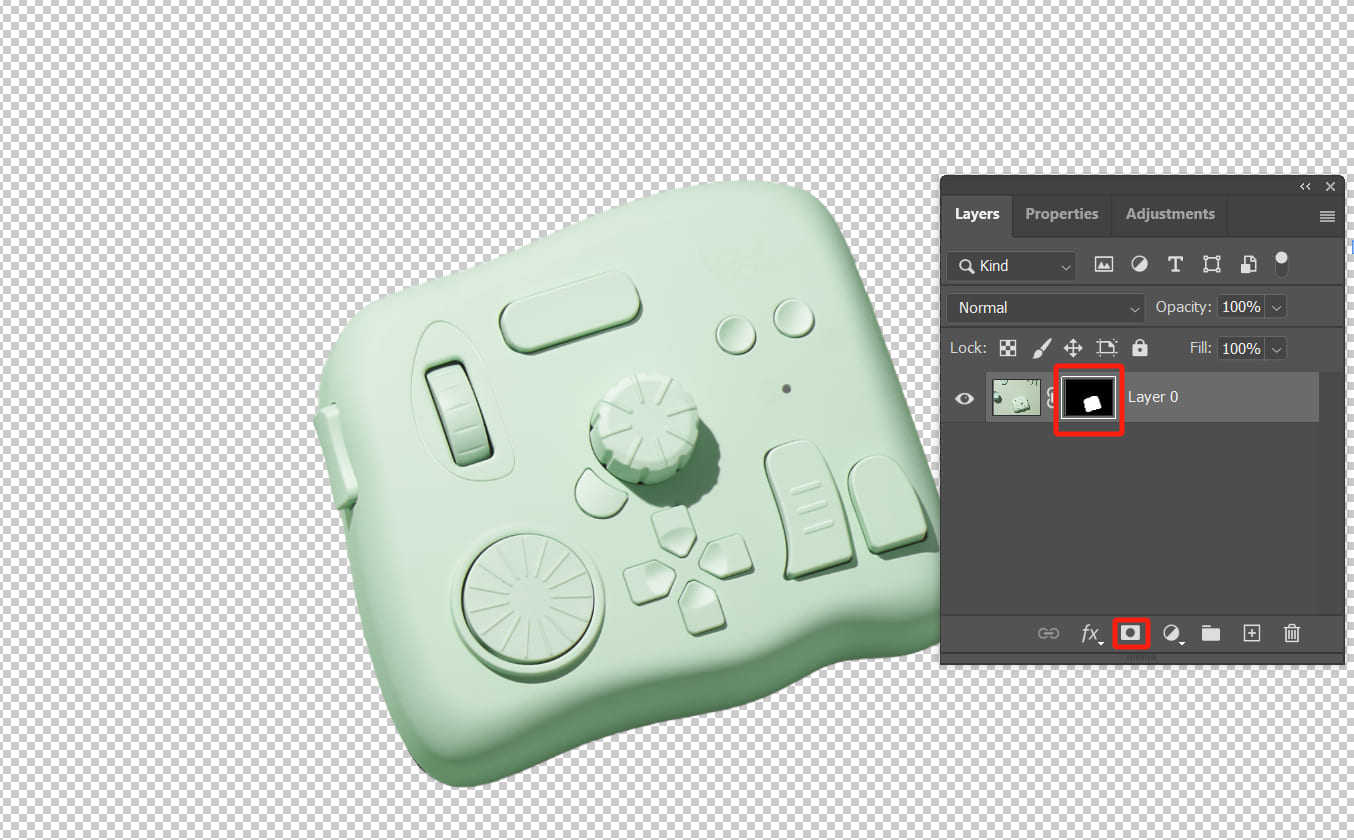
This way, your original layer remains intact, and you simply cover the unwanted parts with a blackboard. In subsequent editing steps, no matter how far along you go, you can always go back to the mask and directly edit the selection.
To reveal an area, you can use a white brush to paint over it and to hide an area, you can use a black brush to cover it. This approach also simplifies the process.
Further Reading:
How to Use Layer Masks to Create Stunning Effects in Photoshop?
Final Thoughts About Select an Object in Photoshop
In Photoshop, there are many ways to create selections. In this tutorial, we have only covered the basic selection tools. However, we believe that the tools we've discussed so far should be sufficient to meet most of your needs.
If you want to experience how TourBox can greatly enhance your workflow efficiency, you can start with the TourBox Lite, which is a simplified version.

This cost-effective option is perfect for first-time users of TourBox, and you're sure to enjoy the ease of use it offers.