Mastering Sharpening: How to Sharpen Images in Photoshop?
Welcome to this tutorial on mastering the art of sharpening in Photoshop. Sharpening is a crucial step in the editing process that can make a significant difference in the overall quality and impact of your images.
In this tutorial, we will explore a powerful technique called multipass sharpening, which allows for precise control over the sharpening process and helps you achieve crisp and detailed results.
Whether you are a photographer, digital artist, or enthusiast, understanding how to effectively sharpen your images can take your work to the next level. So, let's dive in and discover the secrets of how to sharpen an image in Photoshop.

In this article, you will learn:
- What Is Sharpening?
- What Is Multipass Sharpening?
- How to Sharpen an Image in Photoshop?
- Final Thoughts About Sharpening an Image in Photoshop
What Is Sharpening?
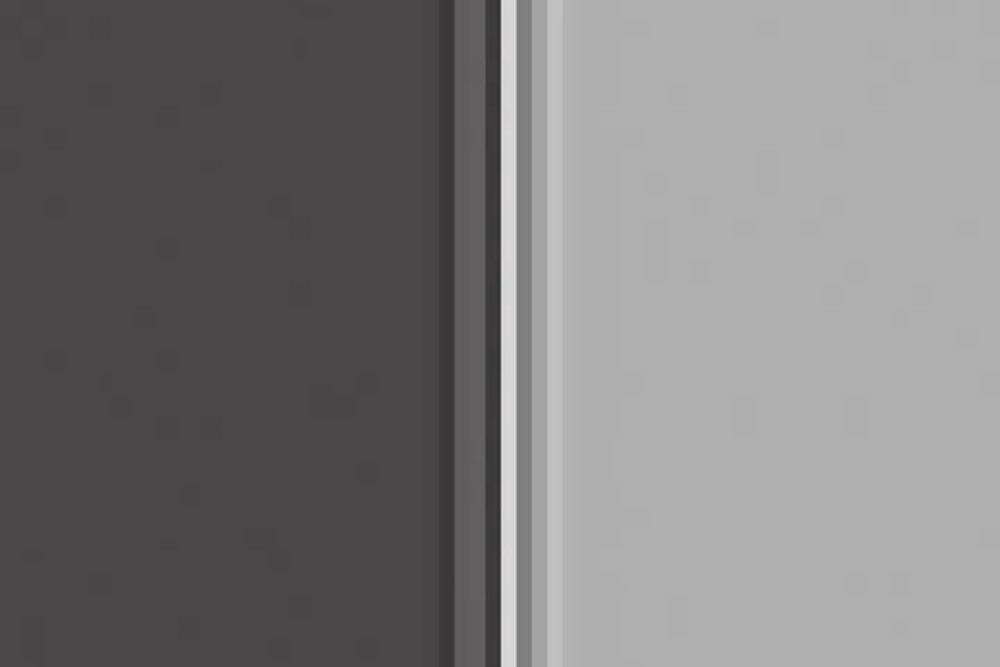
To better explain what sharpening is, let's take a closer look at a texture edge magnified 20 times as an example.

Sharpening, in essence, affects only the edges of an object. It primarily works by adding alternating high-contrast lines on either side of the edge, making the edge appear more pronounced and sharp.
In any image editing software, the sharpening tool typically consists of four sliders: Amount, Radius, Detail, and Masking. These sliders directly address the three main issues commonly encountered in sharpening.
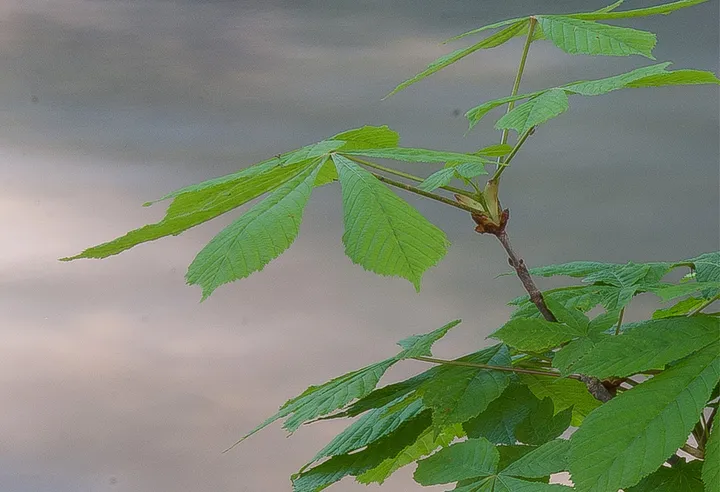
Taking the over-sharpened photo example we shared above, the three problems are as follows:
- The edges of the leaves appear overly sharpened, giving an artificial look. The intensity of sharpening is determined by the "Amount" slider.
- The edges of the leaves exhibit noticeable white and black halos, indicating that the sharpening effect extends beyond the intended area. Instead of subtle contrast at the edges, we see large blocks of white and black. The area affected by sharpening is controlled by the "Radius" slider.
- Non-edge areas, such as the interior of the water surface, have also been sharpened, resulting in an increase in noise. The differentiation between edges and non-edges is controlled by the "Detail" and "Masking" sliders.
Based on these observations, we can draw the following conclusions:
- Amount: Determines the strength of sharpening, which affects the contrast of edges and the degree of separation between edges and objects.
- Radius: Determines the area of sharpening. A larger radius will result in more regions becoming contrast haloing zones along the edges.
- Detail: As the name itself suggests, this slider determines the level of contrast an edge must possess to be sharpened. A higher detail value means even the subtlest edges will be sharpened.
- Masking: This slider identifies areas in the photo that are uniform, such as the sky, water surfaces, or skin, and prevents sharpening from affecting these regions. The masking slider is of utmost importance in the sharpening tool, as it allows for localized sharpening effects.
What Is Multipass Sharpening?
Common sharpening methods in Photoshop typically involve using tools like USM (Unsharp Mask) or Smart Sharpen in the final step of photo processing to sharpen the entire image at once.
While these methods are convenient, they may lack precision. In this tutorial, we will share a technique called Multipass Sharpening, which offers a more refined approach to post-sharpening.
You might wonder why we would bother with a multi-step process when one step seems sufficient. The reason is that each step in the Multipass Sharpening method serves a distinct purpose.
1. Capture Sharpening
The first step of Multipass Sharpening is Capture Sharpening.
Due to the characteristics of digital camera sensors, lens properties, and the presence of anti-aliasing filters, digital photos often appear soft straight out of the camera. The purpose of Capture Sharpening is to counteract this inherent softness in digital photos.
If you shoot in JPEG format, your camera typically applies this type of sharpening automatically. However, for those shooting in RAW format, basic sharpening in post-processing becomes an essential step for every photo.
2. Creative Sharpening
The second step of Multipass Sharpening is Creative Sharpening.
Creative Sharpening aims to enhance important details such as foreground elements, subject matter, and eyes of people, or bring out the special textures of rocks, buildings, trees, etc. It is a localized sharpening technique used artistically for specific elements in a scene.
3. Output Sharpening
The third step of Multipass Sharpening is Output Sharpening.
As the name suggests, Output Sharpening is applied for the final presentation of the image. We may need to output images in different sizes, and during the resizing process, some sharpness can be lost. Therefore, an additional round of sharpening is required for output.
Moreover, different output mediums, such as web displays or print exhibitions, and even factors like different paper types or viewing distances, can influence the desired level of sharpening.
As a result, the values and methods for output sharpening need to be determined based on specific requirements.
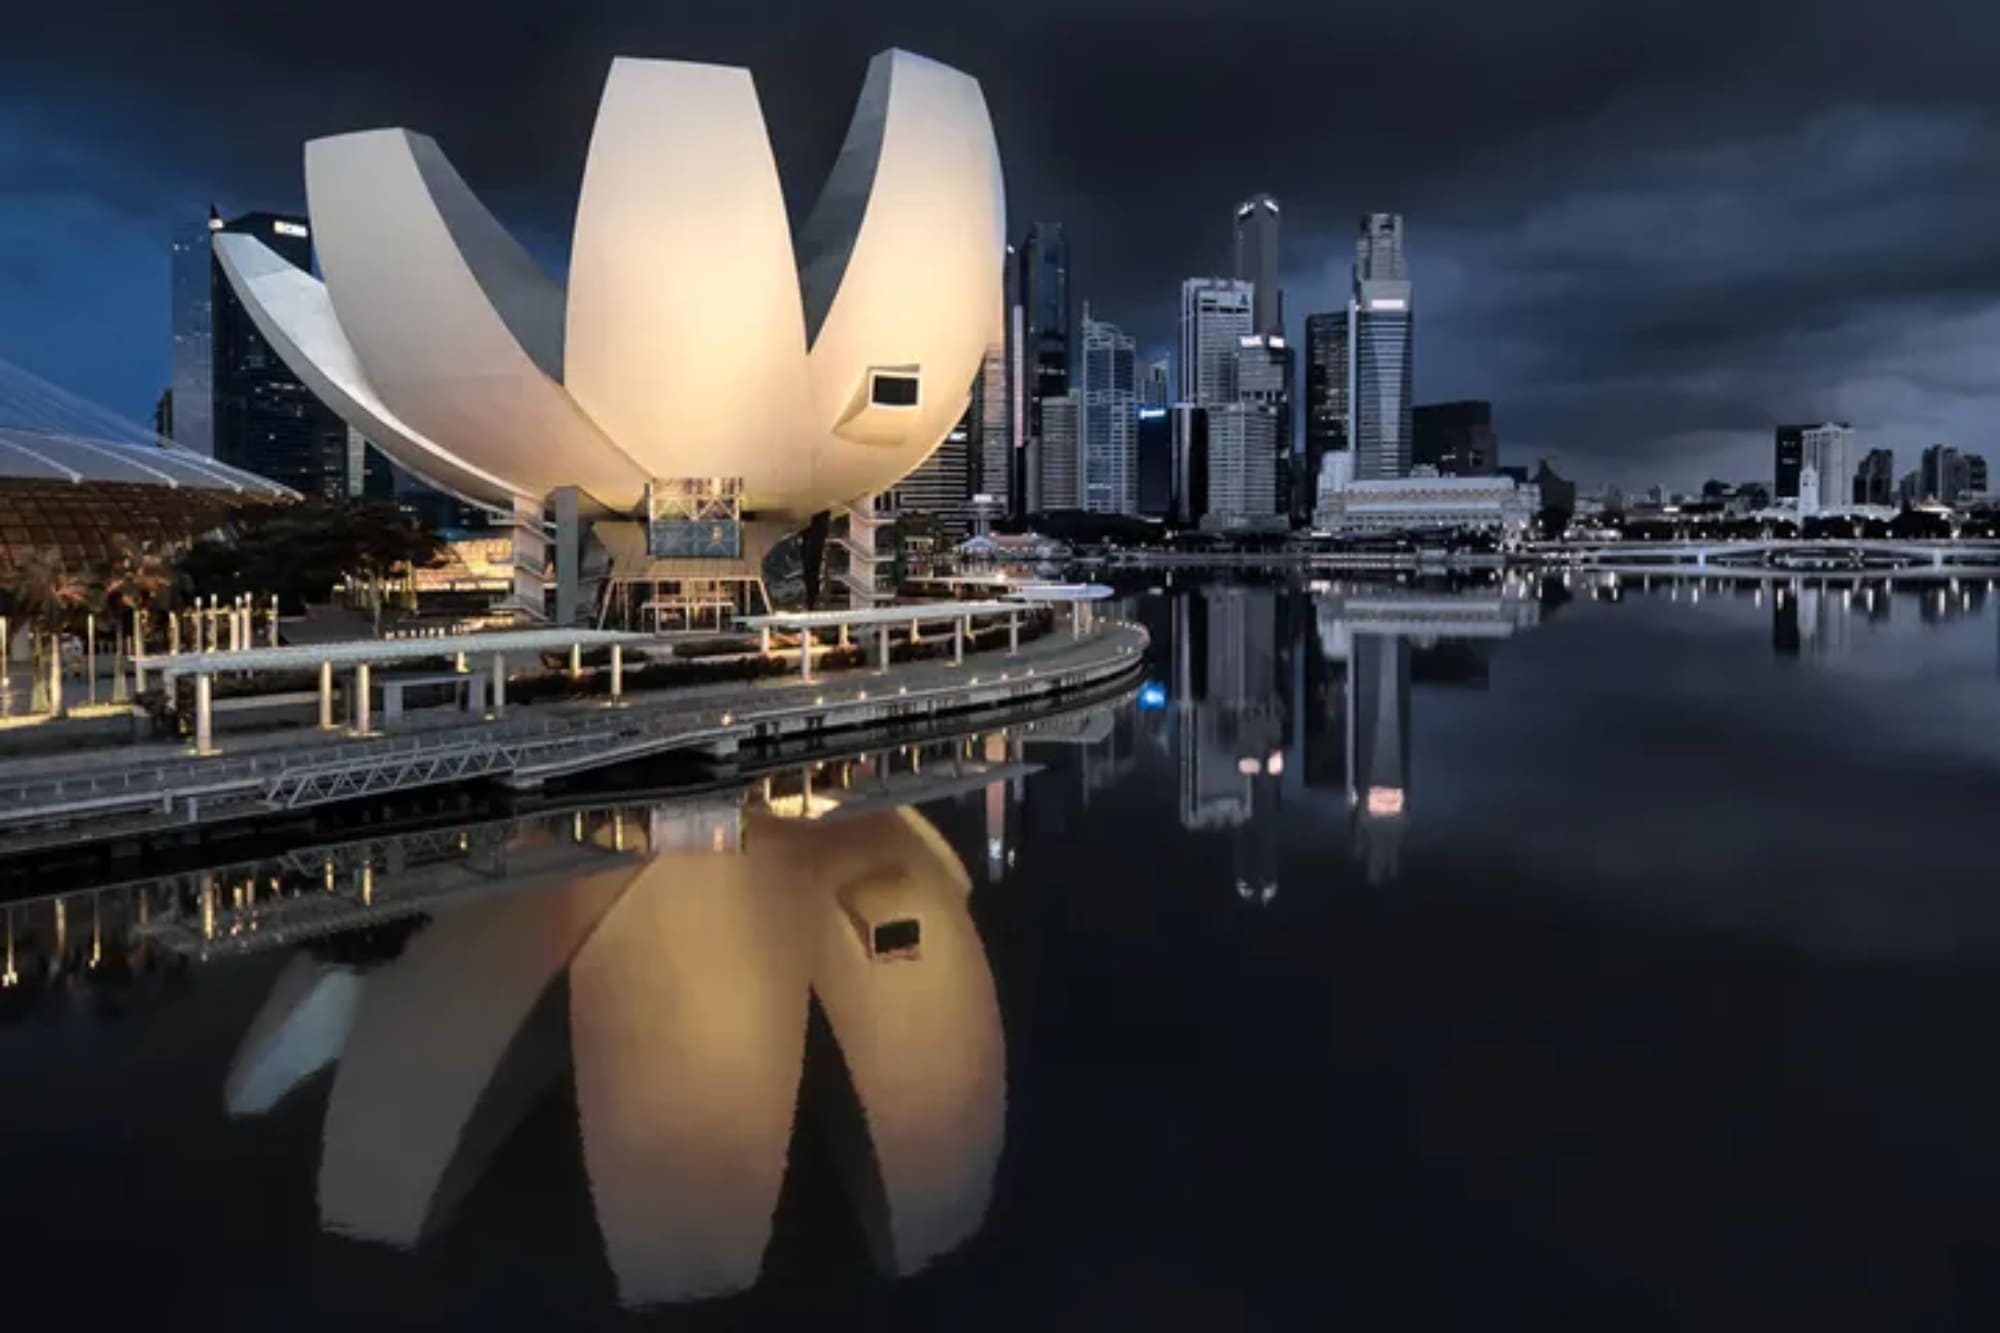
In the following section, we will demonstrate the process of Multipass Sharpening using the example photo below.
How to Sharpen an Image in Photoshop?
We will use the Adobe Camera Raw filter tool in Photoshop for photo sharpening, but you can also use Lightroom Classic for photo processing as the general operations are similar.
Step 1: Capture Sharpening
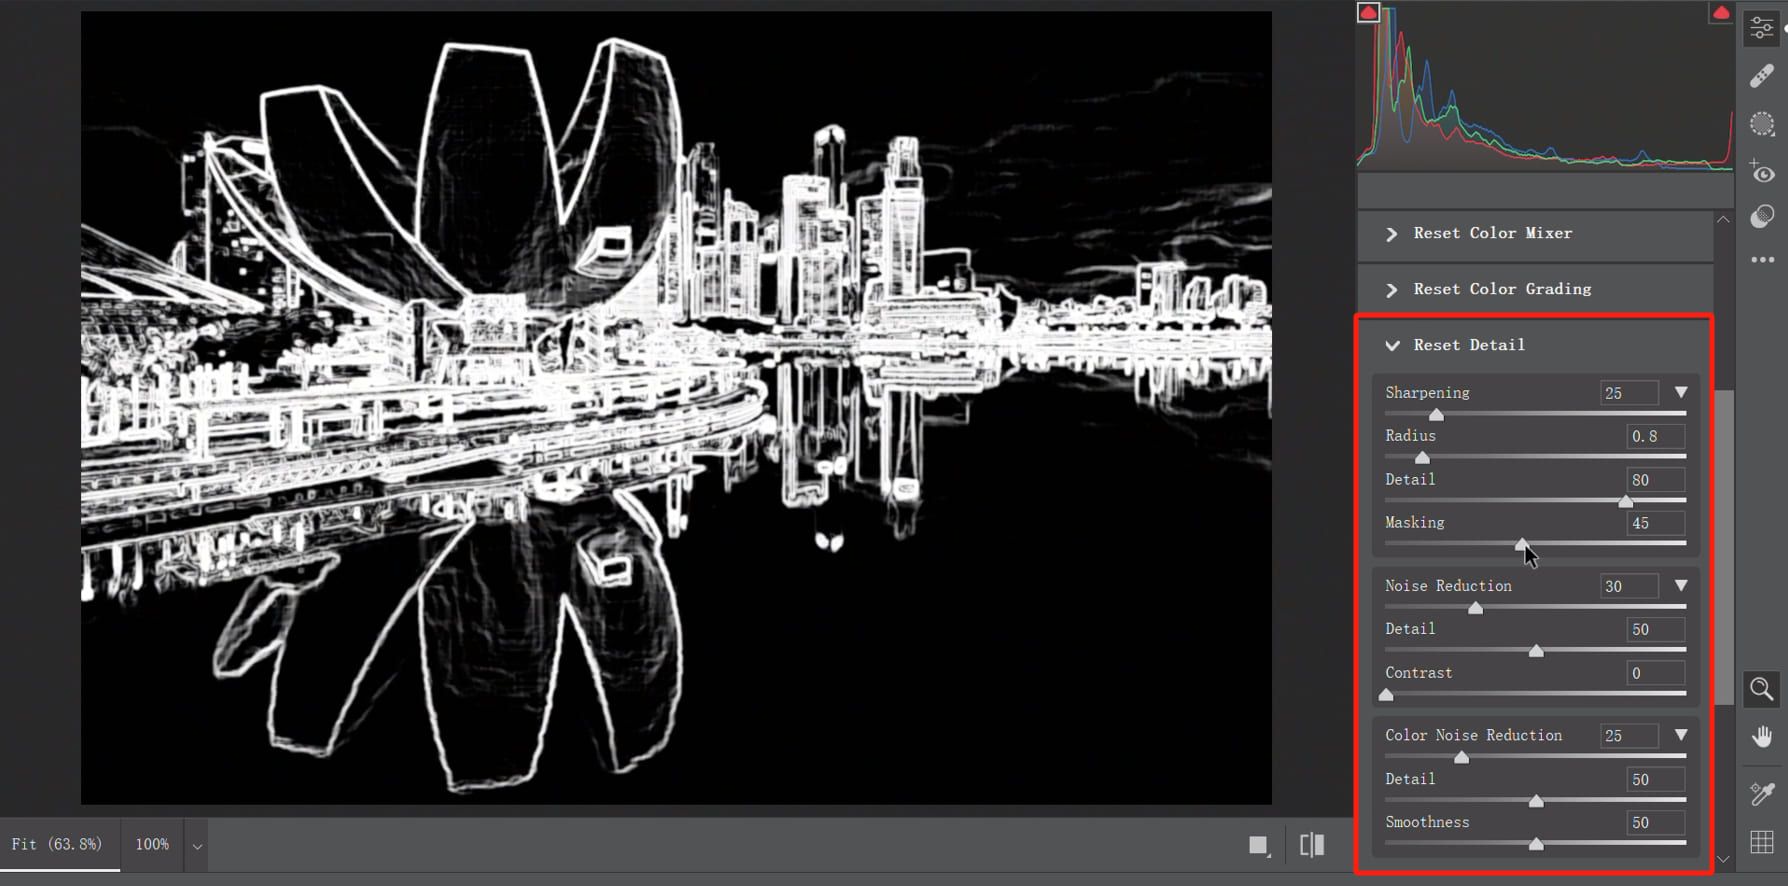
Capture Sharpening is an essential step for processing every photo, usually done in the Detail panel of Adobe Camera Raw or Lightroom.
In Adobe Camera Raw, the default sharpening settings are Amount 25, Radius 1, Detail 25, and Masking 0.
Note: In Adobe Camera Raw, the sharpening Amount is displayed directly as "Sharpening." Just remember that Sharpening refers to the sharpening Amount.
These default settings work well for many photos, but when dealing with images that have a lot of fine details, extensive areas of uniformity, or a higher ISO, further adjustment of the sharpening parameters may be necessary.
For this particular photo, we will reduce the Radius to 0.8 and increase the Detail to 80. This will result in more details being sharpened, although the intensity will be slightly reduced.
Since this photo contains a significant amount of sky and water and was captured handheld with a high ISO, we will raise the Masking to 45 to ensure that noise in the solid color areas is not sharpened.
Extra tip: While adjusting the slider parameters, hold the Alt key (Mac users can make the corresponding adjustments) and move the respective slider to see the specific impact it has on the image.
We also made some adjustments to the noise in the photo here, but that is not the focus of our sharpening tutorial. Therefore, you can refer to our steps to make similar settings if needed.
As the first step of Multipass Sharpening, Capture Sharpening requires a cautious approach. In practical photo editing, it is better to have slightly less intensity than to have white edges or excessive noise.
Step 2: Creative Sharpening
This photo contains both water and sky, as well as detailed modern architecture. Therefore, the purpose of the second step, Creative Sharpening, is to enhance the texture and details of the metal and glass surfaces of these skyscrapers.
In practical projects, Creative Sharpening is usually done after all pixel and contrast adjustments are completed. There are various methods for Creative Sharpening, including Smart Sharpening, LAB Sharpening, High Pass Sharpening, Nik Output Sharpening, and more.
Here, we will use High Pass Sharpening as an example. First, duplicate the layer that needs sharpening (this step is crucial).
Then, select the duplicate layer and go to "Filter" > "Other" > "High Pass" in the Photoshop menu.
The radius for High Pass Sharpening varies depending on the image size and the objects that need sharpening, usually set between 1.5 and 4. Here, we will choose 2.
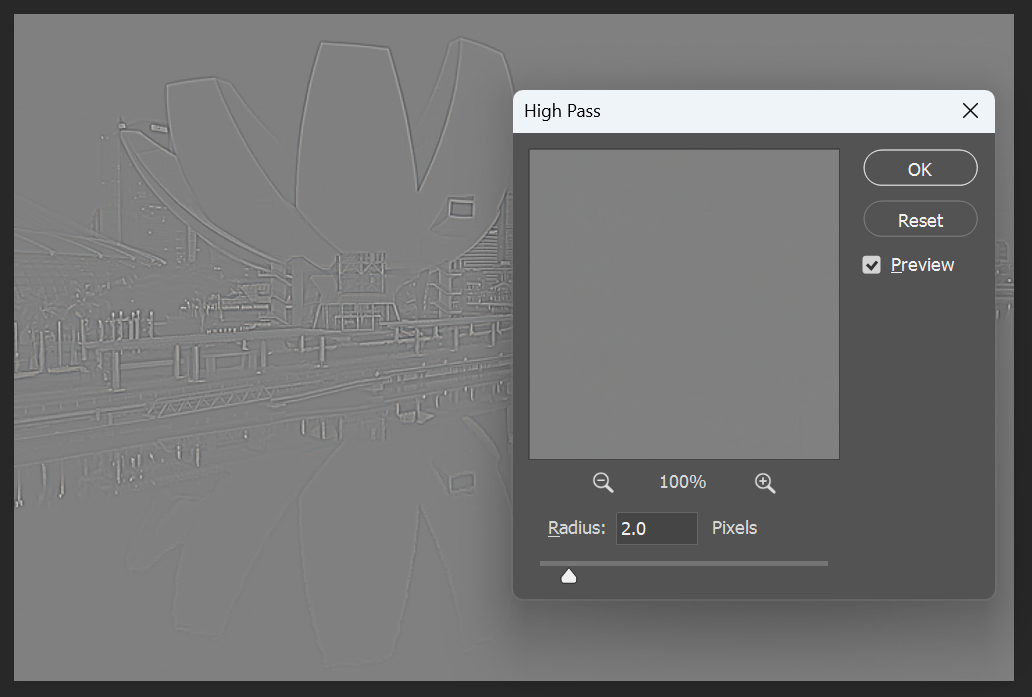
After applying High Pass, you will see that the layer turns into a mostly mid-gray color, with only the edges with high contrast preserved.
To ensure that the sharpening effect doesn't introduce additional color artifacts, go to "Image" > "Adjustments" > "Desaturate" to remove the color from the High Pass Sharpening layer. This way, the sharpening effect will only enhance the edge sharpness without affecting the colors.
Note: Here, since we initially imported the photo as a smart object, the duplicated layer is also a smart object. Smart objects cannot be desaturated. Therefore, before the desaturation step, you need to rasterize the High Pass layer and then desaturate it.
Change the blending mode of the High Pass Sharpening layer to "Overlay." Now, the mid-gray color in the High Pass layer becomes transparent, and only the edge areas are overlaid onto the layer below, achieving the sharpening effect.
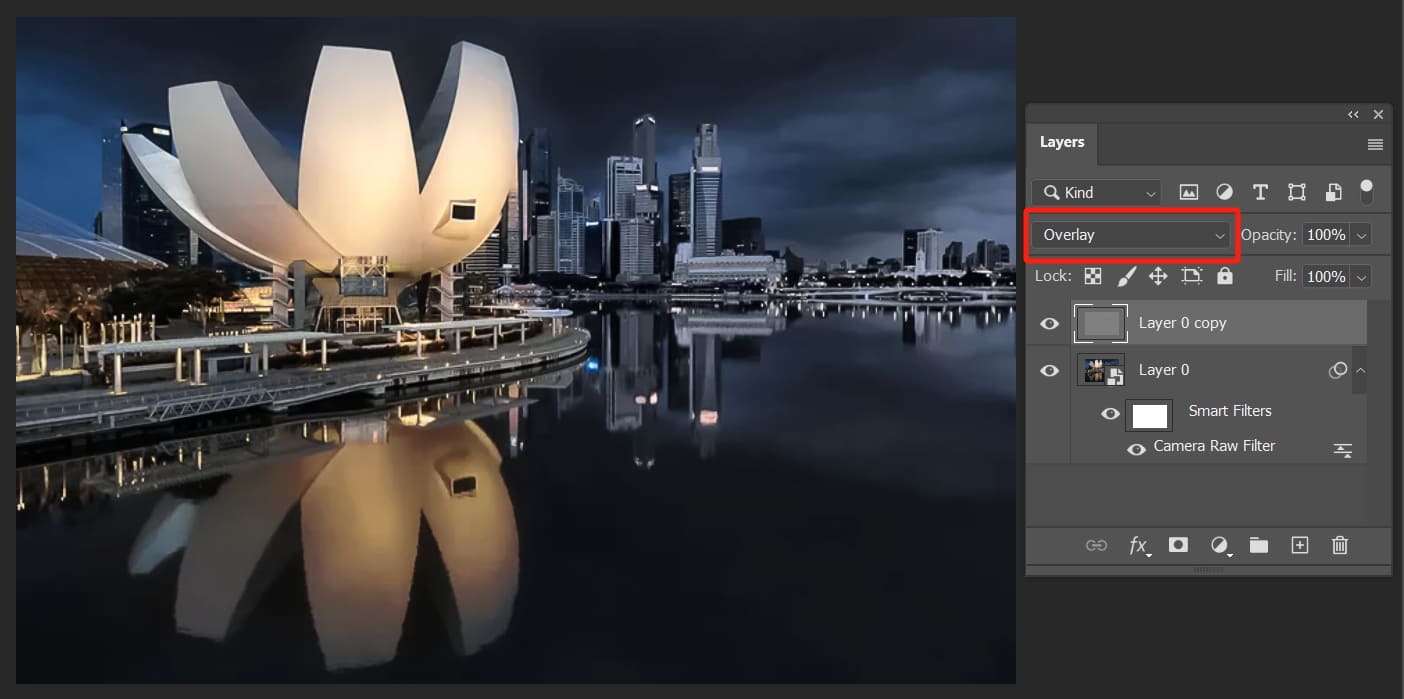
Note: If you find the sharpening intensity too strong, you can lower the opacity of the High Pass Sharpening layer.
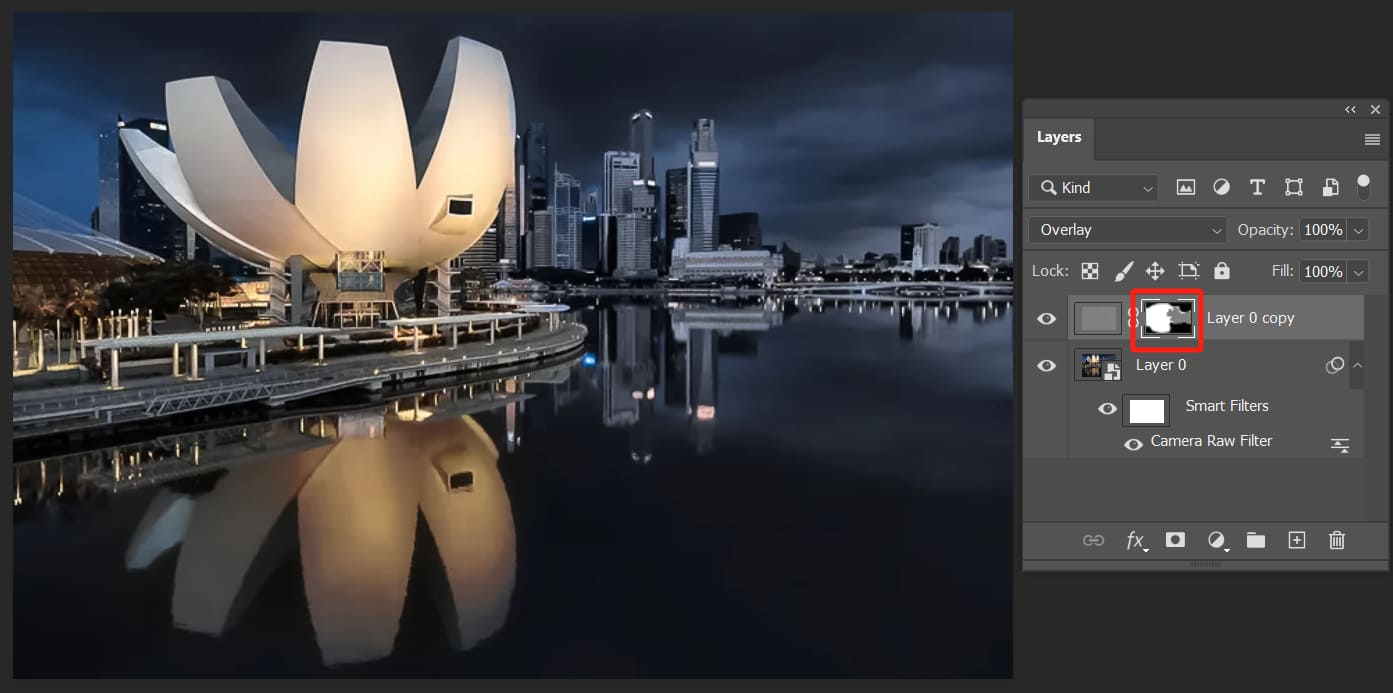
Now comes the crucial step where you need to add a layer mask to the High Pass layer. Use a black brush to paint over the sky and water areas, preventing the sharpening from affecting these clean, detail-less areas.
Use a gray brush to paint over the distant low-rise buildings, creating a lesser sharpening intensity compared to the nearby skyscrapers and adding a sense of depth to the image.
Step 3: Output Sharpening
At this point, the post-processing sharpening for this type of photo is complete, and only the final step of Output Sharpening is needed.
As we emphasized above when outputting an image, we often need to resize it, and during the process of image reduction or enlargement, the image may lose some sharpness. Therefore, it requires sharpening again during output.
The optimal sharpening method, extensively practiced by many professional photographers, is known as "Marc Adamus sharpening," named after the renowned landscape photographer Marc Adamus.
The specific method involves enlarging the image to twice its final size, applying aggressive sharpening, and then resizing the image to its final dimensions.
For example, if you want to publish an image with a long edge of 1000px, you should first enlarge the image to have a long edge of 2000px.
Then, apply aggressive sharpening, which may introduce noticeable noise but should not create significant halos. Finally, resize the image to its final dimensions, i.e., a long edge of 1000px.
If you find the above method too cumbersome, you might consider purchasing the Nik Sharpener plugin.
This is a highly professional sharpening plugin, and the best part is that it can tailor the sharpening specifically for your photo's destination. Whether it's for a printer or a 4K display, it can create detailed and crisp images.

Final Thoughts About Sharpening an Image in Photoshop
By now, you should have gained some understanding of what sharpening is and how to sharpen an image in Photoshop. In concluding our tutorial on sharpening in Photoshop, we'd like to summarize some key points:
- Although Multipass Sharpening may seem more complex, its level of precision better suits the creative needs of photography enthusiasts.
- Capture Sharpening is typically done using the Detail panel in Adobe Camera Raw, aiming to eliminate the digital softness of photos, but the intensity should not be excessive.
- Creative Sharpening involves a variety of tools and techniques, with the key being using layer masks to selectively enhance the texture and depth of objects with better detail and distance perception in the composition.
- For Output Sharpening, you can simplify your workflow by using plugins tailored to your specific needs.
Product Recommendation:
As we conclude this tutorial on sharpening in Photoshop, we want to introduce you to a game-changing tool that can elevate your editing experience: TourBox.

TourBox's intuitive interface and customizable shortcuts enable you to tailor the controller to your unique workflow preferences. With a simple twist, turn, or press, you can fine-tune your sharpening settings and achieve the desired level of clarity and detail in your images.
But TourBox doesn't stop at sharpening. Its versatility extends to other aspects of your editing process, allowing you to streamline tasks like adjusting exposure, contrast, and color grading. With TourBox by your side, you can unlock your creative potential and achieve professional-grade results efficiently.
As we conclude our tutorial on how to sharpen an image in Photoshop, we hope it has inspired and enriched your Photoshop creative journey.