How to Smooth Edges in Photoshop: Step-By-Step Tutorial
During the process of editing images in Photoshop, you've likely encountered this frustration to some extent: after performing tasks such as image cropping or photo composition, jagged edges often appear, resulting in a blurry and inconsistent appearance.
So, how can you solve this problem? In this tutorial, we will guide you step by step on how to smooth edges in Photoshop.
Smoothing image edges enhances clarity and seamlessly integrates the image content. Let's dive deep into this tutorial and bring your images to life!

In this article, you will learn:
- How to Smooth Edges in Photoshop?
- Advanced Techniques for Smoothing Edges in Photoshop
- Final Thoughts About Smoothing Edges in Photoshop
How to Smooth Edges in Photoshop?
This tutorial will focus on using the Feather and Gaussian Blur tools for a non-destructive editing process. We will use the image below as the material for our tutorial.
Step 1: Open Your Image
Start by opening the image you want to work with. Go to File > Open and select your image.
Let's upload the image onto Photoshop to achieve the smooth edge effect. Then, use the keyboard shortcut "Ctrl/Command + J" to duplicate the layer. From here on, all the design operations will be performed on this duplicated layer.

Step 2: Make a Selection
Next, you need to select the object or area where you want to smooth the edges.
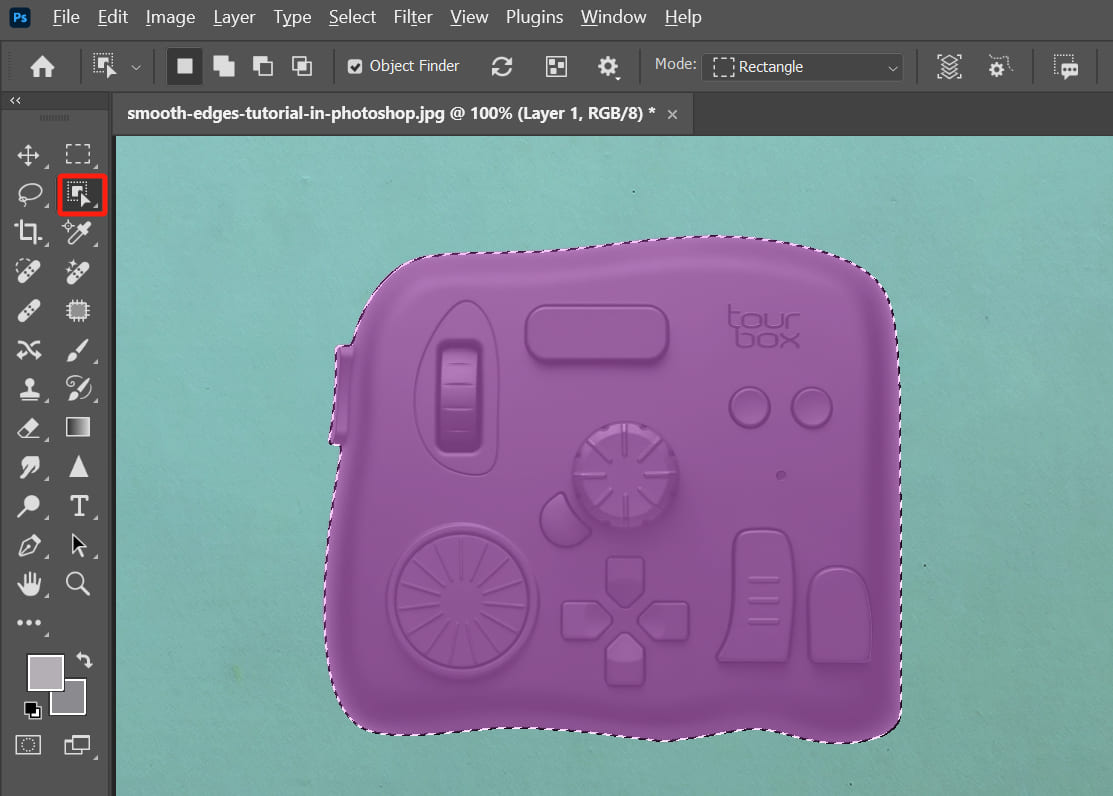
You can use any selection tool for this, but in this tutorial, we will use the Object Selection Tool. Click on the Object Selection Tool in the toolbar or press the "W" key on your keyboard. Then, simply click on the object in the image that you want to select.
Further Reading:
The Object Selection Tool in Photoshop is smart and can recognize objects. All you need to do is use the tool to click on the object you want to have a smooth edge, and it will efficiently and intelligently handle the process for you.
Step 3: Smooth the Edges
Here, we will share two methods in Photoshop to make the edges of your selections smoother. Let's dive into each of them:
Method 1: Feathering & Smooth Selection
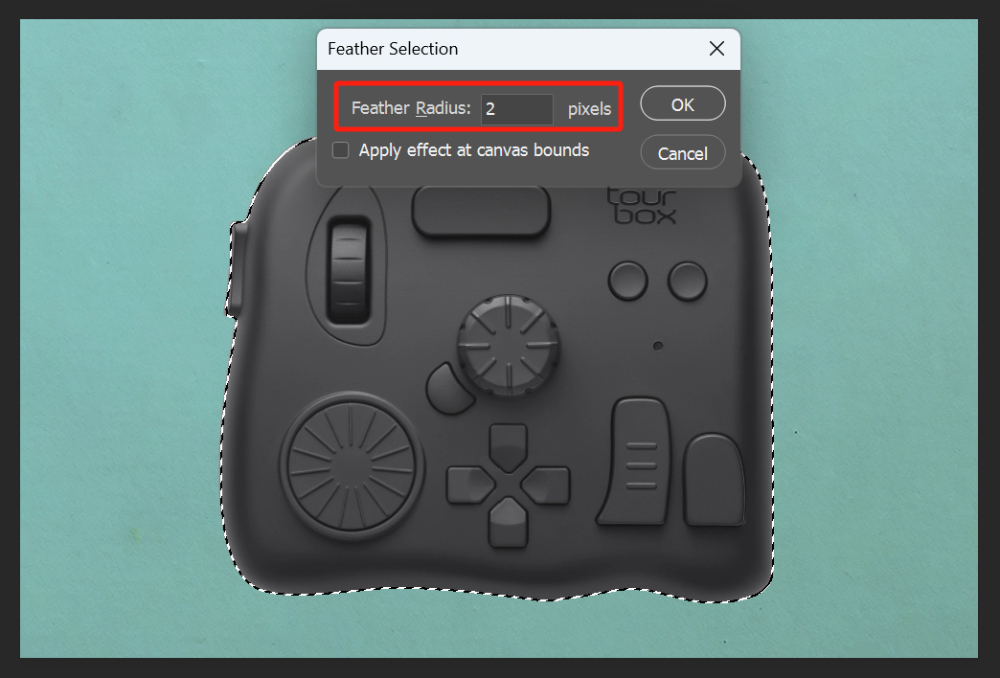
After selecting the object or area, go to "Select" > "Modify" > "Feather". This will open a dialog box where you can set the feather radius.
The larger the radius, the smoother and broader the edge transition will be. Start with a low value (such as 1 or 2 pixels) and increase as needed. Click "OK".
Alternatively, you can press Shift+F6. It will open a pop-up window to define the feathering value.
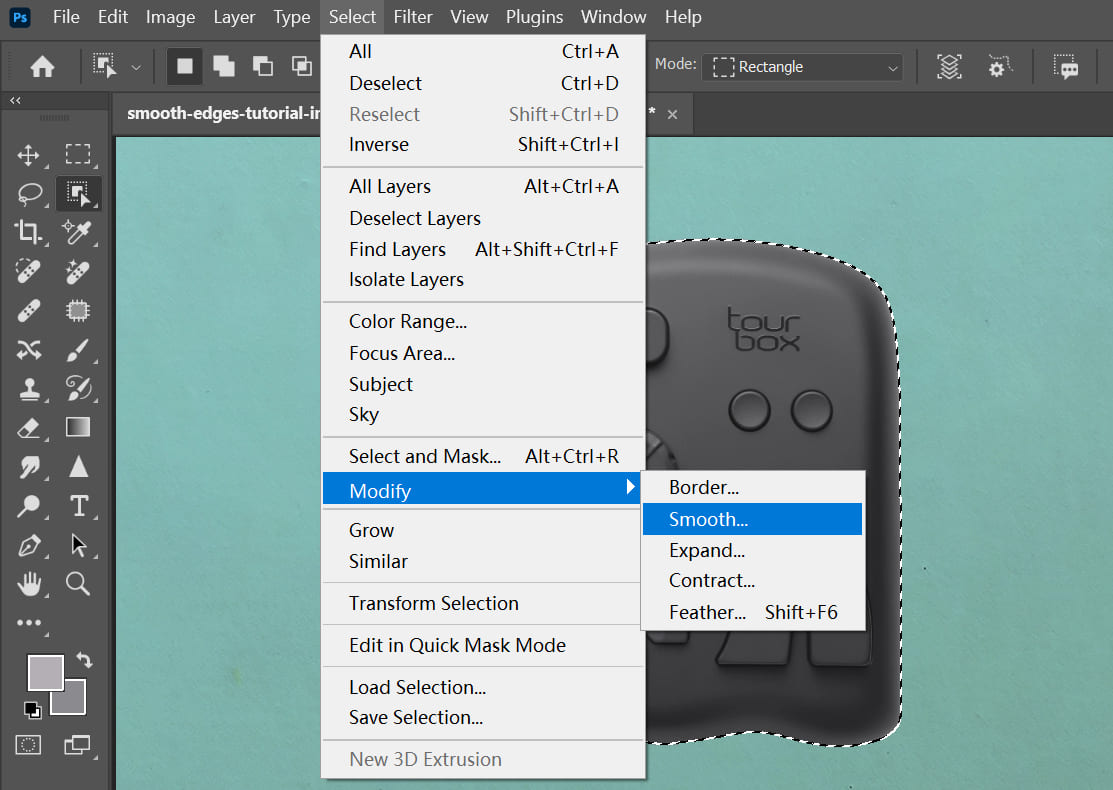
This will smooth the edges of the object. In addition to the feathering option, you can also choose the "Smooth" option in the Modify menu; it can further smooth the edges. You can also combine the use of both tools for better results.
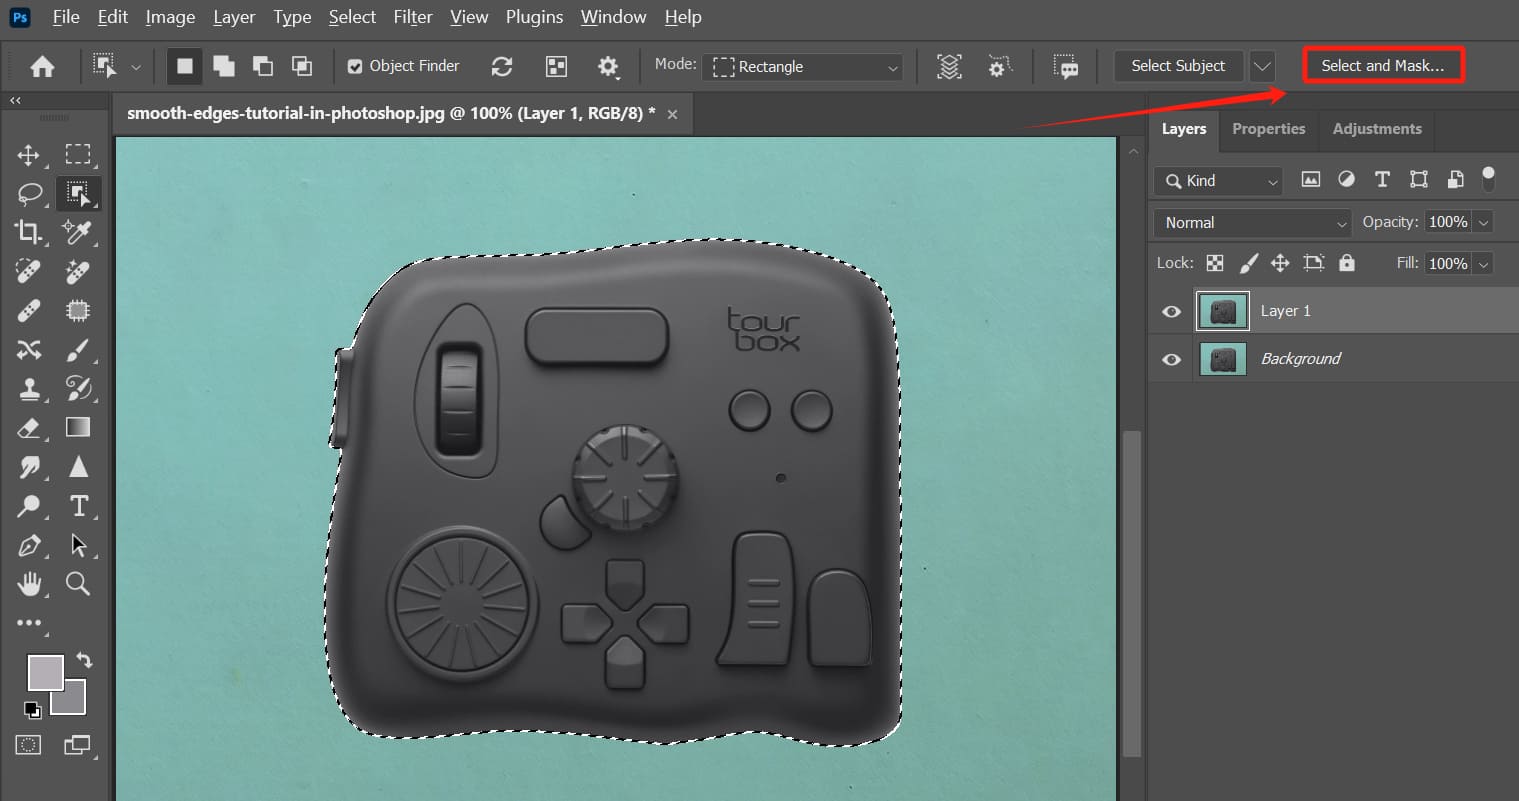
Method 2: Select and Mask
Click on the "Select and Mask" button in the menu bar at the top of the canvas, and a new interface will appear.
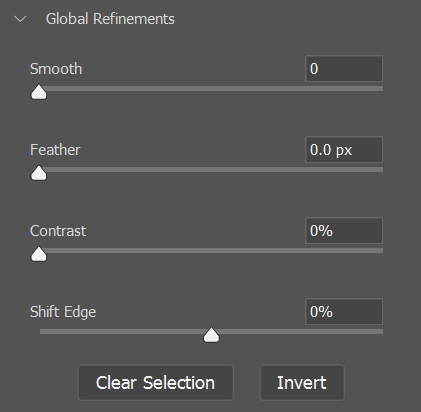
On the new interface, we proceed with the following steps. Scroll down with the mouse wheel to the "Smooth" option and adjust the value to achieve the desired level of image smoothing.
In addition to adjusting the smoothing value, you can also set other values according to your requirements, such as radius, feather, and contrast, within this window.
You will see several adjustment modules with the following concepts:
- Smooth: The smooth value presents a smoother outline for the specified selection.
- Feather: Feathering creates a soft transition between the selection and the background.
- Contrast: The contrast value defines the soft edge transition when the contrast is increased and becomes sharper.
- Shift Edge: Shifting the edge moves the soft selection edge inward or outward to remove unwanted pixels based on the defined value.
The concepts might seem stiff, but you can actually experience and explore them firsthand in Photoshop.
Extra Tip:
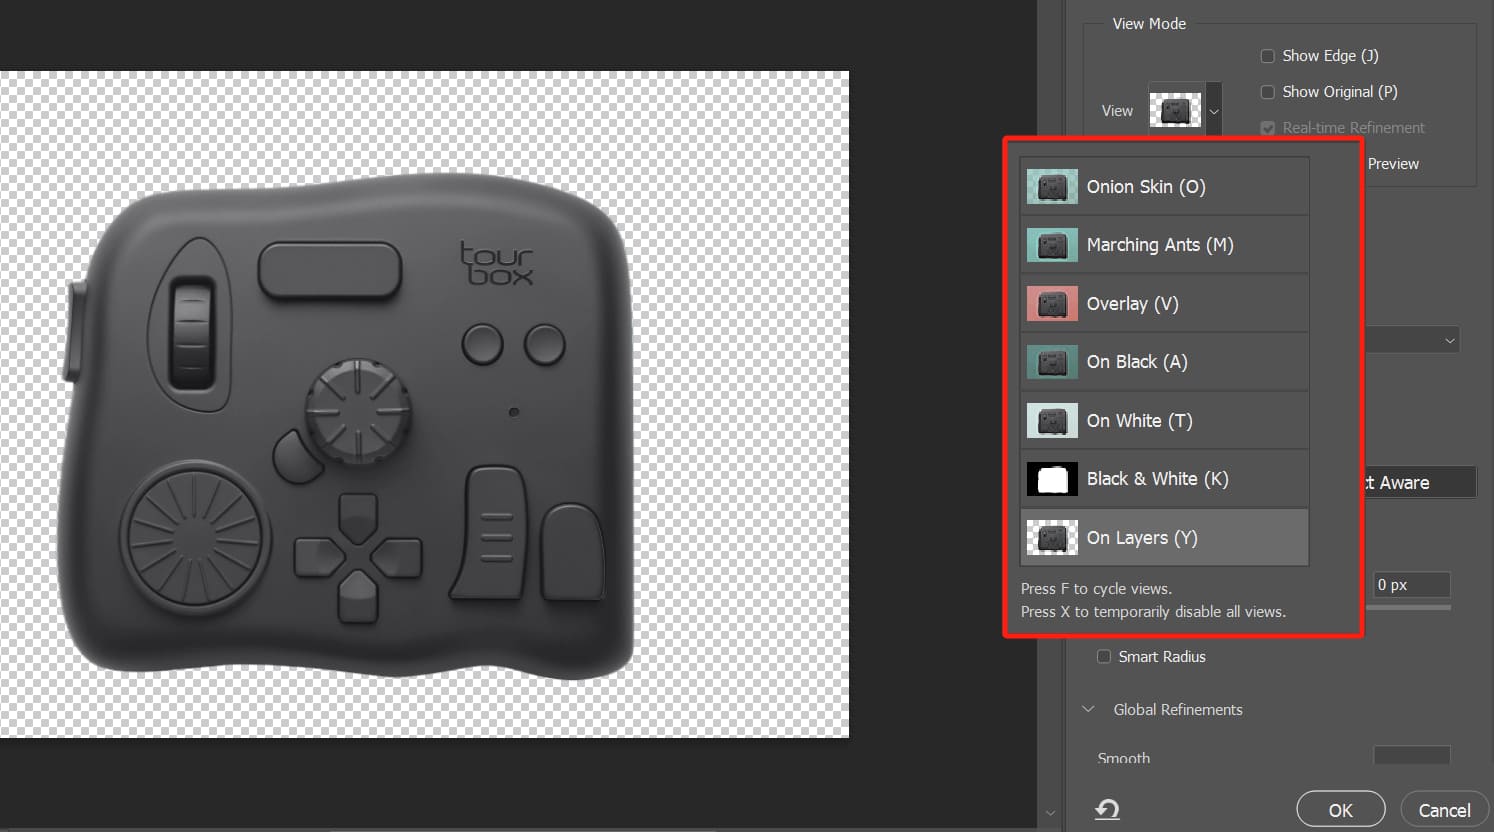
It also provides a real-time preview with a layer mask. As you change the values, it will show a live preview of how the object reflects in the image (assuming you have only the current layer visible).
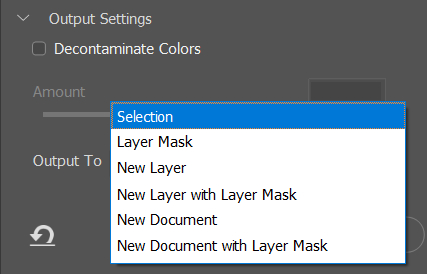
After fine-tuning the edge adjustments, you can choose output options such as outputting the selection, a new layer, or a layer mask in the output module. Click "OK" to apply the changes.
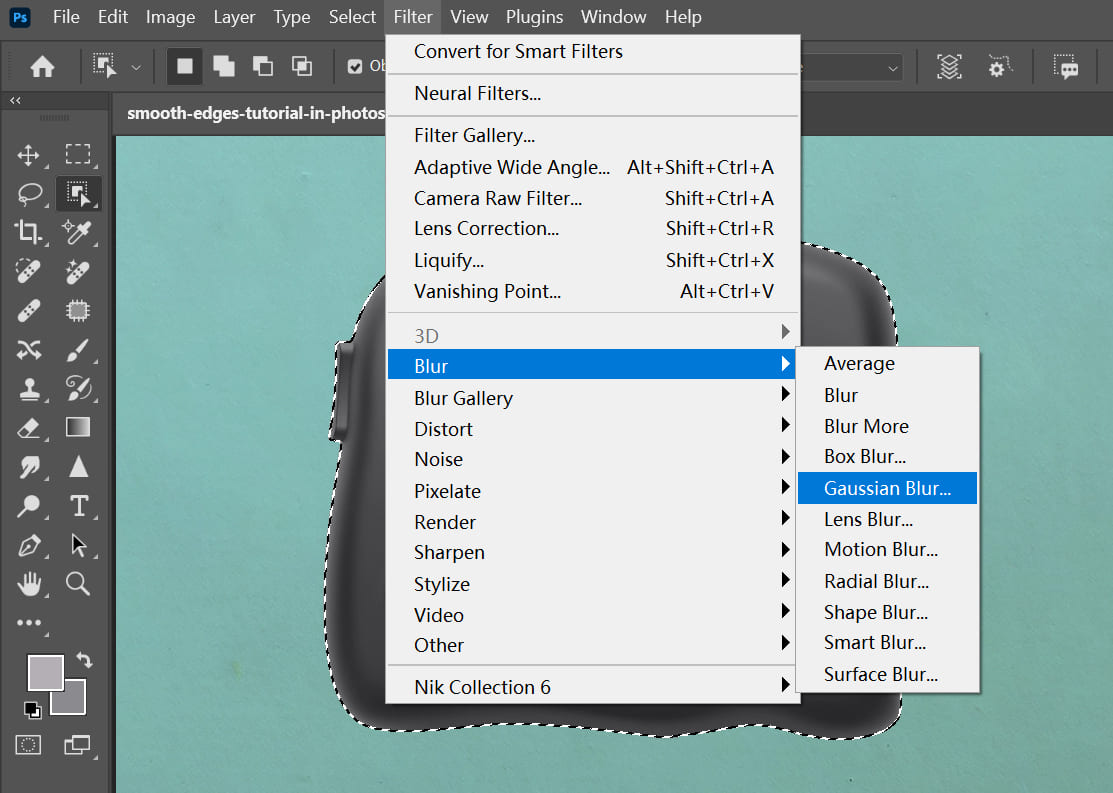
Step 4: Apply Gaussian Blur (Optional)
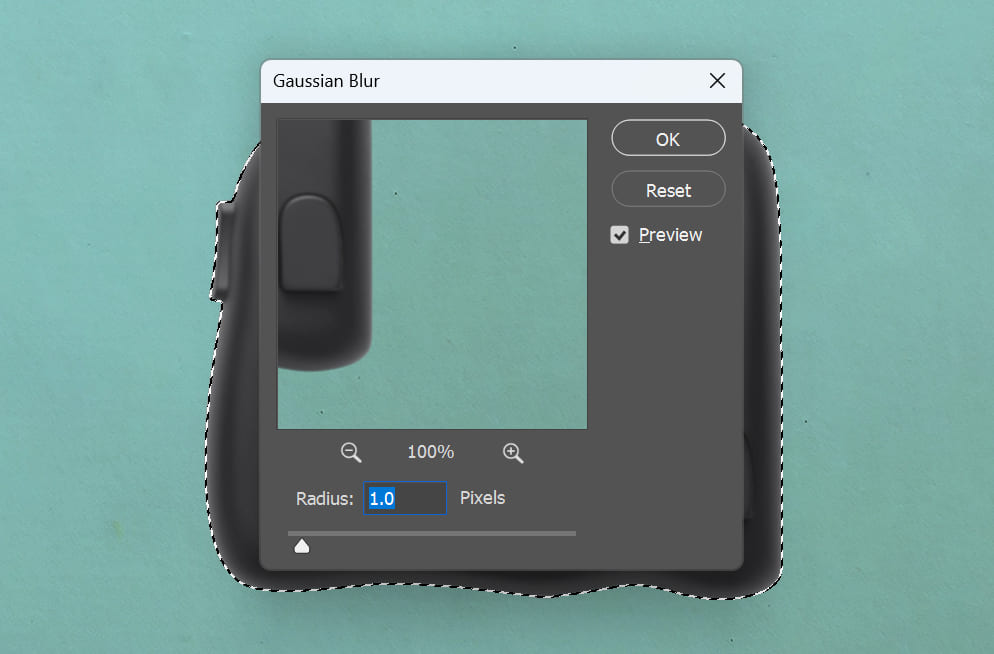
If you want to smooth the edges further, you can apply a Gaussian Blur. Select your new layer, then go to Filter > Blur > Gaussian Blur. Adjust the radius until you're satisfied with the smoothness of the edges, then click OK.
The recommended value for Gaussian Blur in Photoshop depends on the specific image and the desired effect you want to achieve. It can vary based on factors such as image resolution, size, and the level of blurring needed.
As a general guideline, you can start with a low value, such as 1 or 2 pixels, for subtle blurring, and gradually increase the value until you achieve the desired effect.
For more significant blurring, you may need to use higher values, such as 5 or more pixels.
Step 5: Reviewing Your Smooth Edge Effect
After smoothing the edges of your selection in Photoshop, you might not notice any visible changes in the image due to background elements.
At this point, you have two methods to remove unwanted background elements in the image to better observe the effect of the smoothed selection edges:
- Invert the selection, press Delete, and then "Ctrl/Cmd + D" to deselect.
- Create a layer mask for the selection. This non-destructive editing method is the preferred approach as it doesn't alter the image itself.
You have now successfully selected an object in Photoshop and smoothed the edges of the selection. You can proceed with your next image editing steps.
Upon completing your project, go to File > Save As to save the image. Choose the desired format and location, then click Save.
Advanced Techniques for Smoothing Edges in Photoshop
Once you're familiar with the effects of smoothing and feathering in Photoshop at different parameters, you can streamline the process by creating actions with predefined settings to apply in most cases where you need smooth edges.
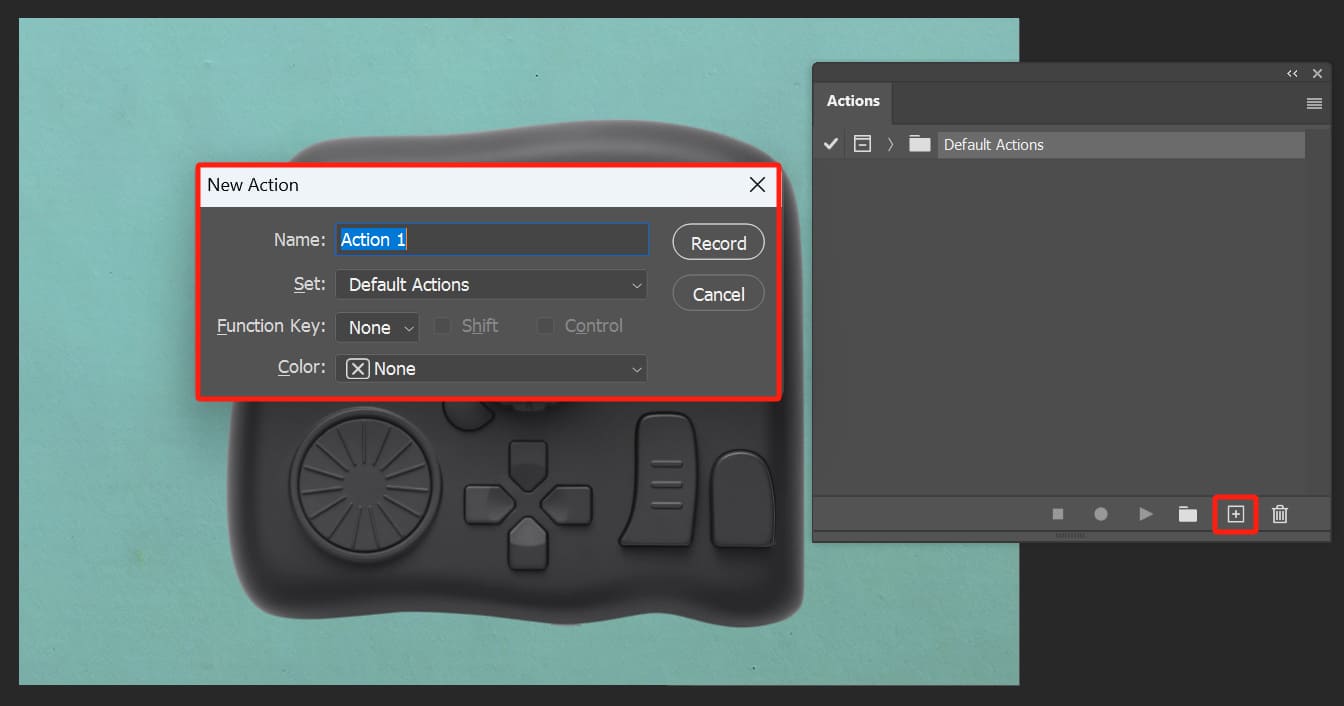
To begin, click on "Window" in the top menu bar of Photoshop to open the Actions panel (shortcut: "Alt/Option + F9").
Click on the "Create new action" button in the bottom right corner of the Actions panel and give your newly created action a name and a function key (shortcut). Now you can start recording your action.
The process is simple. Just proceed with your normal workflow: open the Feather and Smooth panels in Photoshop, input your commonly used parameters, and then stop the action recording. To invoke this action, simply press the assigned function key (shortcut).
Of course, you can make the process of smoothing edges in Photoshop even more enjoyable. Assign the function key of this action to TourBox, and with a press of a button on TourBox, you can quickly smooth the selection edges in Photoshop.

TourBox is a creative tool beloved by digital artists and designers. It simplifies every step of your creative work, allowing you to accomplish various tedious operations with fewer actions.
In the following video, we'll demonstrate a simple technique using TourBox to smooth out the edges of a selection that includes strands of hair.
TourBox's built-in presets help you quickly master this creative controller, while advanced settings provide unlimited possibilities. Visit our photo editing page to learn more about how TourBox can revolutionize your workflow.
Final Thoughts About Smoothing Edges in Photoshop
Learning how to smooth edges in Photoshop unlocks creative potential and enhances image quality for seamless composites.
But like any art form, it's a process that requires patience, precision, and a keen eye for detail. Here are some tips to keep in mind as you hone your skills in smoothing edges:
- Subtlety is Key: Always start with a lower feather radius. It's easier to gradually increase the smoothness than to overdo it and try to go back.
- Multiple Passes: Don't try to get the perfect result in one go. Make multiple passes with different feather radii for a smoother blend.
- Zoom In: Zoom in close. The more detail you can see, the better you can control the edge-smoothing process.
While these tips can help you get better results, the right tools can significantly elevate your Photoshop experience. This is where TourBox comes into play.
TourBox is designed to fit comfortably in one hand, leaving your other hand free to use a graphics tablet or mouse. This allows for a more natural and comfortable editing experience.

If you're interested in TourBox, why not start with our incredibly cost-effective TourBox Lite? You're sure to love the experience it brings to your workflow.