Color Lookup: How to Create Unique Color Grading Presets in Photoshop?
In this article, we'll delve into a seemingly complex Photoshop tool: Color Lookup.
The Color Lookup panel can be quite perplexing. When you open a photo in Photoshop and add a "Color Lookup" adjustment layer, you're greeted with an interface featuring options like 3DLUT File, Abstract, and more—no sliders or parameter settings in sight.
It may seem a bit baffling. So, how exactly should you use the Color Lookup tool?

In this article, you will learn:
- How to Create a Color Lookup Adjustment Layer in Photoshop?
- How to Use Photoshop Color Lookup Tool?
- What Is a 3D LUT?
- Advanced Usage: How to Add 3D LUT Files in Photoshop?
- Final Thoughts About Color Lookup in Photoshop
How to Create a Color Lookup Adjustment Layer in Photoshop?
The Color Lookup tool is actually a very basic color adjustment tool in Photoshop. Its purpose is simply to apply color "filters" directly to your photos.
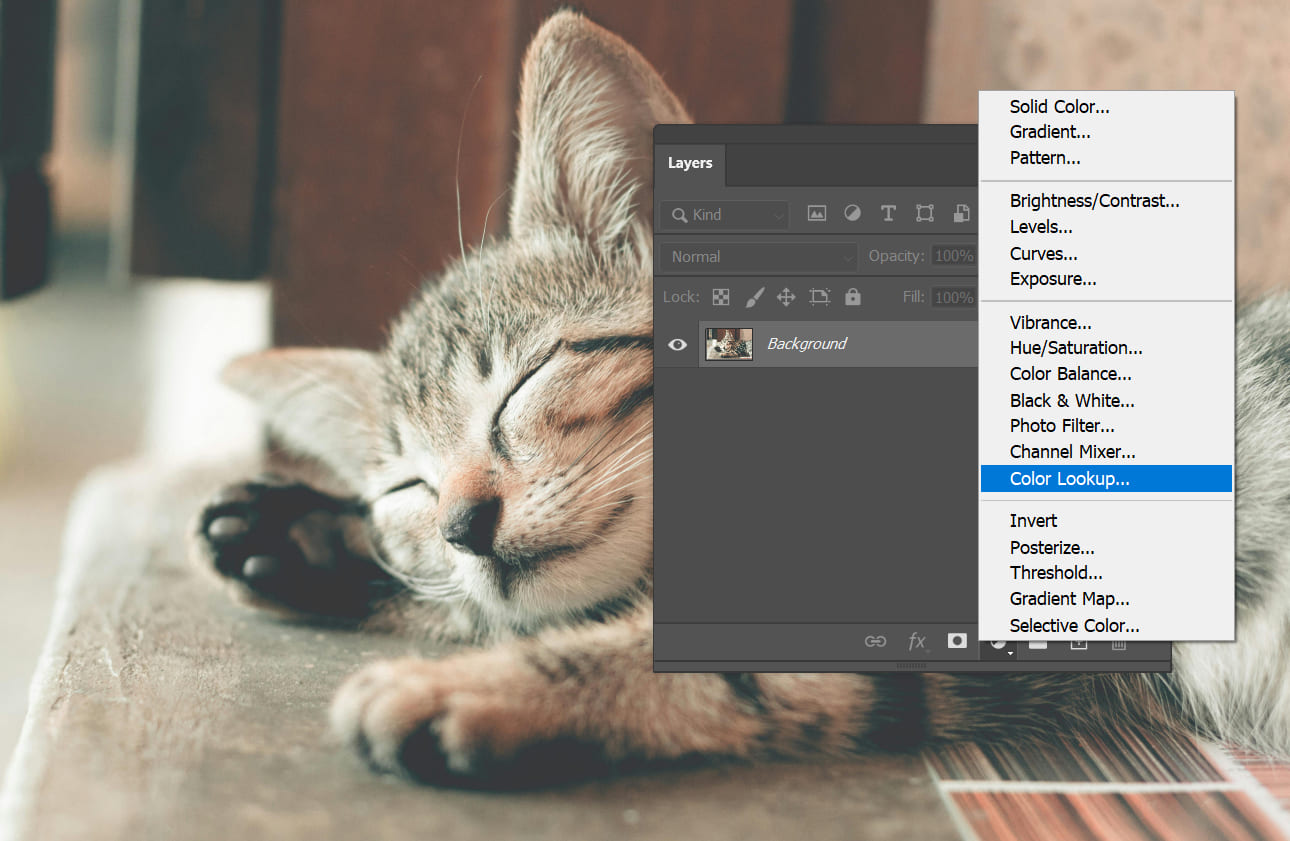
Creating a Color Lookup layer in Photoshop is a straightforward process. After importing an image into Photoshop, in the Layers panel, click on the "Create new fill or adjustment layer" button at the bottom of the panel.
Click on Color Lookup in the pop-up options menu to successfully create a Color Lookup adjustment layer.
How to Use Photoshop Color Lookup Tool?
The Color Lookup panel features three dropdown menus: 3DLUT File, Abstract, Device Link, and a checkbox for "Dither."
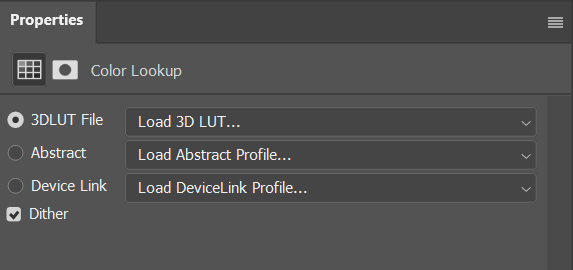
Let's start with the Dither option. In most cases, it's best to keep this option checked. This helps prevent any loss of image quality that may occur after applying a preset, ensuring your photos look natural and smooth.
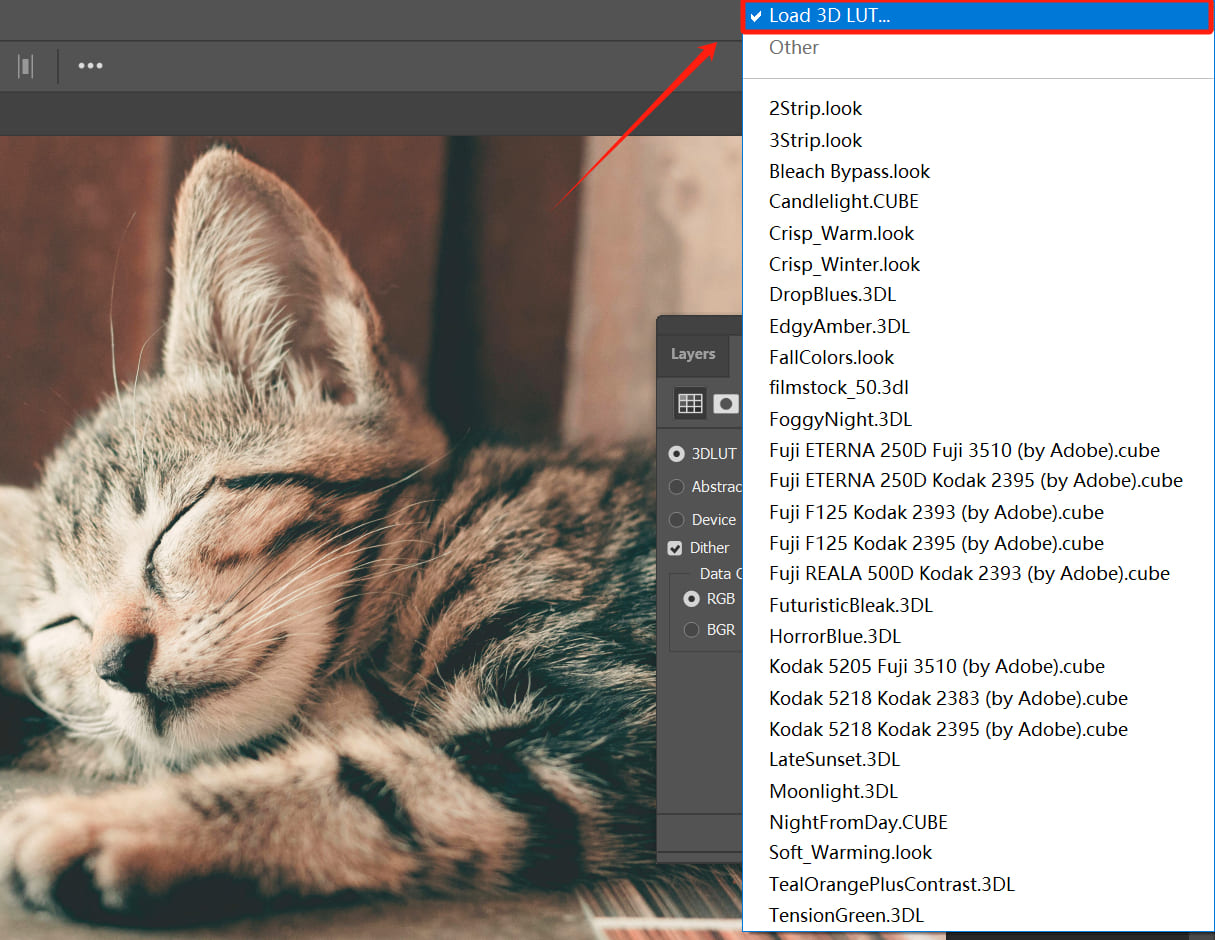
Next, try clicking on the "3DLUT File" dropdown menu. Here, you'll find a variety of filter options. Simply click on any filter to quickly apply its effect.
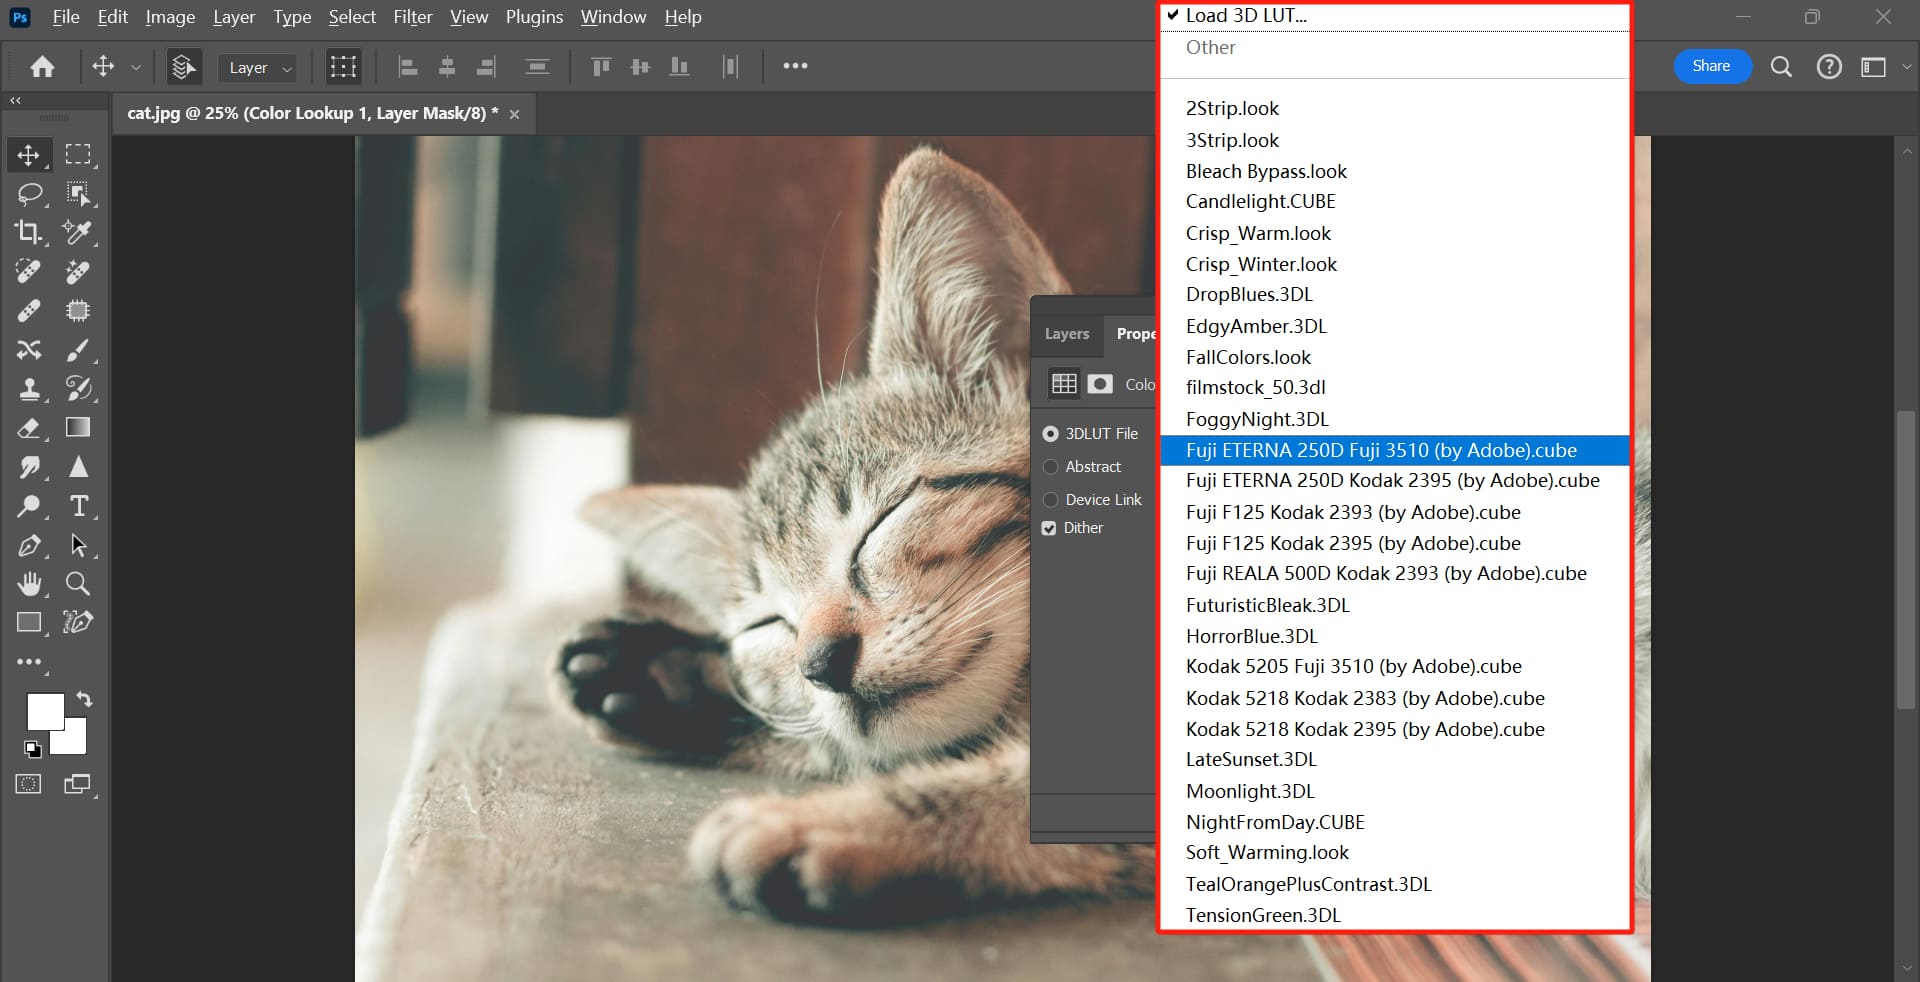
These effects are stunning and straightforward to use. Just click on one to see how it looks. If it's not quite right, try another—it's similar to using filters in mobile apps.
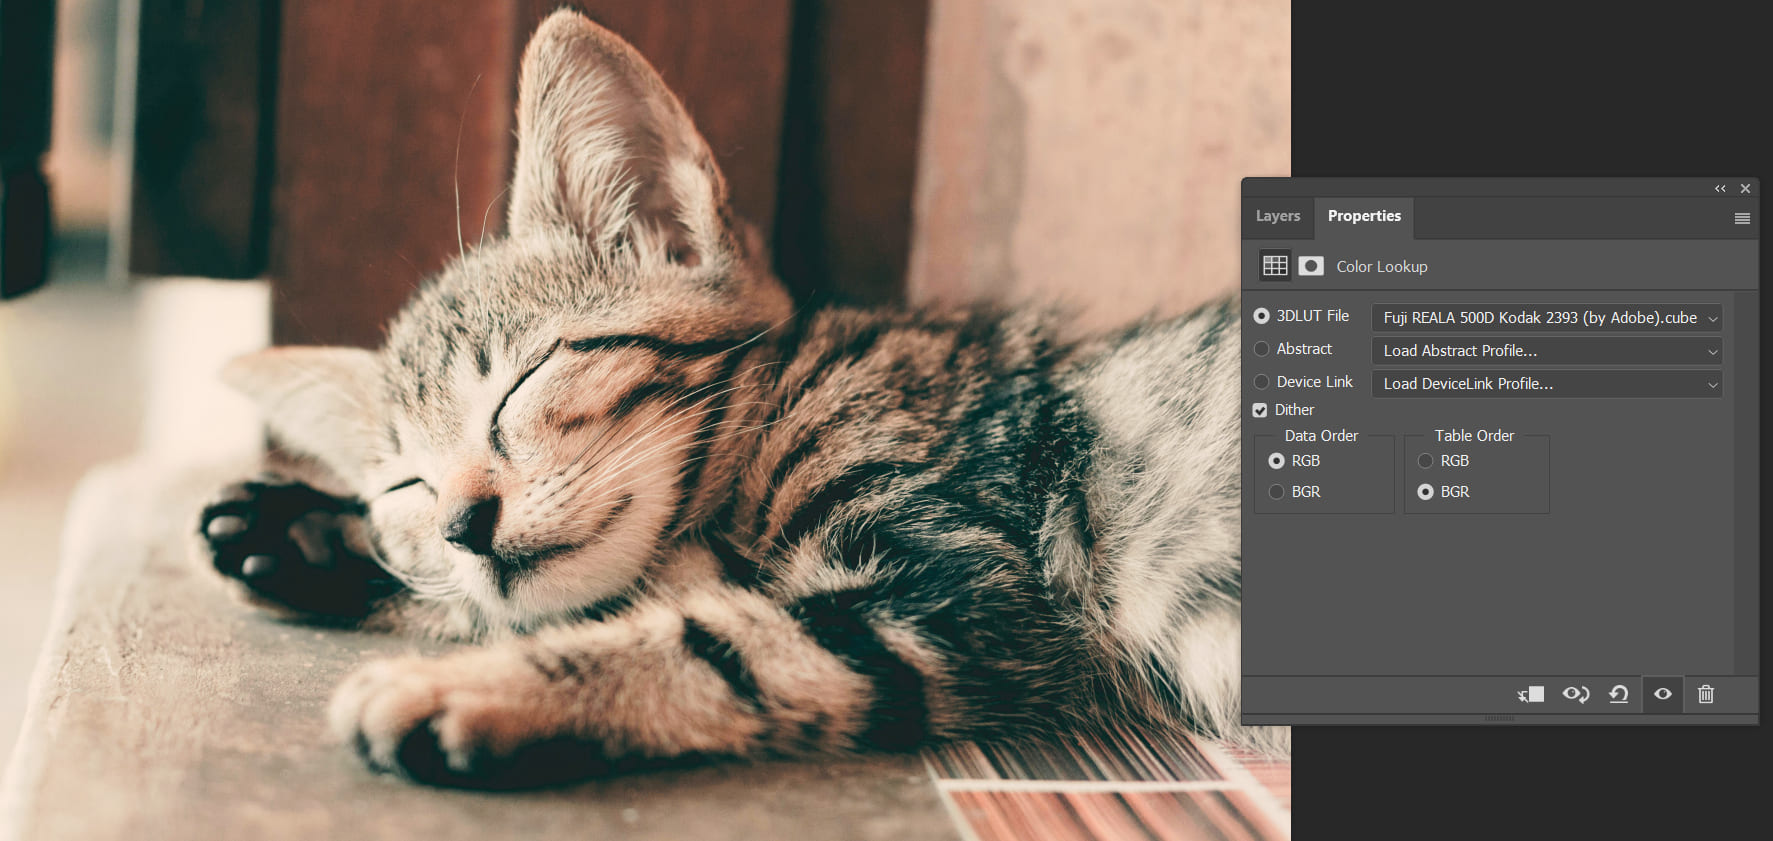
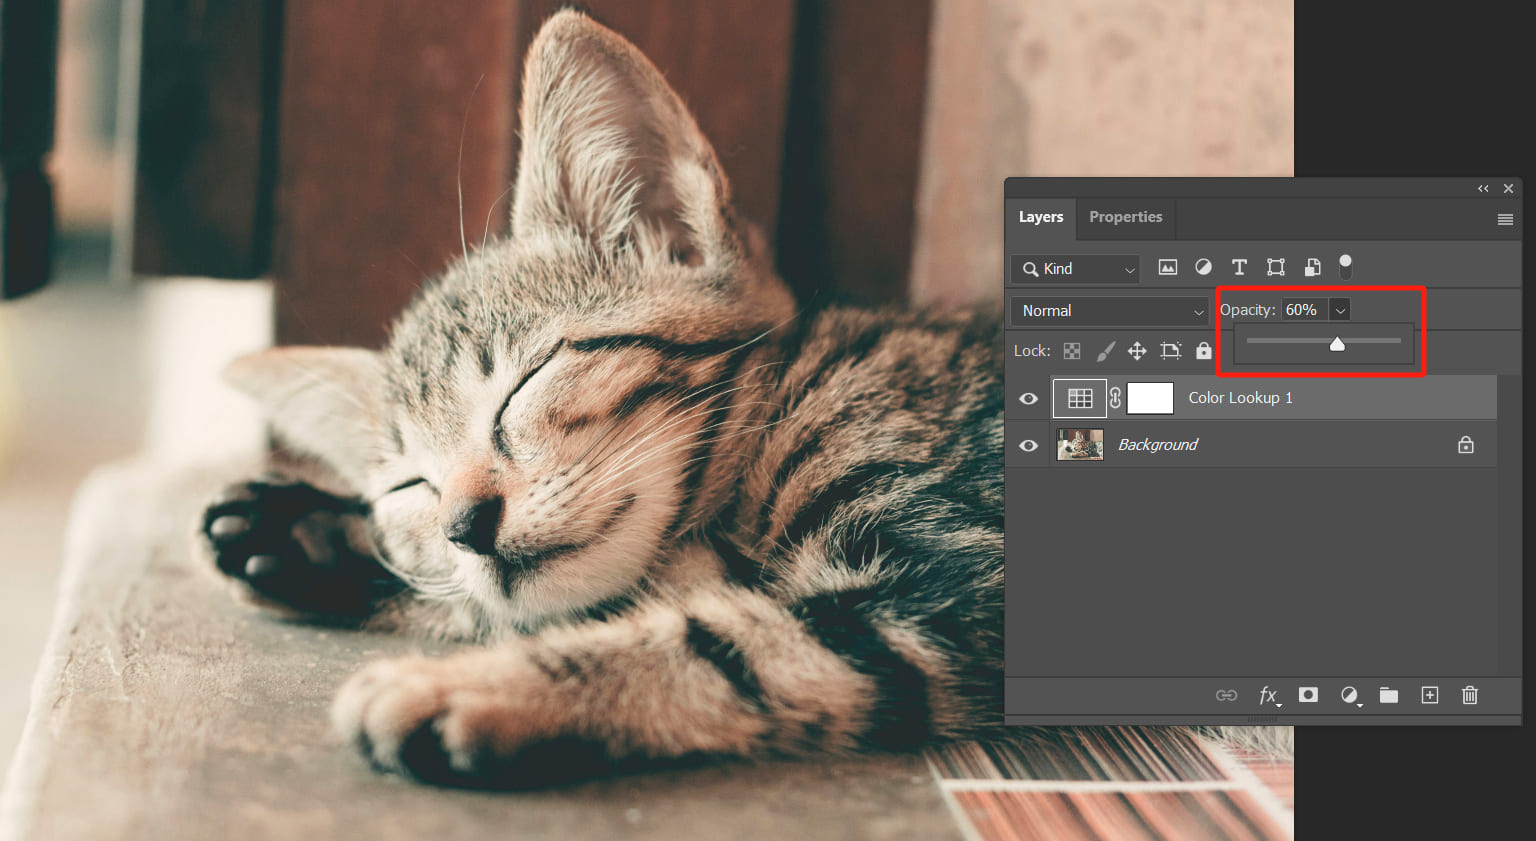
Furthermore, you can adjust the opacity and mask options of the Color Lookup adjustment layer to control the intensity, hide, or reveal the selected filters.
What Is a 3D LUT?
The term "3D LUT" may sound familiar to you. LUT stands for "Look-Up Table," which is a crucial parameter in monitors.
To understand what a 3D LUT is, we may need to delve into some color principles.
RGB files are composed of red, green, and blue—the primary colors, each ranging from 0 to 255. Different combinations of these colors create any color displayed on a monitor.
Further Reading:
Therefore, any color can be described by three numerical values. While you might see descriptions in other color spaces like Lab or CMYK, digital displays primarily use the RGB color space standard.
So, how does the color adjustment principle of a 3D LUT work?
For instance, a particular 3D LUT filter might specify that applying a certain setting will change the RGB value of a pixel to RGB(41, 155, 155), resulting in the pixel's color transforming into another shade.
Of course, these color transformations aren't simple additions or subtractions; they are more akin to a complex equation that rearranges all colors to achieve an overall color adjustment effect.
Advanced Usage: How to Add 3D LUT Files in Photoshop?
In addition to using Photoshop's default 3DLUT files, you can also manually load color-grading files provided by others.
A more advanced way to use the Color Lookup tool is to create your own 3DLUT file, which can be thought of as making your own color grading preset file.
After creating a Color Lookup adjustment layer, in the dropdown menu for 3DLUT files, you'll find an option at the top labeled "Load 3D LUT." Using this option, you can load individual 3DLUT files.
The files you can import are essentially color profile files that photographers create themselves, download from the internet, or share as presets.
If you click on "Abstract" or "Device Link" below, similar dialog boxes will appear, allowing you to load color profile files from your local computer folder. Their function is the same as loading a 3D LUT—importing presets.
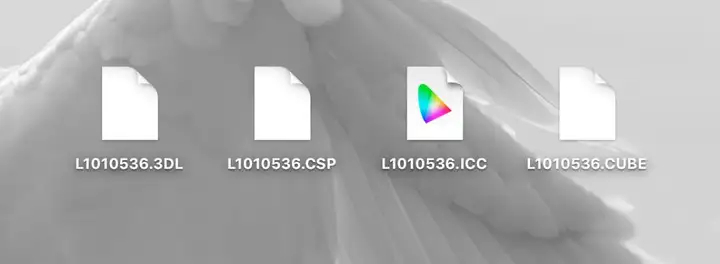
There are various types of color profile files with extensions like .3DL, .ICC, and others. They contain similar information but in different formats.
Photoshop offers these three options to be compatible with more file types. It's akin to how a media player can handle different video file formats like mp4 and mkv for the same movie.
The most commonly used is the .3DL file format. In this section, we will guide you on how to create your own .3DL file.
Step 1: Process Photo by Adjustment Layers
Creating a 3DL file involves adjustment layers for color correction, not within the "Color Lookup" panel. You need to use other adjustment layers to color-grade the photo and then save the final result as a color lookup table (preset file).
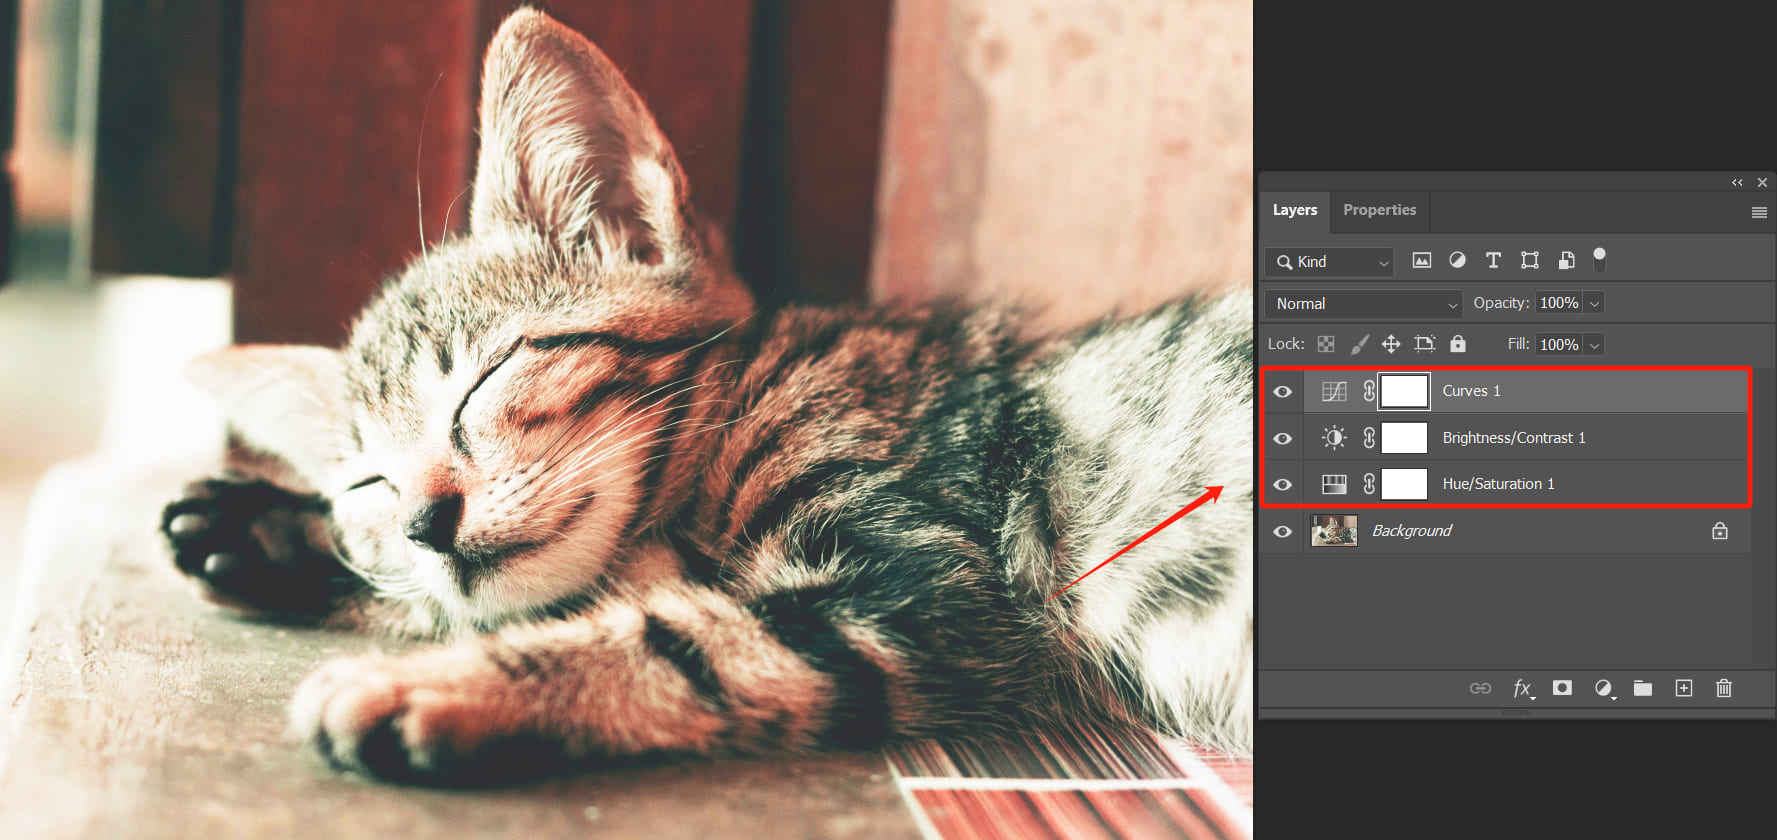
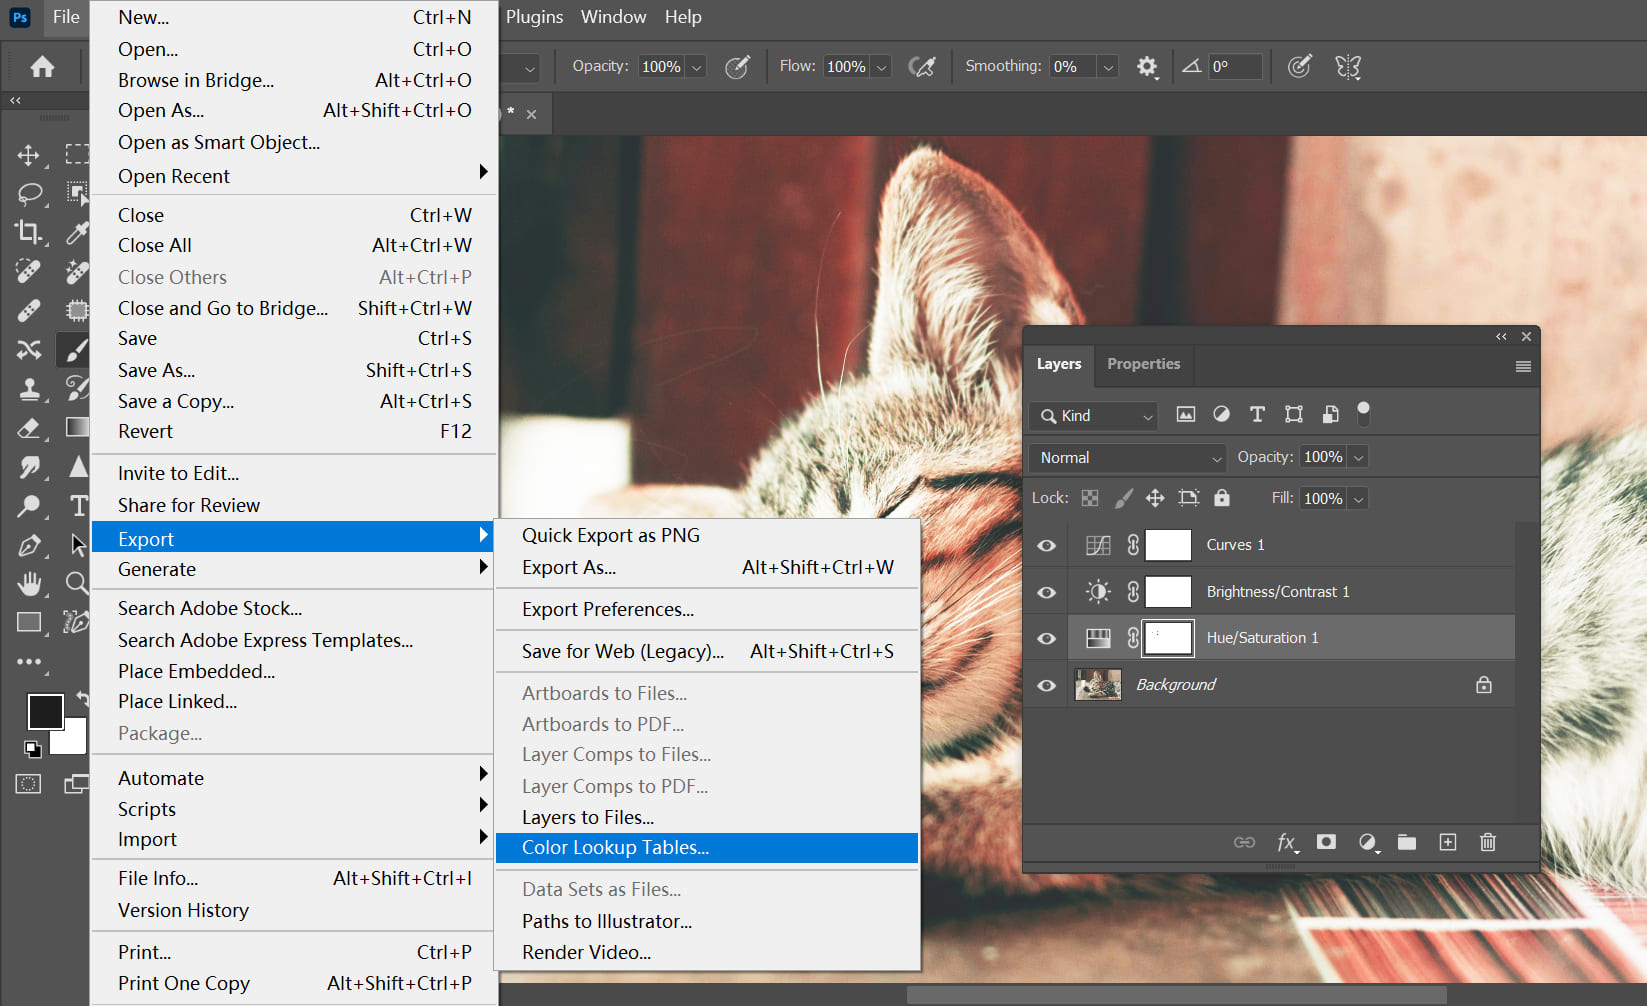
Here, we open a photo in Photoshop (not as a smart object! Smart objects won't work at this stage) and apply adjustments using the Brightness/Contrast, Hue/Saturation, and Curves layers to process the image.
Now that we're pleased with the effect, we want to save this effect for future use (creating a color lookup table) so that we don't have to recreate these three adjustment layers every time.
Step 2: Export as a Color Lookup Table
Once you are satisfied with your adjustments, you can create a color lookup preset file. Here are a few important points to note:
- The file cannot contain any smart objects.
- It must include a "Background" layer.
- Do not modify the masks of adjustment layers.
Next, in the top menu bar, go to "File > Export > Color Lookup Table."
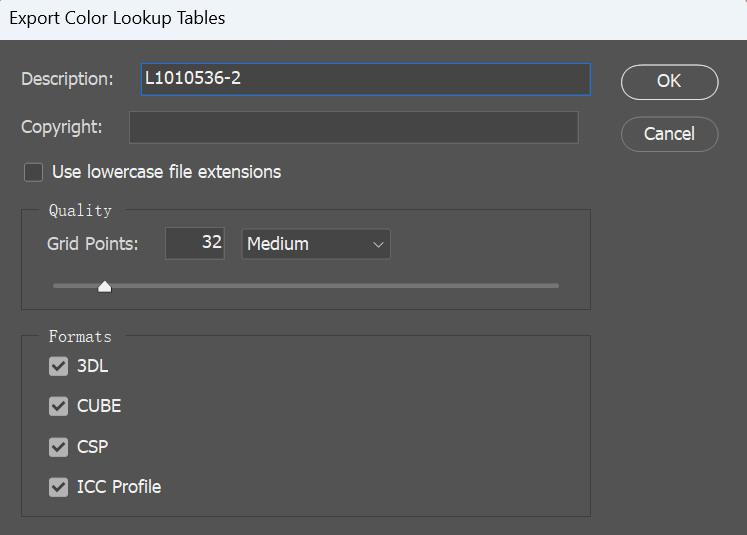
Photoshop will then display a panel for exporting the Color Lookup Table. Keep the Grid Points at 32, which is sufficient.
There's no need to go for extremely high quality; higher isn't always better and can slow down your computer significantly. If your computer is fast, you can set it around 64, but there's really no need to go higher.
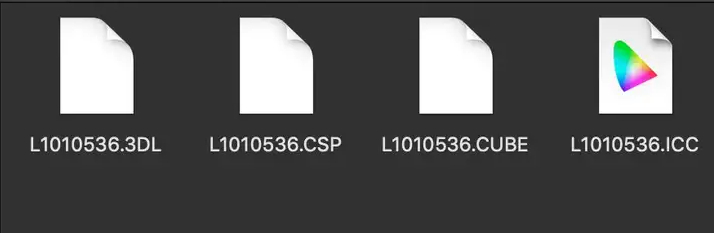
Ensure all formats at the bottom are checked. This way, you'll get four different files in various formats that can be used in different software, all describing the same effect.
After clicking "OK," choose a save path, and you'll end up with four files in different formats but with the same functionality—all Color Lookup Table files.
Step 3: Load a Color Lookup Table
Close the current photo, then open another photo in Photoshop. Create a Color Lookup adjustment layer for this new photo (at this point, it can be a smart object).
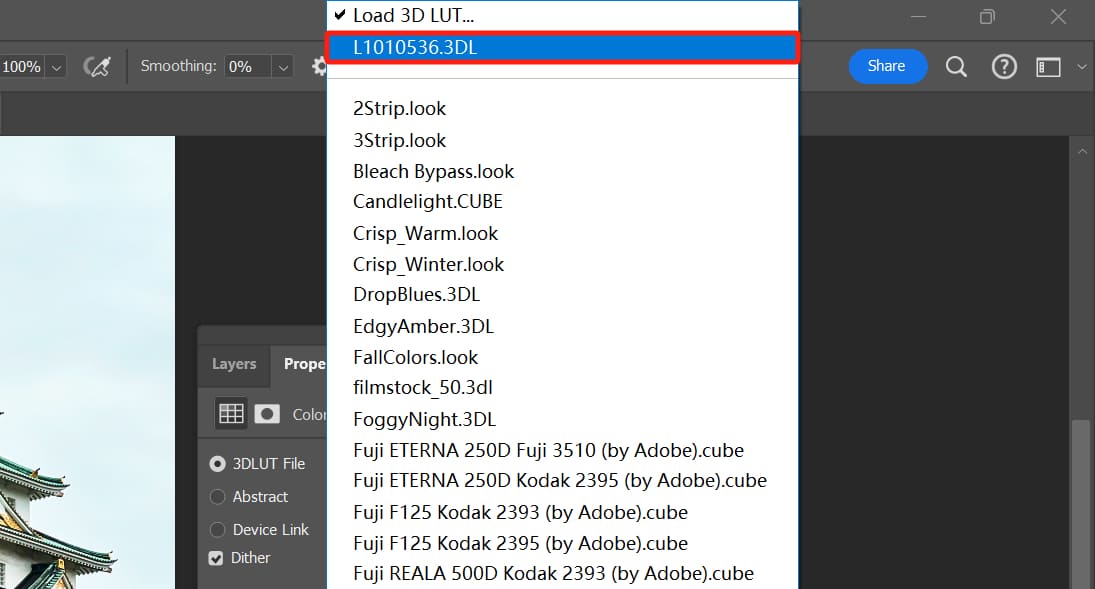
Next, in the Color Lookup panel, load the 3D LUT. In the pop-up dialog, choose a file with the ".3DL" extension (files with the ".CUBE" extension also work), then click "Open."
Now, the effect you applied to the previous photo will be applied to this new one. You'll also see the preset you saved earlier appear in the "3D LUT Files" section.
You don't need to create multiple adjustment layers anymore. You can condense the effects of multiple adjustment layers created in Photoshop into a single Color Lookup Table.
Plus, you can share it with your friends too!
Final Thoughts About Color Lookup in Photoshop
Color Lookup in Photoshop is a highly efficient color grading tool that allows you to quickly apply color "filters" to your photos.
Moreover, you can import color lookup tables that you've created yourself or downloaded from the internet using Color Lookup.
The advantage of this operation is clear: it simplifies complex tasks and allows you to enjoy the adjustment effects easily, either ones you've created or those crafted by other photographers.
However, the downside is that once the file is generated, you can't individually modify a specific adjustment; you can only adjust it as a whole. So, keep this in mind when using it!
Product Recommendation:
Whether you're editing photos in Photoshop or creating digital art, you probably want a more efficient creative experience. That's where TourBox might just be your ultimate creative assistant tool.

Whether you're tweaking color settings or adjusting brush sizes, the TourBox controller allows you to achieve precise and efficient control. But the magic of TourBox doesn't stop there. It brings improvements to your creative experience that were hard to achieve with just a "keyboard + mouse."
Moreover, in other photo editing software like Lightroom Classic or digital drawing software like Clip Studio Paint, TourBox can significantly streamline your workflow. It allows you to accomplish various tedious tasks with fewer actions.

So why not give TourBox a try and see the difference it can make for you?