How to Use Photoshop Neural Filters: An Easy Guide
In Photoshop, Neural Filters make complex image editing easy and fun. This tutorial will quickly show you how to use Neural Filters, helping you start from scratch and easily master this powerful creative tool.

In this article, you will learn:
- What Are Neural Filters?
- How to Use Neural Filters?
- Common Neural Filter Tools
- How to Export an Image After Using Neural Filters?
- Conclusion
What Are Neural Filters?
Neural Filters is a feature added in Photoshop 2022.
It's a powerful filter library in Adobe Photoshop. Using Adobe Sensei's machine learning, it cuts down on repetitive editing steps and lets you pull off complex edits with just a few clicks.
How to Use Neural Filters?
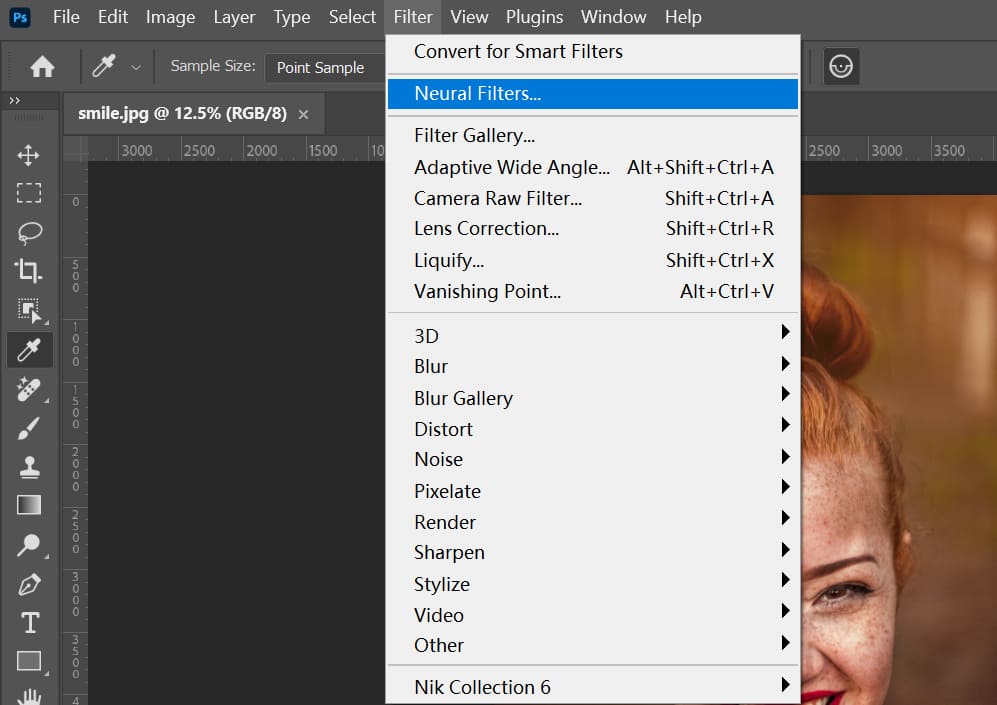
First, sign in to your Adobe account (you must sign in to use Neural Filters). Then, from the top menu in Photoshop, click Filter → Neural Filters to open them.
In the Neural Filters window that appears, you'll see your photo, the filter tools, and the settings panel.
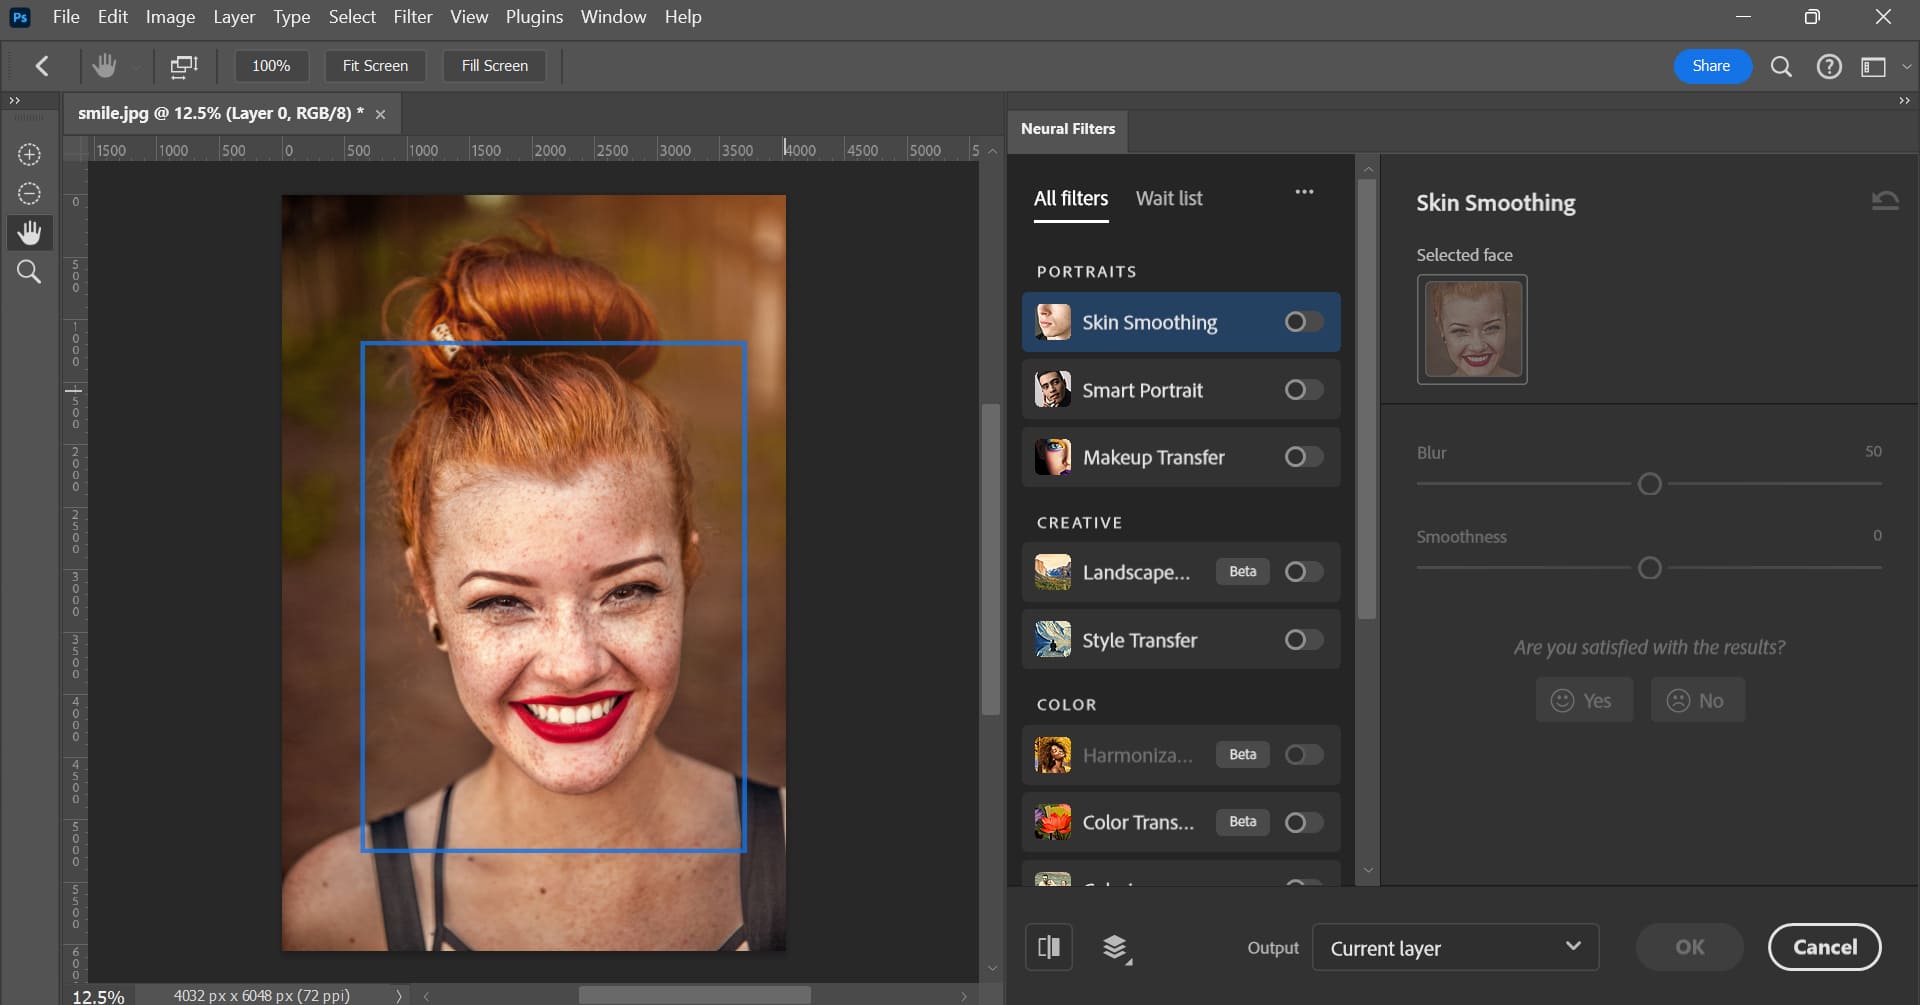
In the filter tools section, you'll find "All Filters" and "Wait List." As the names suggest, All Filters shows every available filter, while Wait List shows filters still in development and coming soon.
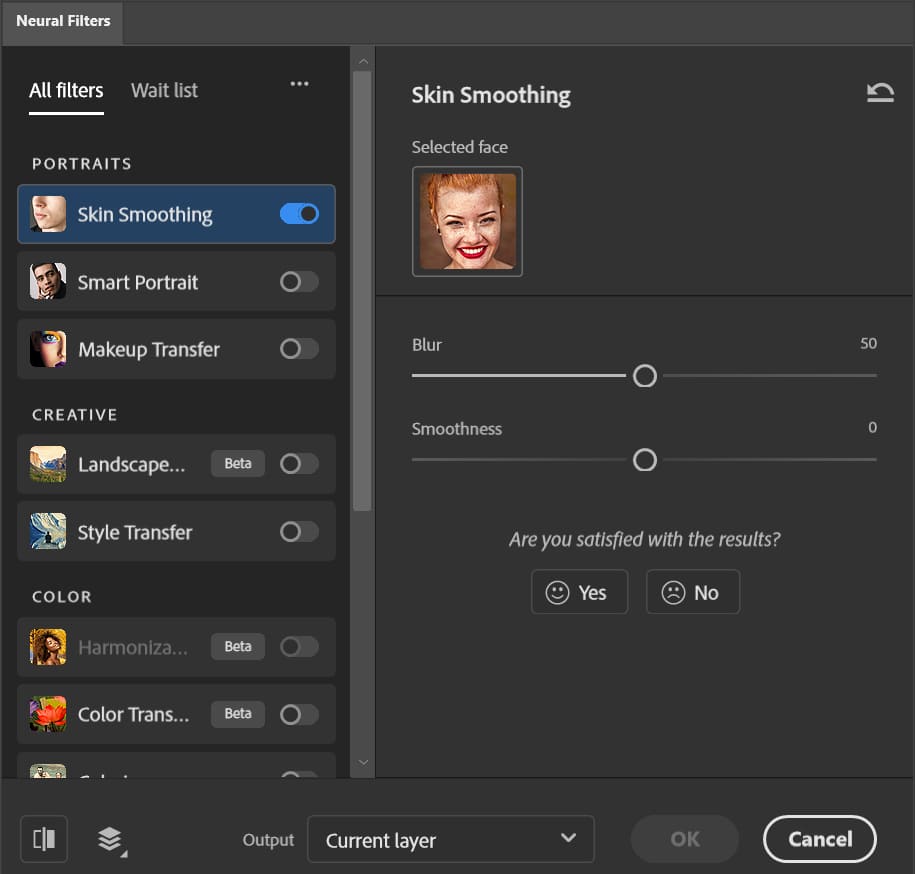
Using Neural Filters is easy, too. Just click the toggle button on the right of the filter you want to try, then in the settings panel on the far right, adjust the sliders to get the effect you want.
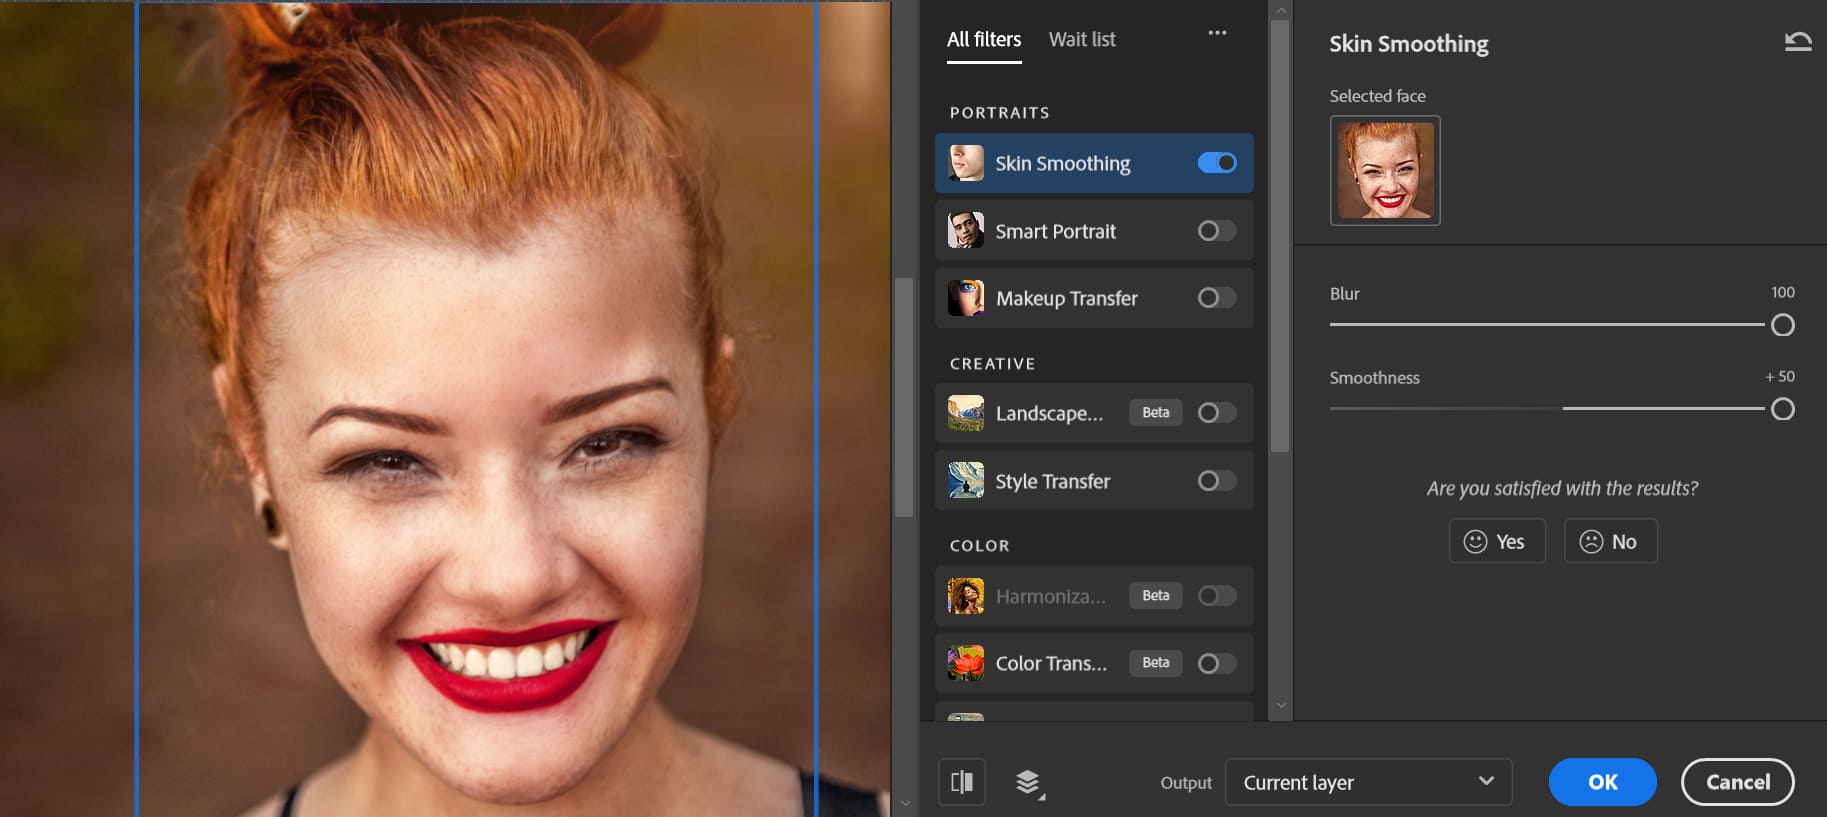
In our example, we simply raise the Blur & Smoothness slider in Skin Smoothing to clear large patches of freckles from the subject's face.
Common Neural Filter Tools
Next, let's take a look at a simple intro to some common Neural Filter tools.
1. Portraits
- Skin Smoothing: Skin Smoothing can automatically detect faces and soften skin. It removes freckles, scars, tattoos, and other blemishes.
- Smart Portrait: Smart Portrait uses cloud-based analysis to adjust age, expression, and more. You can tweak these settings to create a unique look.
- Makeup Transfer: Makeup Transfer lets you apply the makeup style from one photo to another in just one step.
2. Creative
- Landscape Mixer: Landscape Mixer can turn a plain landscape shot into an artistic scene with different tones and moods. You can even blend two landscapes to make a brand-new style.
- Style Transfer: Style Transfer transforms your photo into a piece of art, like an oil painting or illustration, by applying a chosen art style.
3. Color
- Harmonization: Harmonization matches the color and brightness of two layers to make a seamless composite. It balances colors so everything looks natural.
- Color Transfer: Color Transfer copies the color palette from one image and applies it to another for a fresh visual effect.
- Colorize: Colorize adds color to black-and-white or flat-looking photos, bringing them to life.
4. Photography
- Super Zoom: Super Zoom enlarges and crops an image, then uses AI to add back detail. You get a closer view without losing sharpness.
- Depth Blur: Depth Blur creates depth in your shots by blurring the background or foreground. This makes your main subject pop.
5. Restoration
- JPEG Artifacts Removal: This filter removes compression artifacts from JPEG photos, giving you a cleaner image.
- Photo Restoration: Photo Restoration uses AI to revive old photos. It boosts contrast, sharpens details, removes scratches, and can be paired with Colorize for even better results.
How to Export an Image After Using Neural Filters?
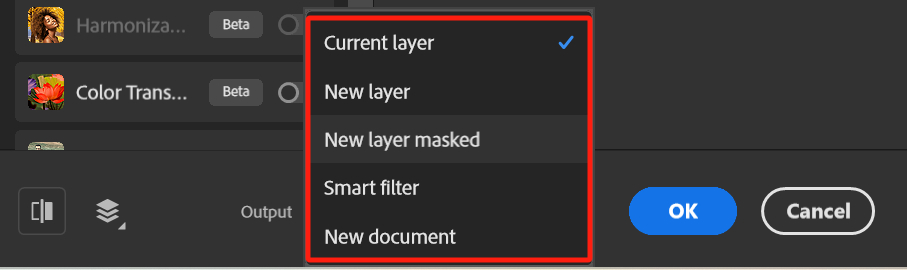
After you apply a Neural Filter and tweak the effect, the last step is to export the image. Neural Filters gives you these output options:
- Current Layer: Edits pixels directly on the layer you’re working on (this is a destructive change).
- New Layer: (Default) Creates a new layer using only the pixels generated by the filter.
- New Layer Mask: Makes a new layer and applies the filter as a mask on that layer.
- Smart Filter: Generates new pixels and applies them as a Smart Filter.
- New Document: Opens a brand‑new document with the filtered result.
Conclusion
Neural Filters are a powerful tool for photographers, designers, and anyone who needs to work with complex images. With just a few clicks, you can pull off advanced edits fast.
That said, Neural Filters still offer very little customization. You may find that, though they're a fun experiment, the results aren't always completely satisfying.
It might be better to use Neural Filters as a first step, then fine-tune your images with tools like Color Balance.
This way, your work will show your own creativity — something AI can't copy.
Finally, we'd like to recommend a creative controller called TourBox to boost your Photoshop efficiency and improve your workflow. When you work in Photoshop or any other image-editing software, you often have to drag sliders with your mouse so much that you can't keep your eyes on the image details.

That's frustrating. With TourBox, you can use its knobs one-handed to nudge slider values up or down by one. Just like playing a video game with a controller.

Even better, you can group your favorite tools into a single TourMenu for a more organized editing process. Of course, TourBox does much more. If you're interested, check out our Photo Editing page to learn about all its features.