How to Use Selective Color in Photoshop to Control RGB Values?
The Selective Color tool is a highly practical feature in Photoshop. It serves as both a zoning adjustment tool and a tool that allows separate control of RGB values, making it widely useful in photo editing.
So, how can you effectively utilize the Selective Color tool in Photoshop? Keep reading this article to discover the answers you're looking for.

In this article, you will learn:
- How to Understand Selective Color in Photoshop?
- How to Use Selective Color in Photoshop?
- Final Thoughts About Photoshop Selective Color
How to Understand Selective Color in Photoshop?
Before delving into the magic of the Selective Color tool, you first need to create a Selective Color adjustment layer in the Layers panel of Photoshop.
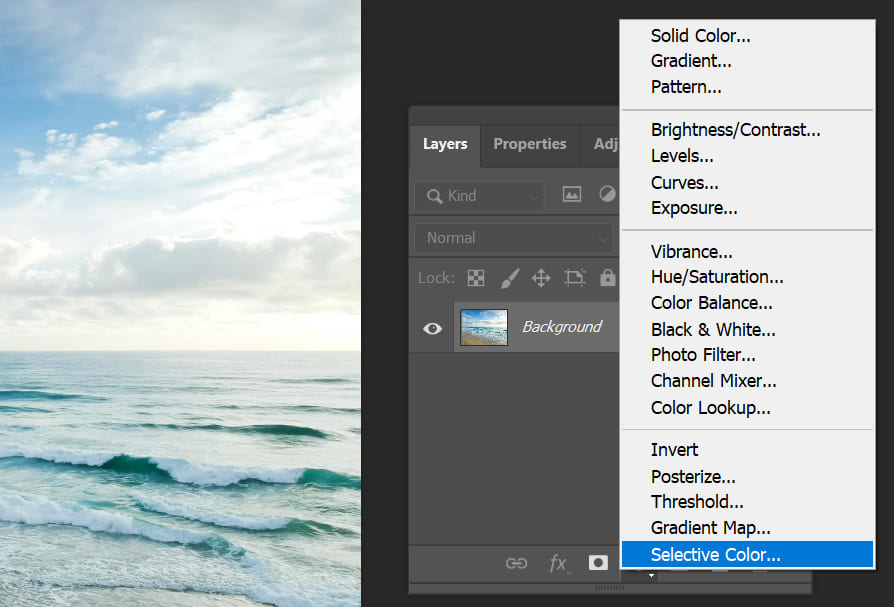
Within the Selective Color tool panel, you must start by choosing a color you want to adjust from the Colors dropdown menu.

Apart from Blacks, Whites, and Neutrals, Selective Color offers 6 colors for you to select from: Reds, Greens, Blues, Cyans, Magenta, and Yellows. Hold on, don't these colors seem familiar?
Aren't these the primary colors and their complementary colors? Any adjustments you make will only affect the corresponding color area when you select a color.
If you're not quite sure about what the primary colors and complementary colors are, you can check out our related articles.
Further Reading:
Selective Color provides 4 options for adjustment:
- Cyan adjusts the R value of RGB.
- Magenta adjusts the G value of RGB.
- Yellow adjusts the B value of RGB.
- Black adjusts the color's brightness.
Specifically:
- Increasing Cyan decreases the R value; decreasing Cyan increases the R value.
- Increasing Magenta decreases the G value; decreasing Magenta increases the G value.
- Increasing Yellow decreases the B value; decreasing Yellow increases the B value.
Once you grasp this principle, using the Selective Color tool will become remarkably straightforward. Don't believe it? In the next section, we'll share a specific case study on using the Selective Color tool.
How to Use Selective Color in Photoshop?
In the photo below, the colors of the sky and the sea lean towards cyan. If you want to change the color of the sky and the sea from cyan to blue, how should you go about it?
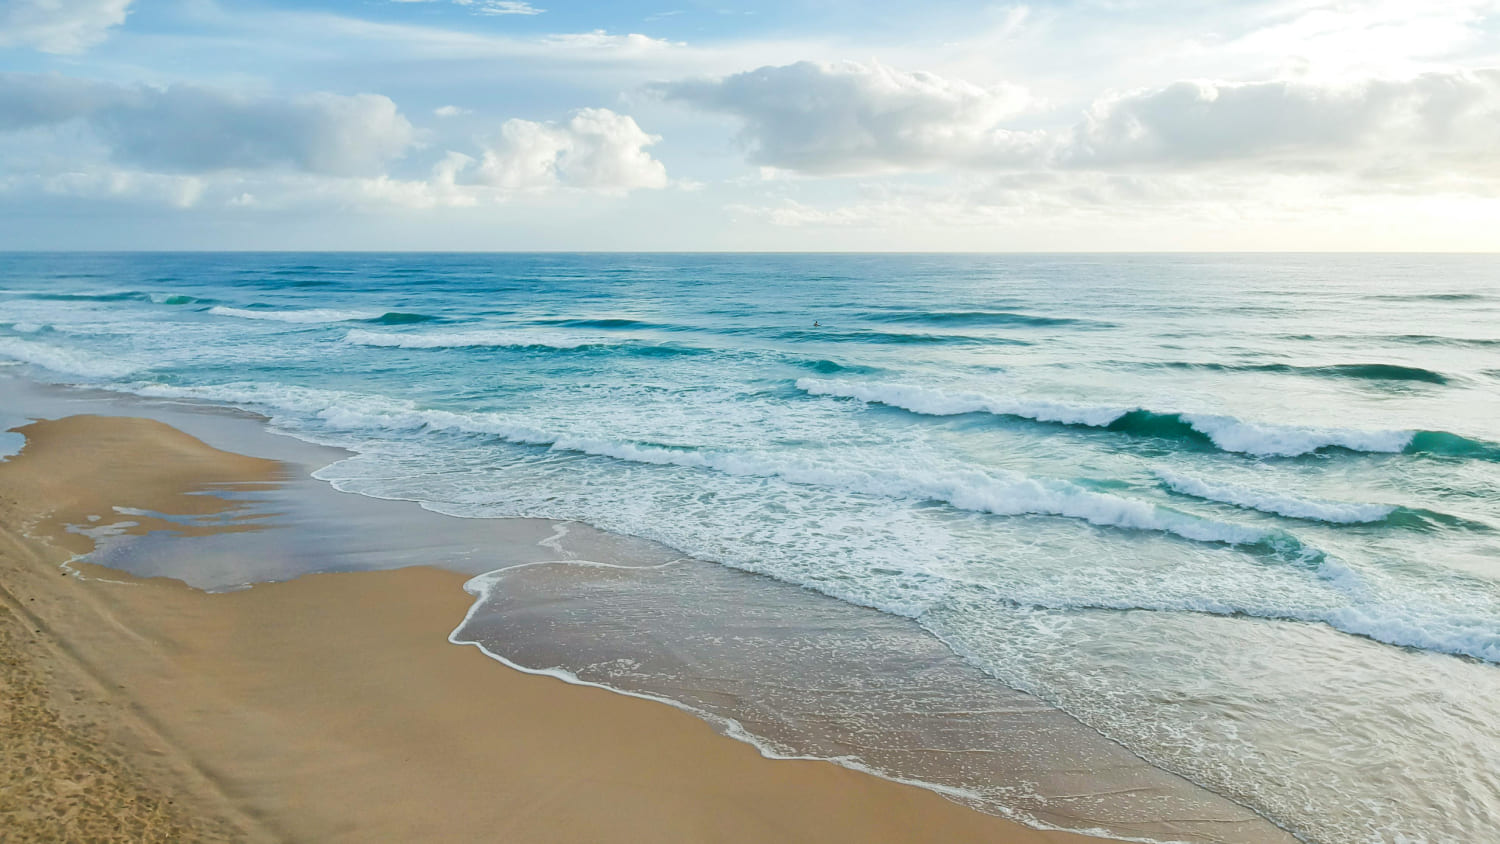
Since you are adjusting the sky and the sea, you need to select the colors corresponding to these two areas, which is cyan. Therefore, you first need to choose Cyans from the Colors dropdown menu in the Selective Color panel.
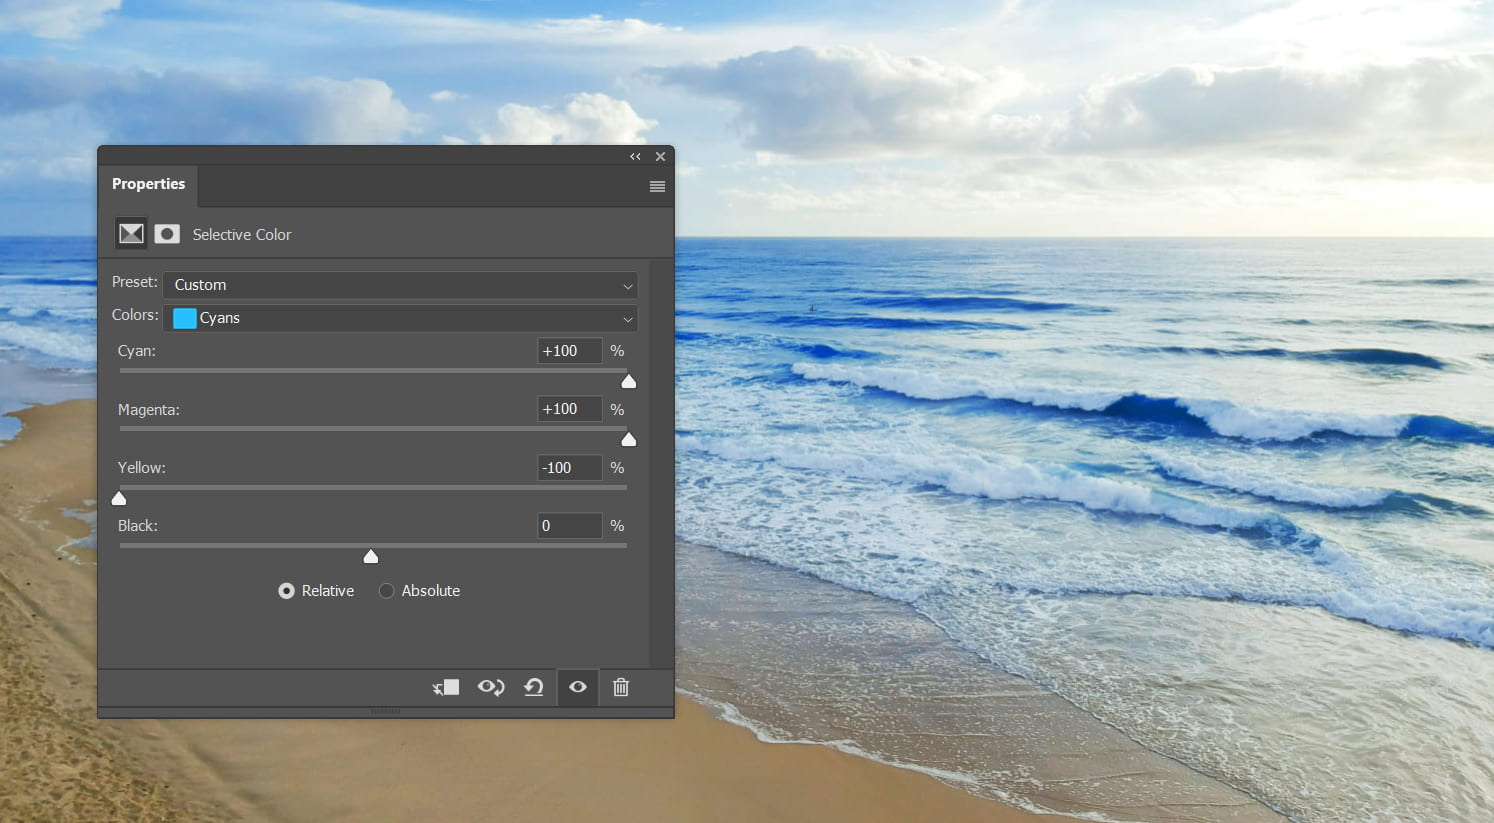
Next, let's think about how to transform cyan into blue. At this point, you need to switch to thinking in terms of RGB colors:
- Cyan means the R value is low, while the G and B values are high.
- Blue means both the R and G values are low, while the B value is high.
So, the specific approach is to reduce the R and G values while increasing the B value. In terms of Selective Color adjustments, this translates to increasing cyan and magenta while decreasing yellow. This sets the direction for your adjustments.
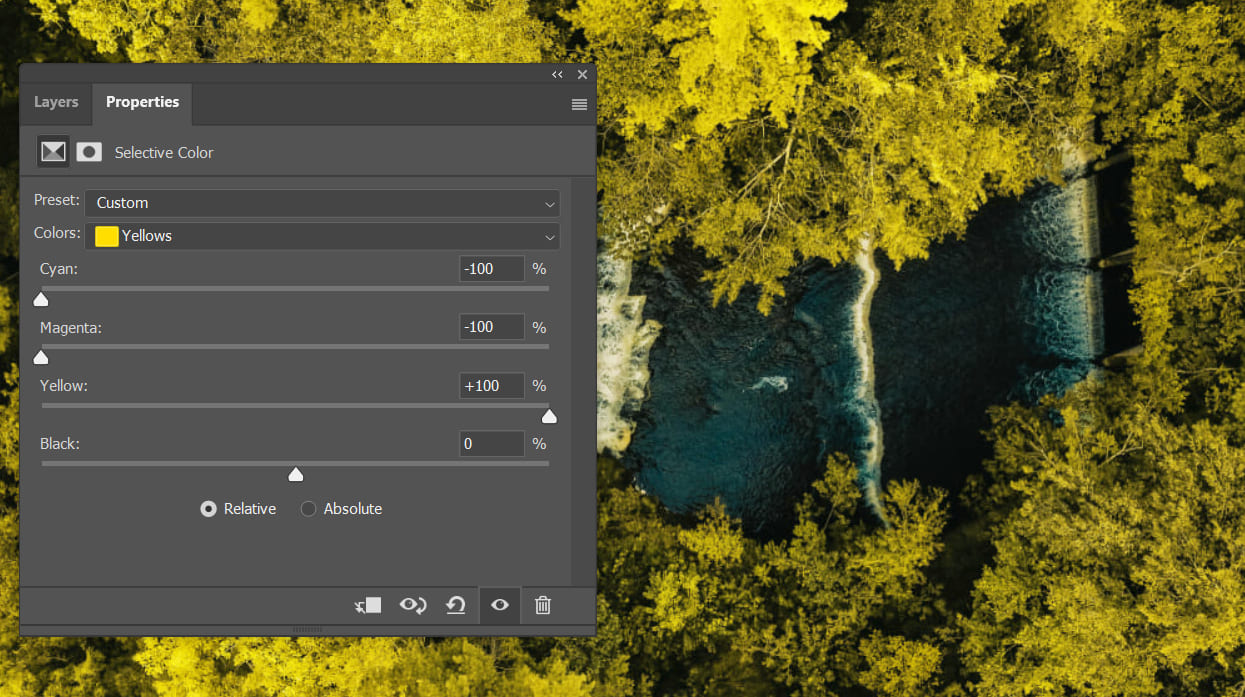
Let's move on to the next photo. If you want to make the leaves on the tree in the photo below appear more yellow, what should you do?
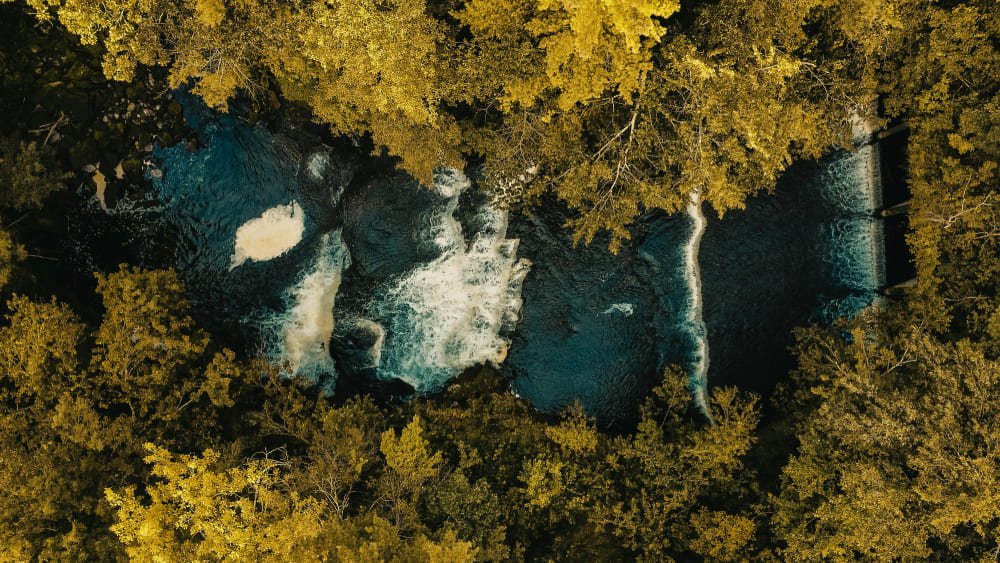
Your thought process at this point should be: [Red + Green = Yellow]. To achieve yellow, you need to enhance both red and green while reducing blue.
In Photoshop's Selective Color, increasing red and green requires decreasing cyan and magenta, and reducing blue involves increasing yellow.
Therefore, the specific adjustments are shown in the image below.
Final Thoughts About Photoshop Selective Color
The Selective Color in Photoshop is extremely simple and user-friendly, but it requires familiarity with RGB color representation and color change patterns.
However, if you're not well-versed in RGB color theory but still want to use features like Selective Color and Channel Mixer in Photoshop for color correction and photo editing, you might appreciate TourBox, a creative controller beloved by many photographers and digital artists.

TourBox frees you from tedious parameter slider adjustments, replacing them with TourBox Knobs to control color settings.
It's like using a game controller for photo editing, offering not just a fantastic user experience but also making your color adjustments more precise, efficient, and intuitive.

If you're intrigued by TourBox, check out our photo editing page to see how TourBox simplifies every step of photo editing.