Photoshop Channel Mixer: A Guide to Advanced Color Adjustments
The Channel Mixer is one of the most abstract tools in post-processing adjustments, making it somewhat challenging to grasp.
If you're unsure about how to use the Channel Mixer, keep reading our article—you'll definitely have a lightbulb moment by the end.

In this article, you will learn:
- How to Understand Channel Mixer?
- How to Use Channel Mixer in Photoshop?
- The Channel Mixer's Variant Form: Calibration
- Final Thoughts About Channel Mixer
How to Understand Channel Mixer?
Digital photos are made up of individual pixels, with each pixel containing a set of RGB values. Any adjustments you make essentially involve altering the RGB values of pixels, and the Channel Mixer is no exception.
Further Reading:
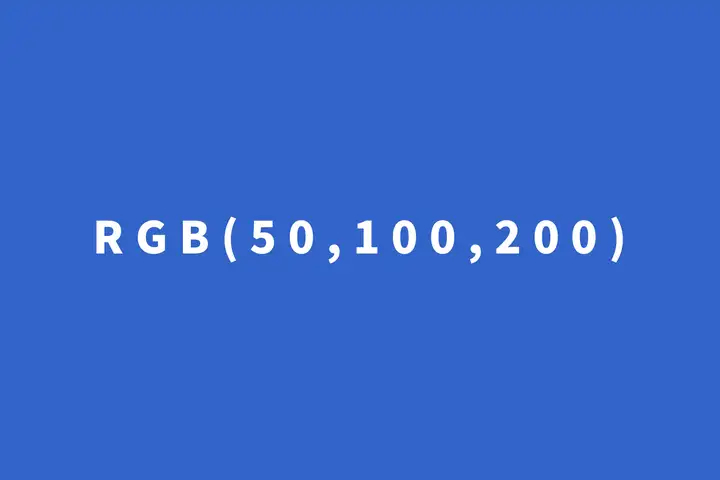
Let's consider the simplest scenario—a monochrome image where all pixels have the same RGB values. Let's say RGB(50,100,200) for all pixels as shown in the image below.
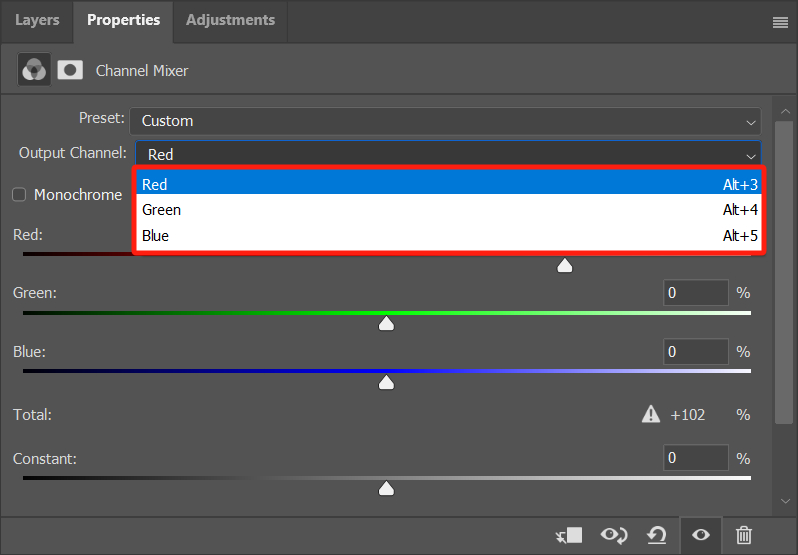
You can then open the Channel Mixer in Photoshop, where you'll find an option for the output channel.
Choosing the output channel as red only affects the R value in the pixels; selecting green only affects the G value, and choosing blue only affects the B value in the pixels.
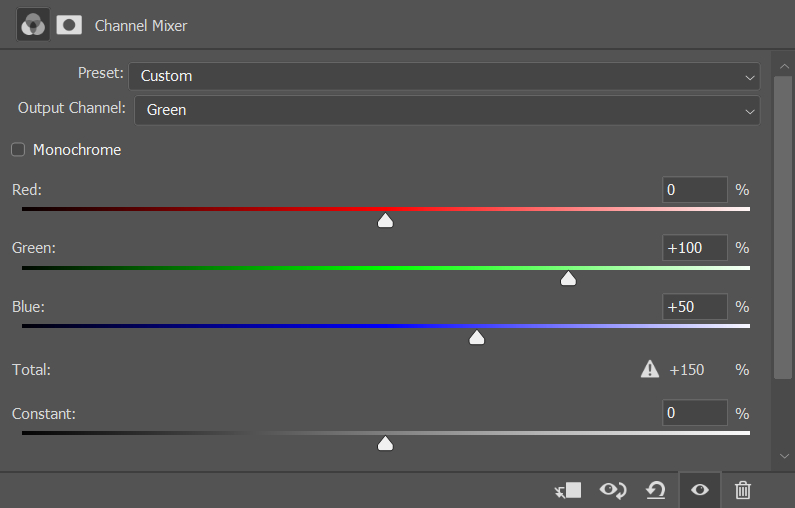
How does it actually impact the image? Let's take the example of the Channel Mixer's green output channel.
By setting the output channel to green, you'll notice that the default values for the red and blue channels are 0%, while the green channel is set at 100%.
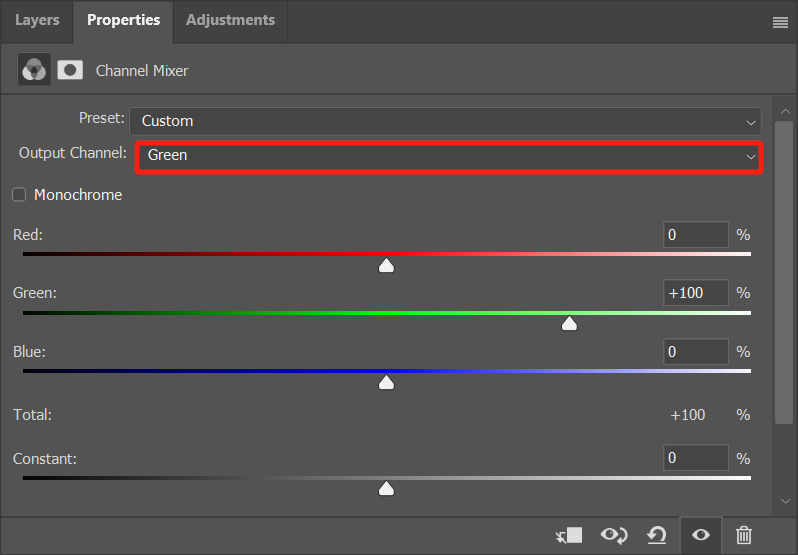
Here's a simple math operation you can visualize: Multiply the R value by 0%, the G value by 100%, and the B value by 0% (corresponding to the values displayed on the Channel Mixer panel). The result would be: [50 × 0%+100 × 100%+200 × 0%=100].
Since we've selected the green channel here, the final output will be the G value, resulting in an RGB value of RGB(50,100,200).
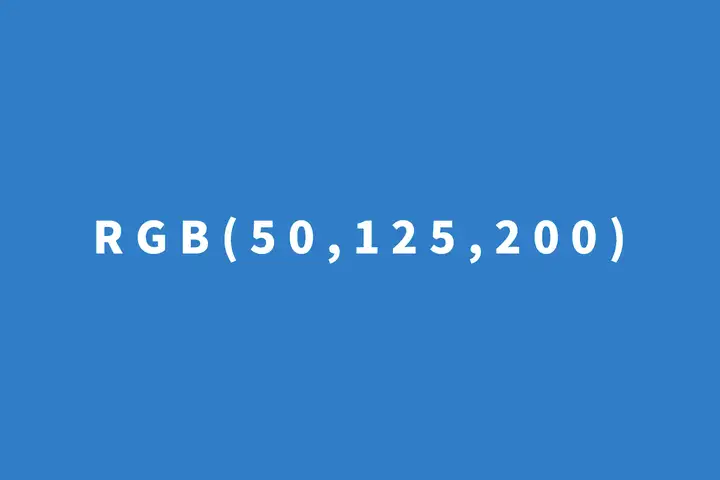
If you increase the red to 50%, leaving the green and blue channels unchanged, what happens?
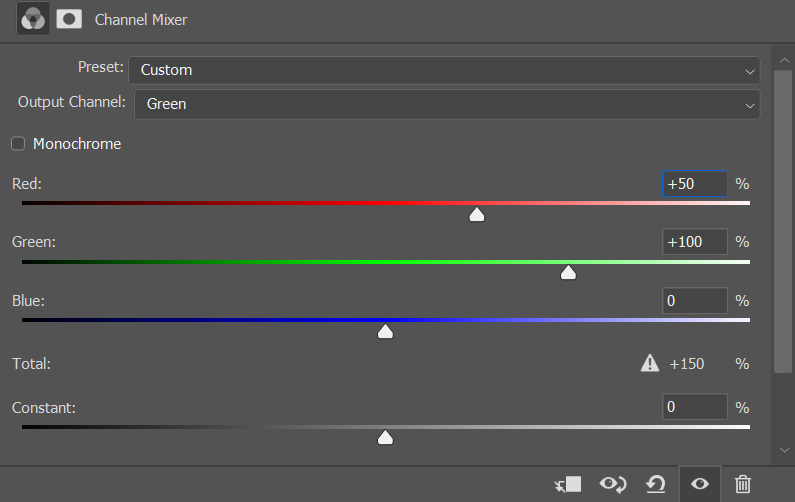
In this scenario, the output value would be calculated as [50 × 50% + 100 × 100% + 200 × 0% = 125]. Since we're focusing on the green channel here, the final output will be the G value. The R and B values remain constant, resulting in an RGB value of RGB(50,125,200) in the end.
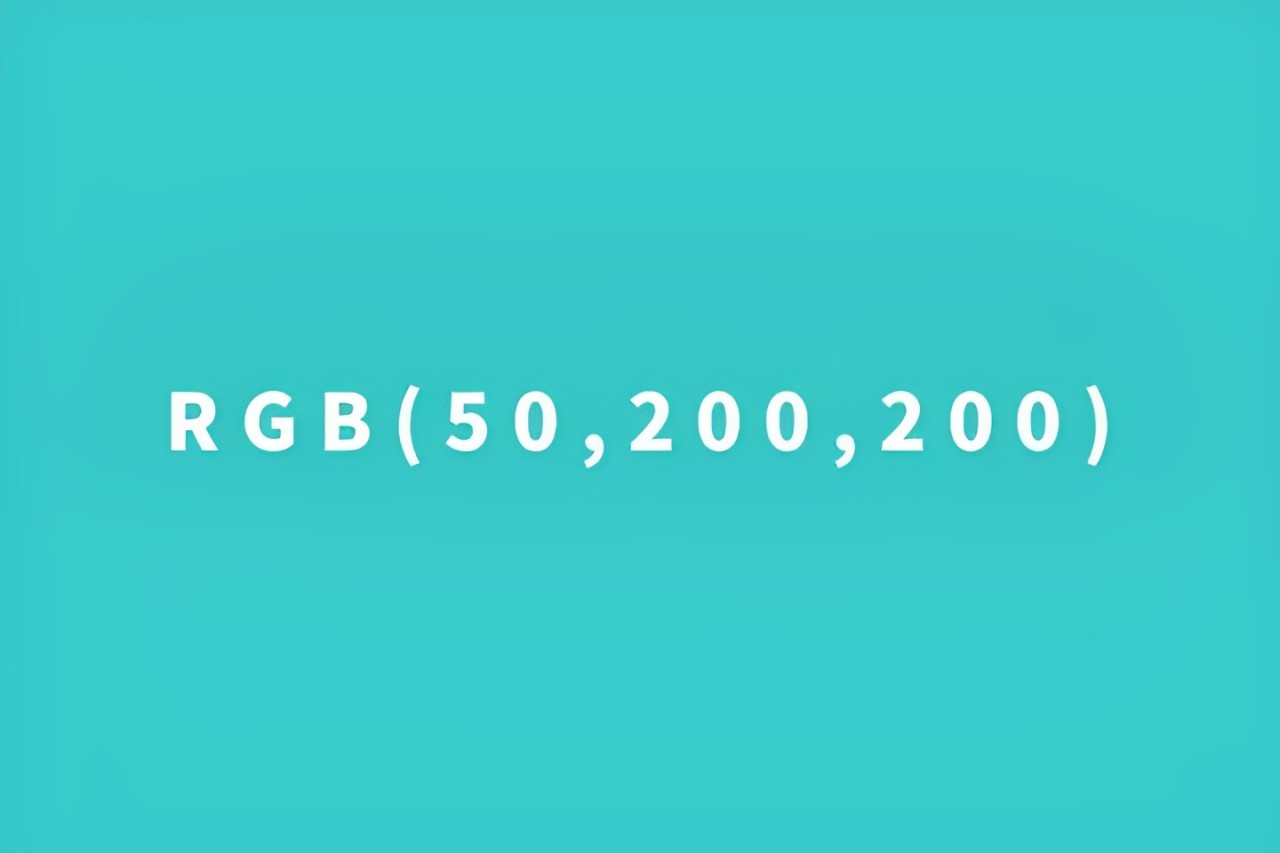
If you don't change the red and green but increase the blue to 50%, what happens?
Continuing with the calculation rules we shared above, the output value in this case would be [50 × 0% + 100 × 100% + 200 × 50% = 200].
Since we've chosen the green channel here, the final output will be the G value. The R and B values stay constant, resulting in an RGB value of RGB(50,200,200) in the end.
No matter how you adjust the values on the Channel Mixer panel, only the G value changes from start to finish! This is because you selected the green channel as the output channel.
By analyzing in this manner, you should now have a thorough understanding of how the Channel Mixer works. So, what exactly is the purpose of the Channel Mixer?
How to Use Channel Mixer in Photoshop?
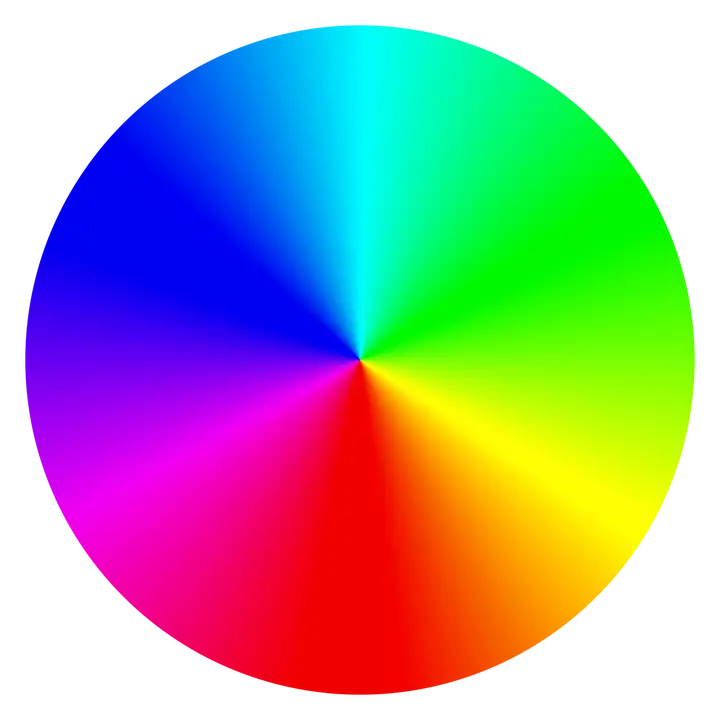
The Channel Mixer serves various purposes, with one of the most common applications being achieving color consistency in photos. For example, consider the color wheel shown below.
If you aim to unify the colors in a picture to cyan and orange, how would you go about it? You might initially think of using the HSL tool, but that can be quite cumbersome.
In just three simple steps using the Channel Mixer, you can achieve this. Since you want cyan and orange tones, you can start by removing the green. Set the output channel to green and then reduce the green value to 0.
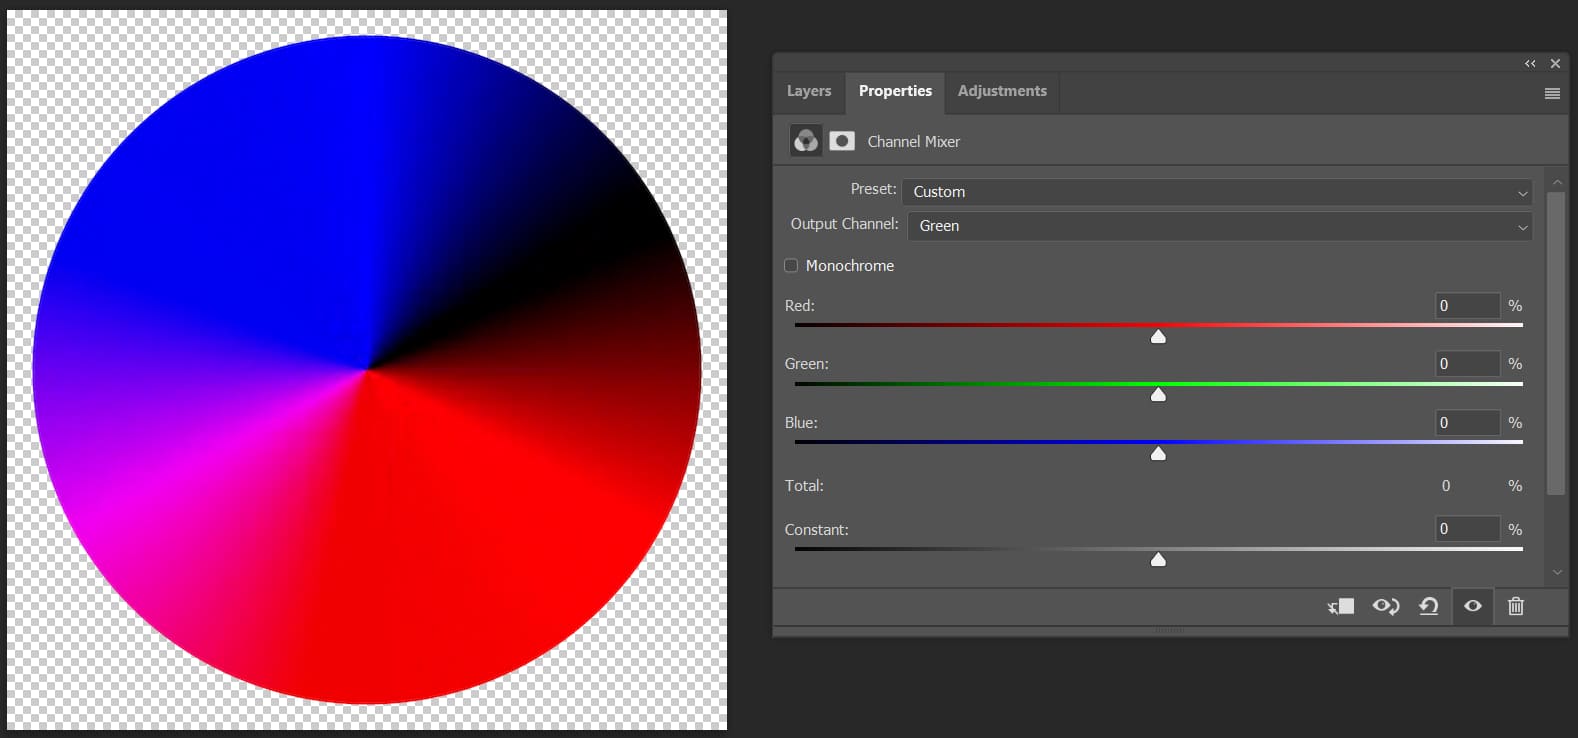
Looking at the color wheel, you'll notice that only red, blue, and magenta hues remain.
If you want to achieve a teal-orange hue, you need to introduce a small amount of green into the red.
This is because equal parts of red and green result in yellow. If there is less green than red, the mixture produces orange.
Therefore, you can add 30% of red to achieve the desired effect.
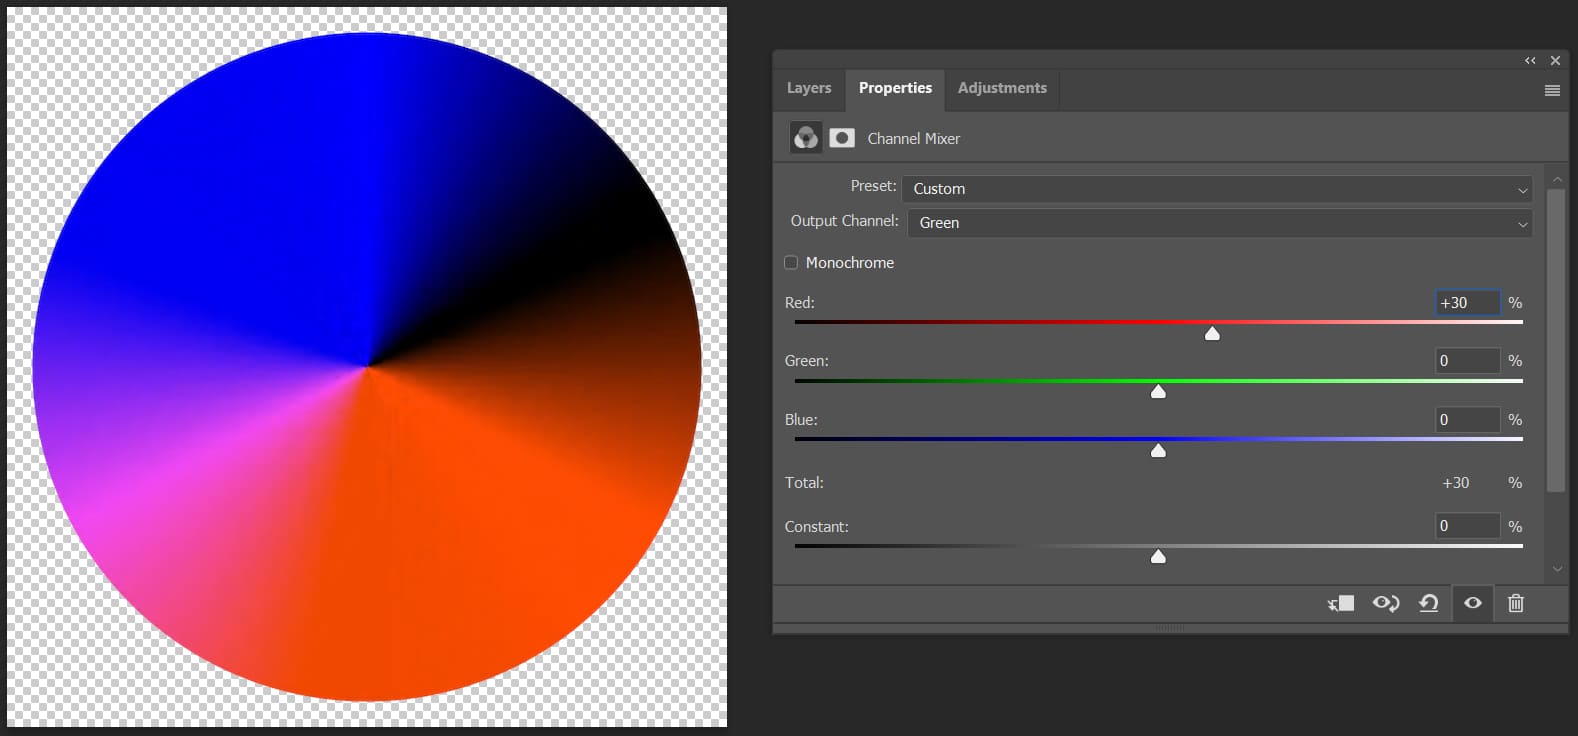
Now, the red transitions into orange. Next, to create cyan, you add green to the blue. But how much green should you add?
To maintain the correct white balance in the image, the total sum of each channel should be 100%. Why is this important?
Simply put, if the sum of the three RGB values in a channel doesn't equal 100, the pixels in that channel will exhibit a color cast, leading to inaccurate white balance.
Currently, red is at 30% and green at 0%, which means blue naturally makes up the remaining 70%. The final result would resemble the image shown below.
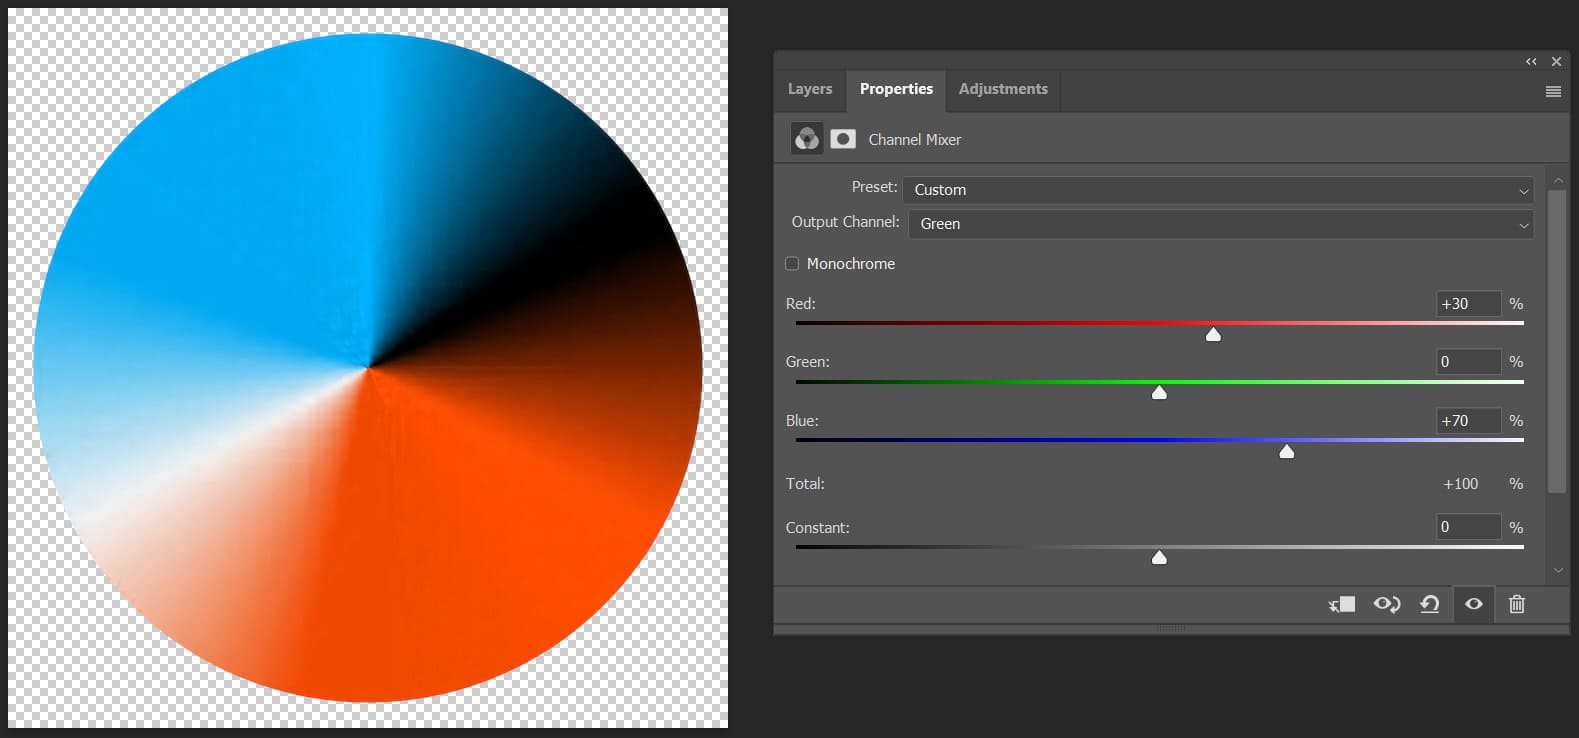
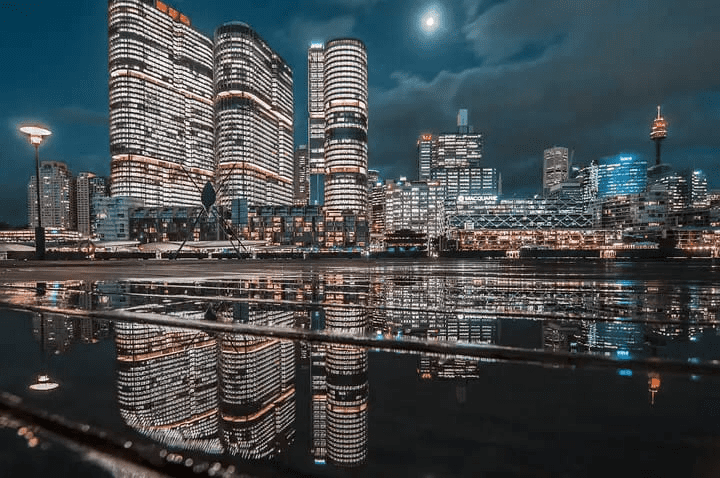
In a nutshell, selecting the output channel as green and applying parameters of red 30%, green 0%, and blue 70% will yield cyan-orange tones. Let's experiment with this using the following photo.
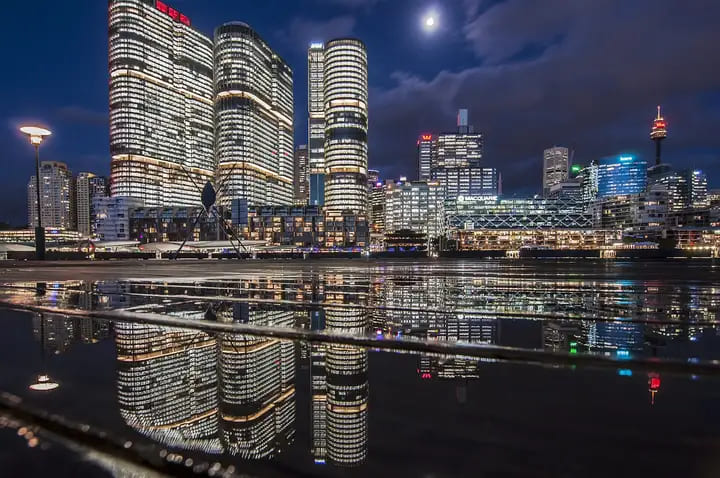
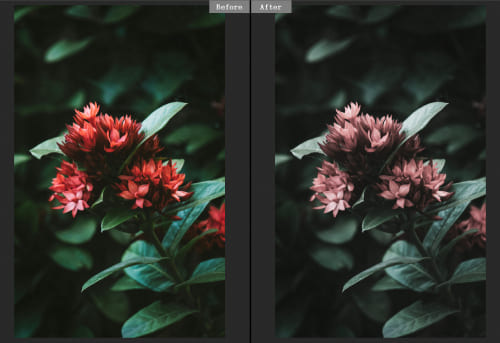
Applying the Channel Mixer parameters directly to this photo results in the following effect.
The Channel Mixer has many other functions, such as correcting color casts, split-toning, and more. Once you grasp its principles, applying it becomes straightforward.
Understanding the Channel Mixer can be a bit abstract, but if you observe it using a chromaticity diagram, this tool becomes much more intuitive.
For example, if you select the output channel as blue and increase the red, the changes on the chromaticity diagram look like this.
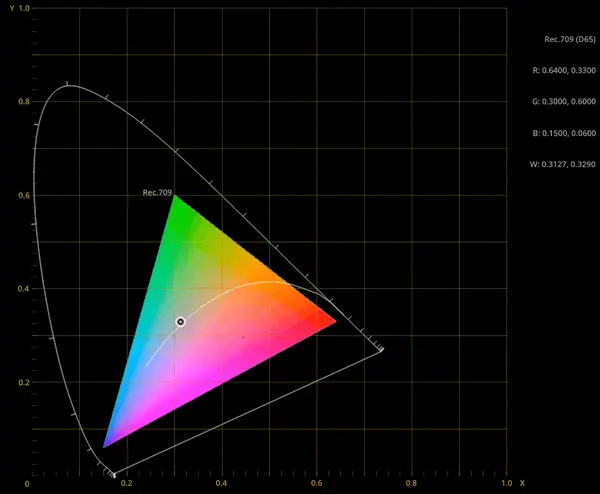
When you choose blue as the output channel and increase the red content, you'll notice that the red region in the image shifts towards blue on the diagram.
Likewise, if you pick blue as the output channel and raise the green content, the green region in the image shifts towards blue on the diagram.

By looking at these two chromaticity diagrams, you can visually understand why the Channel Mixer can harmonize colors—it essentially performs color clipping by adjusting the color channels.
The Channel Mixer's Variant Form: Calibration
Calibration is essentially a variation of the Channel Mixer, allowing for effective color harmonization.
Many popular post-processing color tones can be achieved using this tool. Examples include cyan-orange tones, blue-yellow tones, cyberpunk tones, and more.
Compared to the Channel Mixer, the Calibration tool is generally easier to use. So, if you find the Channel Mixer too complex, you might want to consider using the Calibration tool for color harmony adjustments.
Here's how the Calibration tool works:
- Moving the red primary slider to the right shifts red towards green; to the left shifts red towards blue.
- Moving the green primary slider to the right shifts green towards blue; to the left shifts green towards red.
- Moving the blue primary slider to the right shifts blue towards red; to the left shifts blue towards green.
Many photo editing tools like Lightroom Classic and Camera Raw feature a Calibration tool. Give the Calibration tool a try and see which one you prefer between it and the Channel Mixer.
Final Thoughts About Channel Mixer
The Channel Mixer functionality is not exclusive to Photoshop. Many other image editing software programs also offer similar features.
Programs like GIMP, Affinity Photo, Corel PaintShop Pro, and others provide channel adjustment capabilities akin to the Channel Mixer.
These software tools can be utilized to adjust image colors and channels. While the specific methods of use may vary, the core concept remains the same.
By now, if you've read this far, you should have a good understanding of how to use the Channel Mixer to control RGB values.
Product Recommendation:
In photo editing, whether using the Channel Mixer or other color adjustment tools, you often find yourself tweaking color by dragging corresponding parameter sliders.
This method can make precise parameter control challenging and may not offer the best color editing experience. This is where you might consider TourBox, a creative controller beloved by many photographers and digital artists.

Imagine using a gaming controller to color grade your photos—TourBox can provide you with an unmatched color grading experience.
Utilizing TourBox can streamline every step of photo editing with fewer actions, freeing you from the complexities of keyboard shortcuts and intricate operations.

Of course, TourBox's magic doesn't stop there—check out our photo editing page for more information.