How to Visualize and Remove Spots in Lightroom Classic?
If you're a photography enthusiast, you may have noticed that your camera can accumulate dust over time. This is especially true if you frequently change lenses outdoors, resulting in spots appearing in your photos, often noticeable in the sky.
The most frustrating part is that some of these spots are easily visible, while others are hidden and difficult to find in the image. Besides regular care for your camera and using UV filters for protection, you can also rely on Lightroom Classic to perfectly address these blemishes in your photos.
In this tutorial, we will share how to visualize and remove spots in Lightroom Classic. So, let's dive in.

In this article, you will learn:
- What Are Spots in Photos?
- How to Visualize Spots in Lightroom Classic?
- How to Remove Spots in Lightroom Classic?
- How to Batch-Remove Spots in Lightroom Classic?
- Conclusion
What Are Spots in Photos?
Spots in photos are often more likely to appear when the camera is directly facing the sun, commonly known as shooting against the light.
This situation is frequently encountered during sunrise or sunset, as all sunsets and night scenes are typically captured with small apertures. Therefore, spots can often be seen when using apertures smaller than F8.
Since the sky has a relatively uniform content with smooth color transitions, while spots in other areas are usually covered by people, buildings, or other elements in the photo, spots are more noticeable in the sky.
Therefore, when you decide to remove these spots from every single photo, finding a quick and effective method to eliminate them becomes your ultimate goal. This becomes especially crucial when you have taken a large number of photos, and post-processing hundreds of images manually to remove spots can become quite daunting.
Fortunately, Lightroom Classic can handle this issue through batch processing, as spots in photos taken with the same camera will have identical positions. In the following sections, we will delve into this topic in detail.
How to Visualize Spots in Lightroom Classic?
Open the Lightroom Classic software and import your photos. Navigate to the Develop module and select the Healing tool.
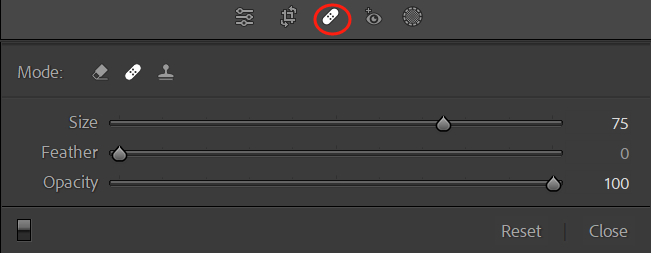
You can then choose between three modes: Content-Aware Remove, Heal, and Clone. If you're familiar with Photoshop, these modes should be easy to understand.
For removing spots in your photo, selecting the Heal mode is sufficient.
Now, here comes the problem. Relying solely on your eyes to identify spots is not reliable and can be tiring. Is there a way to visualize spots in Lightroom Classic?
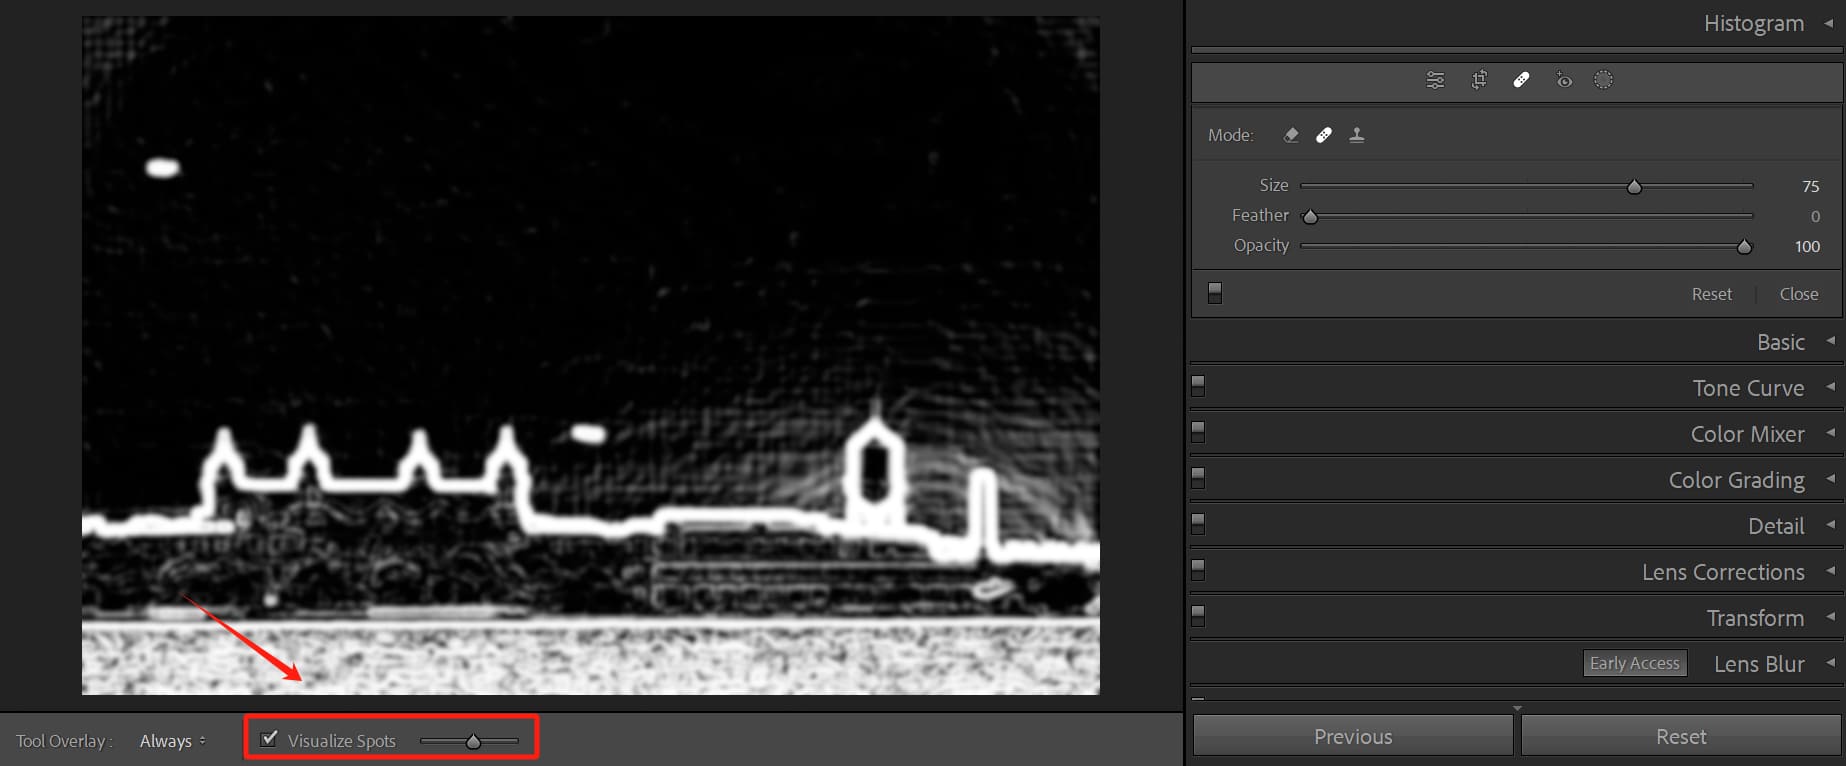
The answer is simple. After selecting the Healing tool, you will see an option called "Visualize Spots" at the bottom of the interface. Clicking on it will turn the photo into black and white, and you can adjust the level of spot visibility by dragging the slider on the right.
How to Remove Spots in Lightroom Classic?
The appropriate distance for the "Visualize Spots" slider in Lightroom Classic will vary depending on the specific photo. When dragged to the maximum, it will display many white dots, but not all of them are spots. Some may be fine details of the sky's color, while the round white circles are the actual spots.
This method not only helps remove sensor spots but also allows you to easily identify unwanted elements, such as birds or tiny aircraft in the sky. Simply click on each one to remove them.
The Heal mode has three settings: Size, Feather, and Opacity, and these values are easy to understand and use.
1. Size
It's best to keep the brush size slightly smaller than the spots to avoid touching other elements, especially when repairing areas with non-uniform colors.
If the size of the Healing brush is not suitable, you can directly select the already marked spots on the photo and adjust the size in the settings panel on the right or directly on the spot itself.
In addition to being able to freely adjust the size and position of the Healing Brush, you can also adjust the reference point for the spots.

2. Feather
Feathering does not need to be too large, especially when dealing with photos that have clouds. If the repaired result is not ideal, it is often due to feathering. Generally, a feathering value between 10-35 is suitable for repairs.
However, the specific value for feathering depends on the distance between the repair spot and other elements. When the brush size increases, the proportion of feathering will also relatively increase, so be mindful of this change.
3. Opacity
As for Opacity, it must be set to 100 to completely remove the spot.
How to Batch-Remove Spots in Lightroom Classic?
As we mentioned earlier, it can be quite frustrating to manually remove spots one by one when you have hundreds of photos to process after a trip.
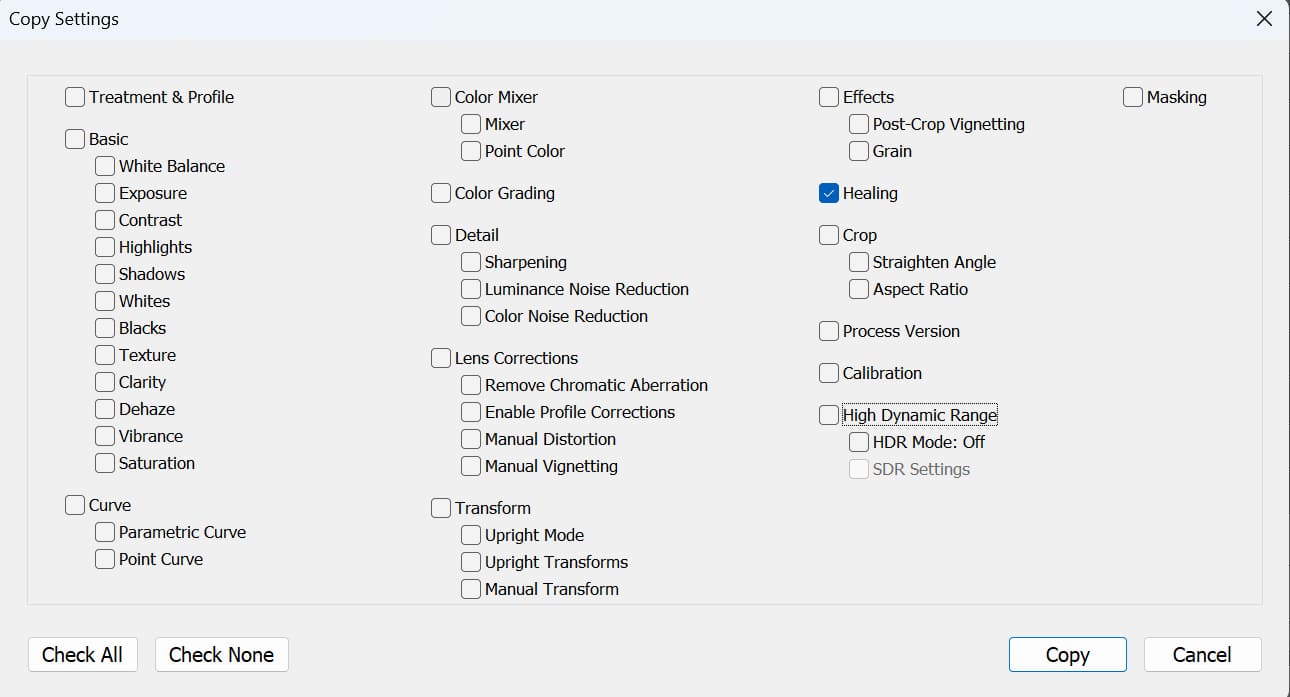
Fortunately, Lightroom Classic offers a solution for batch processing. After you have removed spots from one photo, you can go to Copy Settings and only check "Healing." Then, on the next photo, click on "Paste" to apply the same spot removal.
However, it's important to note that spot removal may produce strange results in different photos, especially on buildings or objects. In such cases, click on the unnecessary repairs and press "Delete" to remove them. So, even though it's a batch process, it's still best to check each photo individually.
Further Reading:
We have shared the method of batch editing in Lightroom Classic. If you're interested, you can check it out: How to Batch Edit in Lightroom Classic.
Is there a tool that can make spot removal in Lightroom Classic easier and more convenient? We recommend TourBox, a creative tool designed for photographers, creatives, and professionals.

With TourBox, you can seamlessly adjust the size of the Healing Brush using a knob, eliminating the need for mouse adjustments.
You can also use macros to simplify the tedious process of batch spot removal with just a press of a button on TourBox.
TourBox also offers built-in features like the Dynamic Panel, which let you break free from the keyboard and mouse and edit photos and do color grading in Lightroom Classic with one hand. If you’re interested, click our link to learn more.

Conclusion
Spots in photos can be unavoidable, especially now that many photography enthusiasts are using mirrorless cameras, which expose the sensor more frequently.
Even if you take care to keep your camera clean and regularly clean the sensor, dust can still find its way into the camera.
So, with the methods of visualizing and removing spots in Lightroom Classic, you can at least ensure that your photos are free from any spots.