How to Use Content Aware Fill in Photoshop?
Tired of battling with unwanted items or missing pieces in your photographs? So, no need to be concerned! Adobe Photoshop's Content-Aware Fill tool can help!
This tool allows you to effortlessly eliminate undesired items or fill in missing portions of an image.
What's more, the best part? It is not necessary to be a Photoshop expert to utilize it!
In this tutorial, we'll walk you through the simple techniques that will help you master Content-Aware Fill and advance your photo editing skills. So, let's get started!

In this article, you will learn:
- What Is Content-Aware Fill in Photoshop?
- How to Use Content-Aware Fill to Remove Unwanted Objects?
- Alternative to Content-Aware Fill for Complex Scenes
- How to Use Content-Aware to Fill in Missing Parts?
- Final Thoughts About Content-Aware Fill in Photoshop
What Is Content-Aware Fill in Photoshop?
Content-Aware Fill is an advanced and powerful feature in Adobe Photoshop that allows users to effortlessly remove unwanted elements or fill in missing parts of an image while preserving the natural appearance and consistency of the surrounding area.
This is achieved through an intelligent algorithm that analyzes the patterns, textures, and colors found in the neighboring pixels and generates a fill that closely matches the original content.
1. How Content-Aware Fill Works?
Content-Aware Fill works by utilizing a sophisticated algorithm that takes into account various properties of the surrounding area, such as:
- Texture: The algorithm identifies and replicates the texture patterns found in the nearby pixels to create a fill that blends seamlessly with the existing content.
- Color: The color of the fill is determined by analyzing the colors present in the surrounding area, ensuring that the generated fill maintains a consistent color palette within the image.
- Structure: Content-Aware Fill also considers the structure and organization of the surrounding elements, such as lines and shapes, to generate a fill that aligns well with the overall composition of the image.
2. Applications of Content-Aware Fill in Photoshop
Content-Aware Fill is particularly useful for various image editing tasks, such as:
- Removing unwanted objects, such as power lines, tourists, or blemishes from an image.
- Filling in missing or damaged areas of an image, such as torn corners or gaps in a panorama.
- Extending the background or foreground of a photo to change its dimensions or aspect ratio.
How to Use Content-Aware Fill to Remove Unwanted Objects?
The Content-Aware Fill feature eliminates undesired features or fills in missing sections of an image in real time, making it an indispensable tool for any aspiring photographer or graphic designer.
So, is this feature really as amazing as it sounds? Let's explore it together.
Step 1: Open Your Image in Photoshop
Open Adobe Photoshop and load the image you want to edit. To do this, go to File > Open and select the image file from your computer.
For our exploration, we will use the following image as an example. We will utilize the "Content-Aware Fill" feature in Photoshop to see how it performs in practice.

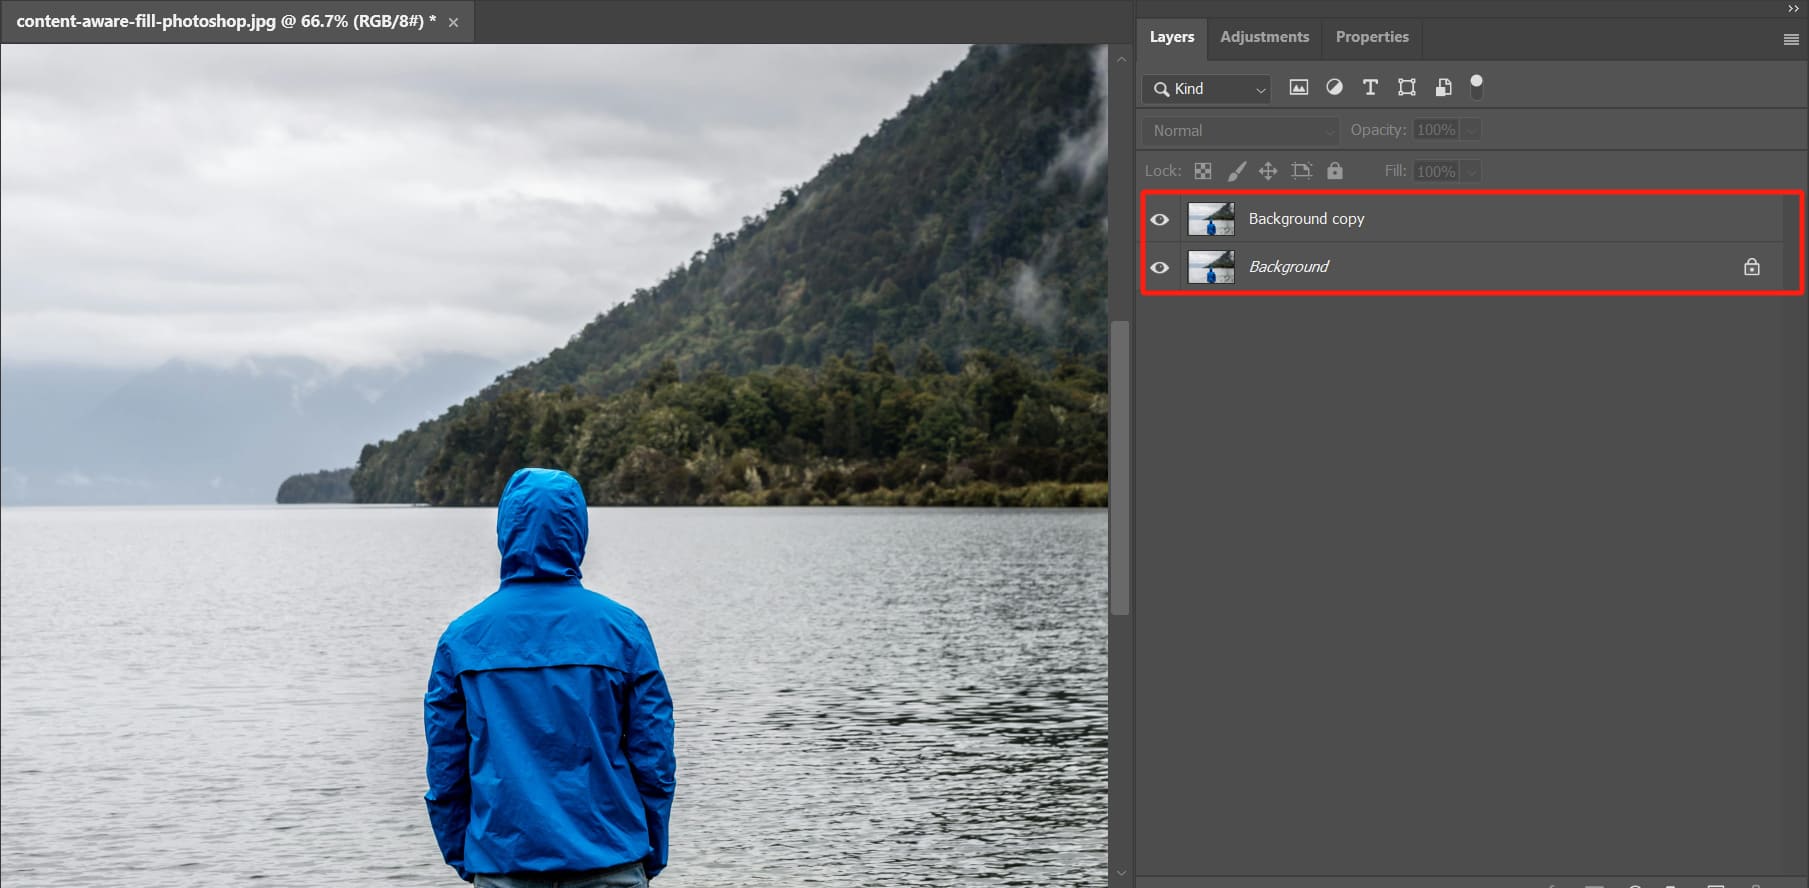
Step 2: Duplicate the Background Layer
To preserve the original image, creating a duplicate layer to work on is a good idea. In the Layers panel, right-click on the background layer and select Duplicate Layer. Click OK in the dialog box that appears.
Step 3: Select the Object or Area to Fill
On the left side of Photoshop, choose the selection tool that best suits your image. Some commonly used selection tools include:
- Lasso Tool: Freehand selection tool
- Polygonal Lasso Tool: Creates straight-edged selections
- Magnetic Lasso Tool: Snaps to the edges of objects as you draw
If you want to make selections quickly, you can also use tools like the Object Selection Tool, Quick Selection Tool, Magic Wand Tool, and so on.
In fact, you don't need to meticulously outline the object or character you want to remove, and the choice of selection tool is not crucial here. Instead, you can simply use a selection tool to roughly trace the approximate shape of the object or character.
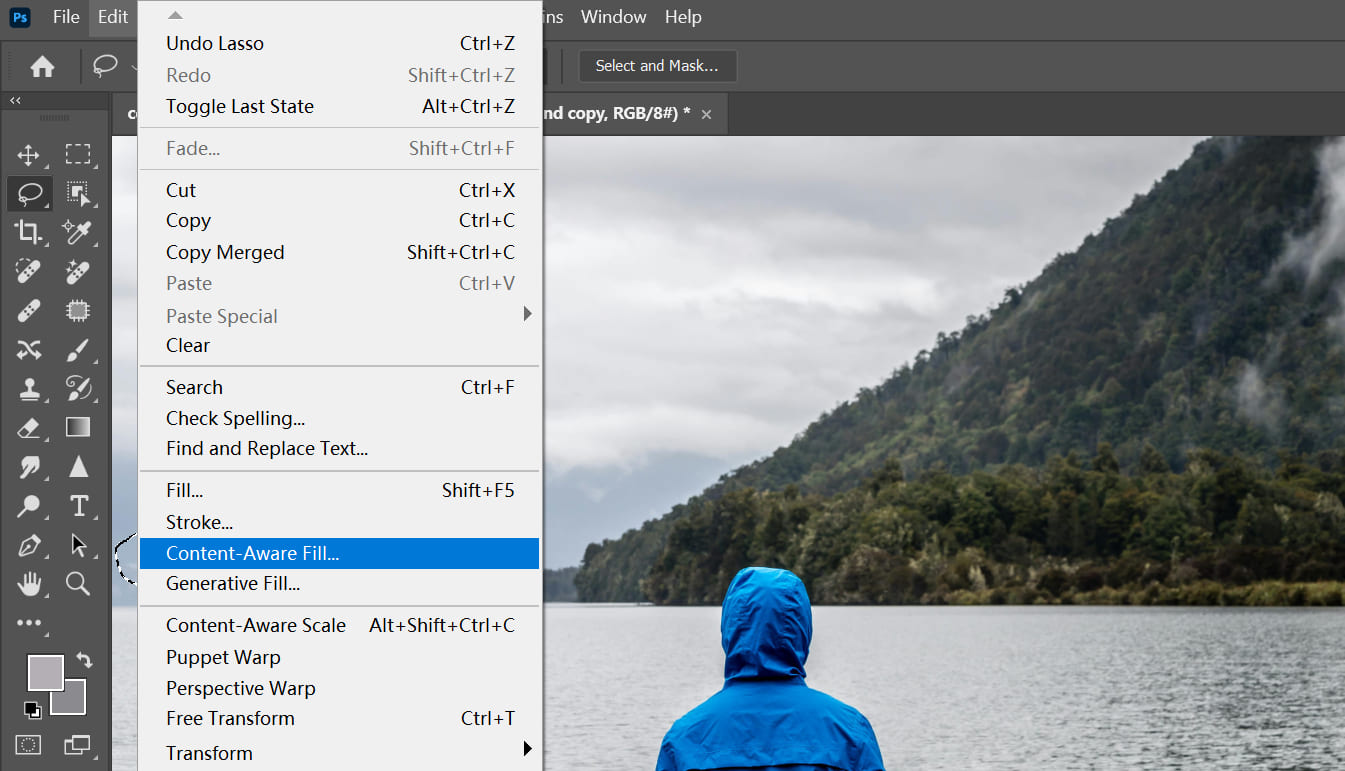
Step 4: Apply Content-Aware Fill
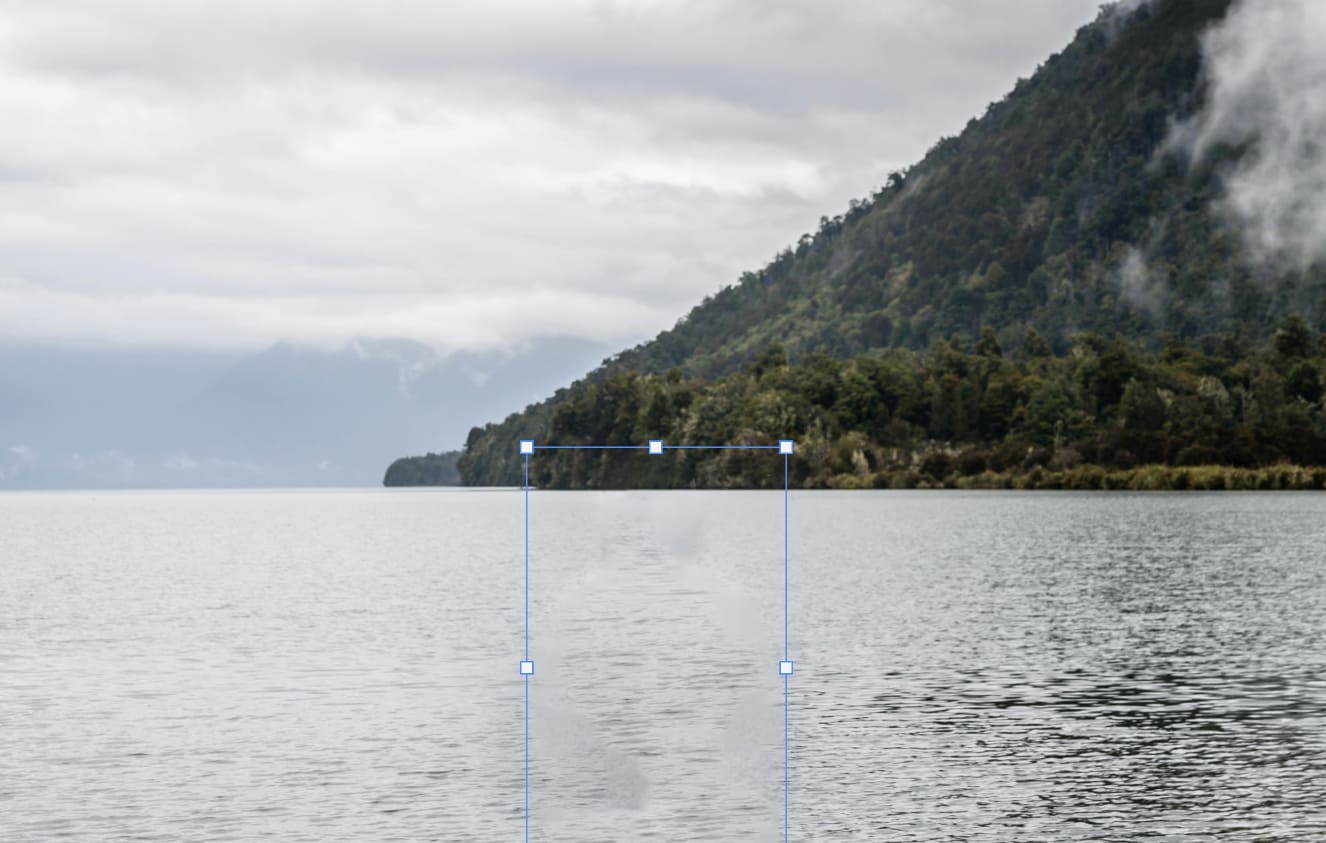
Let's start with some simple scenarios. We'll use the Lasso Tool to roughly outline a cloud area in the distance of the photo.

Next, go to the top menu bar and select "Edit" > "Content-Aware Fill." This will open the "Content-Aware Fill" panel.
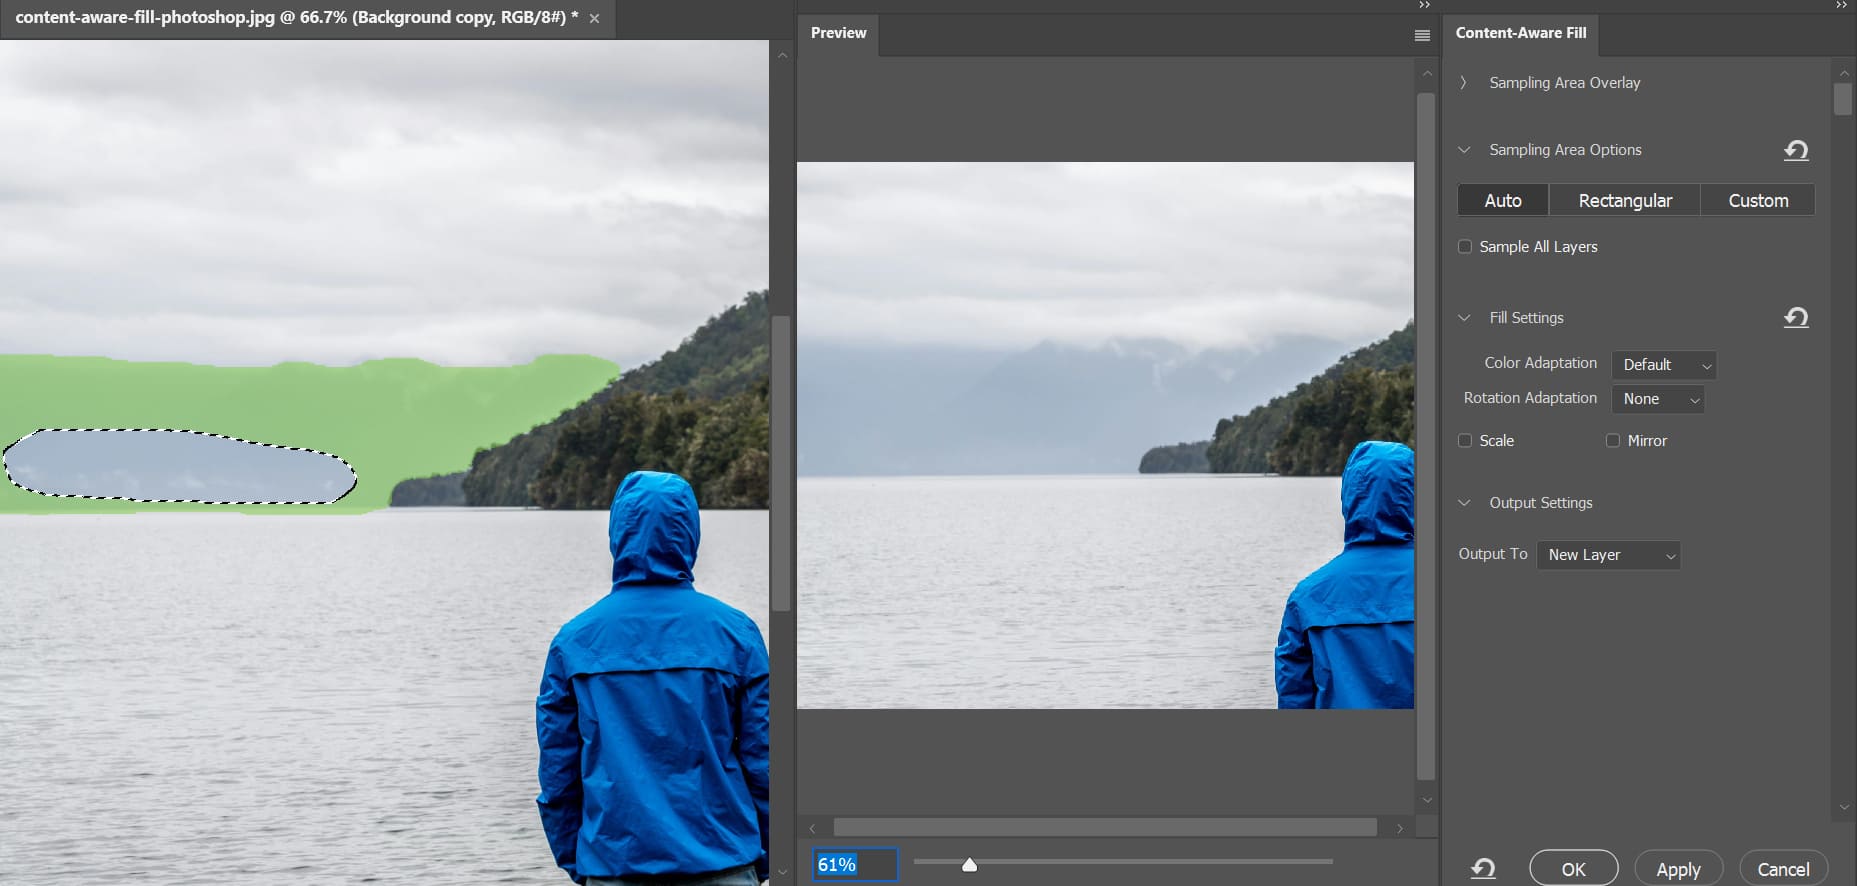
In the panel, you'll see several options on the "Content-Aware Fill" panel. You can adjust the settings to fine-tune the fill, but in most cases, the default settings are sufficient.
Some options you can adjust include:
- Sampling Area: The area that Photoshop uses to generate the fill. You can add or remove parts of the sampling area by painting with the brush tool in the workspace.
- Color Adaptation: Controls how much the fill color is adapted to match the surrounding area.
- Blending Effects: By selecting the appropriate mode and adjusting the opacity, you can create a variety of unique and captivating effects. Experimenting with different blending modes and opacity levels can add depth, texture, and richness to your images, and help you achieve the desired visual impact.
Don't be afraid to play around with these settings and see how they can enhance the mood and tone of your artwork. Once you are satisfied with what you set, click OK to apply the Content-Aware Fill.
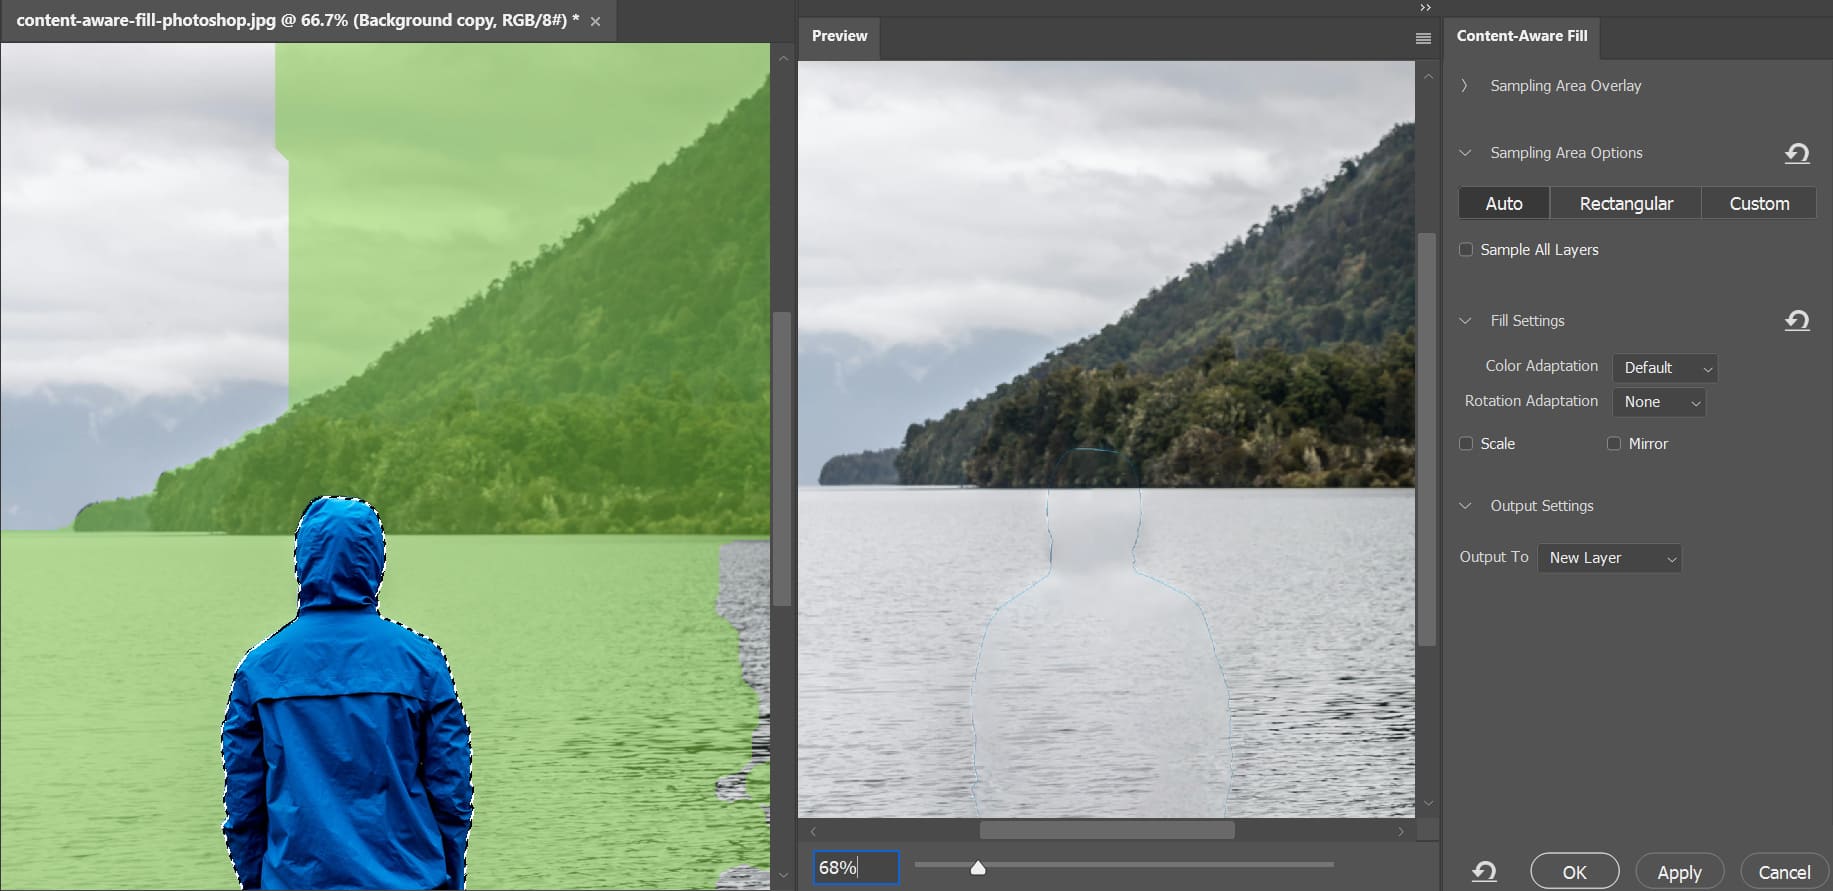
You can see that Content-Aware Fill is a perfect tool for some simple scenarios. But what if you want to use Content-Aware Fill to remove people from a photo or handle more complex images?
Let's say we quickly select the people in the photo using the Object Selection Tool and then apply Content-Aware Fill again. Surprisingly, the result is quite poor, with noticeable edges remaining around the people.
We'll undo the previous steps and expand the selection by 5 pixels using the Expand function. Then we apply Content-Aware Fill once more.
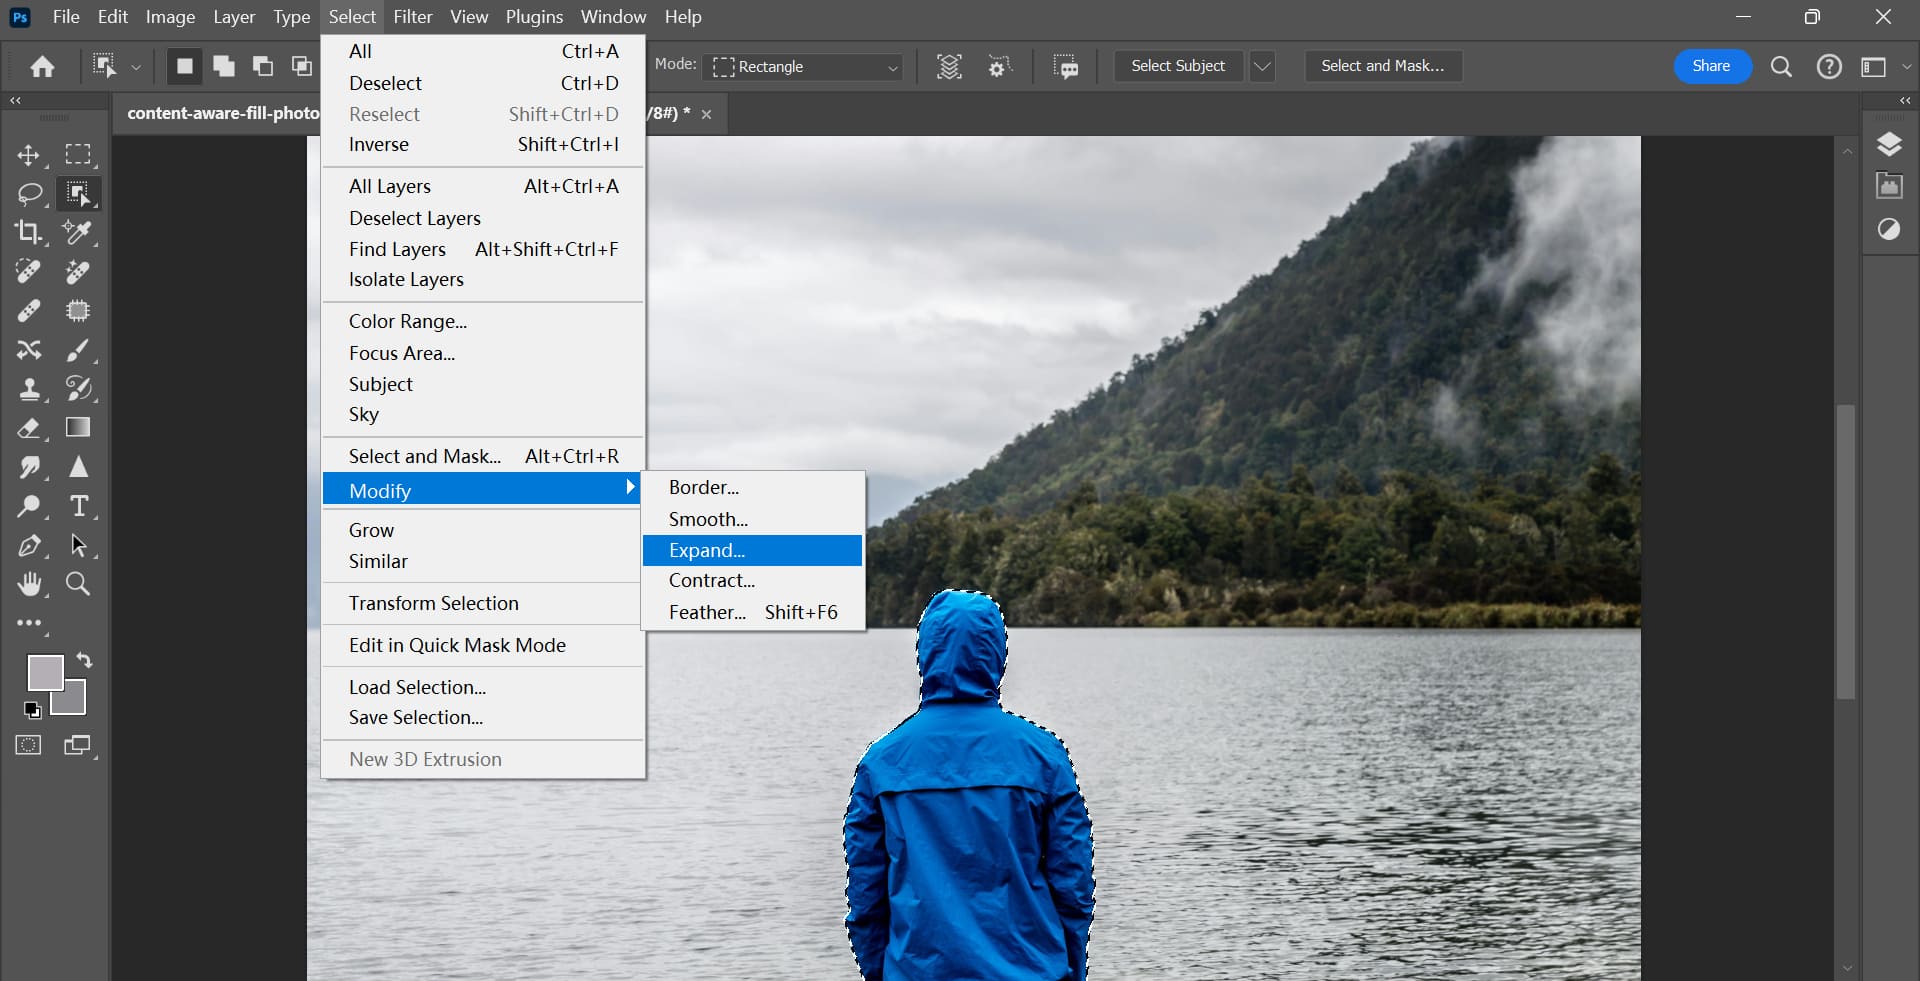
This time, there are no obvious edges around the people. However, no matter how you adjust the parameters of Content-Aware Fill, you'll find that the result is still not satisfactory.
Of course, you can use the Clone Stamp Tool, Healing Brush Tool or anything else to fix any minor imperfections. In other words, for complex image scenes, you can use Content-Aware Fill for an initial treatment and then make further adjustments as needed.
Check out this 2-minute tutorial (made by Photo Feaver) to learn how to use Content-Aware Fill in Photoshop.
Alternative to Content-Aware Fill for Complex Scenes
As we mentioned above, Content-Aware Fill is a fantastic tool for making adjustments to certain details in an image. However, when it comes to complex image scenes, Content-Aware Fill may struggle a bit.
That's where you can turn to an alternative to Content-Aware Fill, or rather an advanced version of it, called Generative Fill, which is a new AI tool introduced by Adobe.
Generative Fill excels in handling complex scene algorithms and produces superior results, albeit with slightly longer processing times. Additionally, you can add auxiliary descriptions to generate more variations in the AI-generated result.
Let's go back to our previous image. Use the Lasso Tool to make a simple selection around the area with people, and then apply Generative Fill.
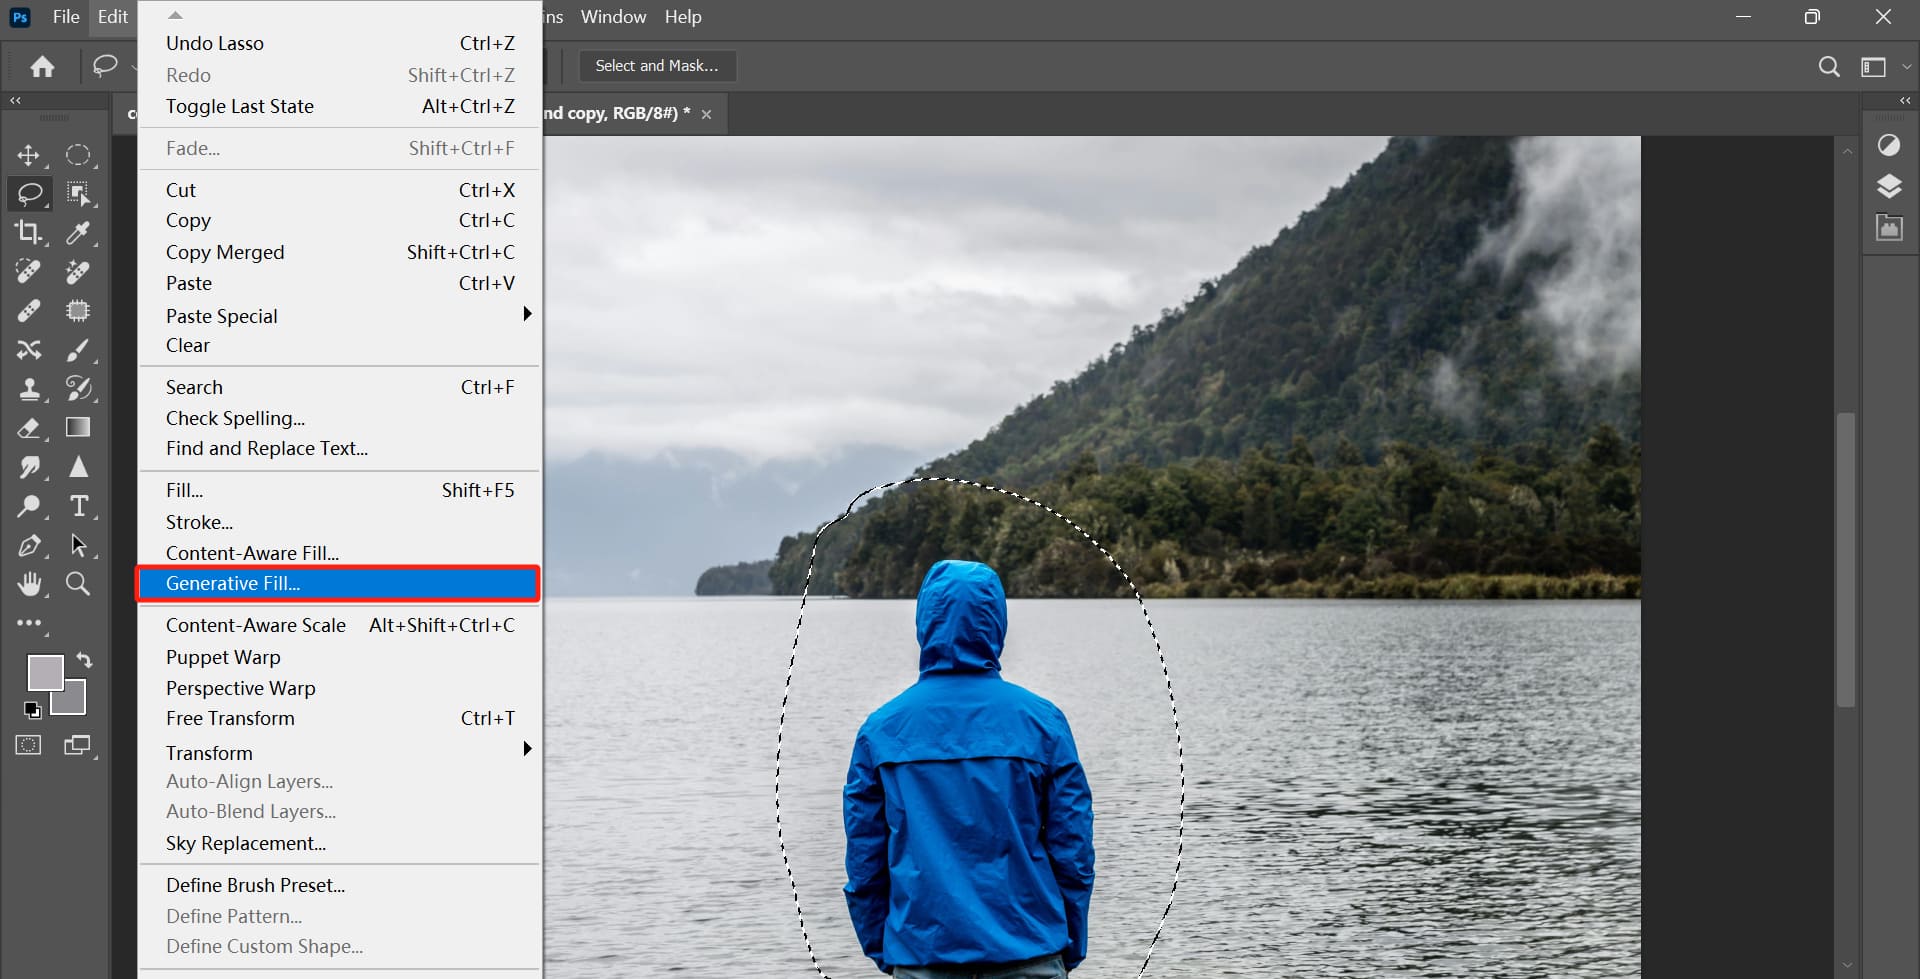
You can see that Generative Fill is incredibly powerful when it comes to processing complex image scenes. The resulting image looks extremely natural, without any trace of Photoshop manipulation.

How intelligent is Generative Fill? Let's take an example using the photo below. We'll select the swan in the photo and use Generative Fill to remove it.
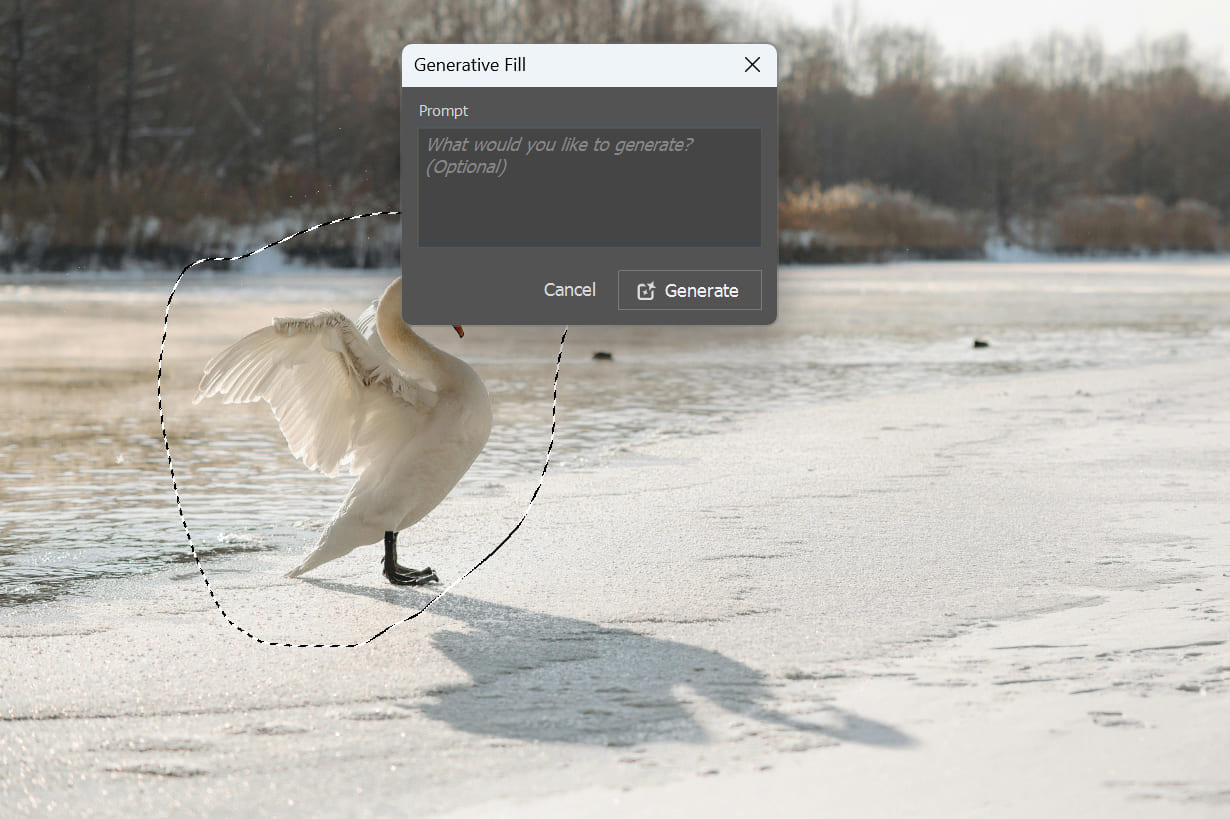
After waiting for a while, Generative Fill generates the result. Wait a minute, the swan is gone, but why is there a person in its place?
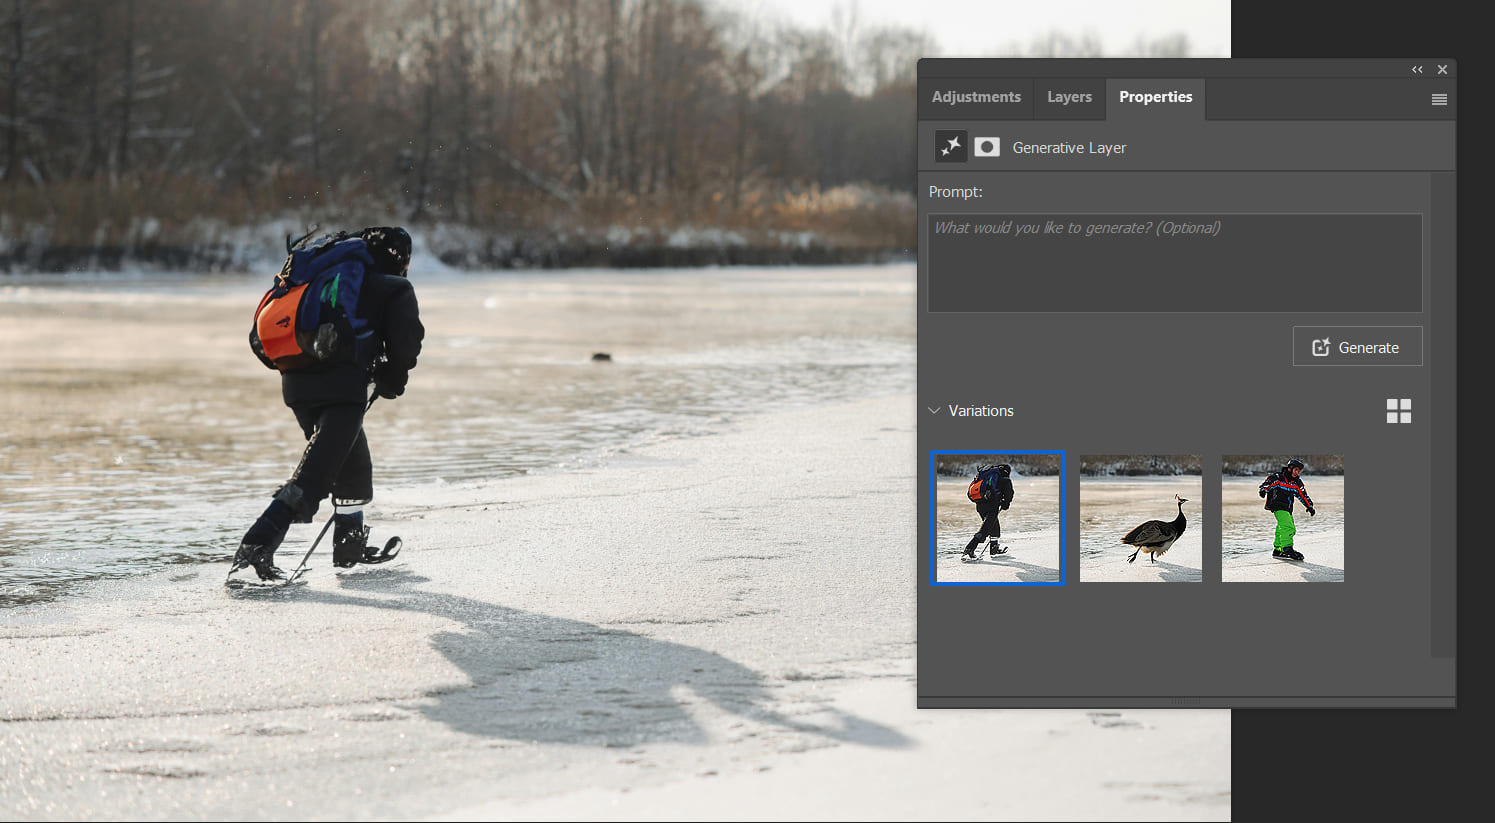
The reason is simple. Take a closer look at the photo. Did you notice it? The swan in the photo has a shadow. However, when we made the selection earlier, we didn't include the shadow.
To ensure a more natural result instead of having a mysterious shadow in the photo, Generative Fill created a new object for you.
Include the shadow area in the selection, and then let's apply Generative Fill once again to see the final result. It's simply perfect!

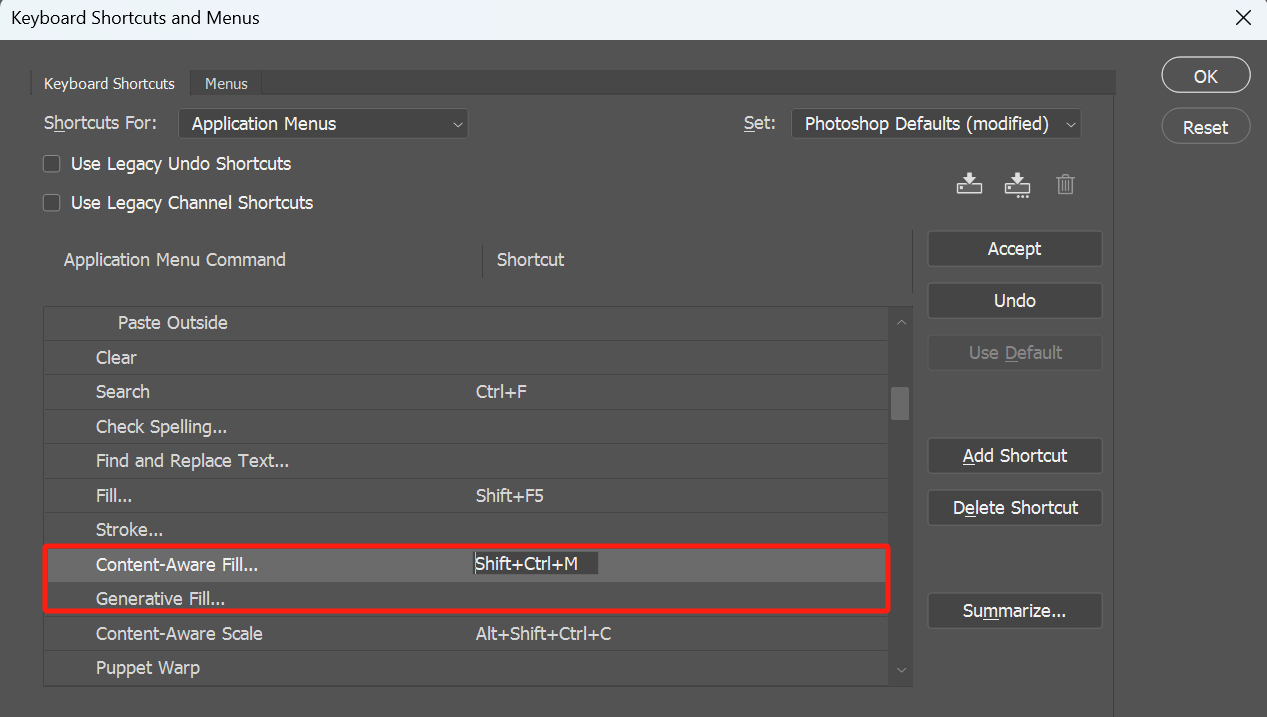
Whether you're using Content-Aware Fill or Generative Fill, applying these features requires clicking through the top menu navigation and finding the corresponding options. In Photoshop, these features don't have default keyboard shortcuts.
You can assign keyboard shortcuts to these functions in the "Keyboard Shortcuts" panel. This way, you can quickly invoke the desired function.
However, keyboard shortcuts are not always the most efficient method. After all, it's hard to remember all the shortcuts for various software, and you might often mix them up. That's where TourBox comes in, a creative tool loved by digital artists and creators.

Let's take Content-Aware Fill as an example. In the TourBox Console, you can create a macro for one of TourBox's buttons.
In this macro, you start by adding a keyboard shortcut action for Content-Aware Fill, then add a 200ms delay, and finally add a confirmation action for "Enter".
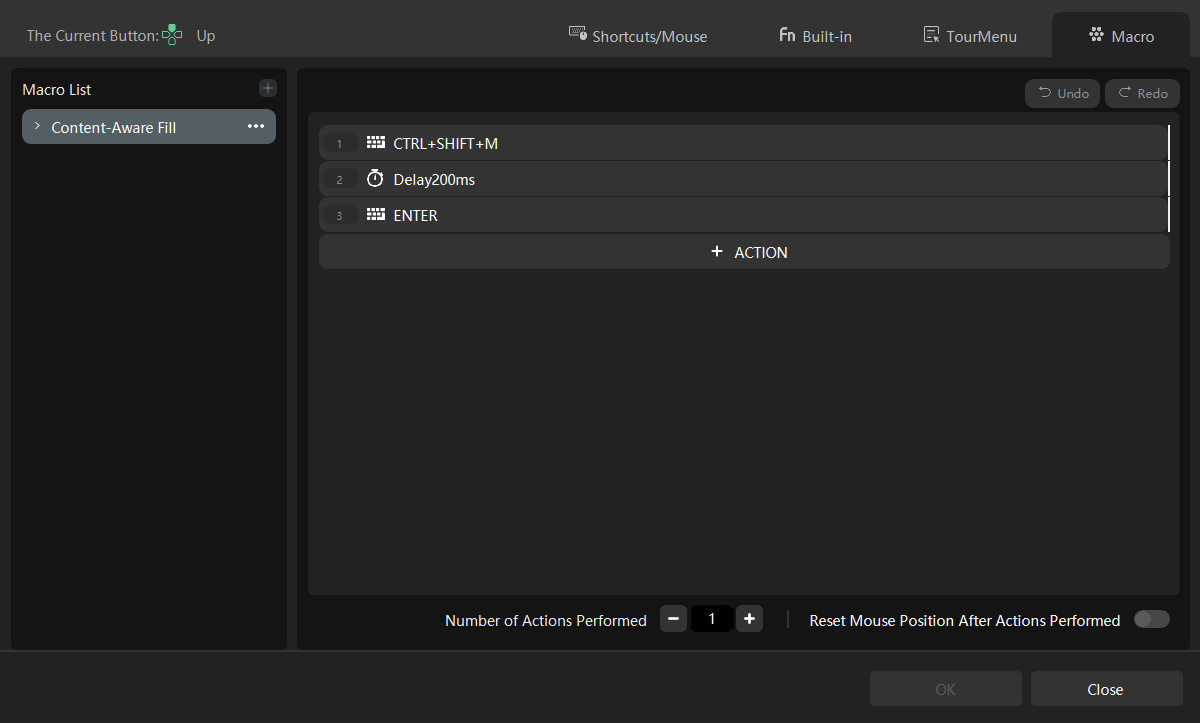
As mentioned above, you usually don't need to make many adjustments in the Content-Aware Fill panel, so you can simply confirm it. With just these three steps, you can create a macro that simulates the process of applying Content-Aware Fill.
Now, all you need to do is use a selection tool to choose the part of the image you want to remove, and then control TourBox with one hand to quickly apply Content-Aware Fill.
Here, we're just providing a starting point to get your creative juices flowing. You can customize your own macro settings based on your needs and usage habits.
Don't be intimidated by the complexity of TourBox macros. In fact, you can get the hang of it in just a few minutes and use macros to accomplish a wide range of complex operations. Setting up macros on TourBox opens up endless possibilities to meet your creative needs.
How to Use Content-Aware to Fill in Missing Parts?
Content-Aware Fill not only allows you to remove unwanted objects, but it can also be used to fill in missing parts of an image with content that blends seamlessly with the surrounding area.
It analyzes the surrounding areas and intelligently fills in the missing parts with content that matches the surrounding areas. In this section, we will cover two ways to use Content-Aware: through the Crop tool's Content-Aware Fill option and the Content-Aware Scale in the Edit workspace.
Method 1: Crop Tool's Content-Aware Fill Option
- Open your Image in Photoshop: Launch Adobe Photoshop and open the image you want to edit by going to File > Open and selecting your image file. After importing the image, you can change it from a background layer to a regular layer.
- Select the Crop Tool: On the left toolbar, click on the Crop tool (shortcut: C) to activate it.
- Adjust the Crop Area: Click and drag the crop handles to adjust the crop area as desired. You can also rotate the crop area by hovering your cursor outside the corner handles and clicking and dragging.
- Enable Content-Aware Fill: In the Options bar at the top of the screen, check the box next to "Content-Aware" to enable this feature.
- Apply the Crop: Once you're satisfied with the crop area, press Enter or click the checkmark icon in the Options bar to apply the crop. Photoshop will automatically analyze the surrounding areas and fill in the missing parts using Content-Aware Fill.
- Inspect the Result: Zoom in and inspect the filled areas to ensure the result is satisfactory. If needed, you can use the Clone Stamp tool or Healing Brush tool to touch up any imperfections.
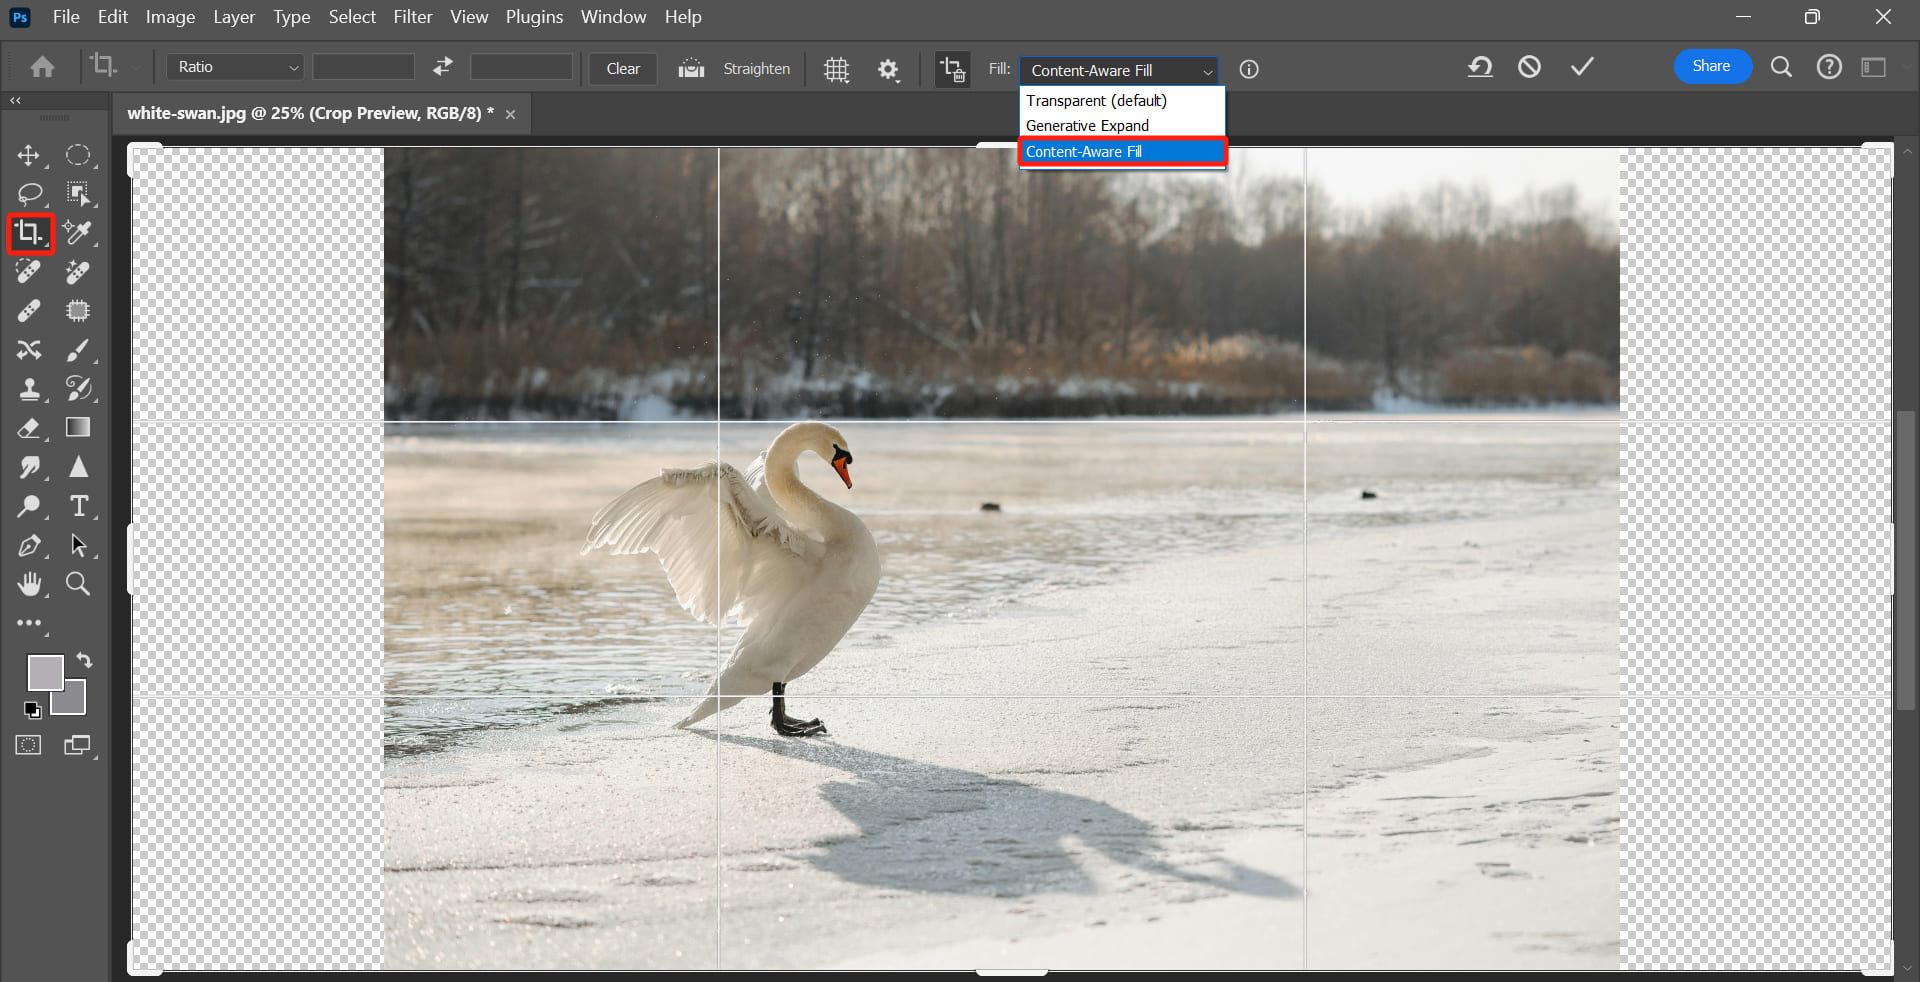
Let's use the same photo as previously to extend the background to fill in missing parts, and see how it looks with the Crop Tool's Content-Aware Fill.
You can see that there are some imperfections in the bottom left corner of the photo. You'll need to use other tools to further refine those areas.

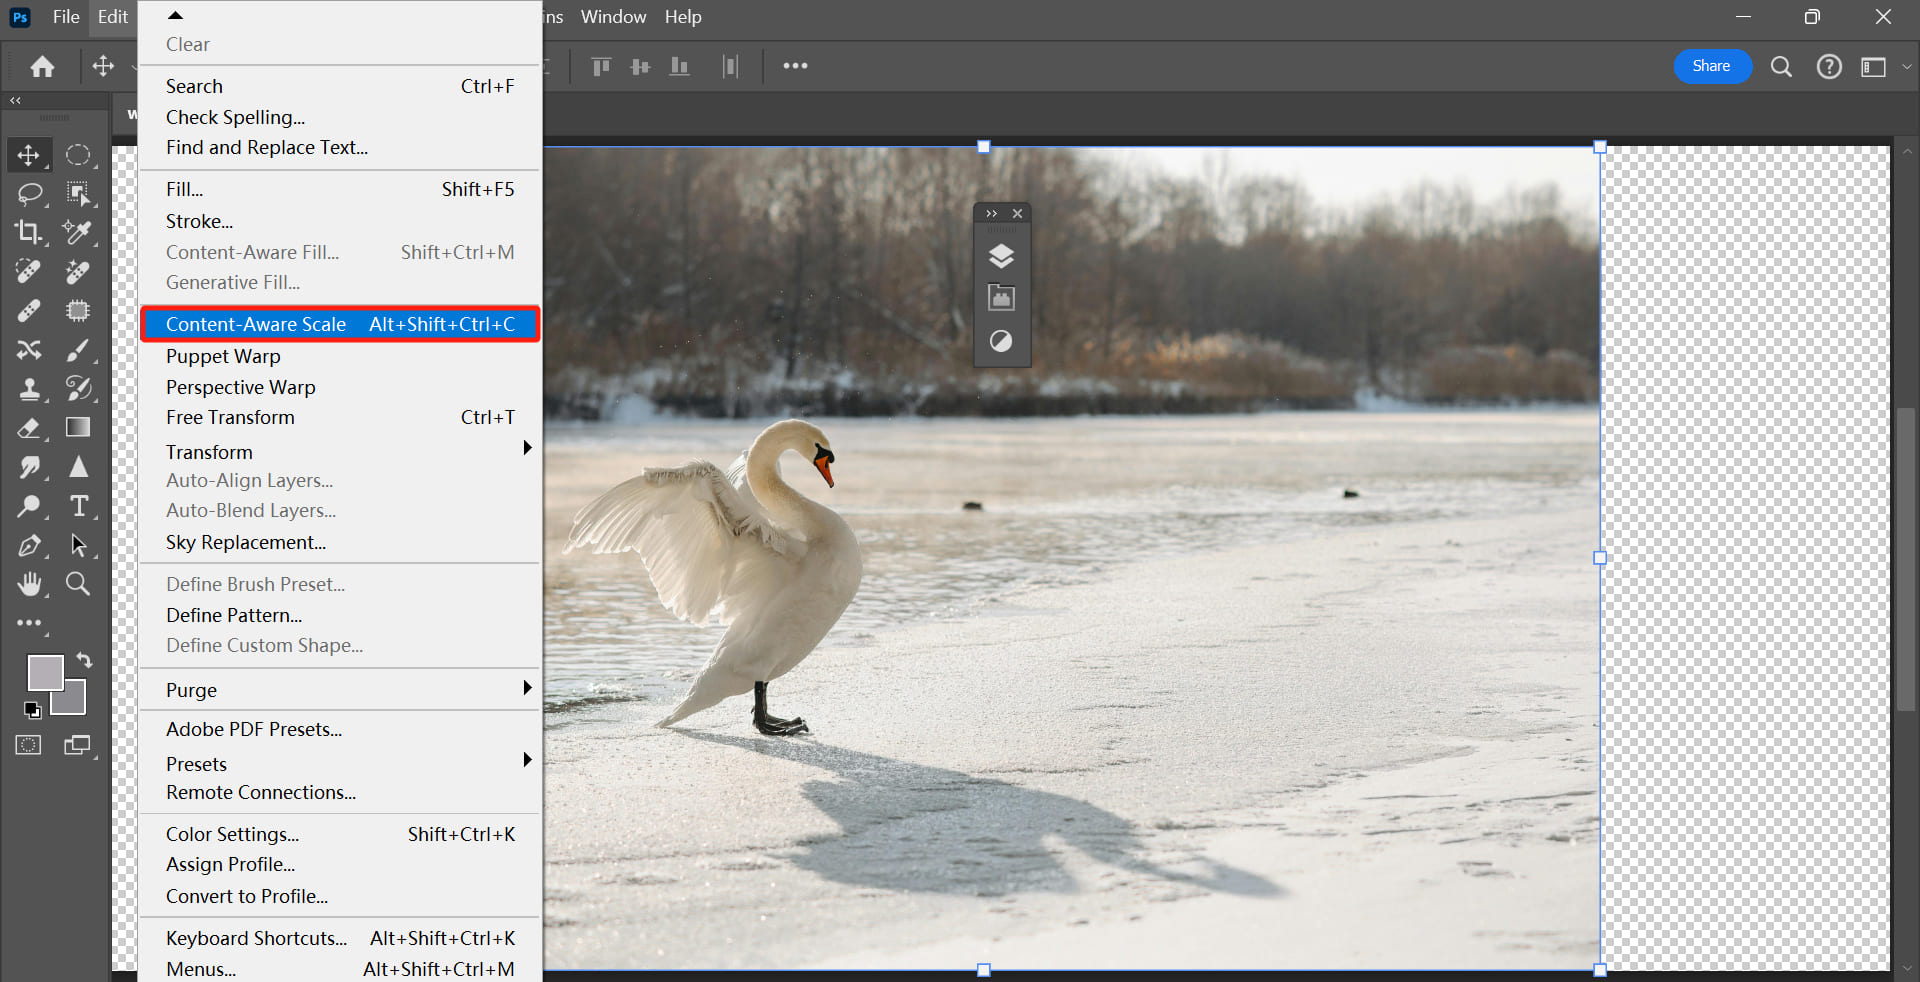
Method 2: Content-Aware Scale in Edit Workspace
- Open Your Image in Photoshop: Launch Adobe Photoshop and open the image you want to edit by going to File > Open and selecting your image file.
- Select the Layer to Be Scaled: In the "Layers" panel, click on the layer you want to scale. If your image is a background layer, first convert it to a regular layer. Then, Select the Crop Tool to create a region that you want to fill.
- Activate Content-Aware Scale: Go to Edit > Content-Aware Scale or use the shortcut "Ctrl + Shift + Alt + C" (Windows) or "Cmd + Shift + Opt + C" (Mac).
- Scale the Image: Click and drag the handles on the bounding box to scale your image. Hold the "Shift" key so that the image extends horizontally. Content-Aware Scale will intelligently resize the image while preserving important details.
- Apply the Scaling: Press Enter or click the checkmark icon in the Options bar to apply the scaling.
- Inspect the Result: Zoom in and inspect the scaled areas to ensure the result is satisfactory. If needed, you can use the Clone Stamp tool or Healing Brush tool to touch up any imperfections.
Further Reading:
How to Use Photoshop Content-Aware Scale: A Step-by-Step Guide
To observe the effect of the Content-Aware Scale, let's expand the background using the same photo as before and see how it looks. It has a more natural transition in this image.

Final Thoughts About Content-Aware Fill in Photoshop
Congratulations! Now you know how to use Content-Aware Fill in Photoshop. Whether you need to remove unwanted objects or fill in missing parts of a photo, this tool can save you time and effort in editing images.
If you have more complex image scenes to deal with, you can try Adobe's Generative Fill, an AI tool that offers superior algorithms and effects for complex scenes compared to Content-Aware Fill.
Practice the steps we discussed above and experiment with different settings to become more proficient in using Content-Aware Fill and Generative Fill.
That concludes our tutorial on using Content-Aware Fill in Photoshop. To take your editing skills to the next level, we highly recommend incorporating TourBox to enhance your experience with Content-Aware Fill.
If you're interested in TourBox, give the cost-effective TourBox Lite a try. You'll definitely appreciate the changes it brings.

Check out our photo editing page to learn more about how TourBox simplifies every step of the creative process.