How to Use DaVinci Resolve: A Step-by-Step Beginner's Guide
Have you ever watched an impressive video edit and thought, "That editing is amazing!" And then wondered if you could ever create something like that yourself?
Today, we'll take a closer look at how to use DaVinci Resolve. Professional editors use it to create top-quality content. But don't assume that professional editing software has to be complicated.
DaVinci Resolve is often called the Swiss Army Knife of post-production, yet it's not as hard as you might think. Let's get started!

In this article, you will learn:
- Why Should You Use DaVinci Resolve?
- How to Start Using DaVinci Resolve?
- How to Edit in DaVinci Resolve?
- How to Color Grade in DaVinci Resolve?
- How to Handle Audio in DaVinci Resolve?
- How to Export a Video in DaVinci Resolve?
- Summary: Editing Is Not Hard
Why Should You Use DaVinci Resolve?
Simply put, DaVinci Resolve offers a free version that's incredibly powerful. It first became famous for color grading, and many movies rely on it for post-production. Over time, it has added editing, visual effects, and audio tools — all in one package to cover all your post-production needs.
Here are some key benefits of DaVinci Resolve:
- All-in-One Tools: It provides editing, color grading, sound, and effects, so you don't have to hunt for extra plugins.
- Free Yet Professional: The free version performs as well as many expensive editing programs. If you need more features, you can upgrade to the Studio version for $295 and join the ranks of professional editors.
- Top-Notch Color Grading: This is its standout feature. If you want to work with movie-quality colors, DaVinci Resolve is the best choice.
Further Reading:
How to Start Using DaVinci Resolve?
1. Explore the Page: Don't Be Intimidated by the Complexity
When you open DaVinci Resolve, you might be overwhelmed by all the buttons and Interfaces (they call them "pages"). Don't worry. Focus on these key pages:
- Media: Where you import and organize your files. Think of it as your editing warehouse.
- Cut: Great for quick, rough edits.
- Edit: Your main workspace for detailed editing and creative moves.
- Color: The heart of DaVinci Resolve for color grading.
- Deliver: When your video is ready, head here to export your final project.
2. Import Your Files and Start Editing
Open the Media page and drag your files into the media pool.
Then switch to the Edit page and drag your files onto the timeline. That's it — your editing journey begins!
How to Edit in DaVinci Resolve?
1. Basic Editing Tools
- Blade Tool (Shortcut: B): Use it to cut clips. It's your first step toward making a great edit.
- Selection Tool (Shortcut: A): After cutting, use this tool to move clips around.
- Snapping Tool (Shortcut: N): When you drag one clip to the end of another, it snaps into place automatically. Turning off this feature means you have to line them up frame by frame. So, most of the time, keeping it on is much more convenient.
Further Reading:
Don't forget to save your work. DaVinci Resolve is stable, but computers can act up sometimes. Get into the habit of pressing Ctrl/Cmd + S so you don't lose your work.
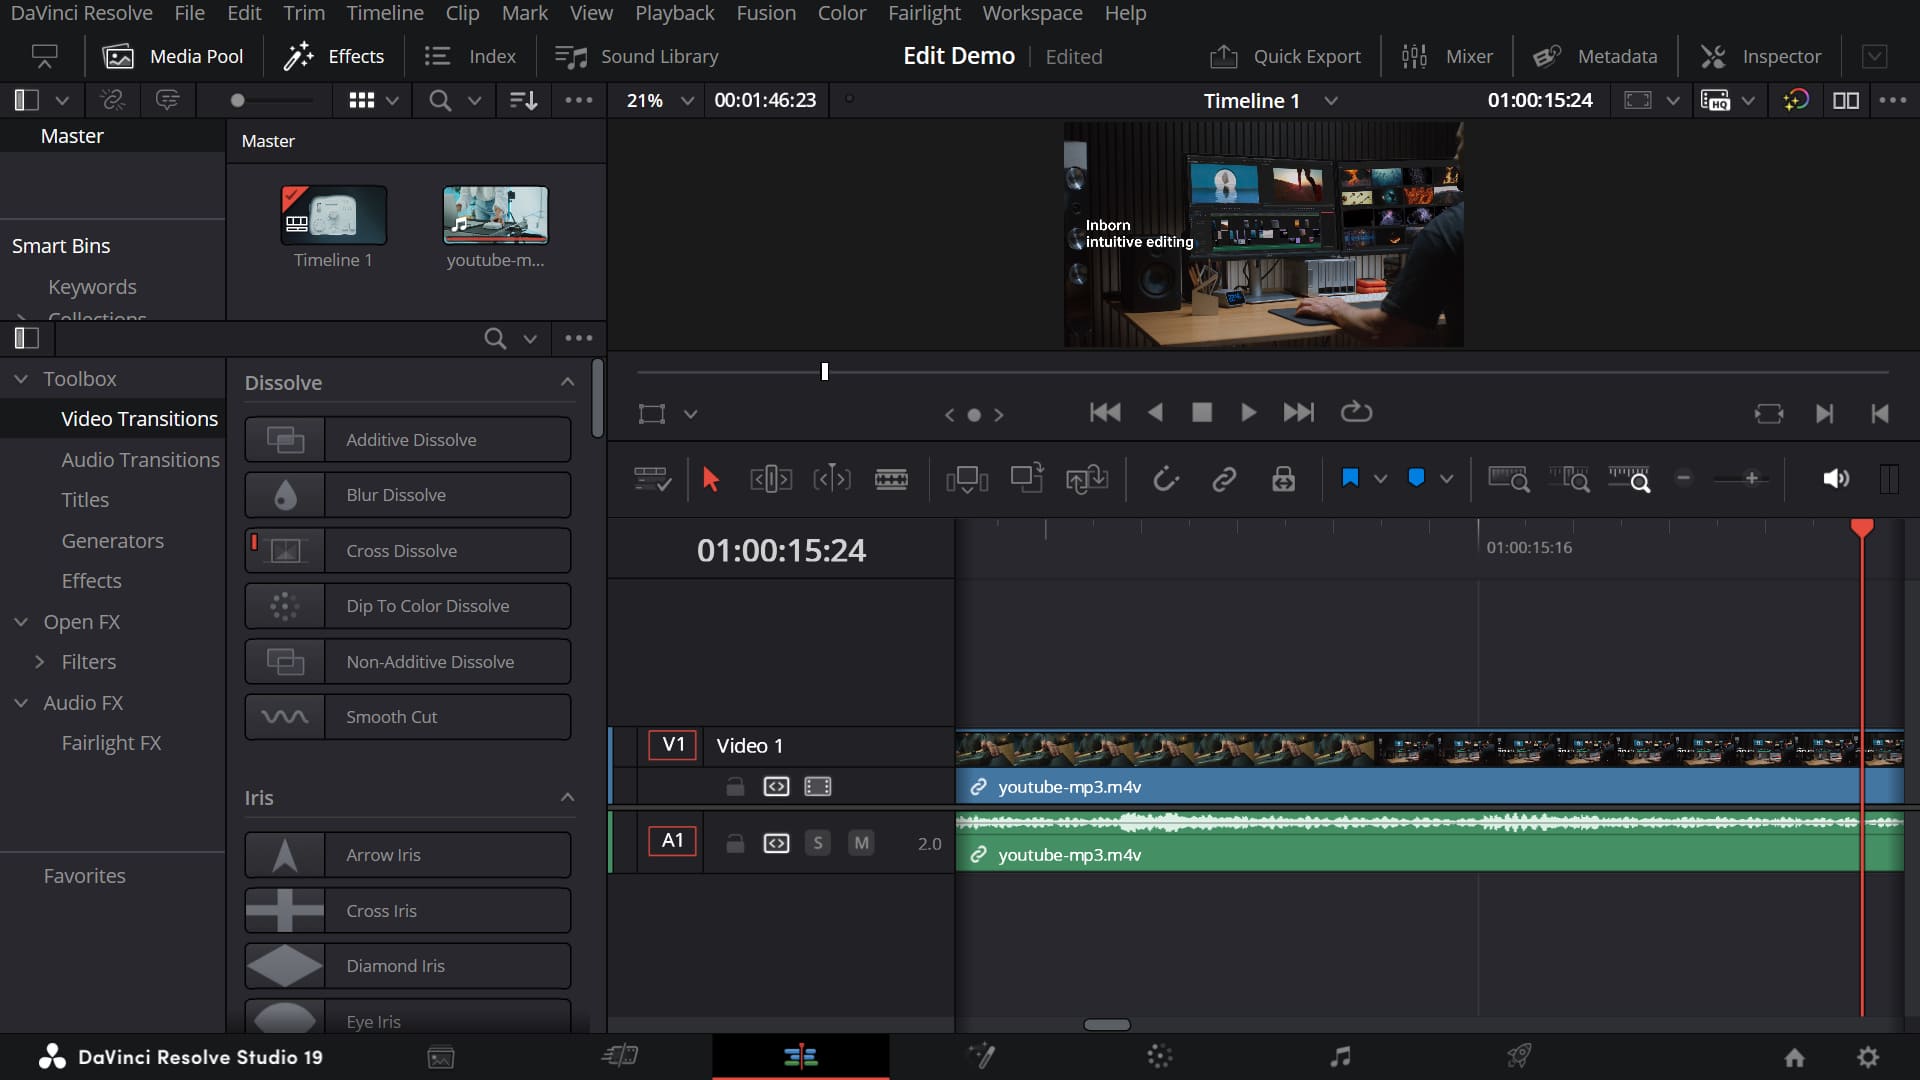
2. Add Transitions for Smoother Edits
Hard cuts can feel boring. Spice up your edit with transitions. In the Effects Library, you'll find many transitions like the classic Cross Dissolve. Just drag one between two clips, and you're done!
There are some advanced techniques for adding transitions in DaVinci Resolve:
- Click on the transition to adjust its duration and curve for a smoother look.
- Experiment with different transitions instead of always using a simple fade.
Further Reading:
3. Add Titles to Make Your Video Stand Out
A video needs a good title to grab attention. In the Effects Library, find Titles, drag your favorite style to the timeline, and double-click to edit the text.
If you want something more dynamic, you can create animated titles in the Fusion page. However, if you're new to DaVinci Resolve, sticking with basic titles is a great start.
Further Reading:
How to Color Grade in DaVinci Resolve?
When it comes to color grading, DaVinci Resolve really stands out. With its tools, you can turn a simple travel vlog into a cinematic road trip film.
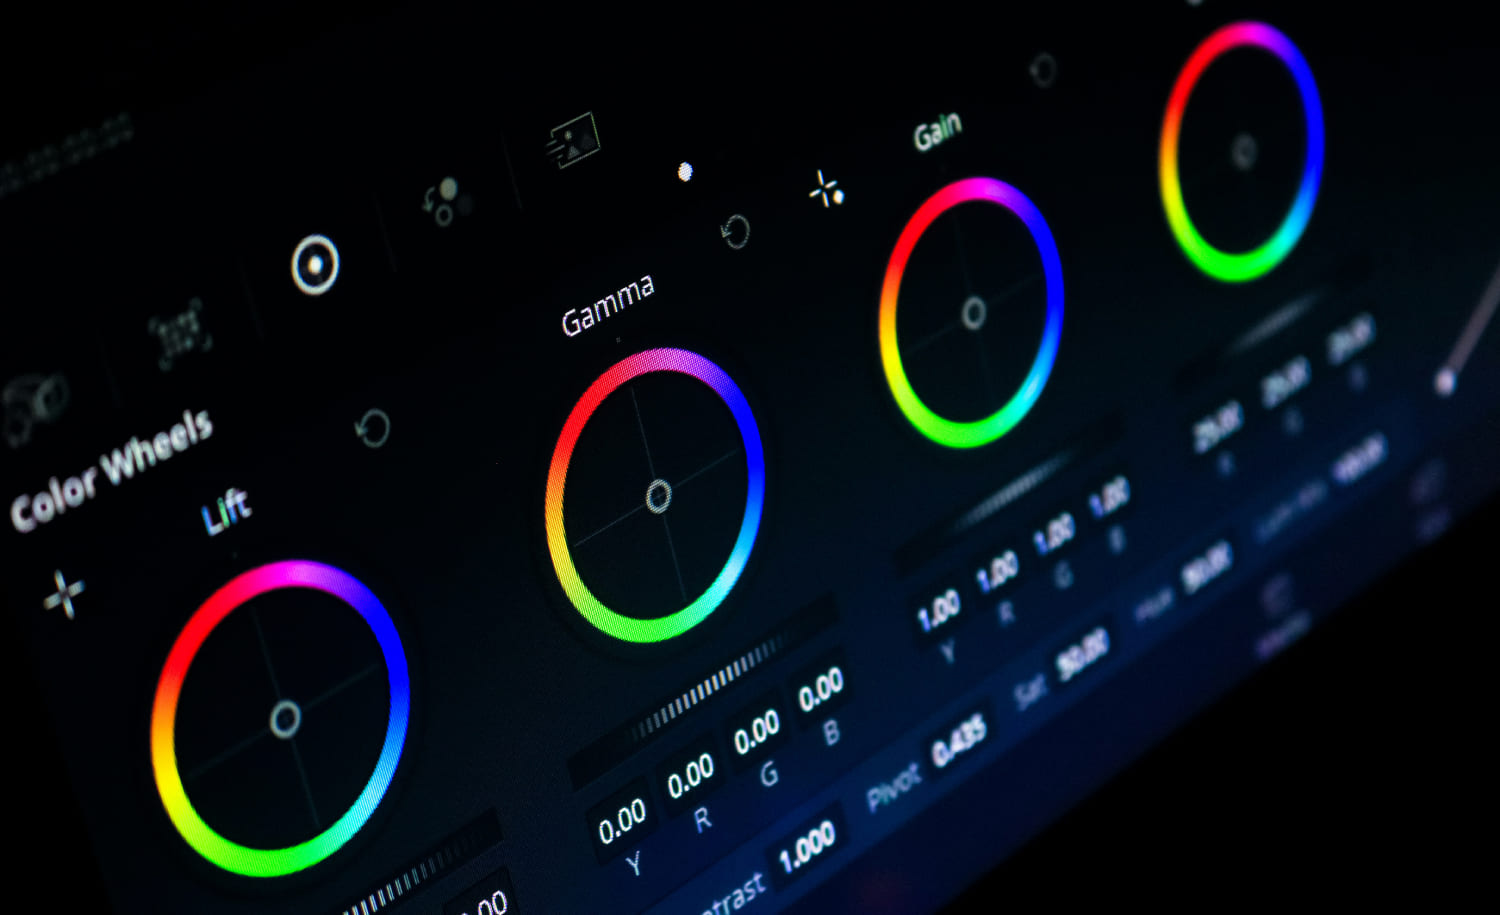
1. Basic Color Grading: The Three Essentials – Lift, Gamma, and Gain
On DaVinci Resolve's Color page, you'll find three color wheels. These are the most commonly used tools for color grading:
- Lift (Shadows): This wheel adjusts the tone and brightness of the dark areas. Changing Lift affects the darkest parts, enhancing shadow details and depth, with little impact on the whites.
- Gamma (Midtones): Use this wheel to adjust the brightness in the midtones. Gamma shifts the balance of these tones, influencing the overall feel of the image, while barely touching the very dark or very bright areas.
- Gain (Highlights): This wheel controls the color and brightness of the bright areas. Adjusting Gain makes the highlights clearer and vibrant without greatly affecting the dark parts.
These wheels have overlapping ranges. So, tweaking one often subtly changes the others, which helps create smooth, natural transitions and a balanced look.
2. Curve Adjustments: Fine-Tuning Every Detail
Click on Curves to precisely adjust brightness and color. For example:
- Raise the midtones and darken the shadows to add more depth.
- Adjust the red, green, and blue channels individually for a unique color style.
DaVinci Resolve's Color page offers many powerful grading tools. Here, we've only covered the basics. If you want to learn more about color grading in DaVinci Resolve, click the link below for further details.
Further Reading:
How to Handle Audio in DaVinci Resolve?
Even the best video falls flat without good sound. DaVinci Resolve has a special Fairlight page where you can mix audio, remove noise, and add effects.
For basic editing needs, you can also work with audio right on the Edit page. That's one of the great things about DaVinci Resolve — you can easily edit a vlog with its simple tools or create a professional film using its advanced features.
When doing simple edits, focus on these two things:
1. Adjust Volume
On the Edit page timeline, drag the middle line of the audio clip to change the volume. For more precise control, select the audio track and adjust its settings in the Inspector panel (you can even type in specific numbers).
2. Add Background Music
Background music is the heart of your video, so don't just cut it together and upload. Pick the right track, drag it onto the timeline, and adjust its volume to boost your video's quality.
Make sure the music doesn't overpower the dialogue — keeping it between 12dB and 6dB works best.
Further Reading:
How to Export a Video in DaVinci Resolve?
After you finish editing, go to the Deliver page and set these export options:
- Format: MP4
- Codec: H.264
- Resolution: 1920x1080 (or higher if needed)
- Frame Rate: Same as your original footage
- Bit Rate: 10,000 kbps or higher to keep the quality
When you're done, click Add to Render Queue and then Start Render. Now, grab a cup of coffee and relax while your video is processed!
Further Reading:
Summary: Editing Is Not Hard
DaVinci Resolve may seem a bit tricky at first, but it's powerful and free. With a little time and practice, you'll quickly go from a beginner to a pro. If you want to make cooler, more professional videos, DaVinci Resolve is your best bet.
At the end of our how to use DaVinci Resolve guide, we'd like to recommend the TourBox, a creative console that can really boost your editing experience and efficiency.

You can set up your favorite DaVinci Resolve shortcuts on the TourBox. Its built-in features also let you zoom in on tracks or move the playhead easily. Using the TourBox with one hand is as simple as using a game controller. It makes editing both faster and more fun.
The TourBox works with many creative apps to improve your workflow. Check out our video editing page for more on how the TourBox can help. And if you prefer working on an iPad, you might like the TourBox Elite Plus.

We hope this article helps you get started with DaVinci Resolve and create your own masterpiece. Now, open DaVinci Resolve and start editing your first great video!