[TourBox Tips] 4 Tips for Editing Photos in Lightroom Classic
In this digital world, photography is no longer just about pressing the shutter. Post-processing has become an integral part of photography, and Adobe Lightroom Classic is undoubtedly one of the favorite tools for photographers.
However, have you ever felt overwhelmed with tedious editing tasks using a mouse and keyboard? Have you ever wished for a more intuitive and efficient way to work with your photos?
You know what we're going to say. TourBox can help you complete various editing tasks in Lightroom Classic faster and more intuitively.
Next, we'll share four tips for using TourBox to edit photos in Lightroom Classic, making your post-processing workflow easier and more enjoyable.
Tip 1: Utilize the Knob and Its Combination Shortcuts
Yes, you read it right. You can accomplish post-processing edits on your photos using just TourBox's Knob rotary control and its combination shortcuts.
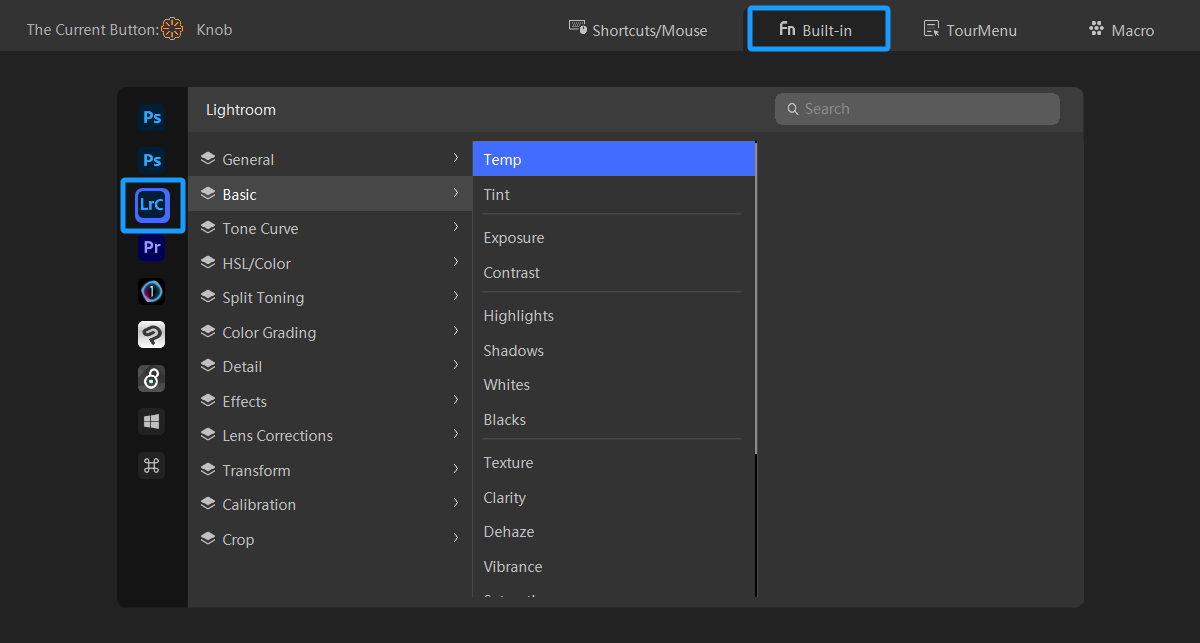
In the TourBox Console, select the Knob from the Rotating Section and enter the settings panel. Switch to the "Built-in" tab.
In the left application bar, switch to the Lightroom option, and you can configure the corresponding functions from the Lightroom list.
For example, you can assign the Knob to adjust the Temp in Lightroom's Basic panel.
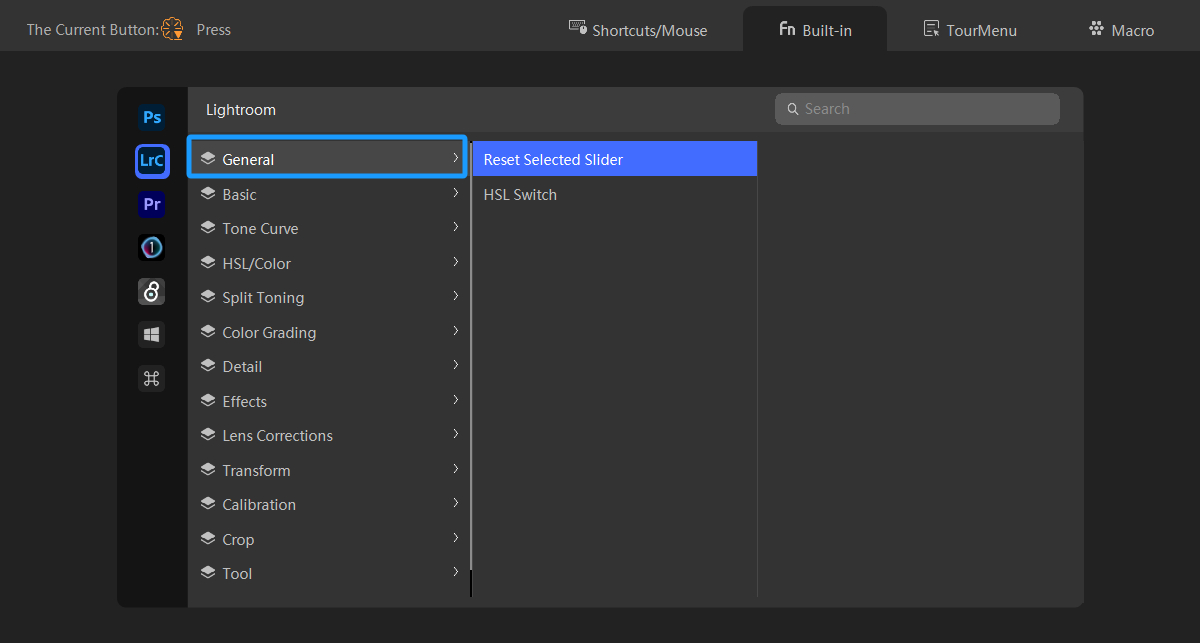
Next, you can assign a "Reset Selected Slider" command to the press action of the Knob. This allows you to quickly reset parameter adjustments with a simple press of the Knob, which is incredibly convenient.
You can also assign other commonly used adjustment parameters from the Basic panel to the combination shortcuts of the Knob.
Extra Tip:
When using combination shortcuts, you may come across some key conflicts. Setting TourBox buttons to UP mode will resolve this issue. Check out our tutorial on "What Are Up Mode and Rep Mode" for more information.
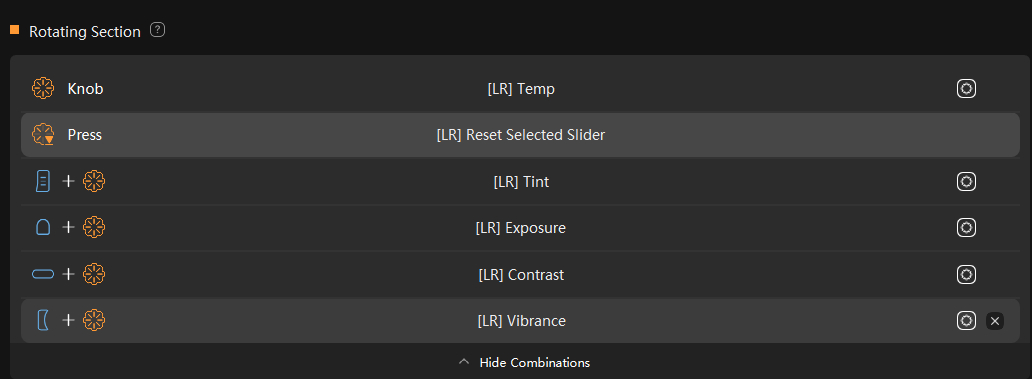
Furthermore, you can add more custom actions in the Custom Section to enhance your operation combinations.

Tip 2: Assign Built-in Functions to TourBox Buttons
You can directly configure commonly used Lightroom functions on the buttons of TourBox, such as the Up, Down, Left, and Right buttons.
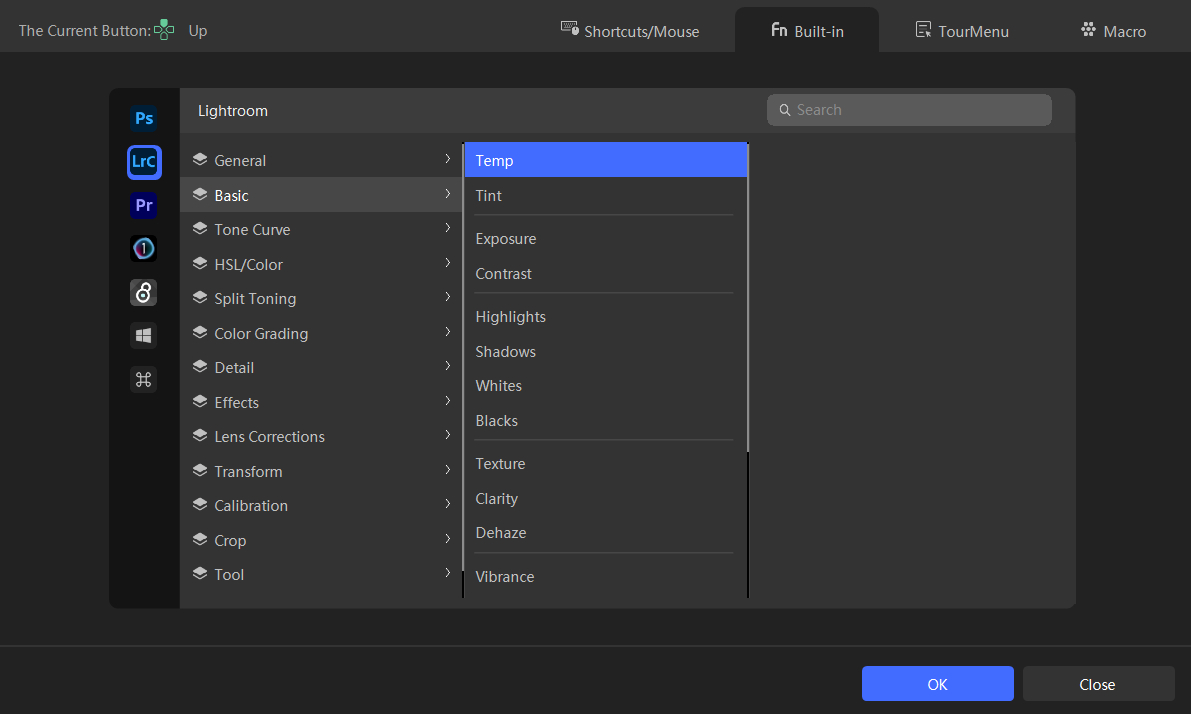
When editing photos in Lightroom, simply press the pre-set button on TourBox to activate the corresponding parameter adjustment.
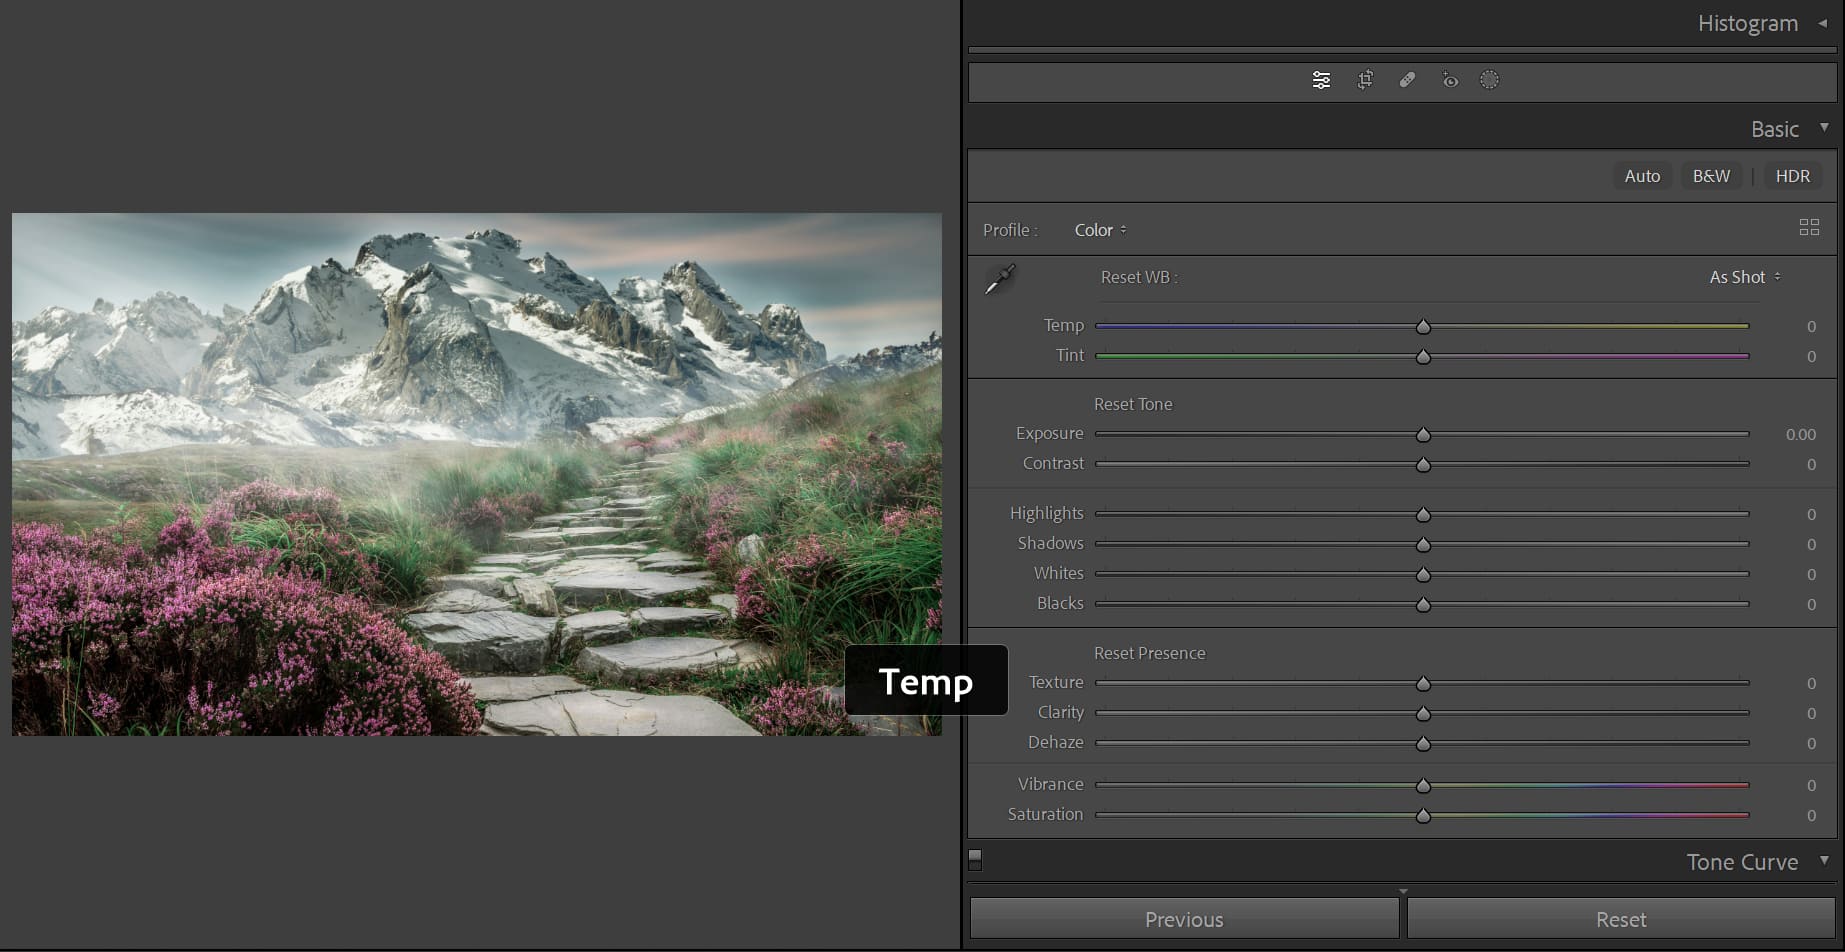
All you need to do is go back to the TourBox Console and assign an "Adjust Selected Slider" function to the Knob and a "Reset Selected Slider" function to the press action of the Knob.
This way, while editing photos, you can press the TourBox button to bring up the respective adjustment slider and use the Knob to adjust the specific parameters precisely.

Tip 3: Use TourMenu
A more efficient and organized method than the previous two is to group similar parameter adjustment sliders into a TourMenu.
As shown in the image below, you can gather the functions from the Lightroom Basic panel into a TourMenu and add dividers between them to make the functions on the TourMenu more distinguishable.
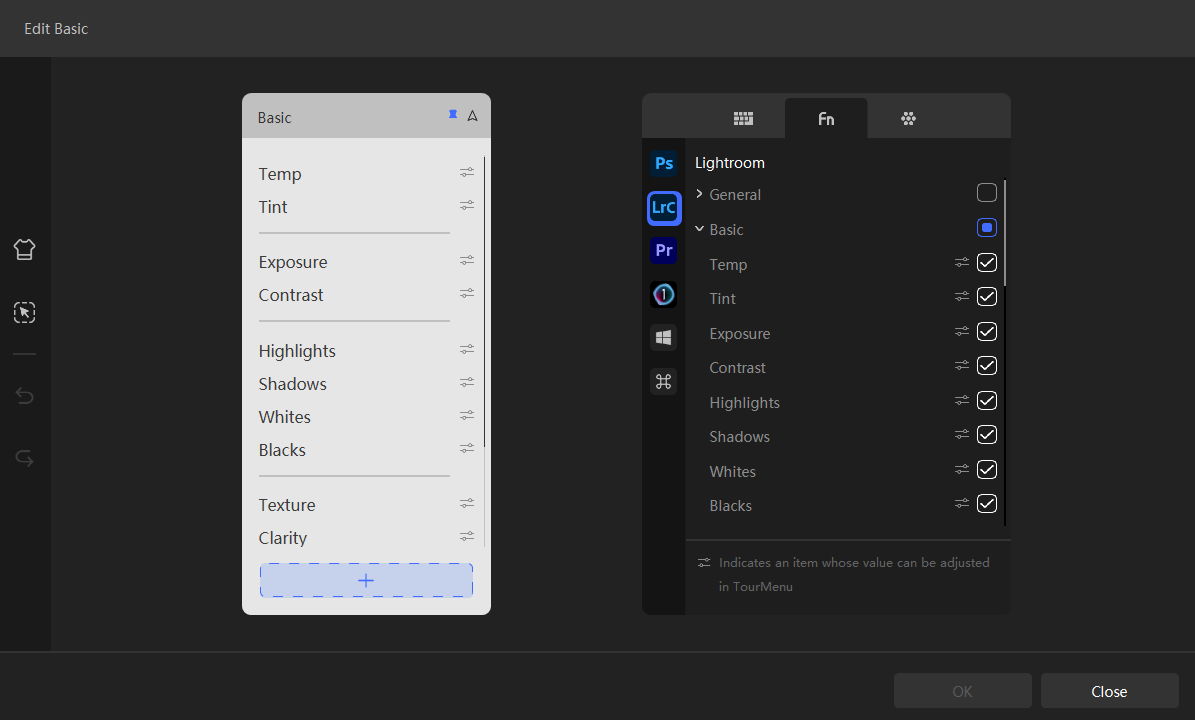
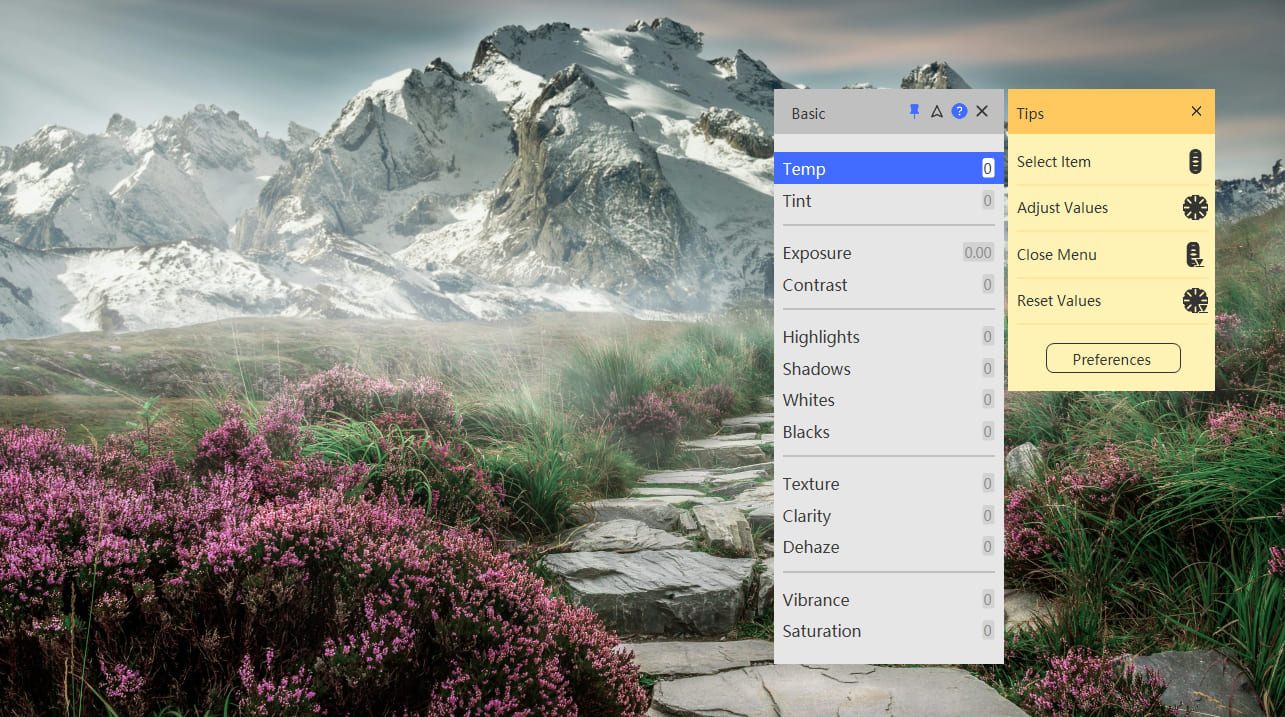
During Lightroom usage, you can press the designated TourBox button to bring up this TourMenu.
Use the Scroll on TourBox to select the desired Lightroom function from the TourMenu and use the Knob to adjust the parameters. If you're not satisfied with the adjustments, simply press the Knob to restore the initial settings.
Tip 4: Set the Adjust Slider (Mouse Pointing)
There's a built-in function in the TourBox Console that you'll definitely love: Adjust Slider (Mouse Pointing).
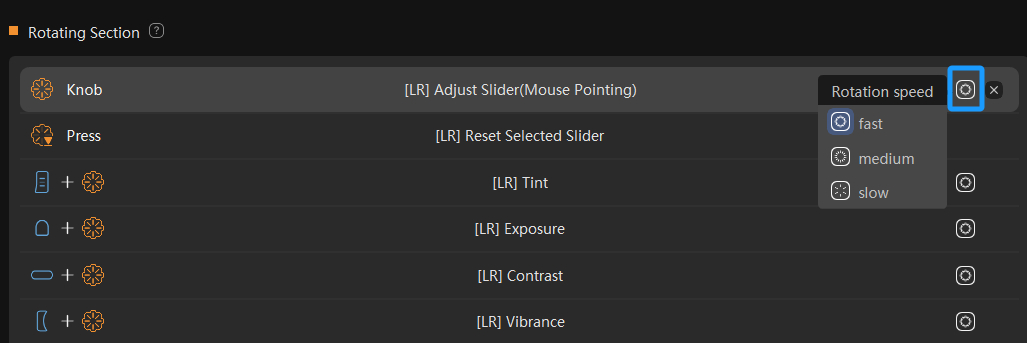
In the TourBox Console, assign the Adjust Slider (Mouse Pointing) function to the Knob, as shown in the image below.
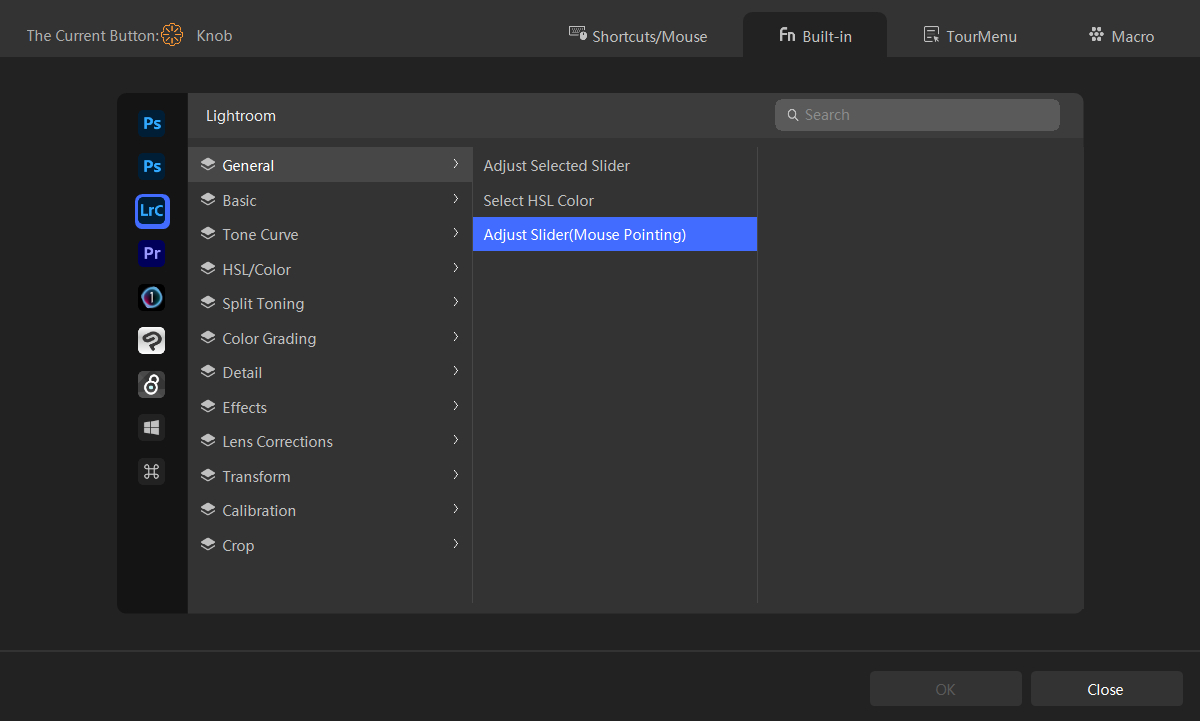
Back in Lightroom, all you need to do is hover the mouse cursor over the parameter slider you want to adjust (no need to click), and then simply rotate the Knob to effortlessly modify the parameter.
Additional Tip:
In the Rotating Section of the TourBox Console, you can set the rotation speed for three rotary controls. If you feel that the rotation speed is too fast or too slow, you can click on "Rotation Speed" at any time to adjust it.
Choose a TourBox setup method that you like and experience the smooth photo editing workflow in Lightroom!