How to Adjust the White Balance in Photoshop?
When you're editing photos in Photoshop, adjusting the white balance is a crucial step. It helps you eliminate color temperature bias and make the image look more natural.
In this tutorial, we'll introduce you to several methods for adjusting white balance in Photoshop. Let's get started!

In this article, you will learn:
- Why Is It Necessary to Adjust the White Balance in Photos?
- How to Adjust White Balance in Photoshop Using Camera Raw?
- Tips for Adjusting White Balance in Photoshop
- How to Adjust White Balance in Photoshop Without Using Camera Raw?
- Final Thoughts About Adjusting White Balance in Photoshop
Why Is It Necessary to Adjust the White Balance in Photos?
Color correction is essentially adjusting the colors in the post-production of a photo. The most fundamental aspect of color correction is restoring the photo to its accurate colors, starting from the correct baseline, and then creating a desired style.
However, in actual photography, photos may have color cast issues due to various reasons such as vibrant colors in the scene or mixed lighting conditions.
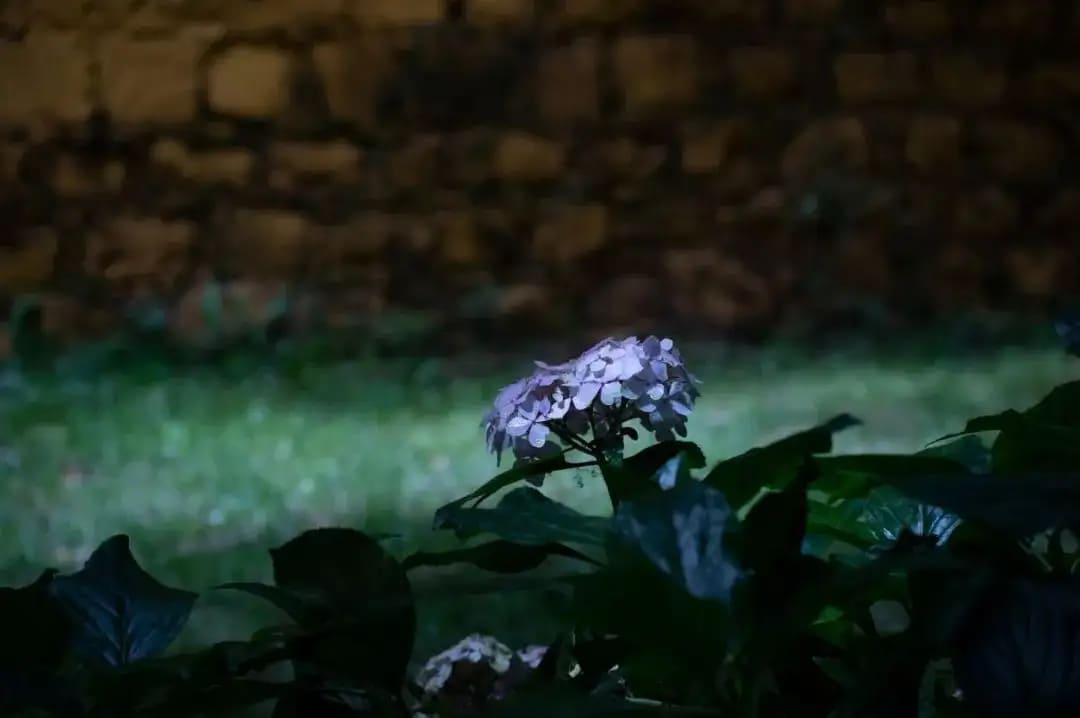
Take the photo below as an example. Due to the large area of yellow in the background and the presence of both shadows and sunlight in the photo, severe color cast issues (and exposure problems) have occurred.
This is where you need to adjust the white balance of the photo. If you shoot in RAW format, adjusting the white balance during post-processing is relatively easy.
We will share how to correct the color cast and restore the photo's colors to normal using the Photoshop tool to adjust the white balance.
Further Reading:
How to Adjust White Balance in Photoshop Using Camera Raw?
In Photoshop, the best tool for adjusting white balance is the white balance tool in the Camera Raw filter. After importing the photo into Photoshop, convert it to a Smart Object for easy changes later, and then select the Camera Raw filter from the top Filter menu.
Extra Tip:
If you've imported a RAW format file into Photoshop, you can directly access the settings panel of the Camera Raw filter.
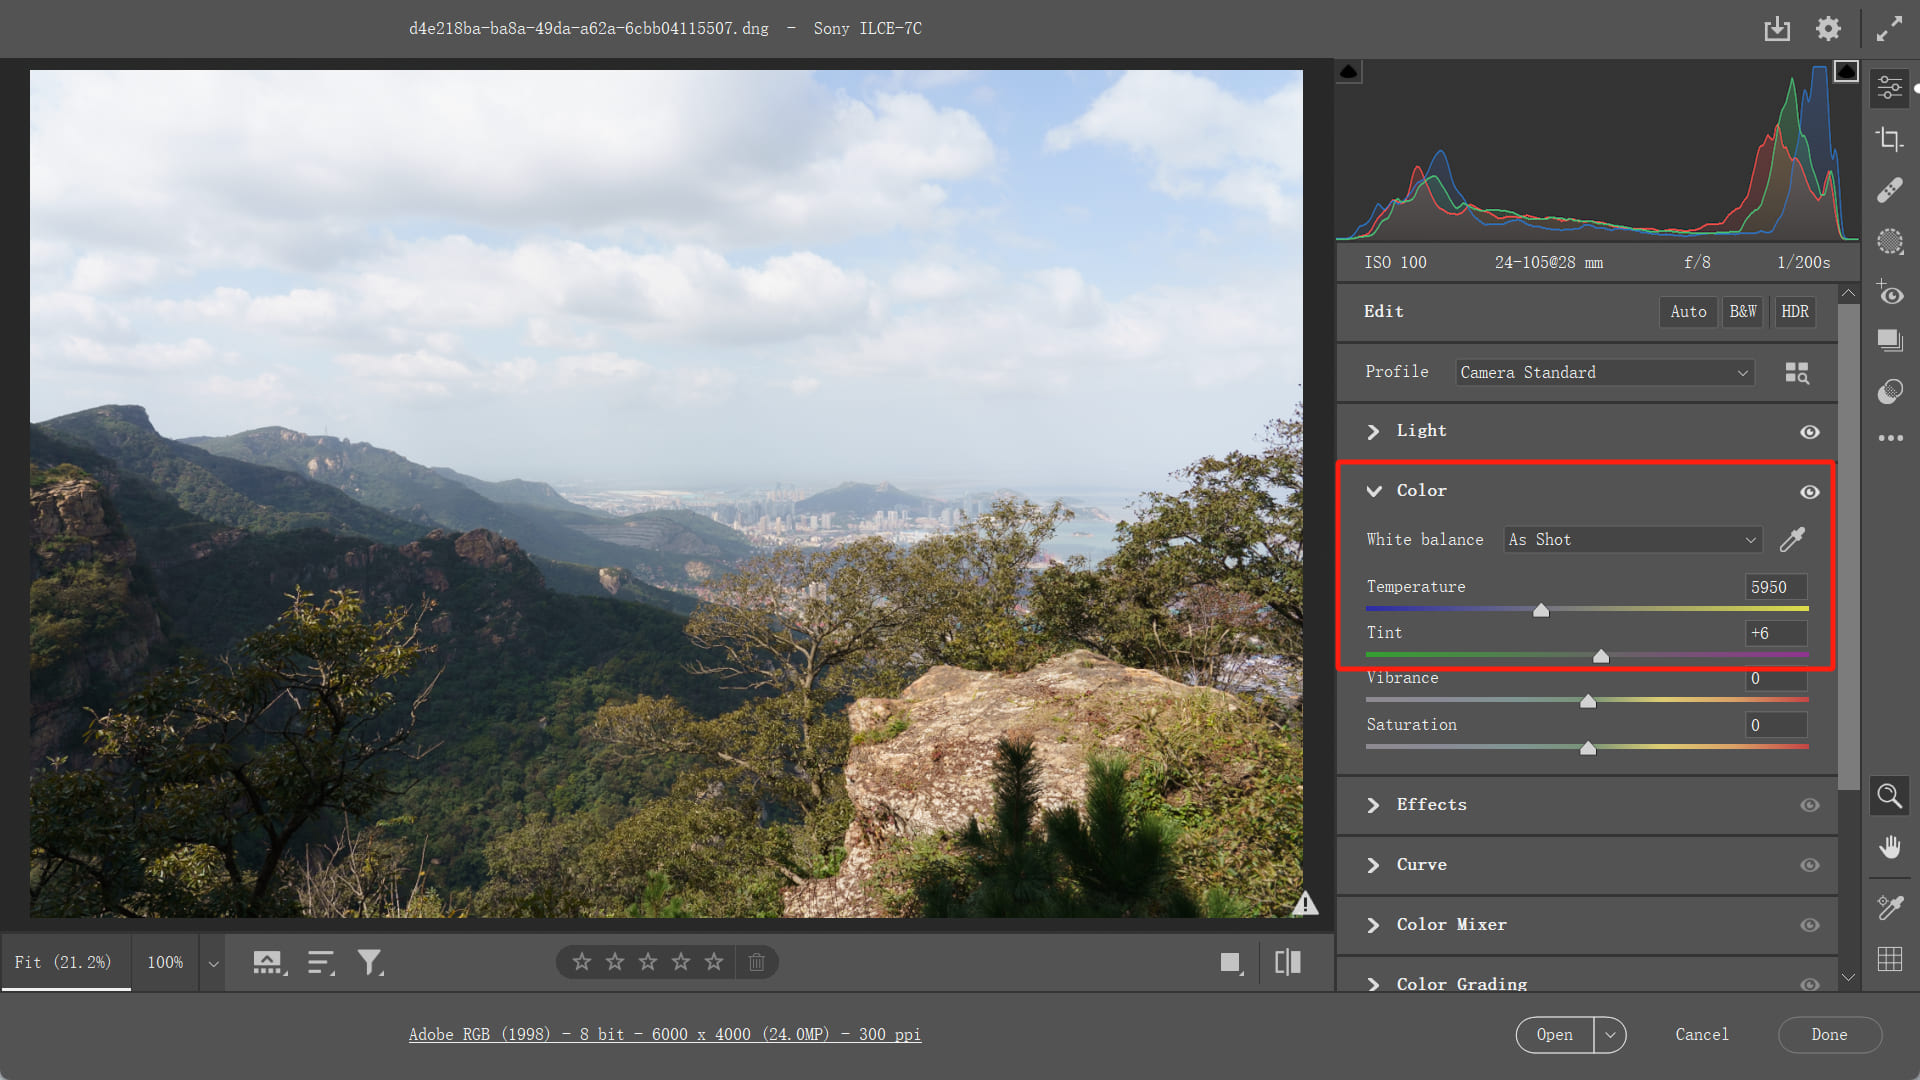
The white balance tool is located in the Color panel within the Camera Raw interface, and it offers three methods for adjusting white balance.
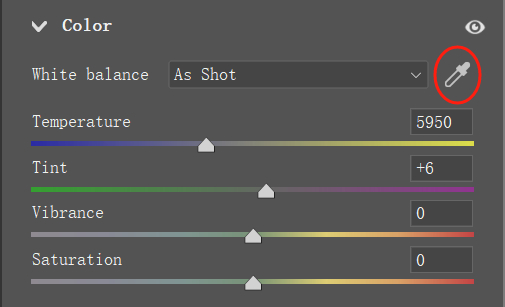
1. Manual White Balance Tool
The manual white balance tool is shaped like a dropper, and you simply need to activate it by clicking with the left mouse button.
All you have to do is click on a mid-gray (neutral gray) or white area in the image, making sure it's not overexposed. Camera Raw will use this as a reference to correct the white balance of the photo.
So, although this tool is called "manual," it's highly automated. As long as you have a gray or white area in your composition, this tool will accurately and effectively adjust the white balance.
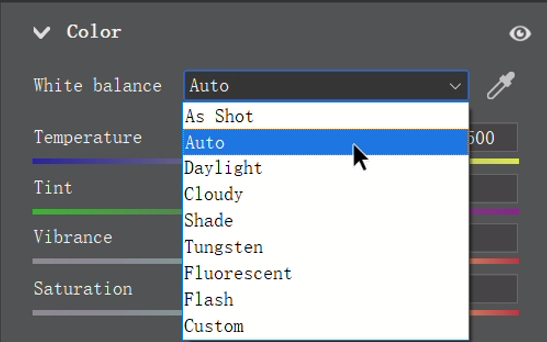
2. Auto White Balance Tool
The auto mode is straightforward. Simply click the dropdown option in the white balance tool and select Auto.
Upon clicking, you'll notice changes in the sliders on the white balance toolbar, and the image on the left will also change accordingly. This completes the automatic adjustment.
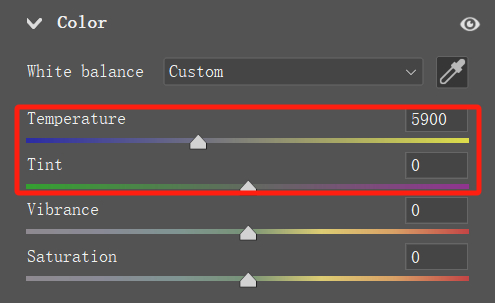
3. Temperature & Tint Sliders
Below the white balance options, you'll see the temperature and tint sliders. Adjusting these sliders also allows you to fine-tune the white balance of the photo.
The temperature and tint sliders are easy to understand, and they have four colors: blue, yellow, green, and magenta. Moving the sliders in a particular direction will shift the photo's colors towards that direction while counteracting the corresponding color.
For example, if your photo has a blue cast, you can slide towards the yellow direction, which will introduce a yellowish tone, effectively counteracting the blue cast.
Tips for Adjusting White Balance in Photoshop
The most common method for adjusting white balance in Photoshop is using the white balance tool in the Camera Raw filter along with the temperature/tint sliders.
You can start by using the white balance tool to click on a neutral gray or white area, and then fine-tune the white balance using the temperature/tint sliders. By using both techniques, you can effectively correct the color tones of your photos.
What if your photos don't have any gray or white areas? In that case, you can try selecting the "Auto" option in the "White Balance" settings and then make further adjustments using the temperature/tint sliders.
With a little practice and experimentation on a few photos, you'll become proficient in using these tools and achieve the most accurate color tones for your images!
If you find it challenging to control the parameter sliders in various color adjustment tools in Photoshop, you might want to explore TourBox, a creative tool beloved by many digital artists and photographers.

TourBox features a built-in "Adjust Selected Parameter" function. Simply select any parameter box in Photoshop, and you can make precise adjustments by simply scrolling the rotary control on TourBox.
You can also make more interesting configurations within TourBox. By combining the use of macros on TourBox, you can even perform parameter adjustments without the need for a mouse and keyboard, relying solely on TourBox.
Check out our photo editing page to learn more about TourBox and its capabilities.
How to Adjust White Balance in Photoshop Without Using Camera Raw?
As we mentioned above, adjusting the white balance in Photoshop is effortless if you use the white balance tool in Camera Raw.
However, is there a way to adjust the white balance in Photoshop without using Camera Raw? Perhaps you don't prefer the Camera Raw filter and would rather use Photoshop's own tools to adjust the white balance.
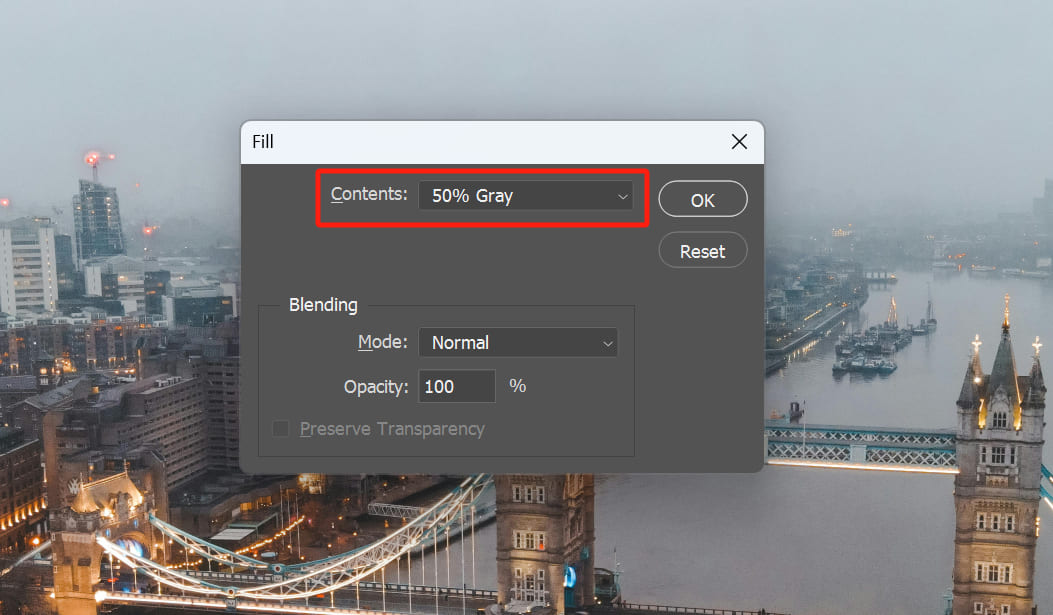
After importing the photo into Photoshop, start by creating a new blank layer. Then, click on "Edit" in the top menu bar and select "Fill." Fill the blank layer with "50% Gray" (neutral gray).
Further Reading:
Mastering Neutral Gray in Photoshop: Achieving Perfect Control
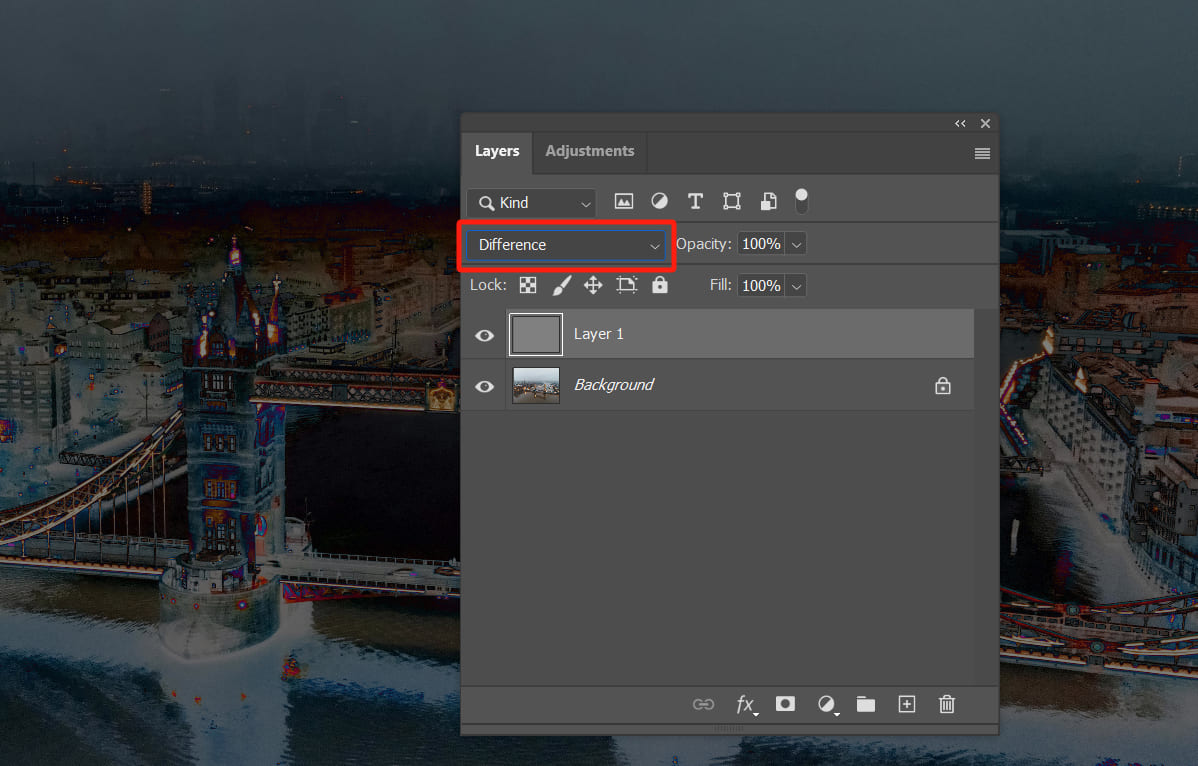
Next, change the blending mode of this neutral gray layer to "Difference."
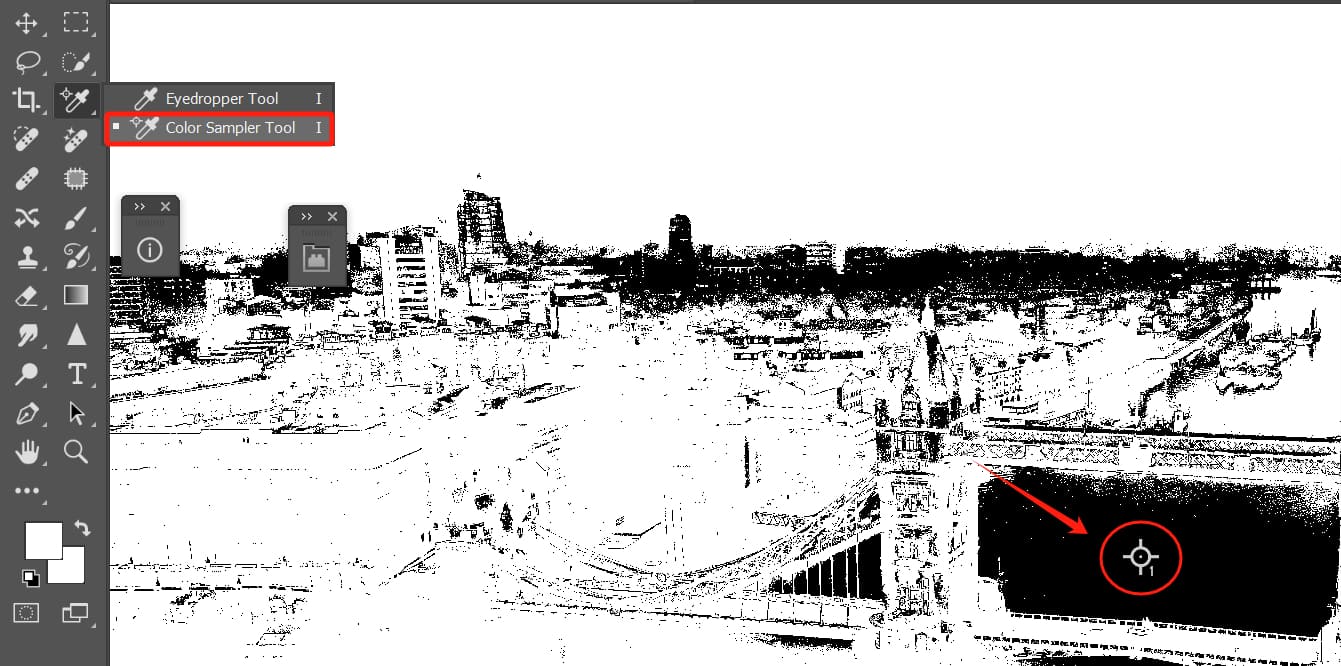
Create a new Threshold adjustment layer. Drag the slider of the Threshold adjustment layer all the way to the left, and then slowly drag it to the right until black areas start to appear.
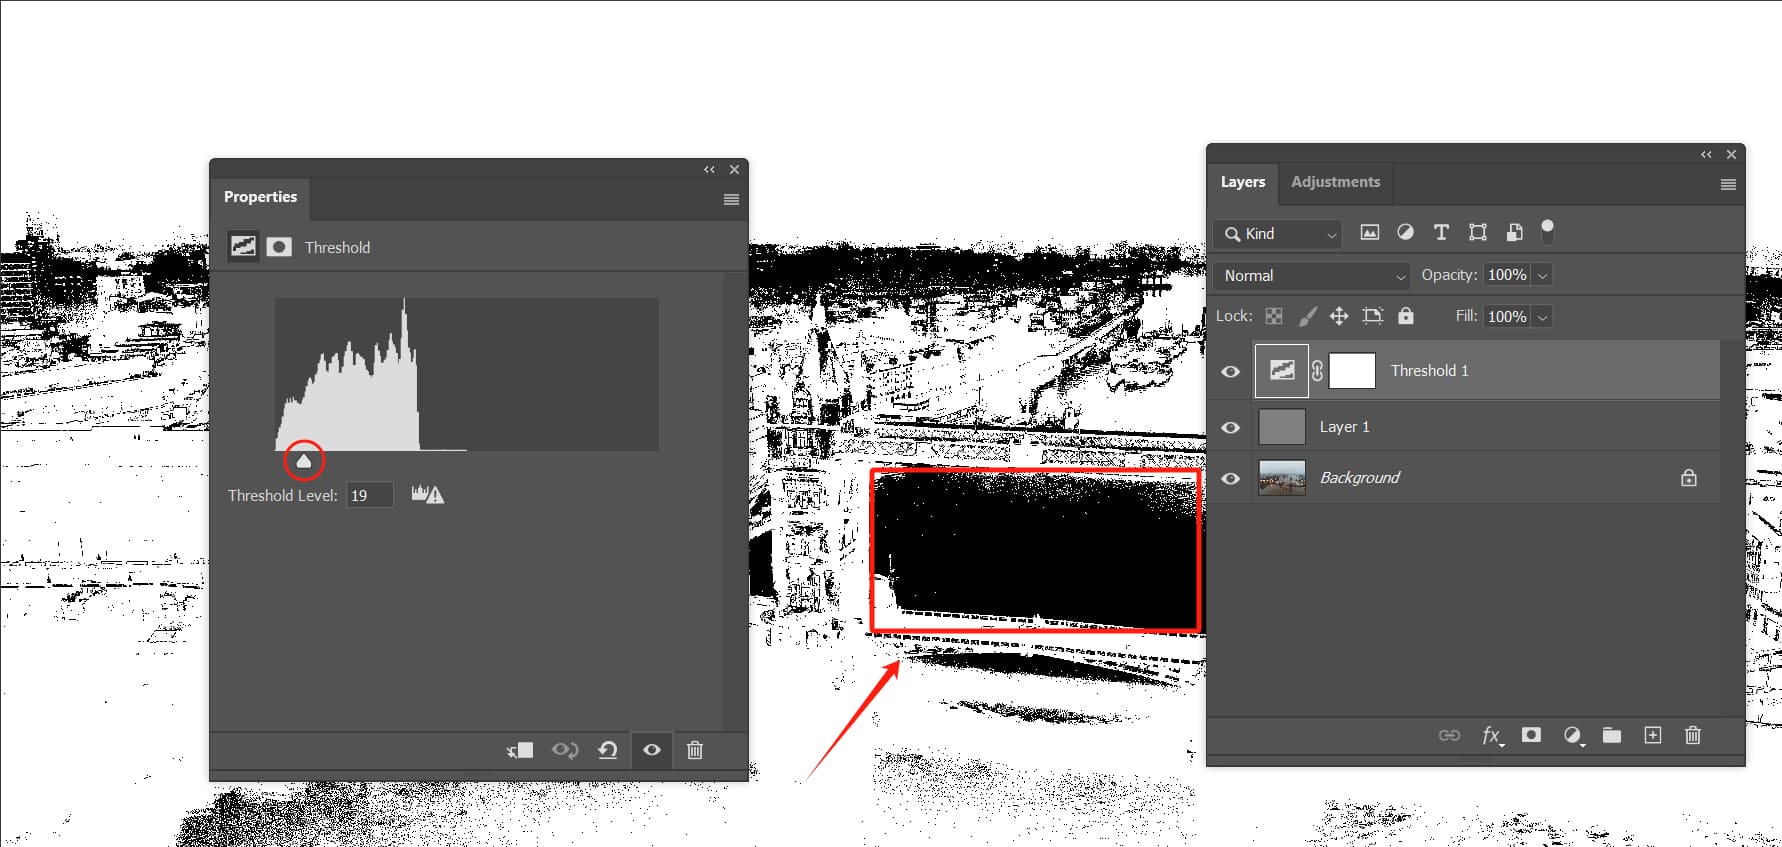
Using the Color Sampler Tool from the left toolbar in Photoshop, place a sample point marker within the black area.
Extra Tip:
For properly exposed photos, it's recommended to place the marker in a shadowed area.
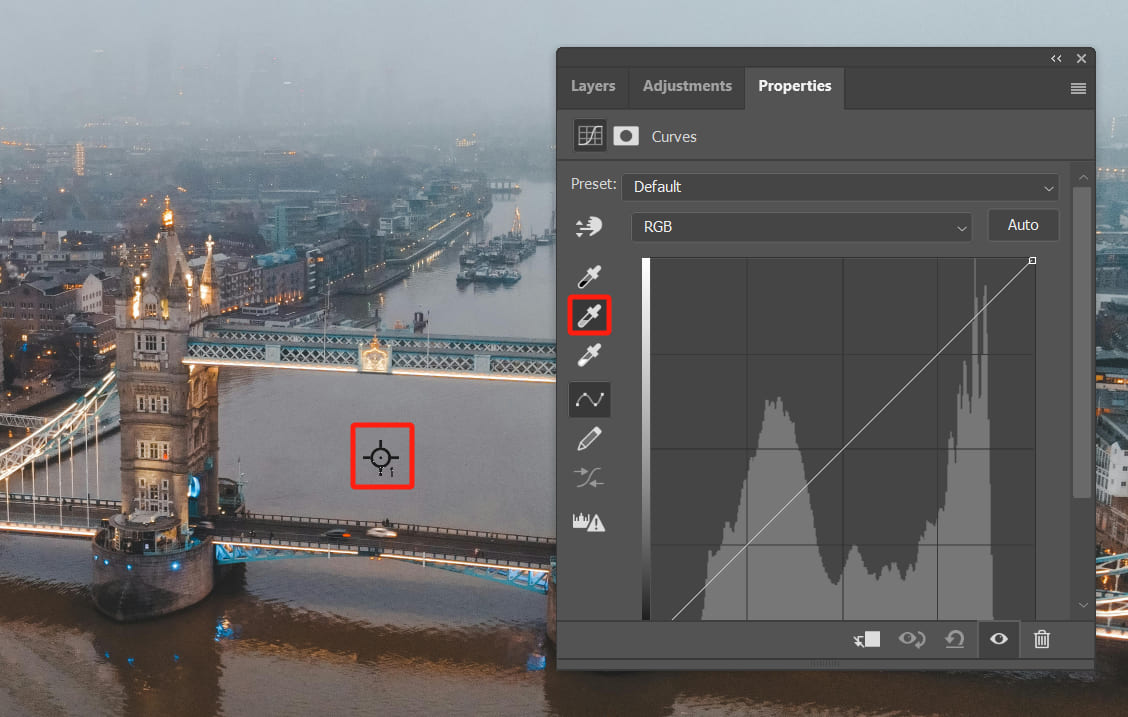
Once you've placed the sample point marker, the neutral gray layer and the Threshold adjustment layer have served their purpose. You can hide or directly delete them.
Next, create a new Curves adjustment layer. Use the gray eyedropper tool in the Curves panel and click on the sample point marker. This will automatically correct the white balance of the photo.
Final Thoughts About Adjusting White Balance in Photoshop
In this tutorial, we shared how to adjust the white balance in Photoshop. You can choose whether or not to use the Camera Raw filter for white balance adjustments based on your preference.
However, we still highly recommend using the Camera Raw filter for white balance adjustments. After all, this tool is really simple and easy to use.
Toward the end of the tutorial, we would like to share two key points for adjusting the white balance in the Camera Raw filter:
- Avoid Excessively Bright Areas for Calibration: When using the white balance tool, it reads information from a specific area in the image to calibrate the white balance. It's best to choose an area with moderate exposure.
- Pay Attention to Changes in Temperature & Tint Values: After calibrating the white balance, the Temperature and Tint values in the Basic panel will change accordingly. Pay attention to these values as they will give you a clear idea of the white balance adjustment.
Product Recommendation:
If you're interested in TourBox, please check out our latest product, TourBox Lite. TourBox Lite offers great value for money, and you're sure to love it.
