[TourBox Tips] How to Create DaVinci Resolve Nodes?
Nodes are a crucial part of DaVinci Resolve, serving as the foundation for color grading and special effects. Think of each node as an independent step in image processing, where you can apply various adjustments such as color balance, contrast, saturation, and more.
Extra Tip:
If you're not familiar with nodes in DaVinci Resolve, you can check out our simple tutorial: "[DaVinci Resolve Tutorial] A Complete Guide to Nodes"
So, how can you control nodes in DaVinci Resolve using TourBox?
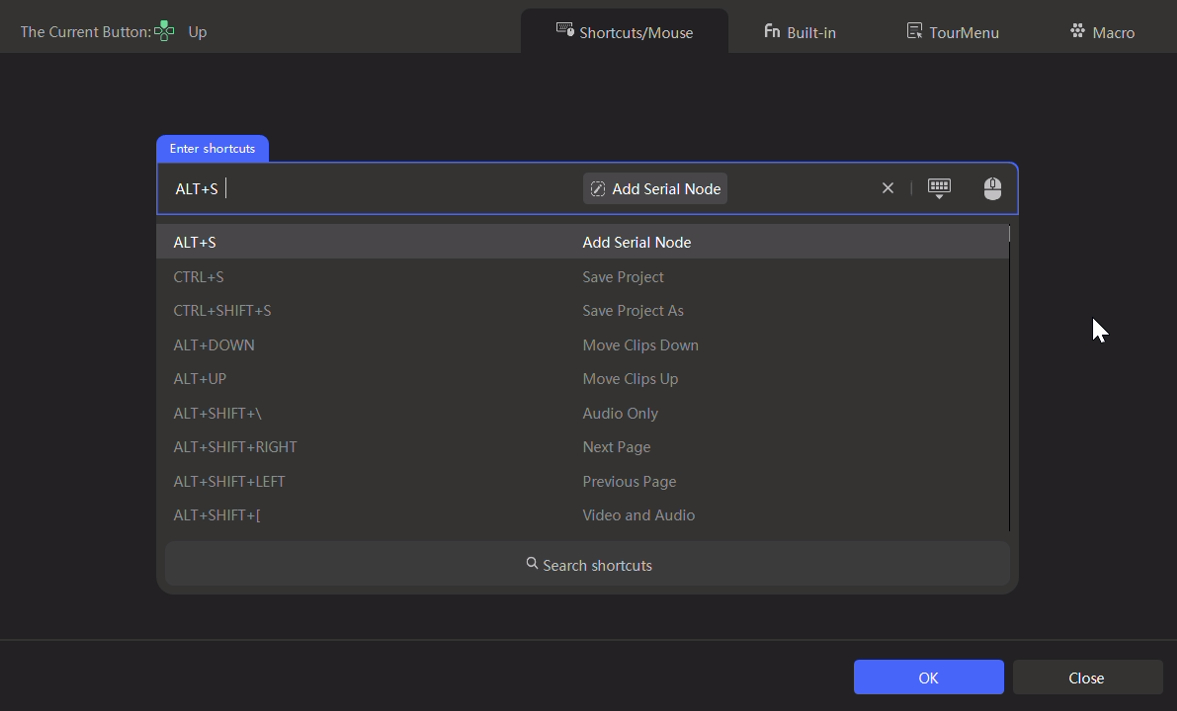
Suppose you're unfamiliar with the keyboard shortcuts for nodes in DaVinci Resolve. In that case, you can start by searching for the default shortcuts related to nodes in the "Keyboard Customization" panel of DaVinci Resolve. You can then memorize or customize those shortcuts according to your preference.

Next, you can assign your frequently used node shortcuts, like Serial Nodes (Alt/Option+S) or Parallel Nodes (Alt/Option+P), to TourBox directional keys (Up, Down, Left, Right).
This way, you can quickly create color-grading nodes and bid farewell to the tedious node creation process.
You can also group your commonly used node operations into a TourMenu and call upon this TourMenu during color grading to choose your desired node operations.
But what if there was a way to create a set of commonly used node combinations with just a single press of a TourBox button?
This can be achieved using TourBox macros. Here, we'll share a suggested macro setup for creating nodes, but feel free to create your own macros based on your color grading workflow.
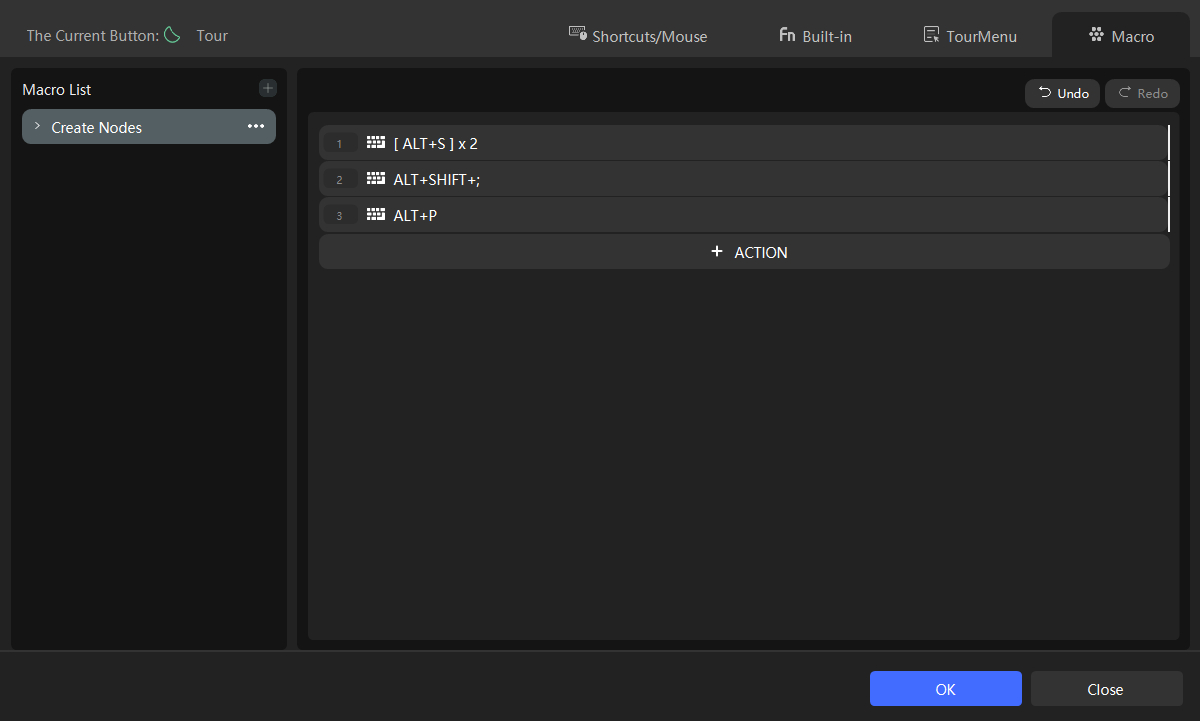
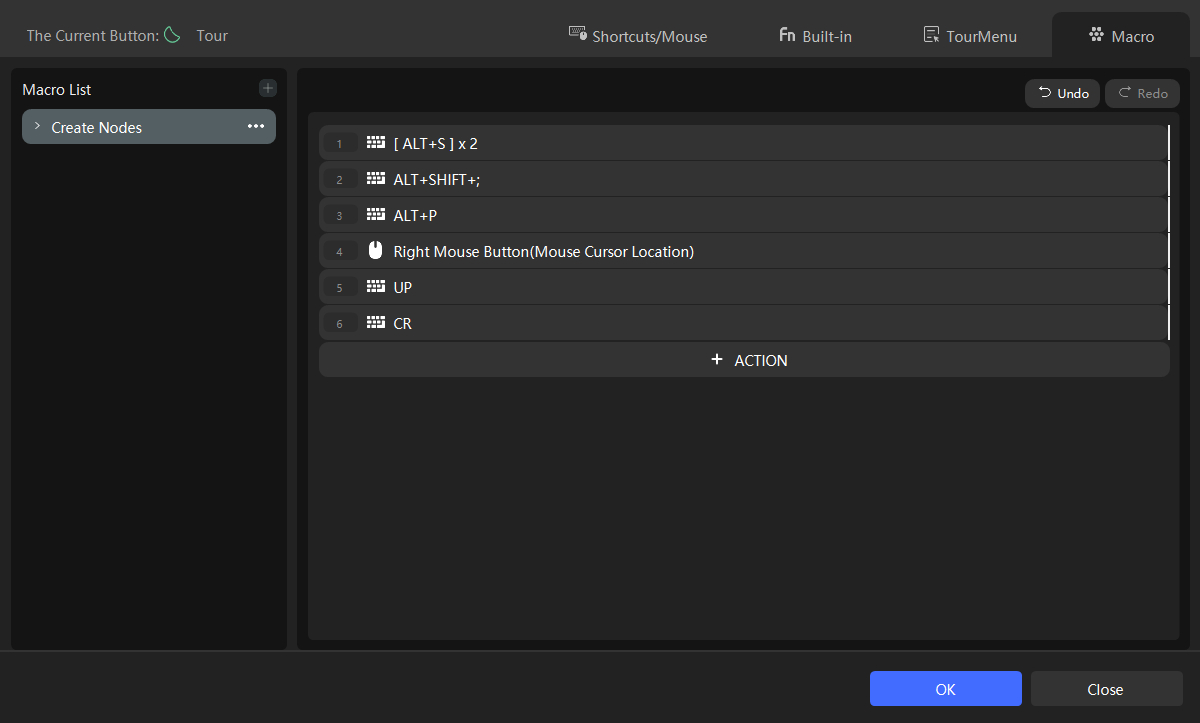
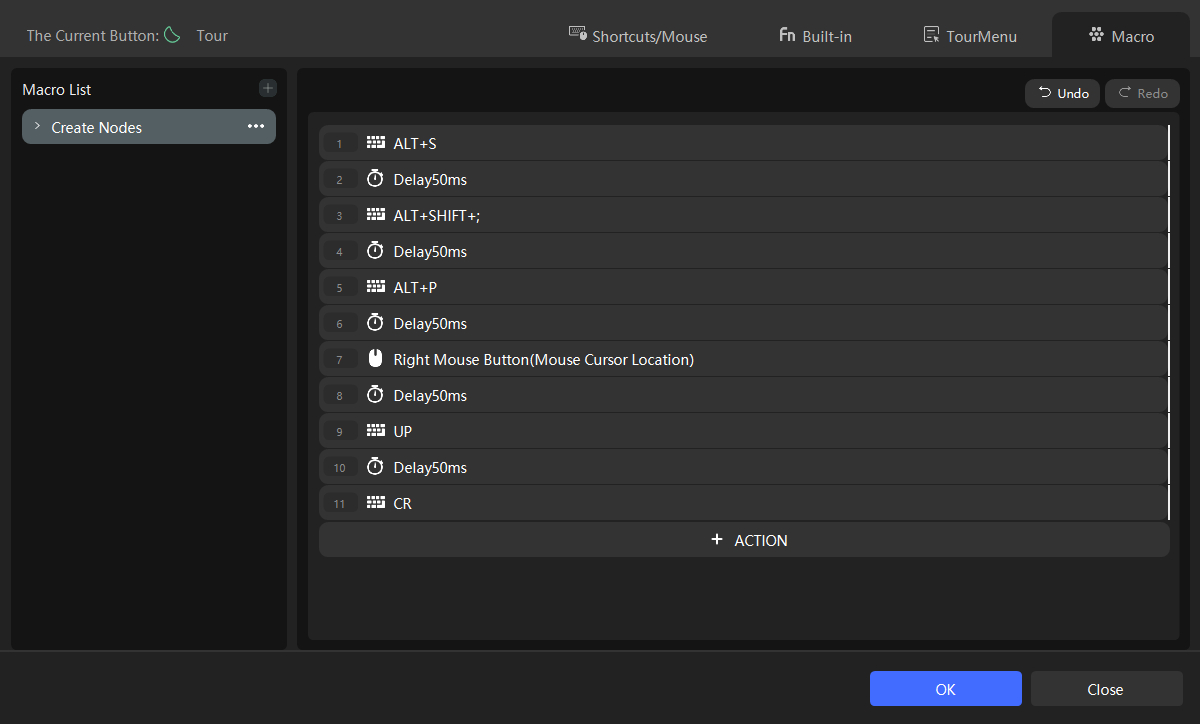
Create a macro in TourBox, add two "Serial Nodes" (Alt/Option + S), then add "Previous Node" (Alt/Option + Shift + ;) and create a "Parallel Node" (Alt/Option + P), as shown in the image below.
If you were to stop here, your node graph in DaVinci Resolve may appear cluttered. To make the node graph more visually appealing, you can add additional commands.
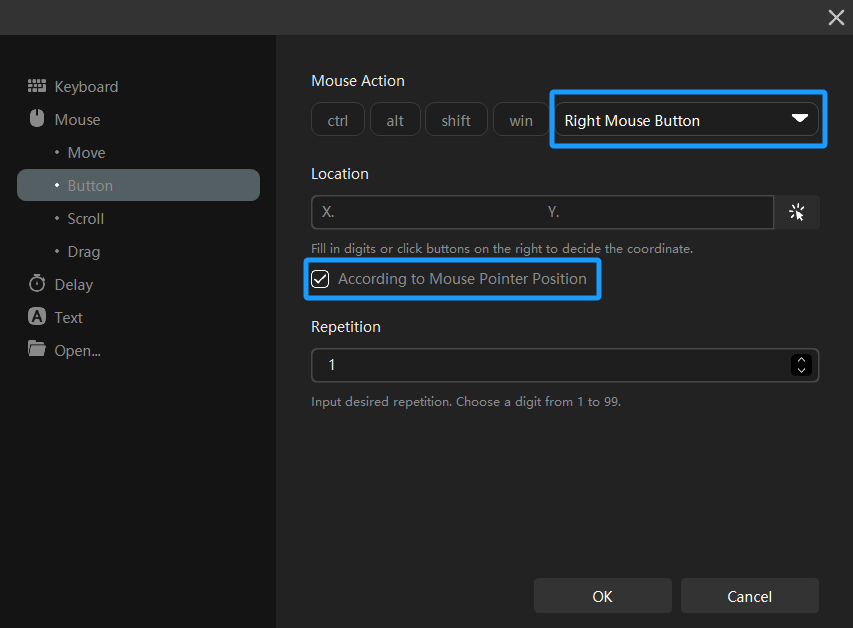
Continue by adding the "Right Mouse Button" command, ensuring that the "According to Mouse Pointer Position" option below is selected. This will enable you to open the right-click menu for the node panel.
Extra Tip:
When executing this macro in DaVinci Resolve, it is necessary to move the mouse cursor to the node panel for the operations to organize the node graph to take effect.
Add the shortcut key "Up" to switch to "Cleanup Node Graph" and add "Enter(CR)" to execute the command.
Finally, don't forget to insert a delay of 50ms (milliseconds) between each action. This ensures that your macro commands simulate manual operations, preventing potential software crashes that may occur when multiple actions are triggered simultaneously.
Once you've completed all the setup, go back to DaVinci Resolve, and with just a press of the TourBox button, you can quickly create a set of color-grading nodes that you frequently use.