How to Add Adjustment Layer in Premiere Pro?
Are you ready to take your video editing skills to the next level? If you've ever wondered how to effortlessly enhance the look and feel of your footage without altering the original clips, then adjustment layers in Premiere Pro are your secret weapon.
In this comprehensive guide, we'll walk you through the step-by-step process of how to add an adjustment layer in Premiere Pro, empowering you to transform your videos with stunning visual effects, seamless color grading, and precise image adjustments.
Get ready to elevate your editing game and captivate your audience with this must-have technique. Let's dive in!

In this article, you will learn:
- What Is the Adjustment Layer in Premiere Pro?
- How to Add Adjustment Layer in Premiere Pro?
- Tips and Tricks for Mastering Adjustment Layers in Premiere Pro
- Final Thoughts About Adding Adjustment Layer in Premiere Pro
What Is the Adjustment Layer in Premiere Pro?
The Adjustment Layer is a special kind of layer used for applying effects across multiple clips. It's a transparent layer that you can apply over your video clips.
The effects or changes you make to the Adjustment Layer will then be applied to all the clips below it in the timeline. This allows you to apply the same effects to multiple clips without having to manually edit each one.
There are several advantages to using Adjustment Layers in Adobe Premiere Pro:
- Consistency: Adjustment Layers can ensure consistency across different clips. This is particularly useful when you're working on a project with multiple clips that need to have the same look and feel.
- Efficiency: Rather than applying an effect to each individual clip, you can apply it just once to the Adjustment Layer. This can significantly speed up your workflow.
- Flexibility: Adjustment Layers are non-destructive. This means you can turn them on and off, or change the effects applied to them without altering the original clips. This provides a high level of flexibility when editing.
- Control: You can control where the effects are applied by positioning the Adjustment Layer on the timeline. You can also stack multiple Adjustment Layers to create complex effects.
How to Add Adjustment Layer in Premiere Pro?
Adjustment layers are a powerful tool in Premiere Pro that can streamline your editing process. Here's a step-by-step guide on how to add an adjustment layer in Premiere Pro.
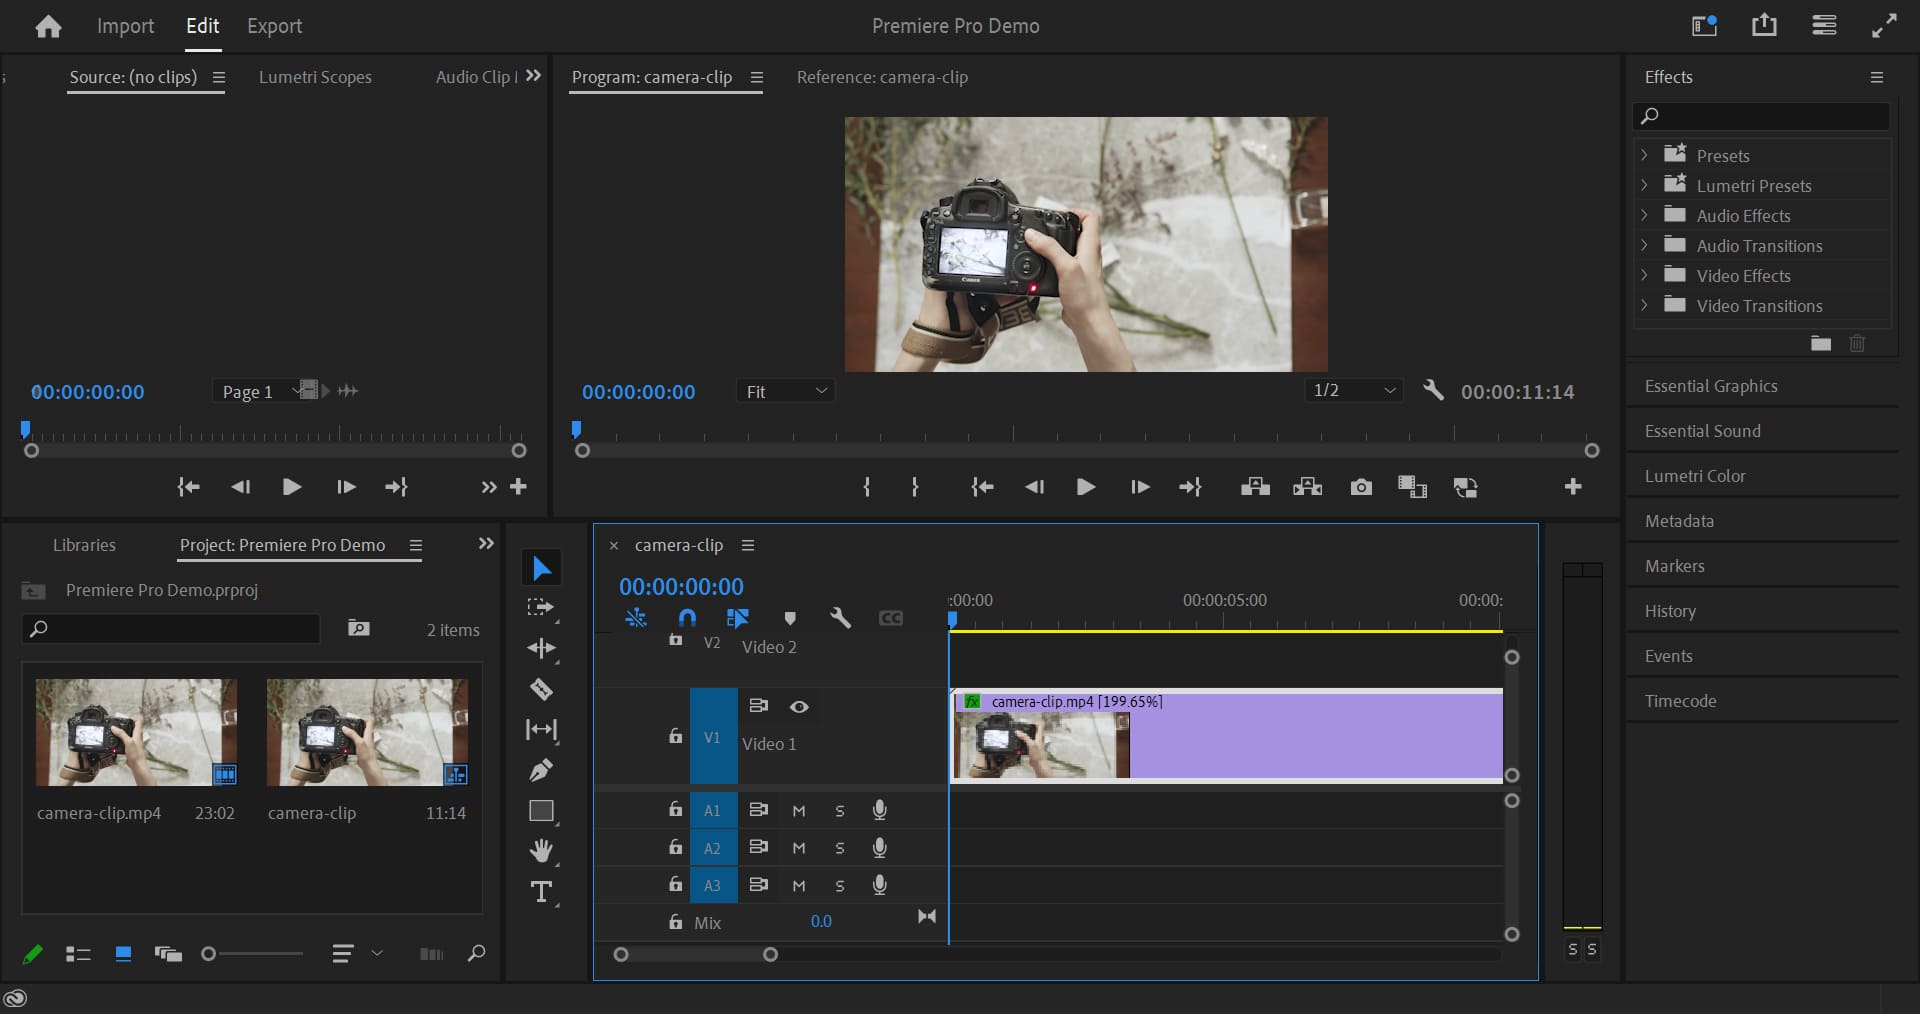
Step 1: Open Your Project
Open the Adobe Creative Cloud application on your computer and locate Adobe Premiere Pro. Click on the application to launch it.
Once Adobe Premiere Pro is open, you will be greeted with the home screen. From here, click on "New Project" to start a new project.
A dialog box will appear, prompting you to provide a name and location for your project. Choose a descriptive name that reflects the content of your video project and select a folder on your computer to save it in. Click "OK" to proceed.
Step 2: Import Media Files
With your project set up, it's time to import your media files. Go to the "File" menu and select "Import" to browse and select the files you want to include in your project.
You can import video clips, audio files, images, and other media assets.
Drag and drop your imported media and video clips onto the timeline for editing.
Further Reading:
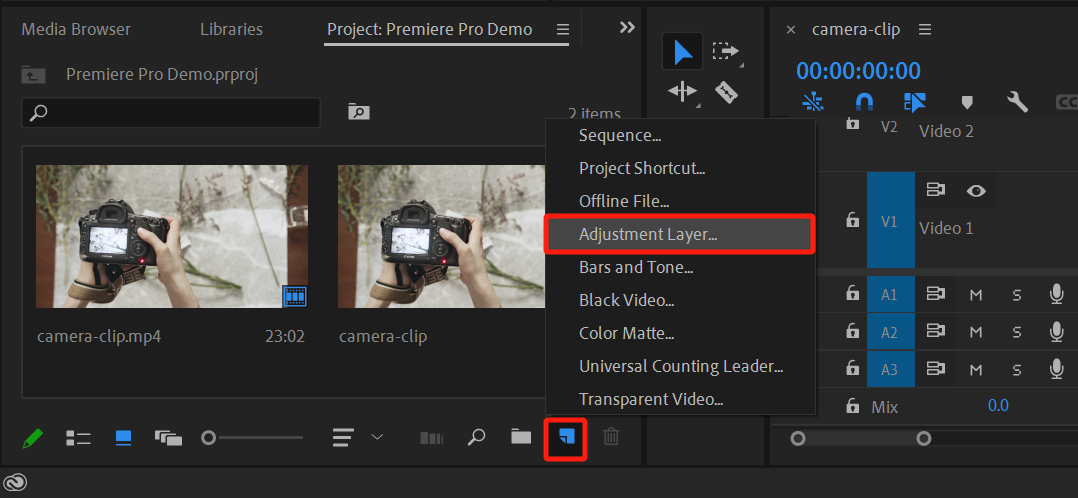
Step 3: Create an Adjustment Layer
In the 'Project' panel (usually located in the bottom left of the screen), click on the 'New Item' button. It's a small button at the bottom of the panel which looks like a folded piece of paper.
In the dropdown menu, select 'Adjustment Layer'.
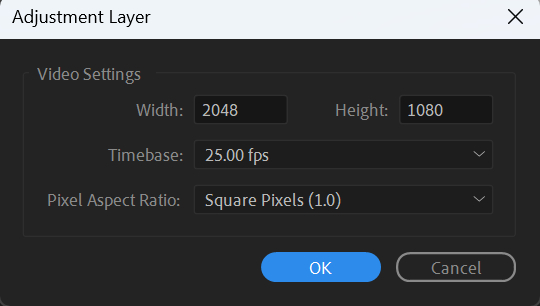
Step 4: Configure the Adjustment Layer
A dialog box titled 'Adjustment Layer Settings' will open. Make sure the settings, including width, height, and timebase, match your sequence settings.
Click 'OK' to create the adjustment layer.
Let's recap the process we just went through. You need to select "Adjustment Layer" from the "New Item" option menu in the project panel, and then confirm it in the dialog box that pops up. This process doesn't have a keyboard shortcut, making it quite cumbersome.
Is there a way to make this step simpler? We'd like to recommend TourBox, a creative tool beloved by many editors and digital artists.

You can map commonly used shortcuts in the software to the buttons on TourBox, eliminating the need to remember any keyboard shortcuts.
In Premiere Pro, there is no default keyboard shortcut for creating adjustment layers. However, you can set a shortcut for adjustment layers in Premiere Pro's Keyboard Shortcuts panel.
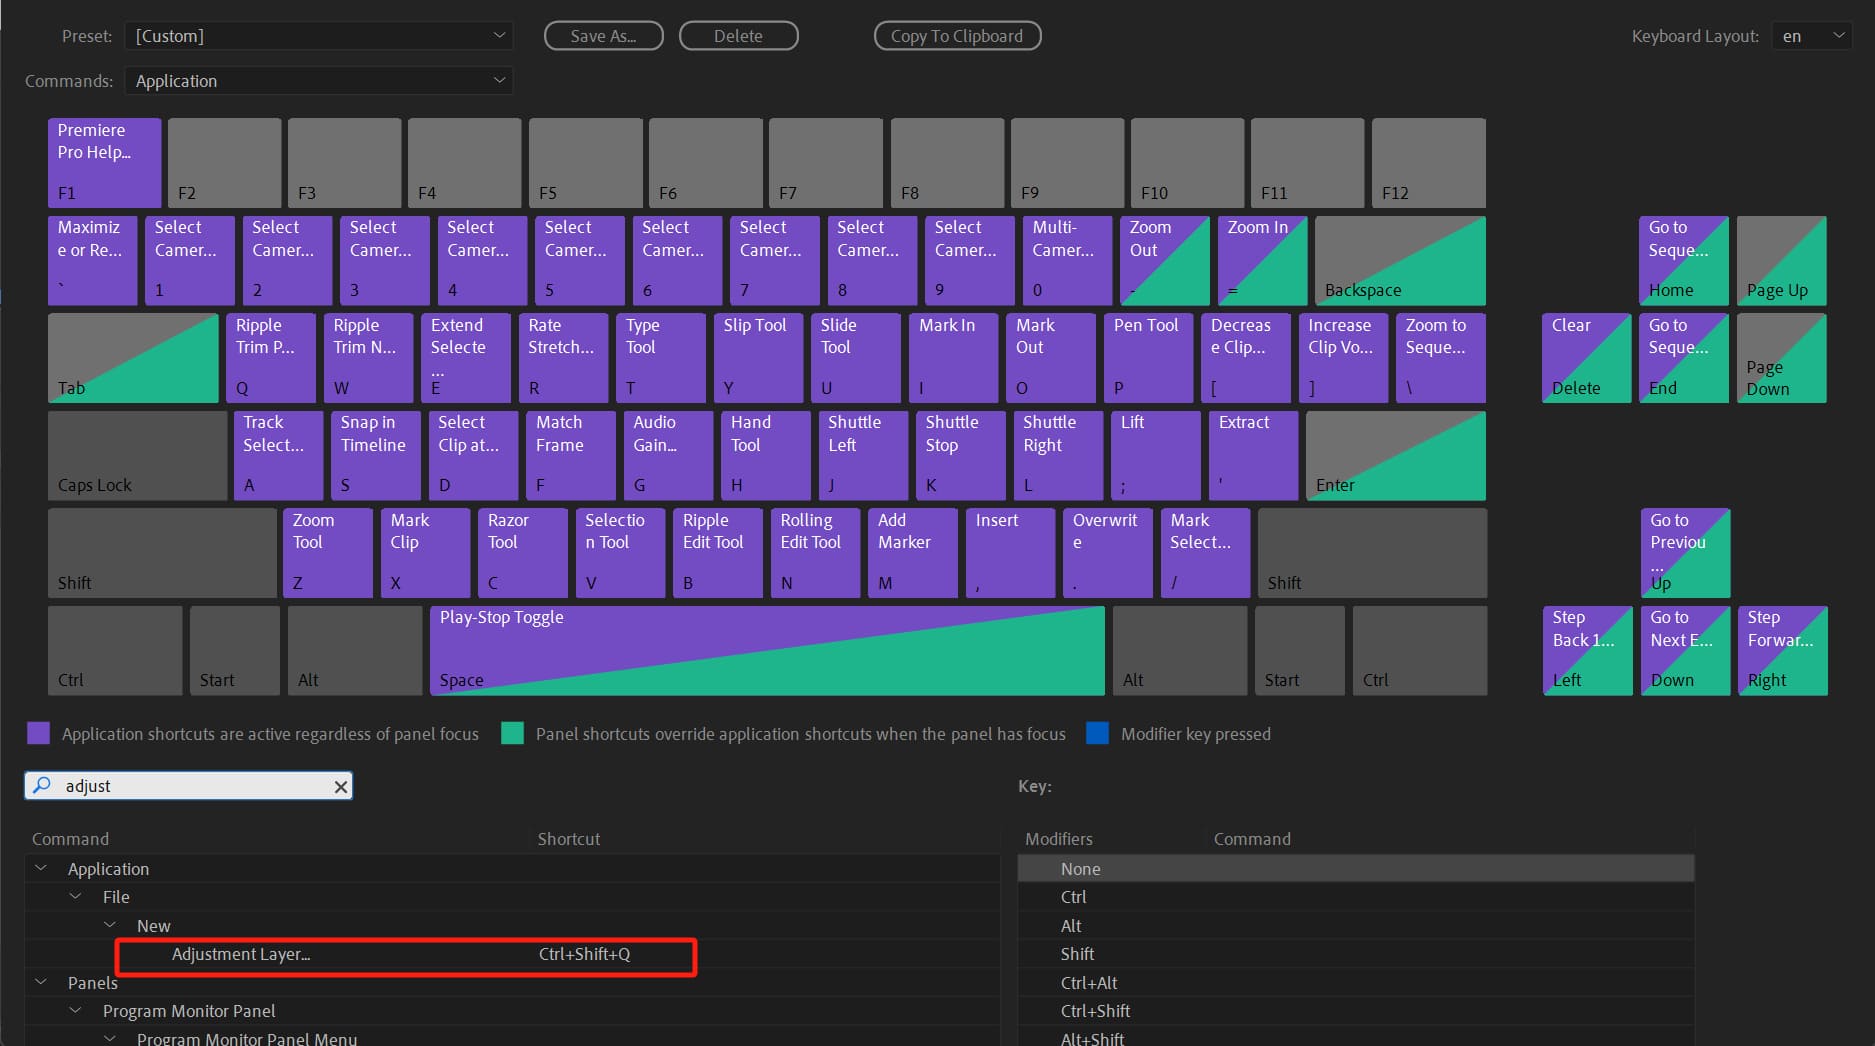
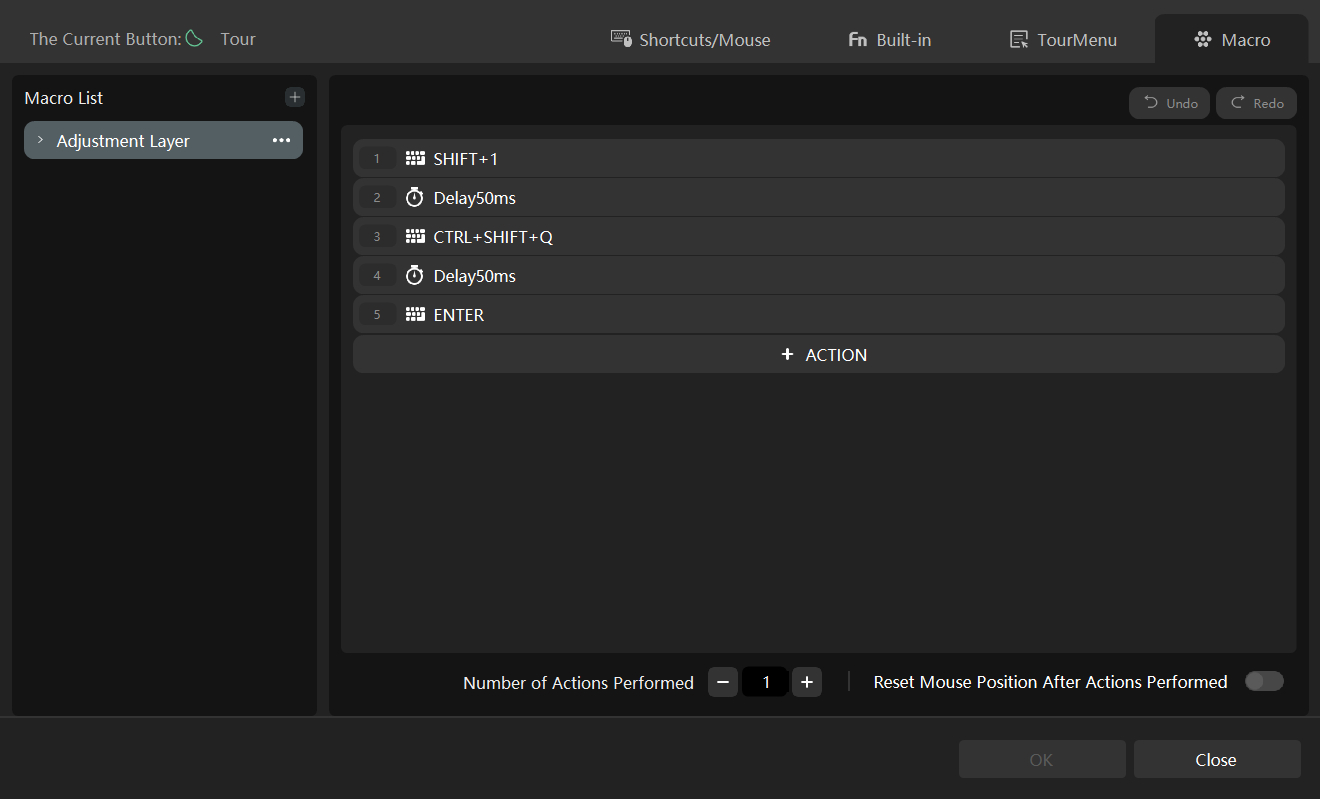
Then, in the TourBox Console, you can set up a macro to add a Premiere Pro adjustment layer.
The shortcut for the Premiere Pro adjustment layer requires you to first select the project panel to activate it. So, you can set a shortcut in the macro to select the project panel first ("Shift + 1"), then set the shortcut for the adjustment layer, and finally set an Enter key to confirm the settings.
Further Reading:
Add a 50ms delay between each command in the macro to simulate human operation. Back in Premiere Pro, simply press the configured button on TourBox, and you can quickly create an adjustment layer.
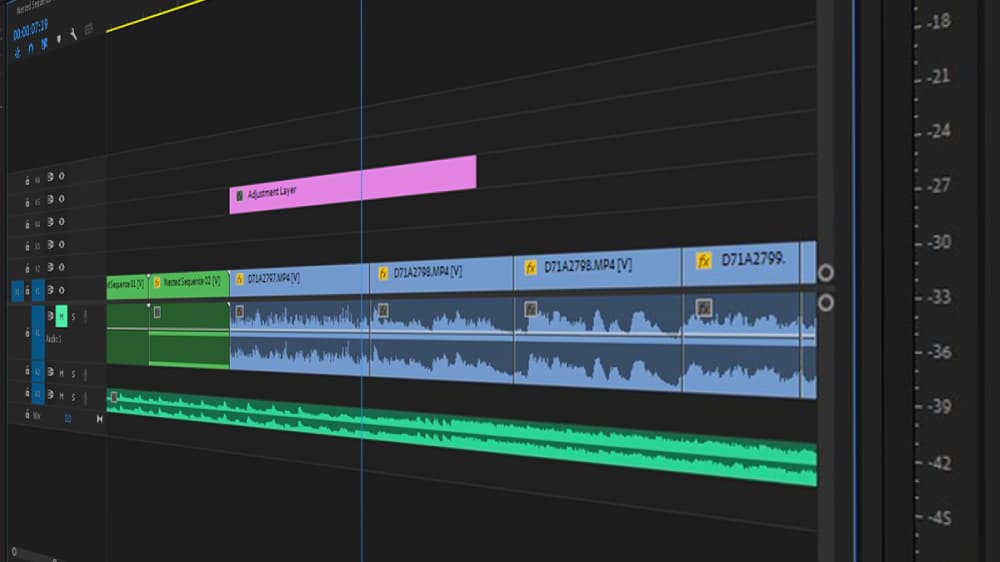
Step 5: Add the Adjustment Layer to Your Sequence
You should now see the adjustment layer in your 'Project' panel. Click and drag it onto a new track above your video clips in the 'Timeline' panel.
If you don't have a track above your video clips, Premiere Pro will automatically create one when you drag the adjustment layer onto the timeline.

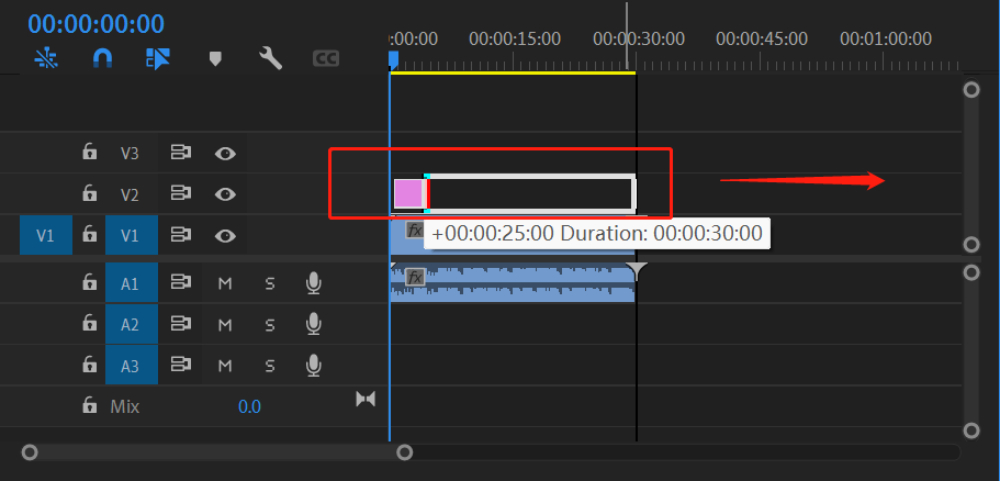
Step 6: Extend the Adjustment Layer
By default, the adjustment layer is relatively short. To apply effects to a longer duration, select the adjustment layer in the timeline and drag its end to extend it over the desired range of clips.
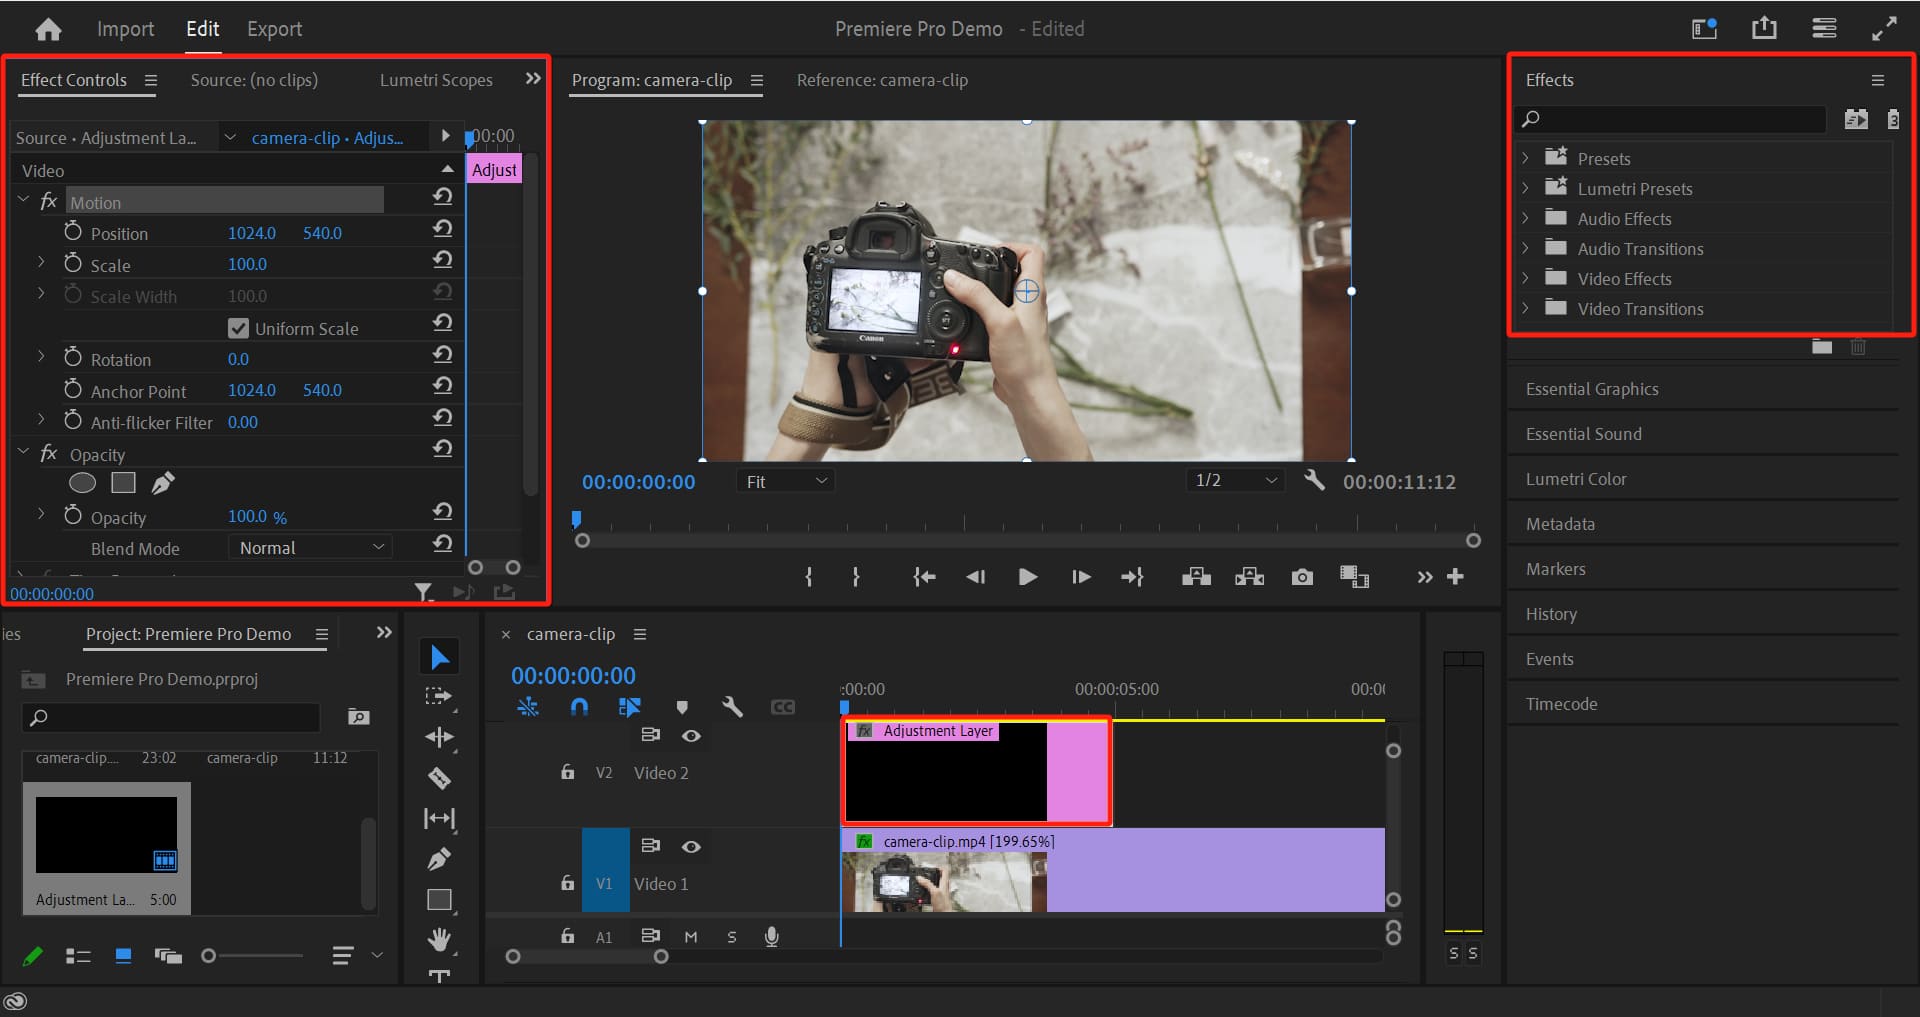
Step 7: Add Effects to the Adjustment Layer
With the adjustment layer selected in the timeline, go to the 'Effects' panel. If you can't see it, go to Window > Effects to open it.
Choose the effects you want to apply to the adjustment layer. You can do this by either double-clicking on an effect in the 'Effects' panel or by dragging the effect onto the adjustment layer in the timeline.
You can adjust the settings of the added effects in the 'Effect Controls' panel.
And voila! You have successfully added an adjustment layer to your project in Adobe Premiere Pro. This adjustment layer will apply any added effects to all the clips beneath it in the timeline.
Tips and Tricks for Mastering Adjustment Layers in Premiere Pro
Now that you understand the basics of how to add an adjustment layer in Premiere Pro, let's enhance your editing prowess with a few extra tips and tricks.
Tip 1: Use Multiple Adjustment Layers
Don't shy away from using multiple Adjustment Layers. Having separate layers for different effects can simplify your workflow.
For example, you might use one Adjustment Layer for color correction and another for applying a specific visual effect.
This organization can make it easier to toggle effects on and off or modify them later.
Tip 2: Name Your Adjustment Layers
If you're using multiple Adjustment Layers, it can be helpful to name each one based on its purpose (e.g., "Color Correction," "Vignette Effect").
This will make your editing process more organized and efficient.
Tip 3: Adjust Opacity for Subtle Effects
If an effect applied through an Adjustment Layer is too strong, remember that you can adjust the layer's opacity.
Lowering the opacity will reduce the intensity of the effect, allowing you to achieve more subtle results.
TourBox comes with built-in controls for Premiere Pro, allowing you to easily set and manipulate parameters like adjusting the opacity of adjustment layers.
Further Reading:
TourBox Console 5.5 New Features | Effect Controls for Premiere Pro
Final Thoughts About Adding Adjustment Layer in Premiere Pro
Adjustment Layers are a powerful feature of Premiere Pro that can significantly enhance your editing workflow. They offer a non-destructive way to apply effects and adjustments to your footage.
With practice, these tips and tricks will become second nature, allowing you to make the most of this versatile tool.
To further enhance your editing process, consider adding TourBox to your toolkit. You'll definitely love the editing experience that TourBox brings.

There are many other powerful features of TourBox that we couldn't cover in detail due to space limitations. Check out our video editing page for more information.
We've come to the end of our tutorial on how to add adjustment layers in Premiere Pro. We hope this has been helpful for your editing and creative journey.