Six Methods: How to Change Colors in Lightroom Classic
Color grading is a crucial aspect of post-processing, as captivating colors catch the eye and reflect a photographer's unique style.
When it comes to colors, everyone has their preferences. To achieve your desired results in photo color grading, it's essential to understand what each setting can do.
In Lightroom Classic, there is more than one method to alter the colors in your photos. In this tutorial, we will share six different techniques for changing colors in Lightroom Classic. So let's dive right in!

In this article, you will learn:
- Method 1: White Balance
- Method 2: HSL Color
- Method 3: Color Grading
- Method 4: Tone Curve
- Method 5: Profile Browser
- Method 6: Calibration
- Final Thoughts About Changing Color in Lightroom
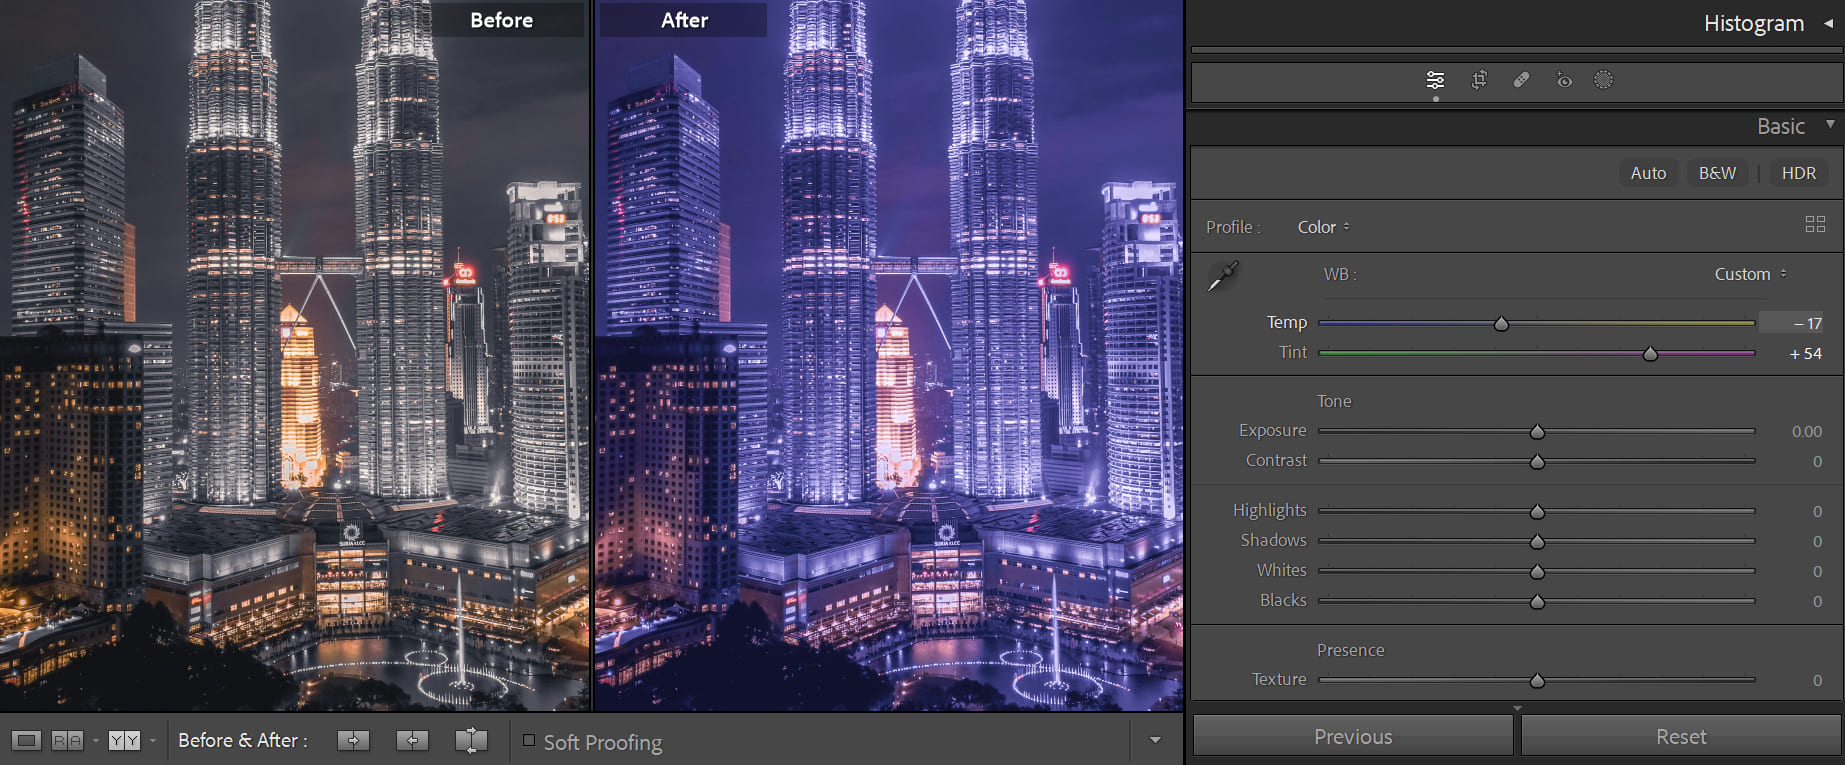
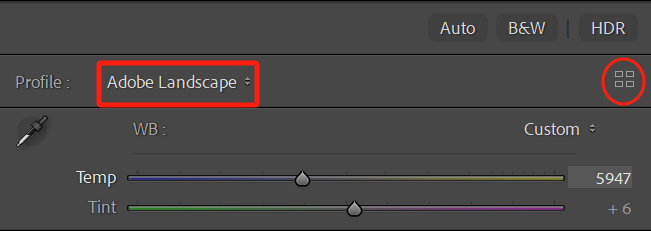
Method 1: White Balance
The primary function of White Balance is to correct the overall color of a photo based on neutral tones and whites present in the image. It's not only used to adjust the colors in urban and landscape photos but also to change the emotional atmosphere conveyed by a photo.
Adjusting the white balance in Lightroom Classic will affect all the colors in the photo, so it's important to be mindful of this aspect.
By manipulating the white balance, you can make cityscape night photos instantly look cool and cyberpunk, or make harsh afternoon light resemble the warm glow of a sunset.
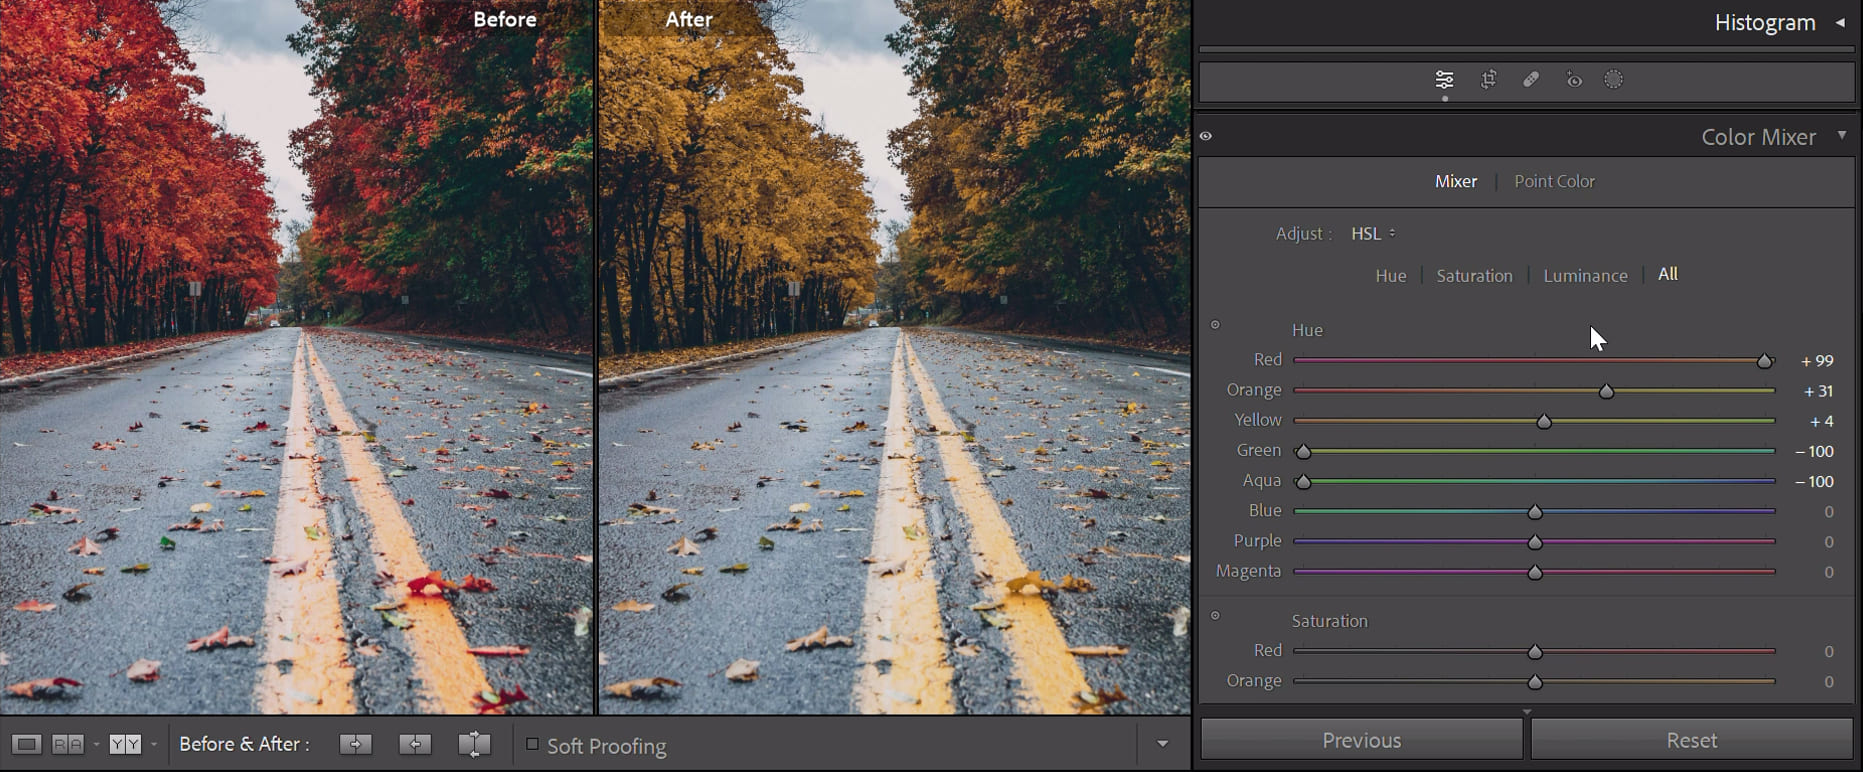
Method 2: HSL Color
When you want to change a specific color in your photo, you can use the HSL/Color tool in Lightroom (available in the Color Mixer panel after Lightroom Classic 13.0).
This tool allows you to adjust the hue, saturation, and luminance of a particular color. If there's a color in the photo that catches your attention and you want to either downplay or emphasize it, the HSL color tool is your go-to option.
For example, you can change the color of leaves to instantly transform an early autumn photo into a deep autumn scene. And of course, you can also tone down a color to make it less vibrant and stand out less.
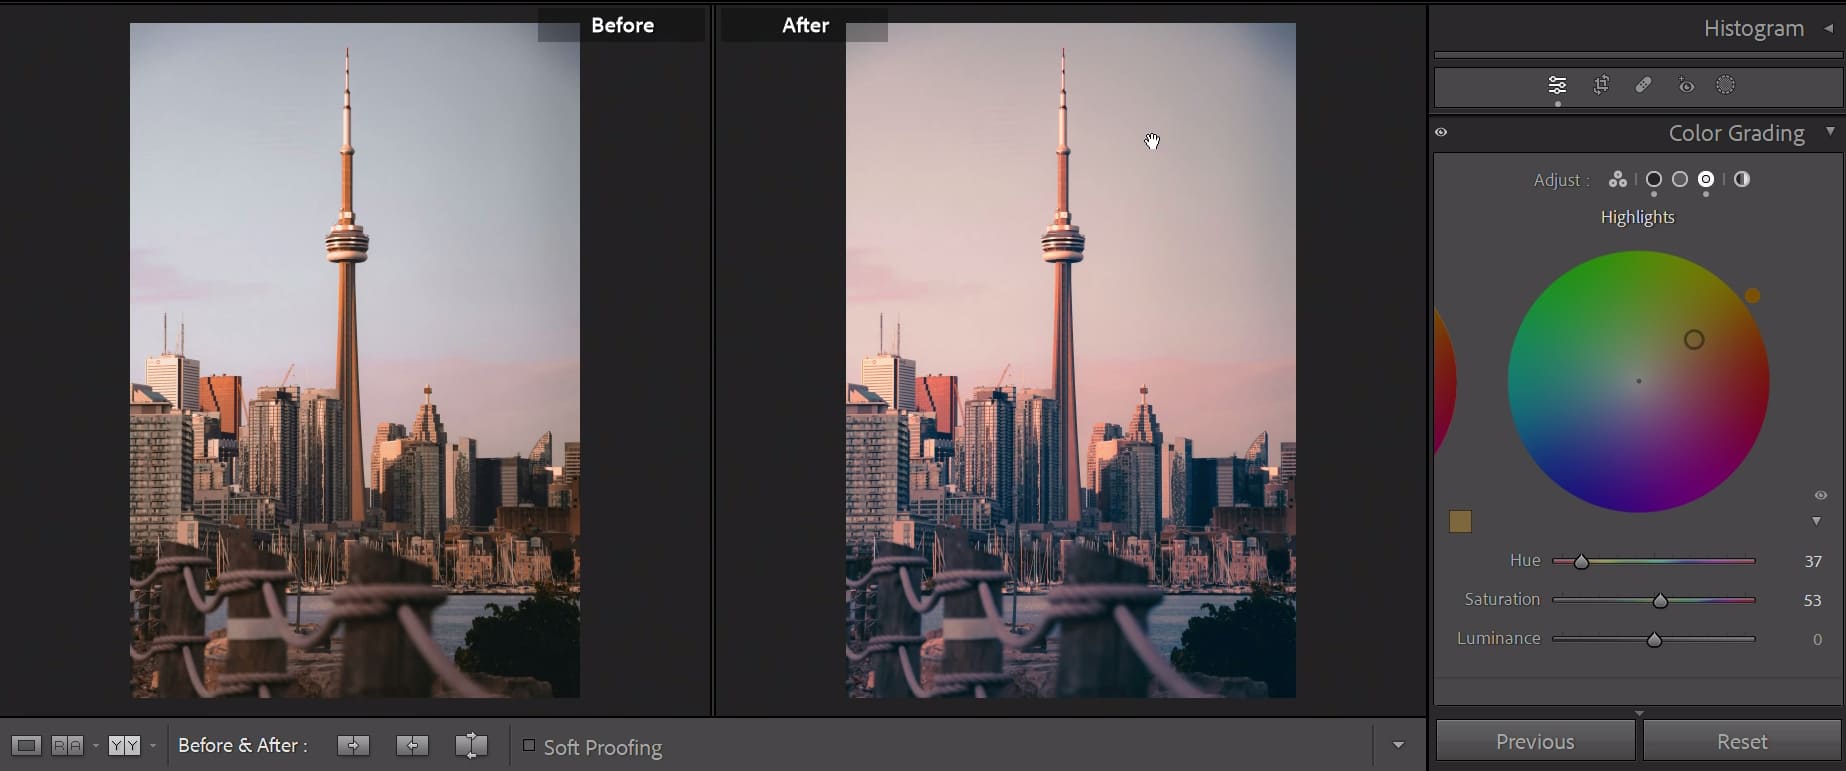
Method 3: Color Grading
To change the colors in your photos using Color Grading in Lightroom Classic, you need to make judgments based on the highlights and shadows. Its effects work particularly well in photos with distinct contrasts between bright and dark areas, such as sunrise and sunset shots.
For example, you can add a touch of warmth to the highlights in the sky and introduce some cool tones in the shadows. This can make a beautiful sunset photo even more vibrant, while maintaining a natural look to the lighting.
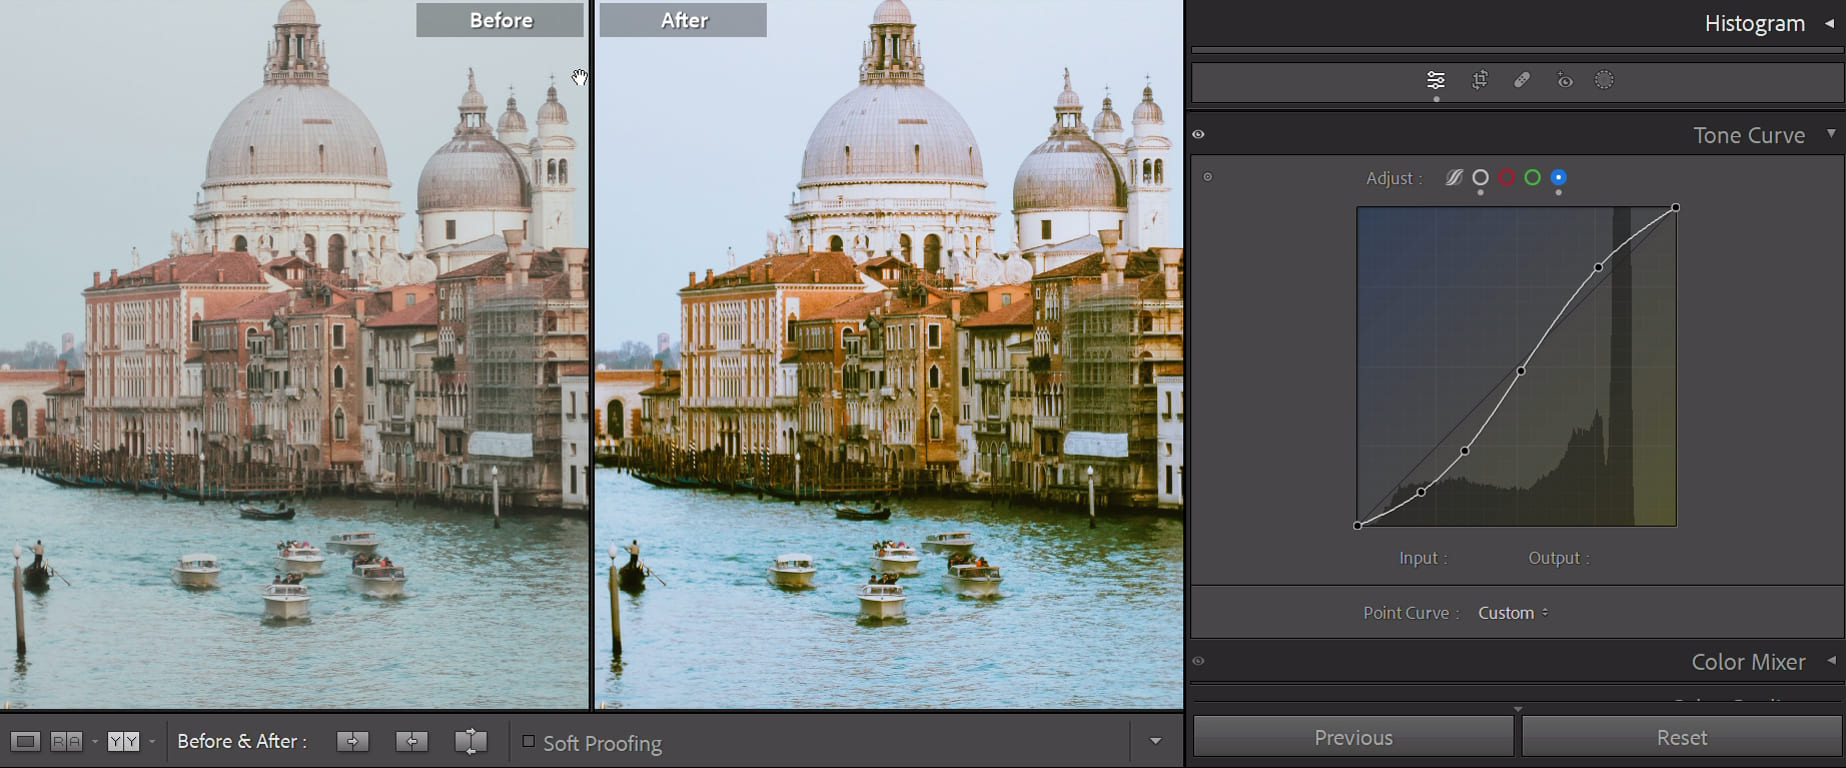
Method 4: Tone Curve
Compared to the previous methods discussed, using the Tone Curve to change colors is a more advanced technique that requires a good understanding of histograms and exposure.
The major advantage of the Tone Curve is its ability to not only alter colors but also adjust the contrast of a photo. With just a few adjustments to the Tone Curve, you can simultaneously modify the exposure, colors, and contrast of an image, allowing for efficient and speedy editing.
For example, in the image below, you can first adjust the contrast using the parametric curve and then use the blue curve to reduce the intensity of dark areas while brightening the highlights. With just two steps, you can create a completely transformed photo.
When dealing with evenly lit images, using the Tone Curve can greatly enhance the sense of depth and three-dimensionality.
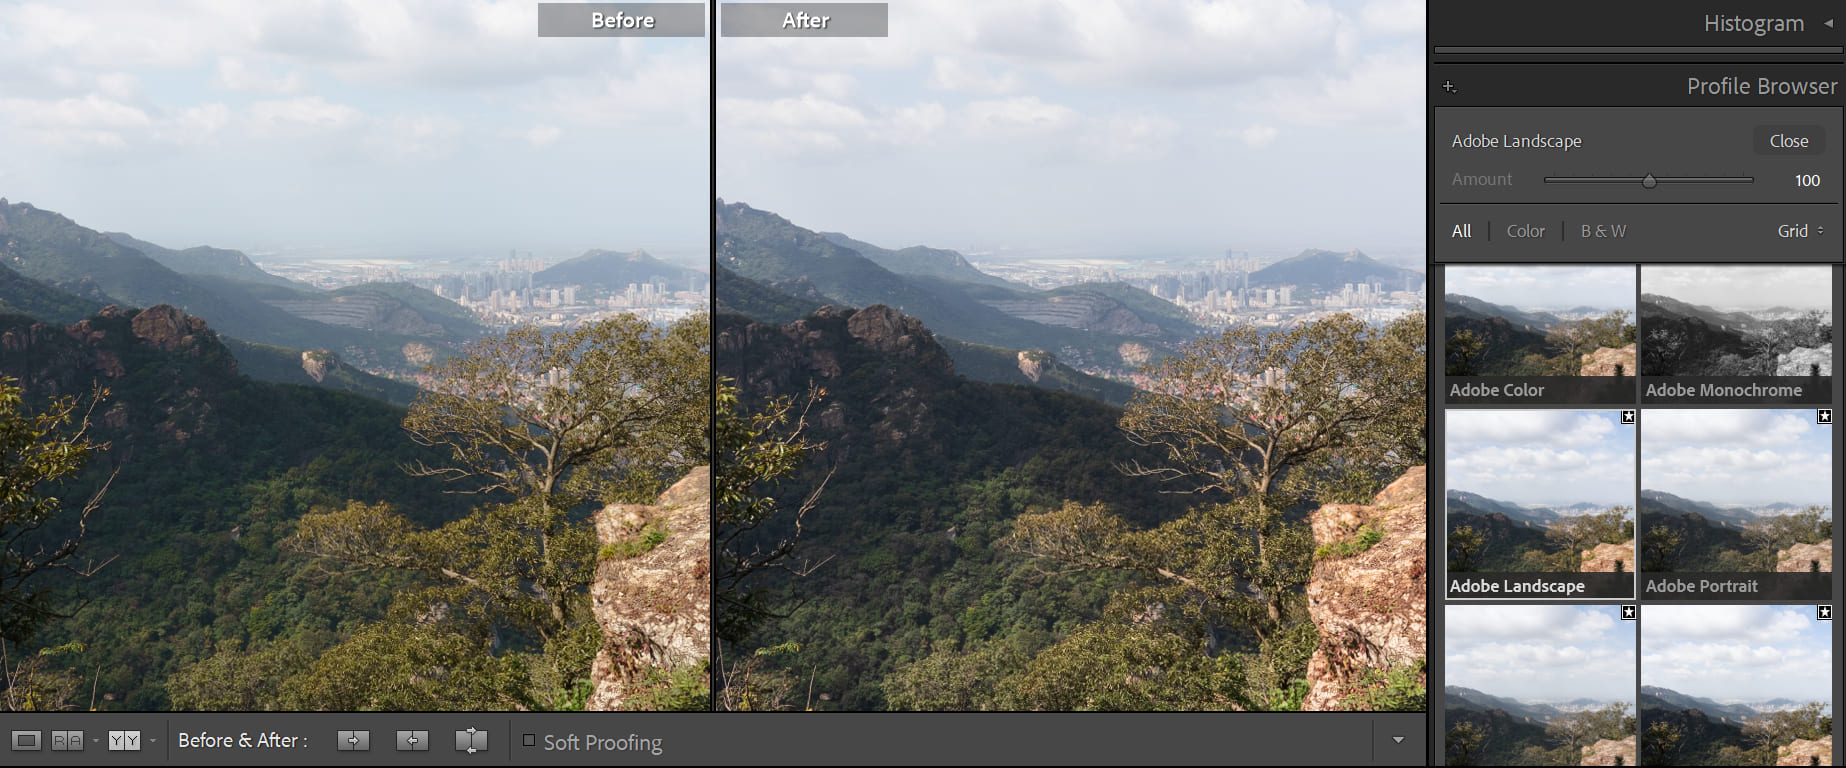
Method 5: Profile Browser
The Profile Browser is a hidden gem in Lightroom Classic that is often overlooked, despite its prominent position at the top.
Similar to presets, the Profile Browser allows you to apply different profiles to your photos. However, unlike presets, selecting any profile doesn't change any of the settings in Lightroom. Instead, it simply loads a different set of effects as a starting point for your editing process.
It's important to note that the available profiles in the Profile Browser may vary depending on the RAW files from different cameras.
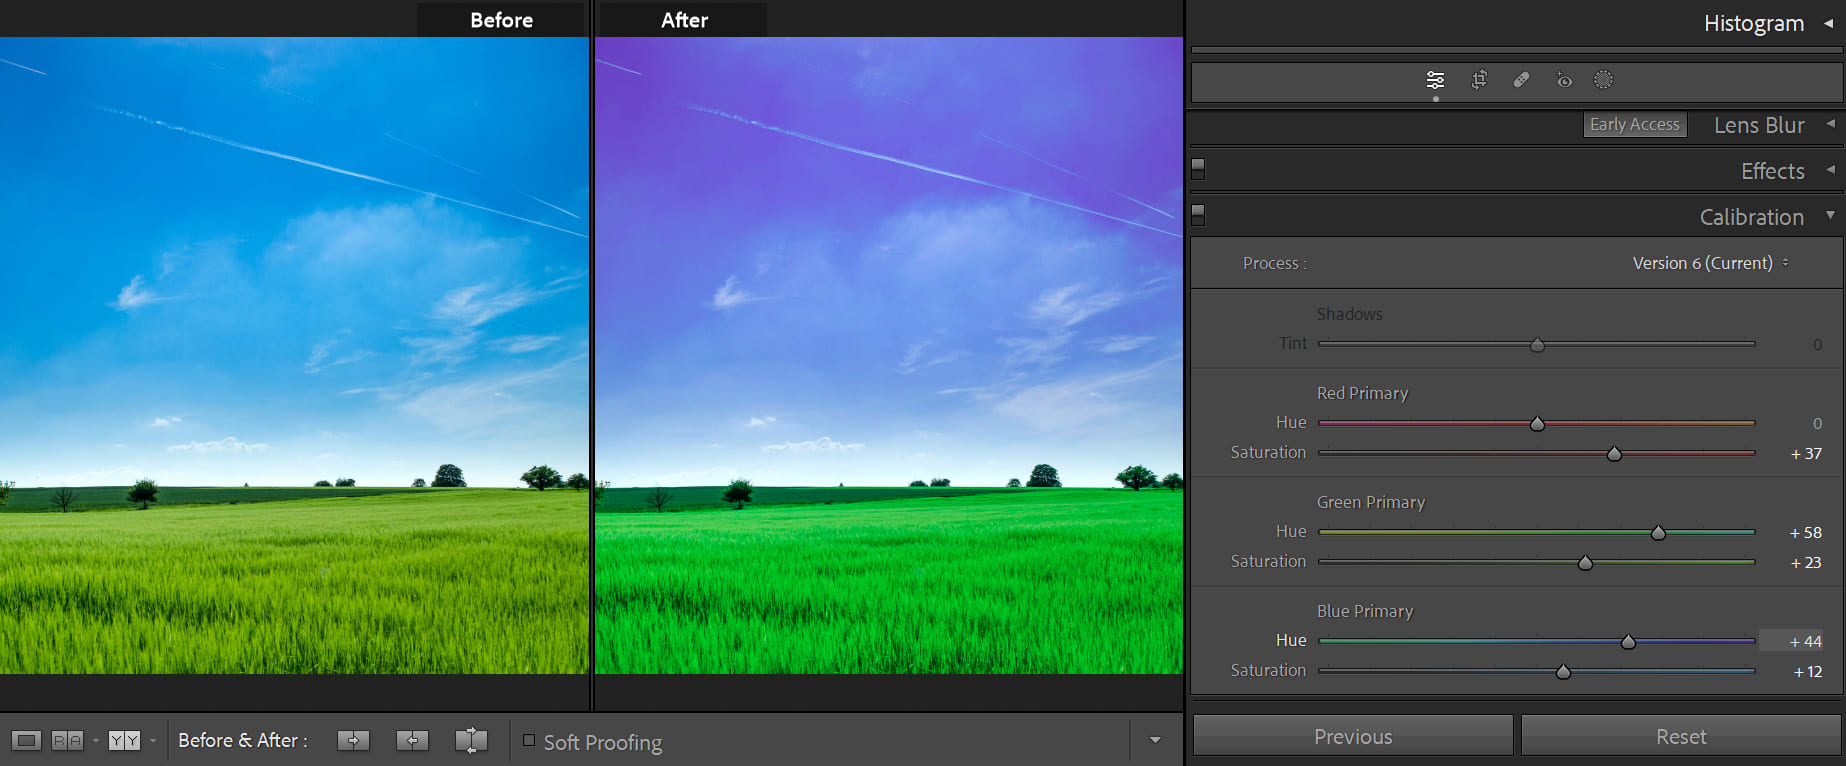
Method 6: Calibration
Do you remember the hue and saturation functions in the HSL settings?
Well, the Calibration settings are quite similar, with the difference being that HSL only affects a single color, while Calibration can impact the hue and saturation of the three primary colors (red, blue, and green) throughout the entire image.
If you want to make widespread changes to the overall hue in your photo, adjusting the Calibration settings is the quickest way to do it. If you're a fan of those trendy Instagram filters, you can achieve a similar look just by making simple adjustments in the Calibration panel.
However, if you prefer more natural color adjustments, the Vibrance setting in the Basic panel can usually fulfill the same needs.
Final Thoughts About Changing Color in Lightroom
Above are the six methods in Lightroom for changing the colors in your photos. It's important to note that you don't have to use all six methods at once. Instead, you can choose the method that best suits your specific situation and needs.
In summary, before you start editing your photos, you can select a preset that you like as a starting point. Then, you can make adjustments to the overall colors using White Balance or the Tone Curve.
If you want to modify a specific color, you can use the HSL color tool. For changing the colors in the highlights and shadows, you can utilize Color Grading.
Lastly, if you want to add a personalized color effect, you can use the Calibration settings to change the overall hue of the photo. However, if you prefer a more natural and unaltered look, you can skip this last step.
Product Recommendation:
During the process of color grading in Lightroom, using a keyboard and mouse can be cumbersome and not very intuitive. That's why we recommend TourBox, a creative tool designed specifically for photographers, creatives, and professionals.

With TourBox, you can assign commonly used panels in Lightroom Classic to its buttons, allowing you to adjust color parameters with its rotating control.
This process is incredibly intuitive, as you can see the changes in your photos in real-time. No longer will you waste time with frequent mouse and keyboard operations. With just one hand, you can accomplish everything with TourBox.
What's even better is that TourBox offers TourMenu and macro functionality, providing limitless possibilities for your operations. You can even press a single button to batch-process your color grading in Lightroom Classic.
If you want to experience TourBox, try our latest product, TourBox Lite. It offers a lower price and a more user-friendly setup, making it perfect for first-time users of TourBox.

And that concludes our tutorial on how to change the colors of photos in Lightroom Classic. We hope this guide has been helpful on your creative journey.