How to Use Hue & Saturation Adjustment in Photoshop?
Hue/Saturation in Photoshop is a commonly used color adjustment tool. Many people utilize saturation within Hue/Saturation to control the color intensity or adjust hue to tweak tones.
However, this manipulation is just a small aspect of Hue/Saturation's capabilities. There are plenty of hidden tricks within Hue/Saturation, making this tool incredibly potent and rivaling any creative coloring tool.
Let's explore the wonders of Photoshop Hue/Saturation together!

In this article, you will learn:
- What Is the Purpose of Hue/Saturation in Photoshop?
- How to Create a Hue/Saturation Adjustment Layer?
- How to Use Photoshop Hue/Saturation?
- Advanced Photoshop Hue/Saturation Technique: Selective Desaturation
- Final Thoughts About Photoshop Hue/Saturation
What Is the Purpose of Hue/Saturation in Photoshop?
You can use Hue/Saturation to significantly alter the overall saturation/hue/lightness of a photo or a specific color.
How to Create a Hue/Saturation Adjustment Layer?
In Photoshop, the best way to create a Hue/Saturation adjustment is by making an adjustment layer.
After opening a photo, simply click on the "Create a new fill or adjustment layer" button in the Layers panel, then choose Hue/Saturation from the adjustment layer menu to create it successfully.

If you find the process of creating adjustment layers in Photoshop to be cumbersome, you might want to consider using TourBox, a controller highly favored by many digital artists and photographers.

With just a press of a button on TourBox, you can swiftly create the adjustment layer you desire.
TourBox can significantly enhance your efficiency and experience while using Photoshop. Whether you're editing photos or engaging in digital drawing, TourBox can streamline your workflow, allowing you to focus more on your creative work.
How to Use Photoshop Hue/Saturation?
After creating a Hue/Saturation adjustment layer, you'll see the Hue/Saturation settings panel like the one below.

The Hue/Saturation panel offers various options, broadly divided into three areas: Presets, Adjustments, and Color Range Selection.
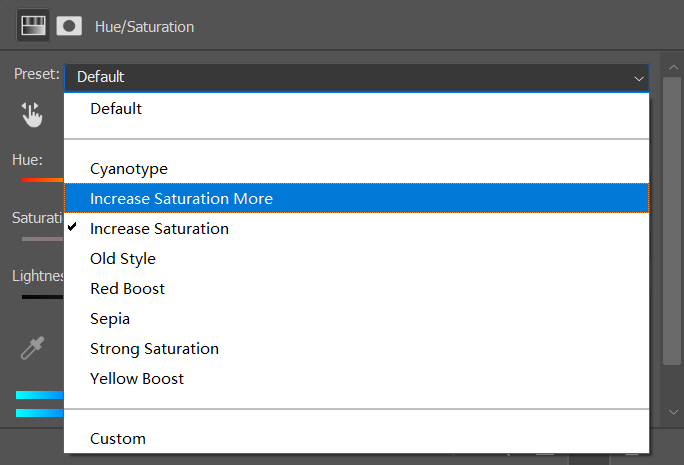
1. Preset
In the Hue/Saturation panel, the Presets dropdown offers 8 default presets that you can click on for instant effects, making it very straightforward.
Even after applying a preset, you can still fine-tune all color-grading options as needed.
2. Adjustments
This section includes a "hand" tool, a menu, and three sliders.
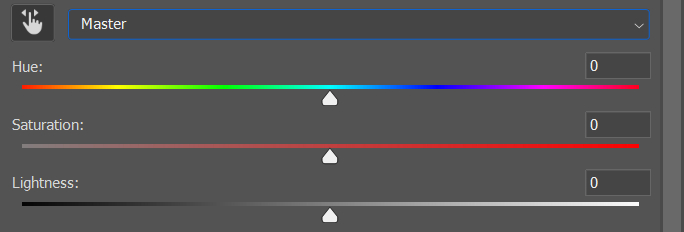
The sliders in Photoshop's Hue/Saturation are the simplest and most straightforward to understand. As the names suggest, the three sliders for Hue, Saturation, and Lightness are used to adjust the photo's hue, saturation, and brightness, respectively.
Further Reading:
The key point is the dropdown menu labeled "Master" in the panel. "Master" signifies that the three sliders below affect the entire photo.
Clicking on the dropdown reveals six other options besides "Master." If you're familiar with color spaces, these options correspond to RGB and CMY.
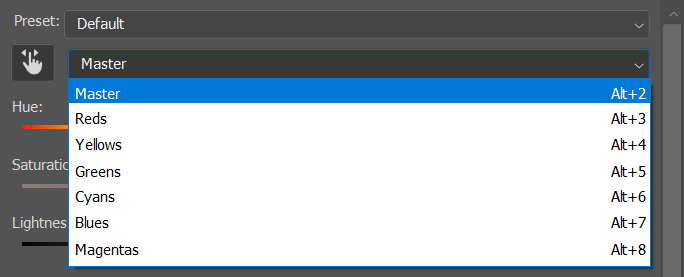
By selecting any of these options, you can adjust the hue, saturation, and lightness of specific color ranges in the photo. This adds another dimension to your color adjustments, enabling you to make targeted adjustments to different areas of the photo.
Now, what if you want to adjust a specific area but you're unsure of the exact color (for example, if you're new to colors and don't know which category brown falls under), what do you do?
This is where the "hand" tool located nearby comes in handy. It functions as a color picker. Once selected, your cursor turns into a pipette, allowing you to click on any area. Photoshop will then identify the corresponding color option.
For instance, in the photo below, using this hand tool and clicking on the dog in the photo will switch the option from "Master" to "Red."

Here are two advanced tips for using the Hue/Saturation hand tool:
- While holding down the mouse in the area you want to adjust (remember, hold down!), dragging the cursor left or right will directly alter the saturation of that color.
- If you want to adjust the hue of the selected color range, hold down the Command/Ctrl key and then drag the mouse left or right.
3. Color Range Selection
Next up is the most complex area in the Photoshop Hue/Saturation tool.

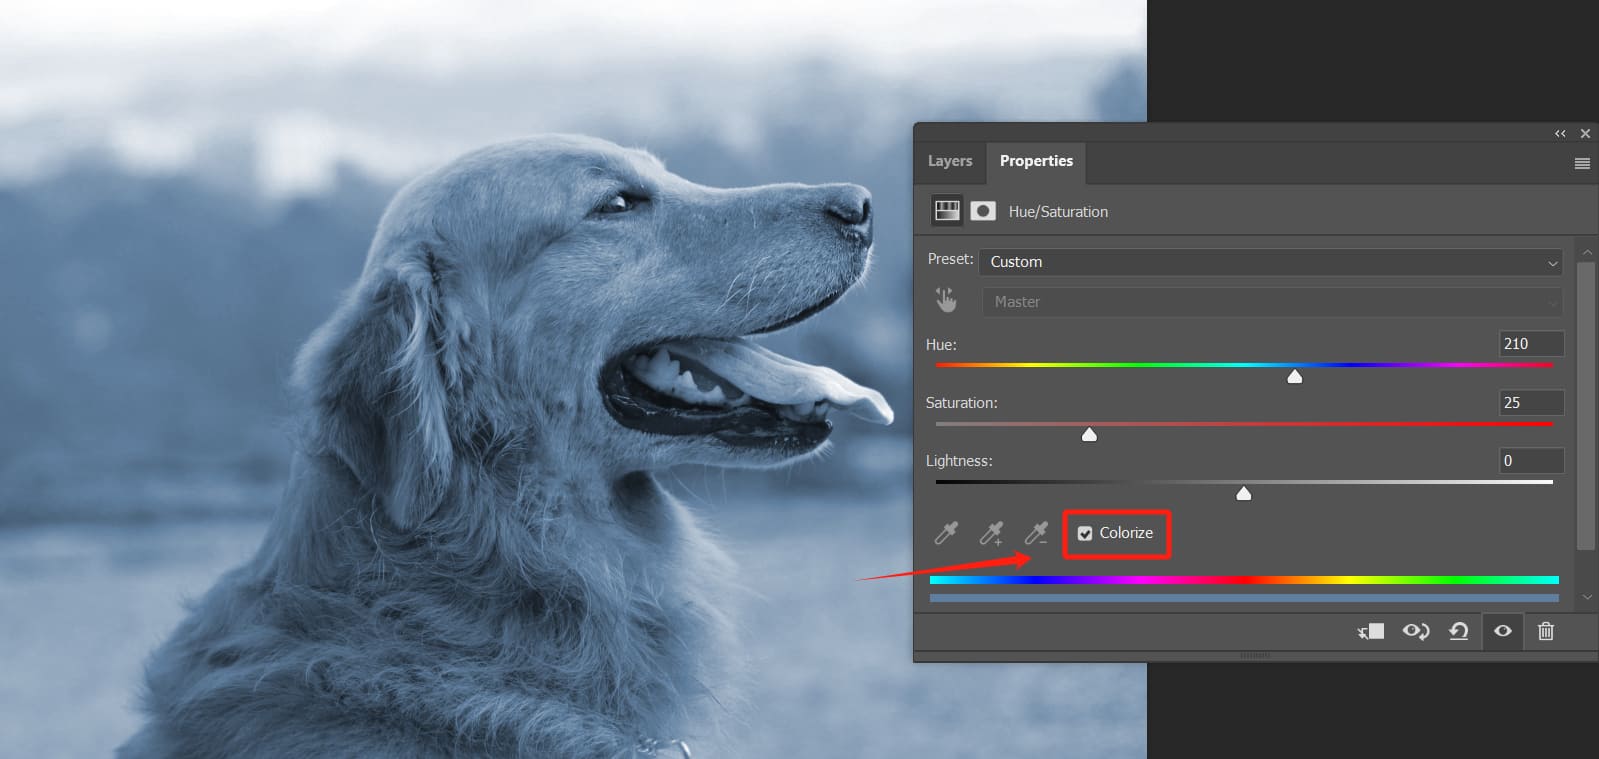
The first thing you'll notice is a "Colorize" checkbox. When checked, the original colors in the photo are eliminated, and the photo takes on the hue from the "Hue" slider, perfect for creating monochrome images.
At the bottom of the panel, there are two colored sliders. You need to activate these two sliders using the hand tool from the Adjustments Area.
When you activate the Color Range Selection area with the hand tool, you can use the three eyedropper tools in this area to choose color ranges.
These three droppers serve the purpose of selecting a range (1st dropper), adding to a range (2nd dropper), and subtracting from a range (3rd dropper).

The top color bar remains constant. When adjusting the hue, the bottom color bar changes. The static color bar above serves as a reference and contrast, showing how the original (above) color transforms into the current (below) color.
The bottom color bar is used to control the color adjustment range. After selecting a color range, you can drag the three sliders between the two color bars to adjust the colors.
The middle slider adjusts the main color range, while the sliders on the sides affect the transition areas of the color range. This helps make color changes in your photo more natural, resulting in a more realistic appearance.

Advanced Photoshop Hue/Saturation Technique: Selective Desaturation
Here, we'll explore an advanced application of the Hue/Saturation tool in Photoshop through a simple example.
We'll solely utilize this tool to achieve a selective desaturation effect on a photo, without employing any layers, masks, or additional Photoshop functions.
Selective desaturation involves preserving a specific color in the photo while reducing the saturation of other colors, potentially leading to a black-and-white effect. This effect isn't commonly utilized (it can become cliché if overused), but when applied correctly, it can yield a stunning result!
For example, in the photo below, the leaves have a strong presence, even though there is some background blur. However, the flowers at the center of the photo still lack prominence.
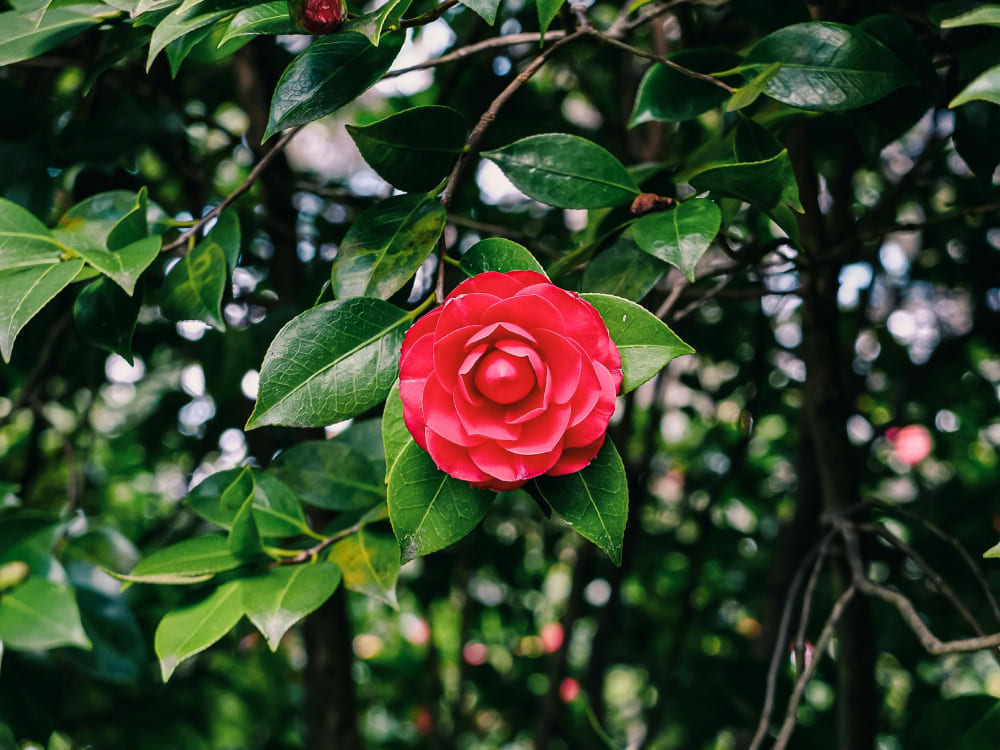
Therefore, consider using Photoshop's Hue/Saturation tool to desaturate all colors except for the flowers (magenta and some red areas).
Step 1: Create a "Hue/Saturation" Adjustment Layer
Open the photo in Photoshop and create a Hue/Saturation adjustment layer. The adjustments panel will pop up, allowing you to make the necessary settings.
Step 2: Select the Color Range
Click on the hand tool in the Hue/Saturation panel and then click on any area in the image where you want to decrease the saturation.
For instance, if you click on the leaves in the photo, the sliders in the Color Range Selection area at the bottom of the panel will activate.
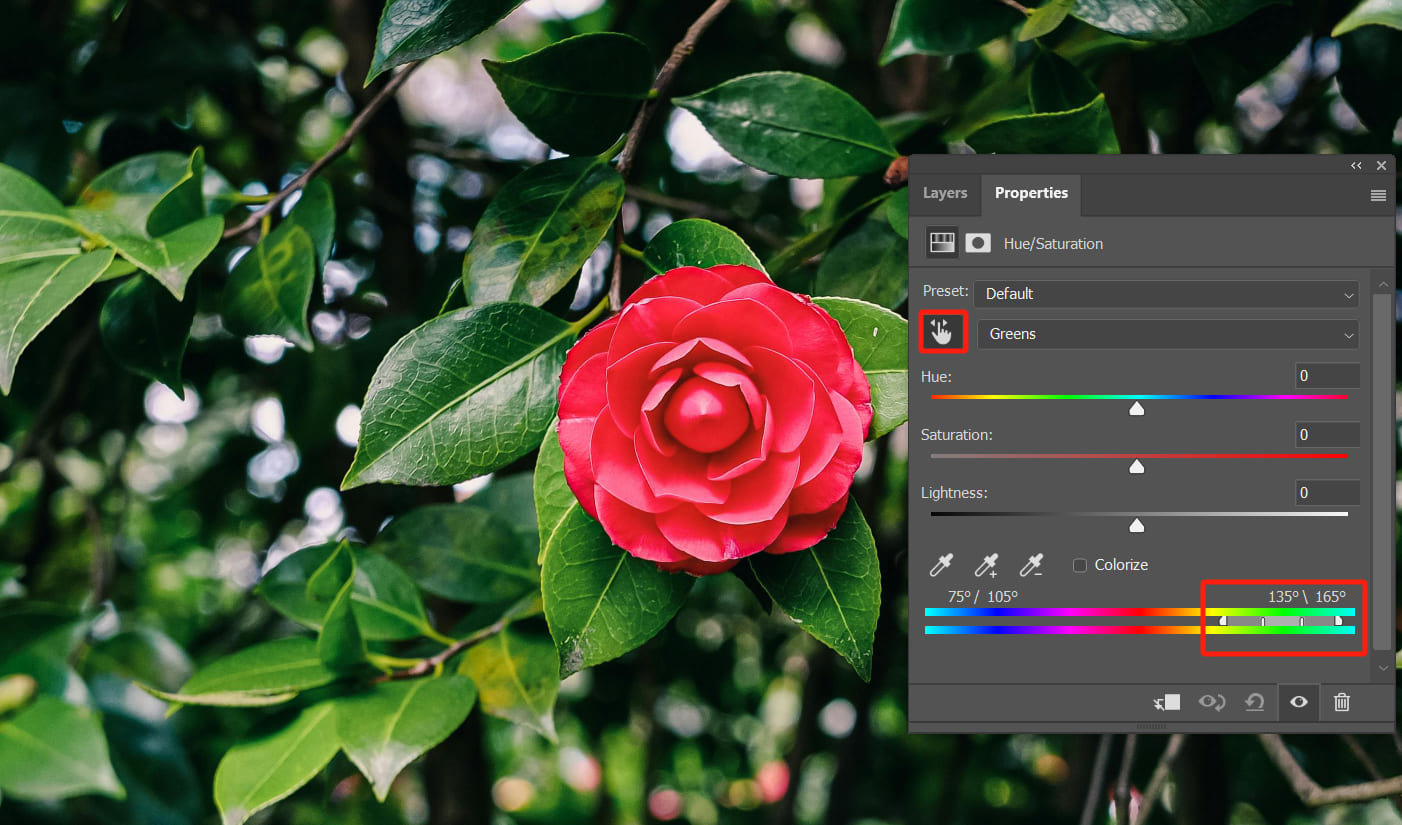
Drag the adjustment sliders in the middle to cover a larger area.
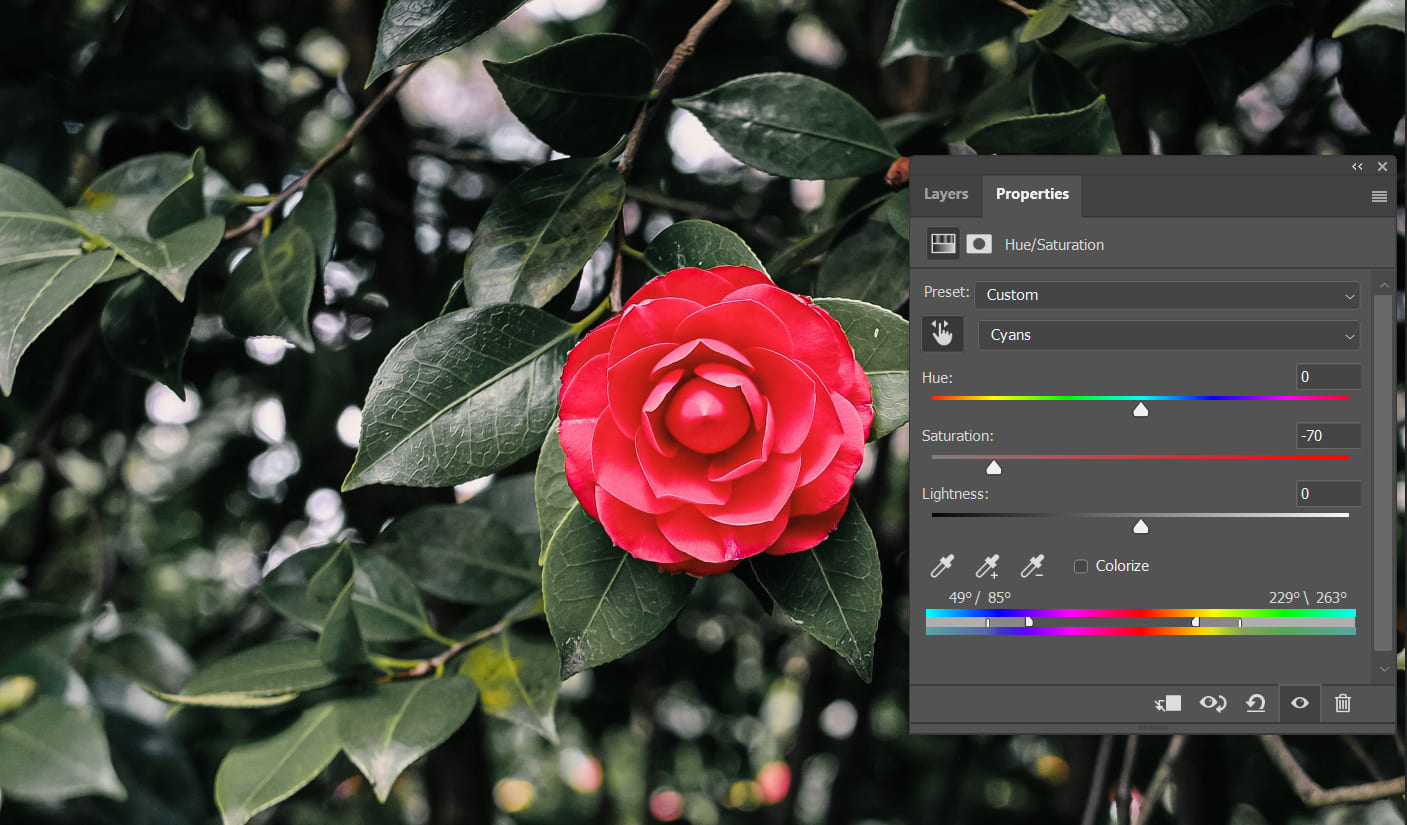
Step 3: Decrease Saturation
Once you've identified the areas where you want to reduce saturation, you can directly adjust the saturation to -70.
This will decrease the color intensity in those areas, leaving the flower region with its original color intensity. This will make the photo more striking.
We recommend not reducing the saturation of these areas to -100, as it can look very unnatural.
In summary, the whole process involves creating an adjustment layer, selecting/dragging to set the adjustment area, and then reducing saturation. As long as you're clear about your adjustment goals, the operation is very intuitive.
Of course, the beauty of the Hue/Saturation tool lies in its variety of options.
If you prefer not to control the color range using sliders, you can utilize the dropdown list of colors at the top of the panel. Simply select yellow, green, blue, or cyan individually and then decrease their saturation. This approach can achieve the same effect differently.
Final Thoughts About Photoshop Hue/Saturation
The seemingly simple Hue/Saturation function in Photoshop actually hides many interesting features.
It not only allows you to adjust the hue/saturation/brightness of a particular color but also enables you to specify adjustment areas, completely transforming the colors in the areas you need and instantly creating monochromatic effects.
You might notice that this function is quite similar to the HSL tool in Camera Raw or Lightroom. Indeed, their principles and approaches are quite alike.
However, the HSL tool cannot work with masks for localized adjustments, its adjustment range is not as extensive as Hue/Saturation, and it cannot manually define color adjustment ranges.
So, when you require more advanced area adjustment capabilities, Photoshop Hue/Saturation is definitely a powerful tool.

TourBox is also such a tool that can greatly enhance your Photoshop workflow, much like using a game controller for gaming. TourBox allows you to freely navigate the creative world of Photoshop!